Note
Access to this page requires authorization. You can try signing in or changing directories.
Access to this page requires authorization. You can try changing directories.
APPLIES TO:  Azure Data Factory
Azure Synapse Analytics
Azure Data Factory
Azure Synapse Analytics
Tip
Try out Data Factory in Microsoft Fabric, an all-in-one analytics solution for enterprises. Microsoft Fabric covers everything from data movement to data science, real-time analytics, business intelligence, and reporting. Learn how to start a new trial for free!
It's often necessary to send notifications during or after execution of a pipeline. Notification provides proactive alerting and reduces the need for reactive monitoring to discover issues. This article shows how to configure email notifications from an Azure Data Factory or Azure Synapse pipeline.
Prerequisites
- Azure subscription. If you don't have an Azure subscription, create a free account before you begin.
- Standard logic app workflow. To trigger sending an email from the pipeline, you use Azure Logic Apps to define the workflow. For details on creating a Standard logic app workflow, see Create an example Standard logic app workflow.
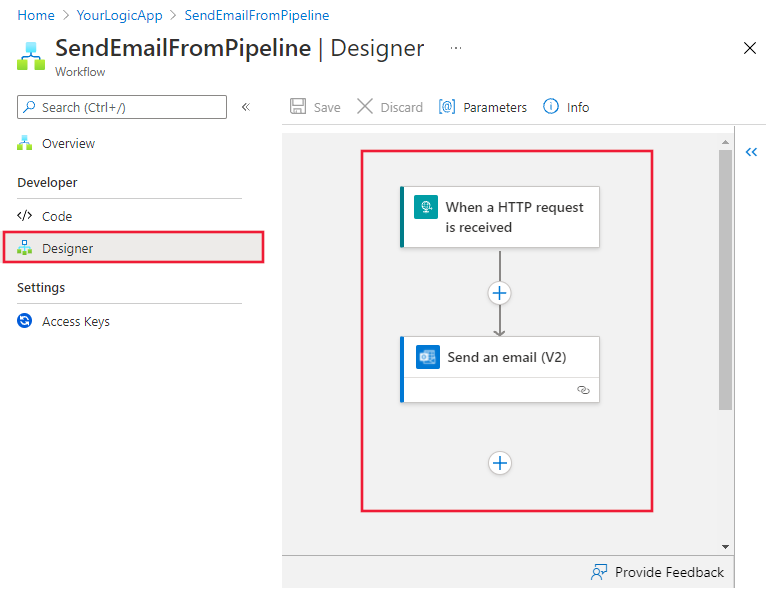
Create the email workflow in your logic app
Create a Standard logic app workflow named SendEmailFromPipeline. Add the Request trigger named When an HTTP request is received, and add the Office 365 Outlook action named Send an email (V2).
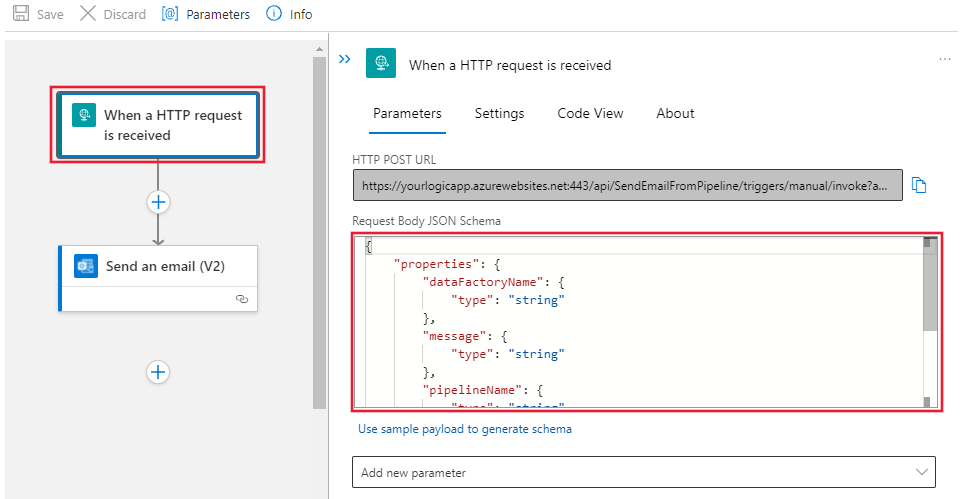
In Request trigger, provide this JSON for the Request Body JSON Schema property:
{
    "properties": {
        "dataFactoryName": {
            "type": "string"
        },
        "message": {
            "type": "string"
        },
        "pipelineName": {
            "type": "string"
        },
        "receiver": {
            "type": "string"
        }
    },
    "type": "object"
}
The Request trigger in the workflow designer should look like this:
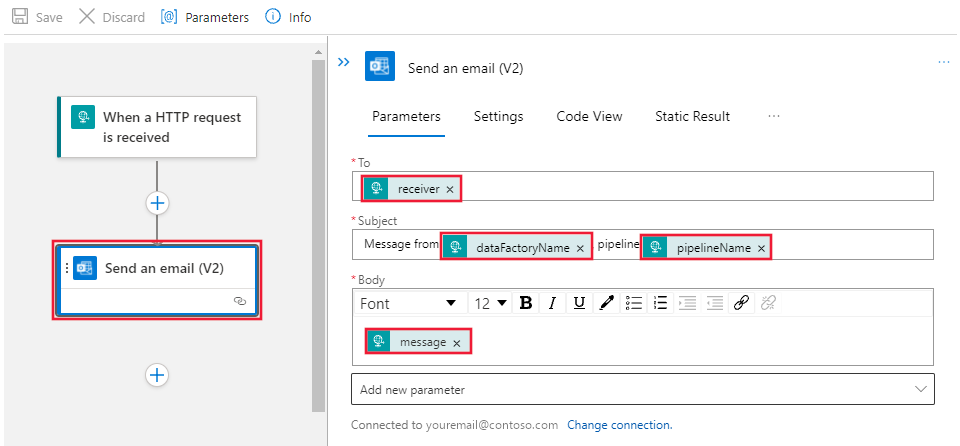
For the Send an email (V2) action, customize how you wish to format the email, using the properties from the request Body JSON schema:
Save the workflow. Browse to the Overview page for the workflow. Make a note of the workflow URL, highlighted in the image below:
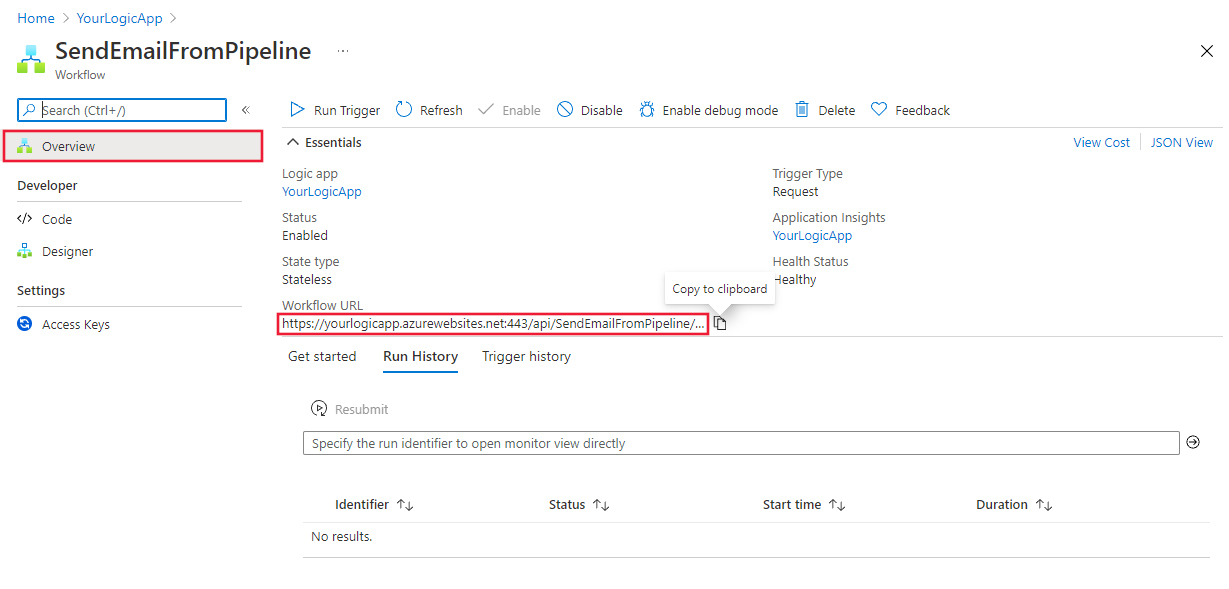
Note
To find the workflow URL, you must browse to the workflow itself, not just the logic app that contains it. From the Workflows page of your logic app instance, select the workflow and then navigate to its Overview page.
Create a pipeline to trigger your logic app workflow
After you create the logic app workflow to send email, you can trigger it from a pipeline using a Web activity.
Create a new pipeline and find the Web activity under the General category, to drag it onto the editing canvas.
Select the new Web1 activity, and then select the Settings tab.
Provide the URL from the logic app workflow you created previously in the URL field.
Provide the following JSON for the Body:
   {
    "message" : "This is a custom dynamic message from your pipeline with run ID @{pipeline().RunId}.",
    "dataFactoryName" : "@{pipeline().DataFactory}",
    "pipelineName" : "@{pipeline().Pipeline}",
    "receiver" : "@{pipeline().parameters.receiver}"
   }
Use dynamic expressions to generate useful messages for events in your pipelines. Notice that the JSON format here matches the JSON format you defined in the logic app, and you can also customize these as required.

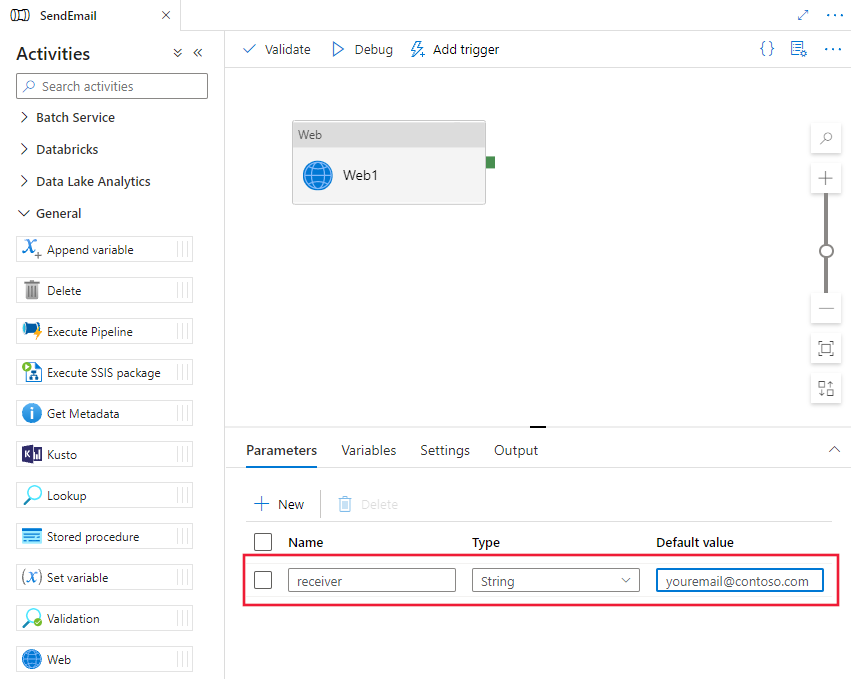
Select the background area of the pipeline designer to select the pipeline properties page and add a new parameter called receiver, providing an email address as its Default value.
In this example, we provide the receiver email from a pipeline parameter we define arbitrarily. The receiver value could be taken from any expression, or even linked data sources.
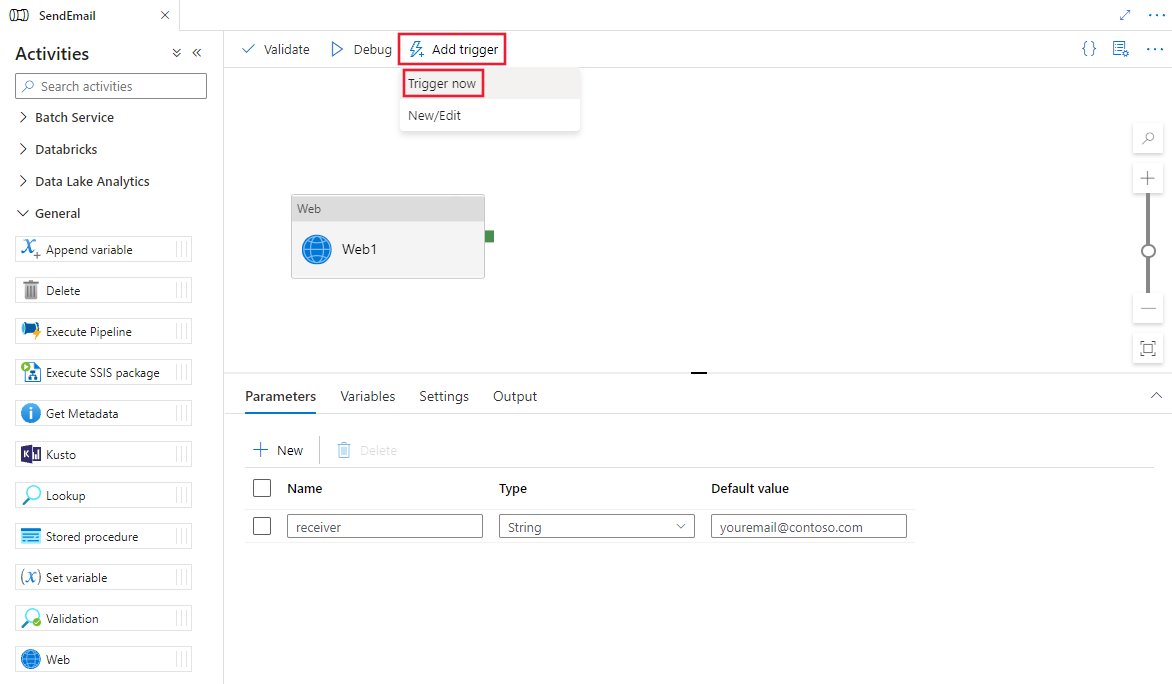
Publish your pipeline, and then trigger it manually to confirm the email is sent as expected.
Add dynamic messages with system variables and expressions
You can use system variables and expressions to make your messages dynamic. For example:
@activity("CopyData").output.errors[0].Message@activity("DataFlow").error.Message
The above expressions will return the relevant error messages from a Copy activity failure, which can be redirected then to your Web activity that sends the email. Refer to the Copy activity output properties article for more details.