Note
Access to this page requires authorization. You can try signing in or changing directories.
Access to this page requires authorization. You can try changing directories.
Important
This feature is in Beta. Workspace admins can control access to this feature from the Previews page. See Manage Azure Databricks previews.
The Veeva Vault connector uses OAuth 2.0 Machine-to-Machine (M2M) authentication via Microsoft Entra ID as an external identity provider. This page describes how to configure both Microsoft Entra ID and Veeva Vault to enable authentication from Azure Databricks.
Step 1: Register an application in Microsoft Entra ID
In the Azure portal, search for App Registrations and navigate to it.
Click New Registration.
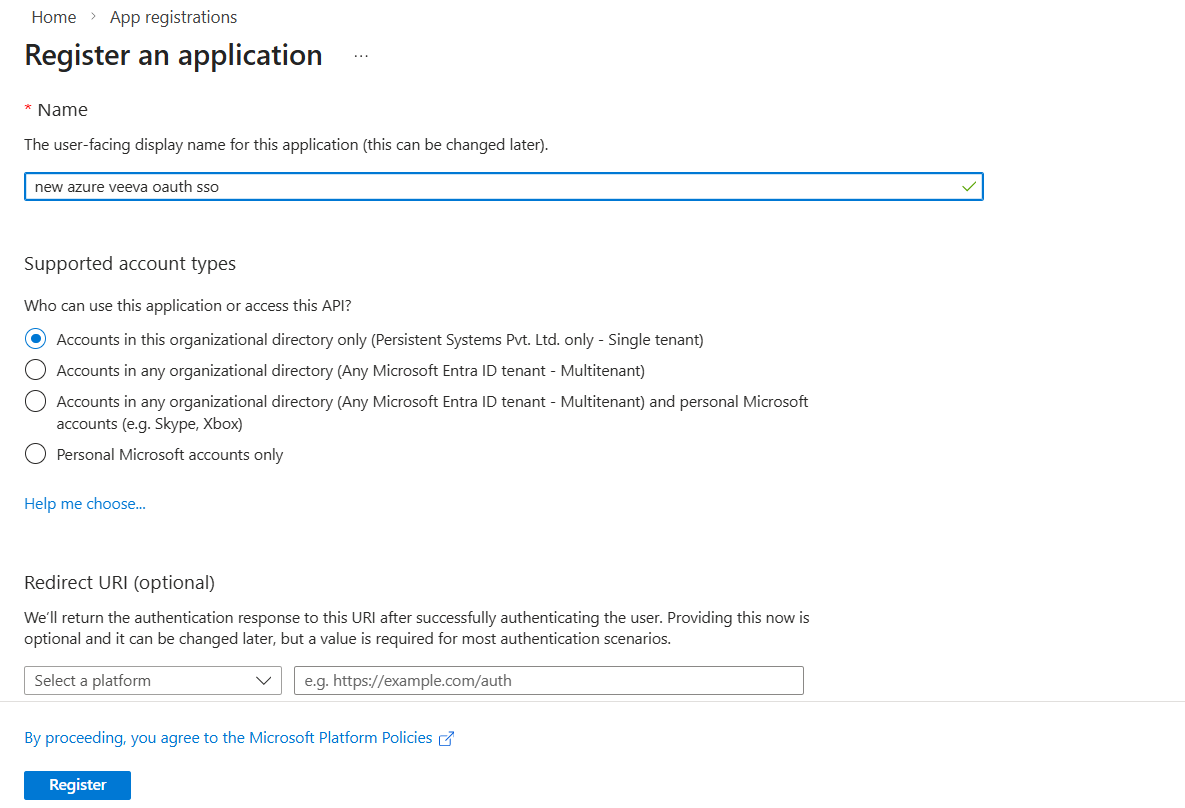
Enter an application name, leave the redirect URI empty, and click Register.
On the App registrations page, click on the All applications tab.
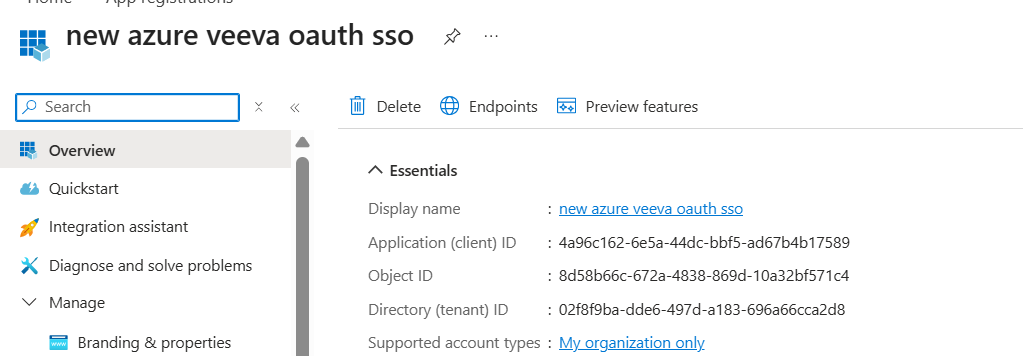
Search for the newly created app name and click on it.
Copy the Application (client) ID — this is your Client ID.
Step 2: Generate a client secret
In the app registration, expand the Manage tab on the left pane and select Certificates & secrets.
Click New client secret.
Enter a description, set an expiration as required, and click Add.
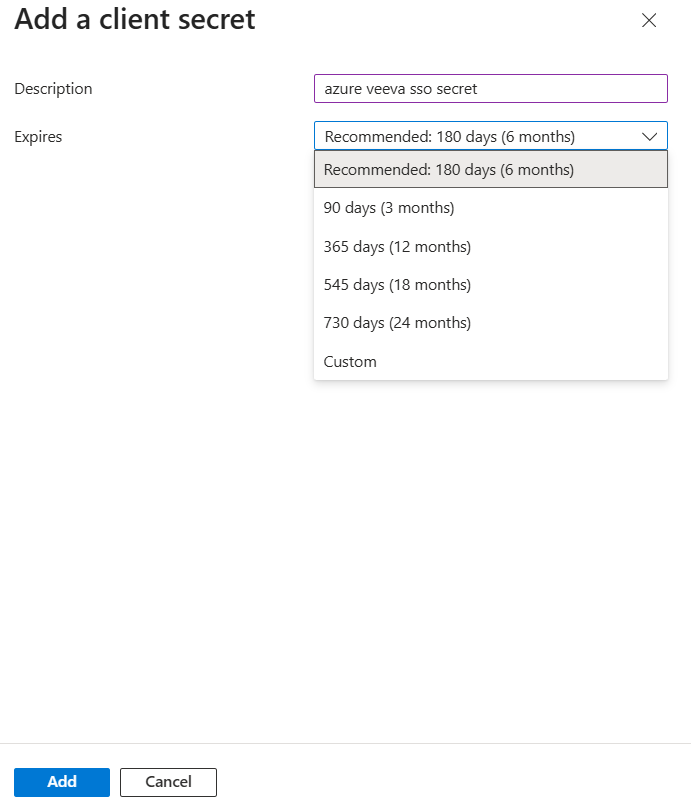
Copy the Value — this is your Client secret. If you don't save it now, it cannot be retrieved later and you must generate a new one.

Step 3: Retrieve token and metadata endpoints
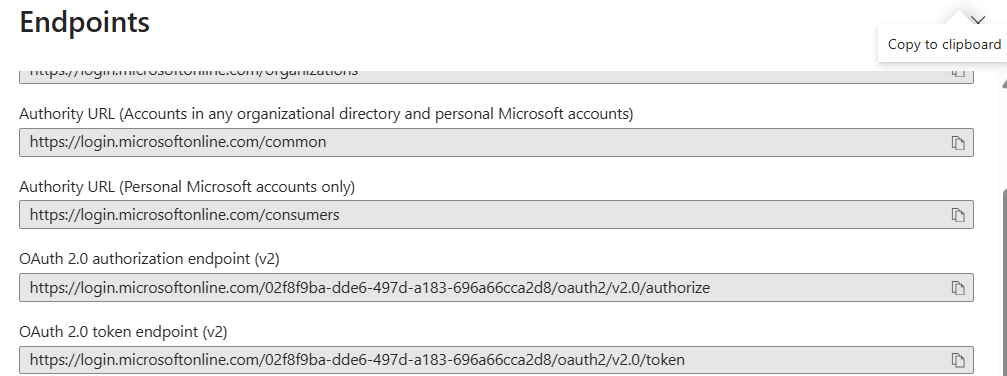
In the app registration, click Overview > Endpoints.
Copy the OAuth 2.0 token endpoint (v2) — you'll need this as the Token Endpoint when creating the connection.
Copy the OpenID Connect metadata document URL — you'll need this when configuring the Veeva OAuth profile in the next steps.

Step 4: Create an OAuth 2.0 / OpenID Connect profile in Veeva Vault
- In Veeva Vault, click Admin > Settings > OAuth 2.0 / OpenID Connect Profiles.
- Click Create and enter a Label. Set the Status to Active.
- Select Azure AD as the Authorization Server Provider.
- Keep the Identity Claim as-is and ensure User ID Type is set to Federated ID.
- Click Upload AS Metadata, select Provide Authorization Server Metadata URL, and enter the OpenID Connect metadata document URL from Step 3.
- Click Save.
- Copy the Vault Session ID URL from the saved profile — you'll need this when creating the connection.
Step 5: Create a security policy in Veeva Vault
- In Veeva Vault, navigate to Security Policies.
- Create a new policy, select Single Sign-On as the type, and ensure Authentication Type is set to Single Sign-On.
- Select the OAuth 2.0 / OpenID Connect profile created in Step 4.
- Set the policy Status to Active and click Save.
Step 6: Create a dedicated service account user
- In Veeva Vault, click Users & Groups > Create > Create Domain User.
- Fill in the required user details and click Save.
- In the user configuration:
- Set Security Profile to Vault Owner.
- Set Federated ID to the Microsoft Entra ID Client ID from Step 1.
- Assign the security policy created in Step 5.
- Set User Type to Admin and Full User under Vault CRM.
- Click Save + Create.
Next steps
After completing source setup, create a Unity Catalog volume to use for staging Veeva archives. Then create a connection. See Create a Veeva Vault connection.