Note
Access to this page requires authorization. You can try signing in or changing directories.
Access to this page requires authorization. You can try changing directories.
Important
Lakebase Autoscaling is the latest version of Lakebase, with autoscaling compute, scale-to-zero, branching, and instant restore. For supported regions, see Region availability. If you are a Lakebase Provisioned user, see Lakebase Provisioned.
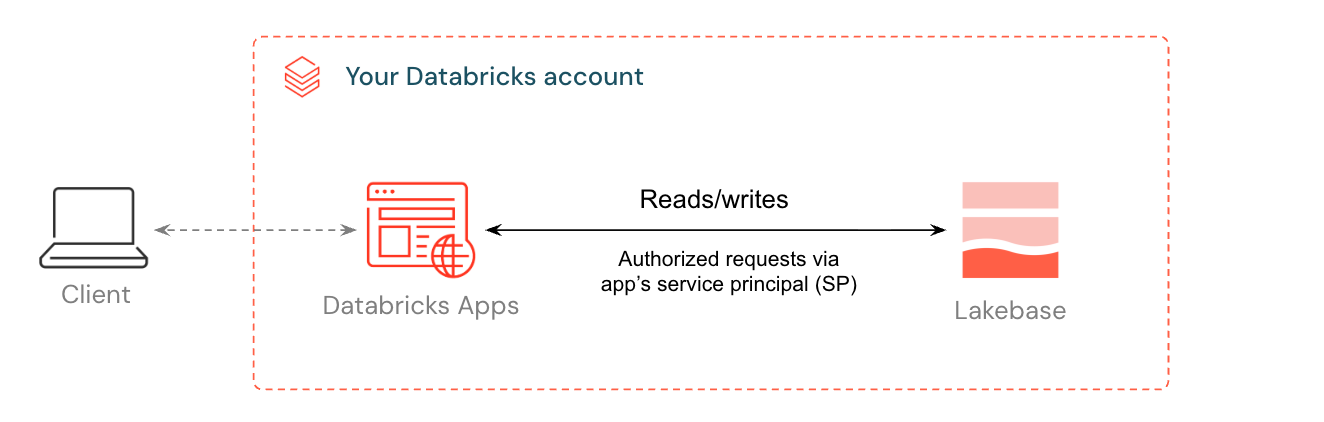
Databricks Apps let you build and run interactive applications directly in your workspace. When you add Lakebase as a resource, Databricks handles the entire auth chain: a service principal is created for your app, granted a matching Postgres role, and connection details are injected as environment variables. Your app connects to a fully managed Postgres database without managing credentials or connection strings.
This guide walks you through deploying a template app connected to a Lakebase database. By the end, you'll have a running app with data you can inspect and query directly from Lakebase, and optionally register in Unity Catalog alongside your lakehouse data.
Note
You need access to a Databricks workspace with Lakebase enabled (contact your workspace admin if needed), permission to create compute resources and apps, and basic familiarity with Python and SQL.
Step 1: Provision a Lakebase instance
A Lakebase project is a managed Postgres instance that your app connects to as a resource. Projects are organized into branches, each representing an isolated database environment.
Before you create your project, make sure your workspace has serverless compute enabled. If you can't make this change yourself, contact your admin.
To create a project: ![]() App switcher → Lakebase → Autoscaling → Create project → accept defaults
App switcher → Lakebase → Autoscaling → Create project → accept defaults
Your project is created with a production branch and a databricks_postgres database.
Step 2: Create a Databricks App from template
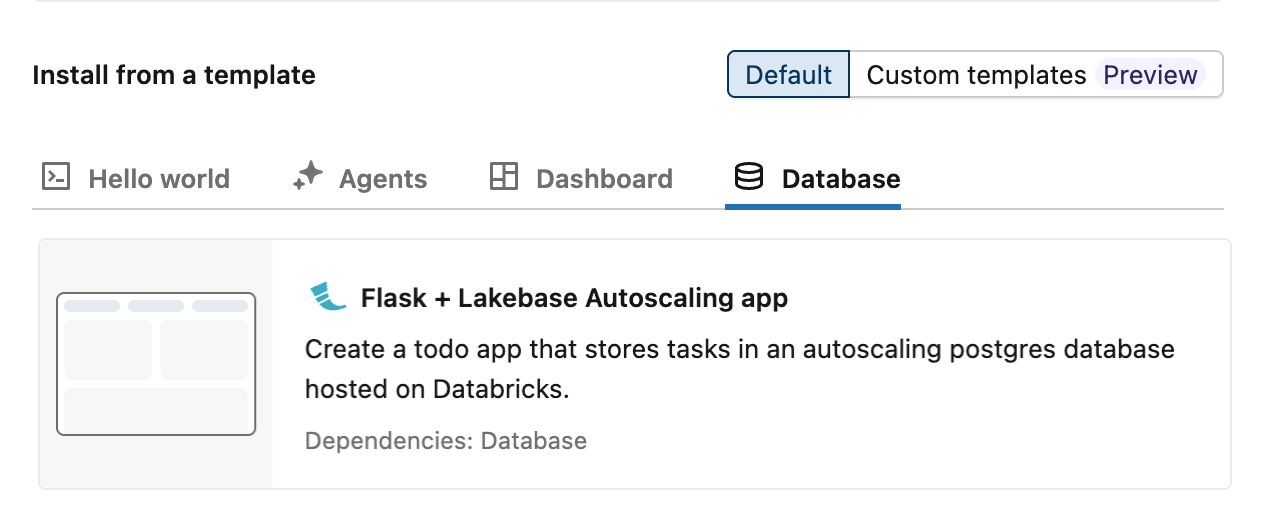
Templates handle the infrastructure complexity for you: connection pooling, OAuth token refresh, and error handling are already built in. If you need a fully custom app instead, see Write your own.
Three autoscaling todo app templates for Lakebase are available: Dash, Flask, and Streamlit. Navigate to New > App to open the app creation interface, and select your preferred template from the Database tab.
Step 3: Configure database resource
Adding Lakebase as a resource does two things: it creates a service principal with the right database permissions, and injects your connection details as environment variables into the app. This is what allows the template to connect to your database automatically, without any connection strings in your code.
In the Configure step, select the database and compute size for your app. For detailed information about adding database resources, see Add a Lakebase resource to a Databricks app.
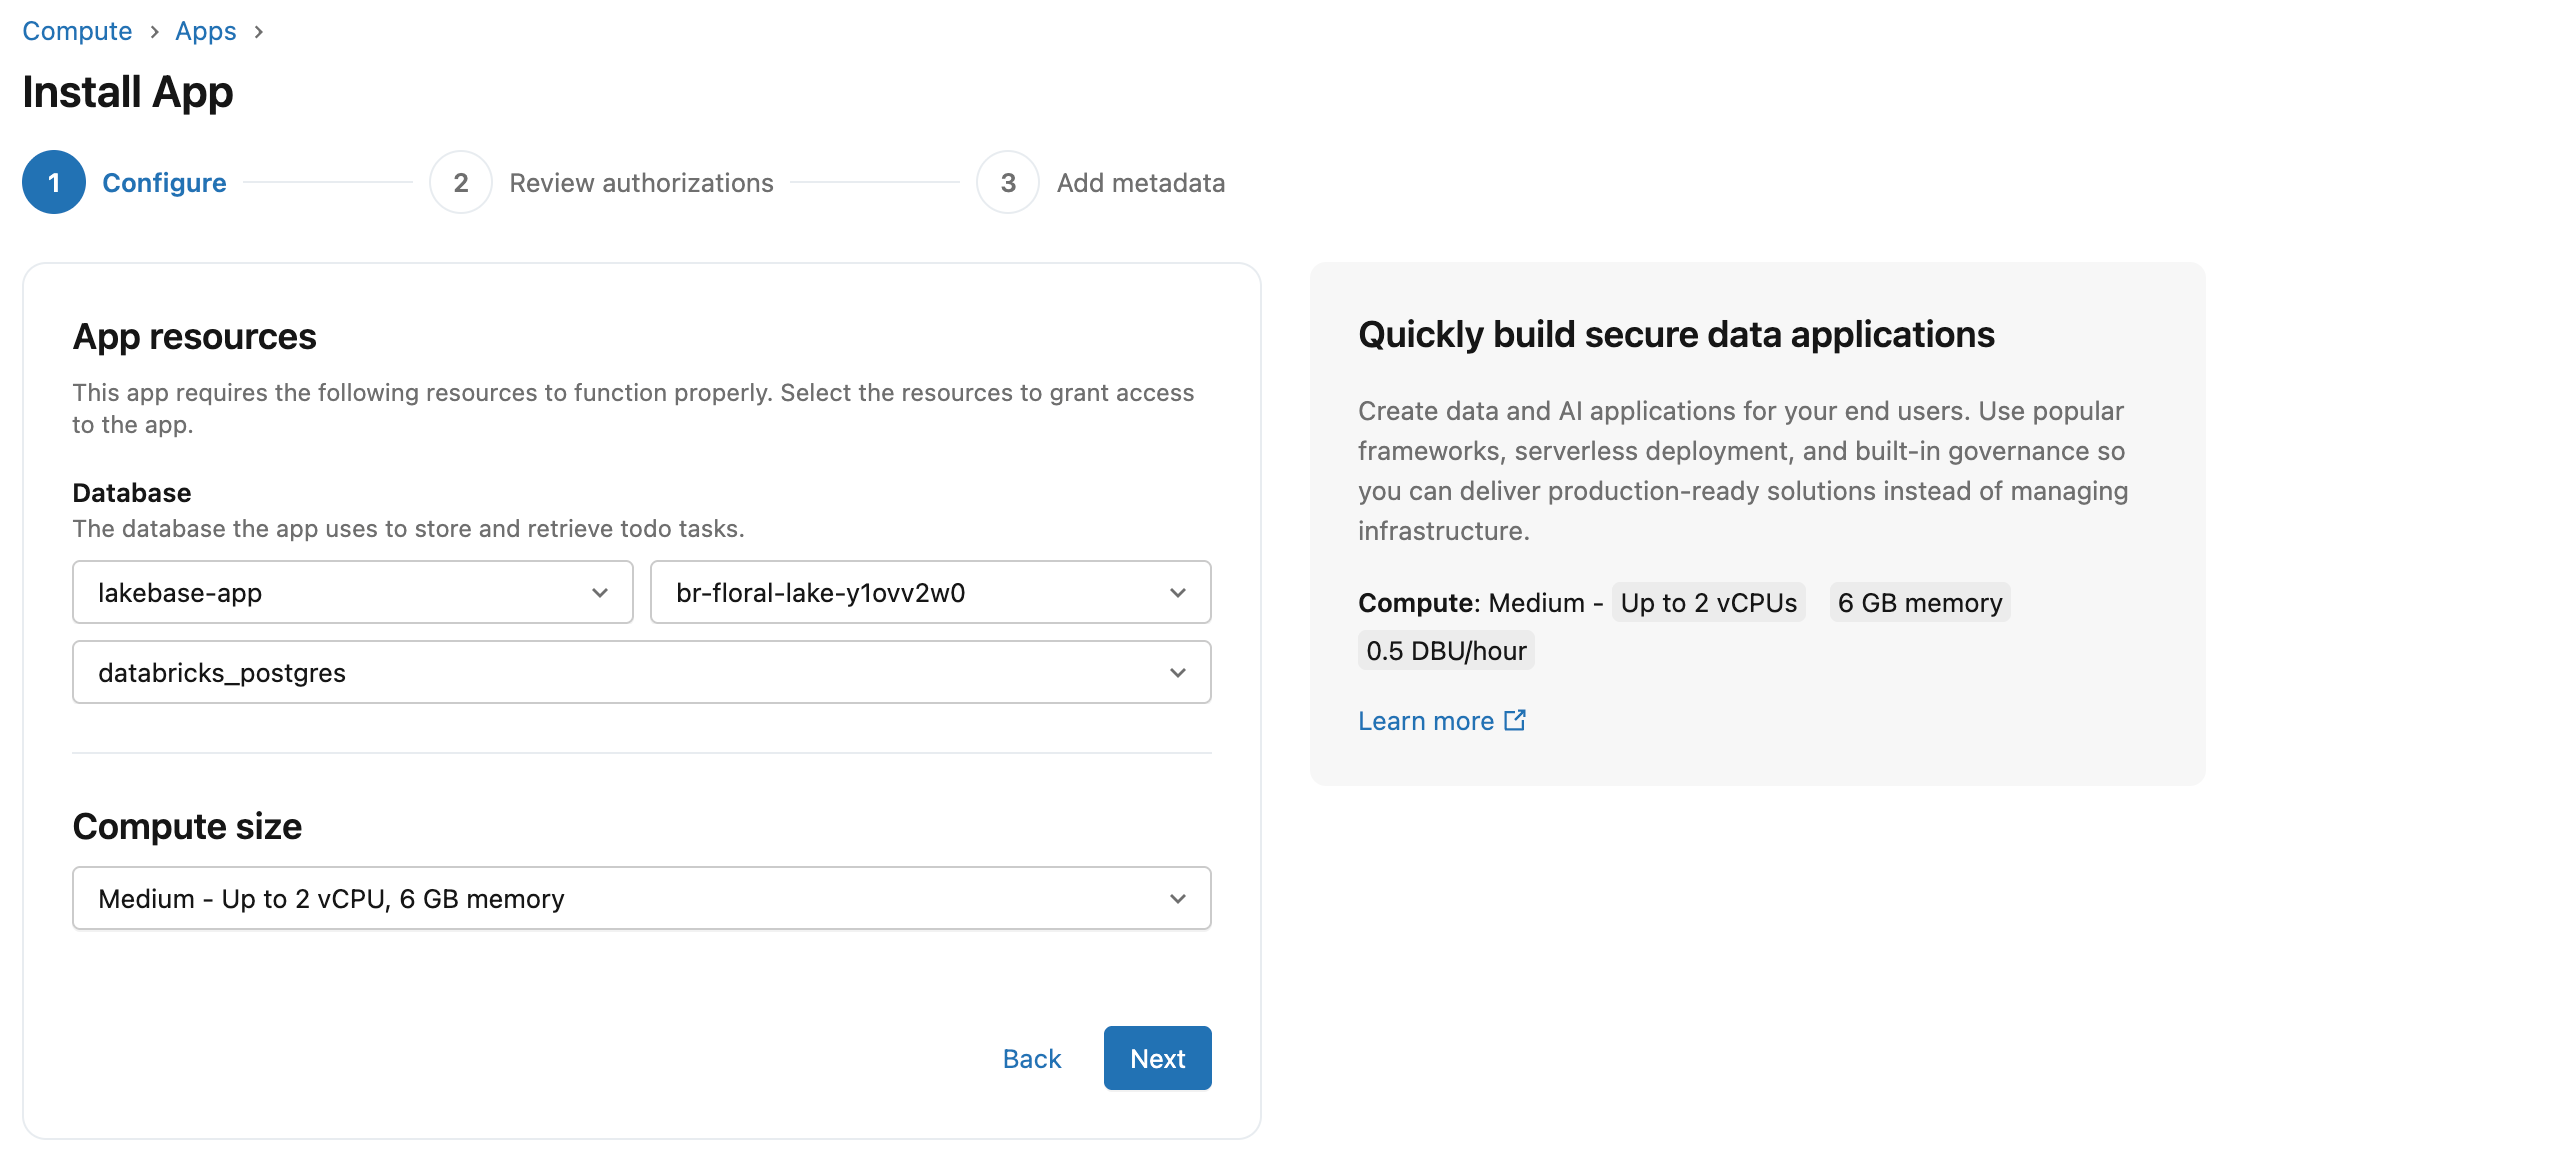
Under App resources, select your Lakebase project, branch, and database. Branch names display as IDs: if you accepted the defaults in Step 1, you'll only have one branch (production) to choose from. For other projects or to match IDs to names, see your project's branches page.
Under Compute size, for this guide we're selecting Medium. Note this is the app server compute, separate from the Lakebase database compute, which scales independently.
Step 4: Review authorizations
Each Databricks App runs as its own service principal, a dedicated identity separate from any individual user. When you connect Lakebase as a resource, Databricks automatically creates a matching Postgres role for that service principal and grants the app's service principal the database access it needs to connect, create its own schema, and read and write data, with no manual role setup required.
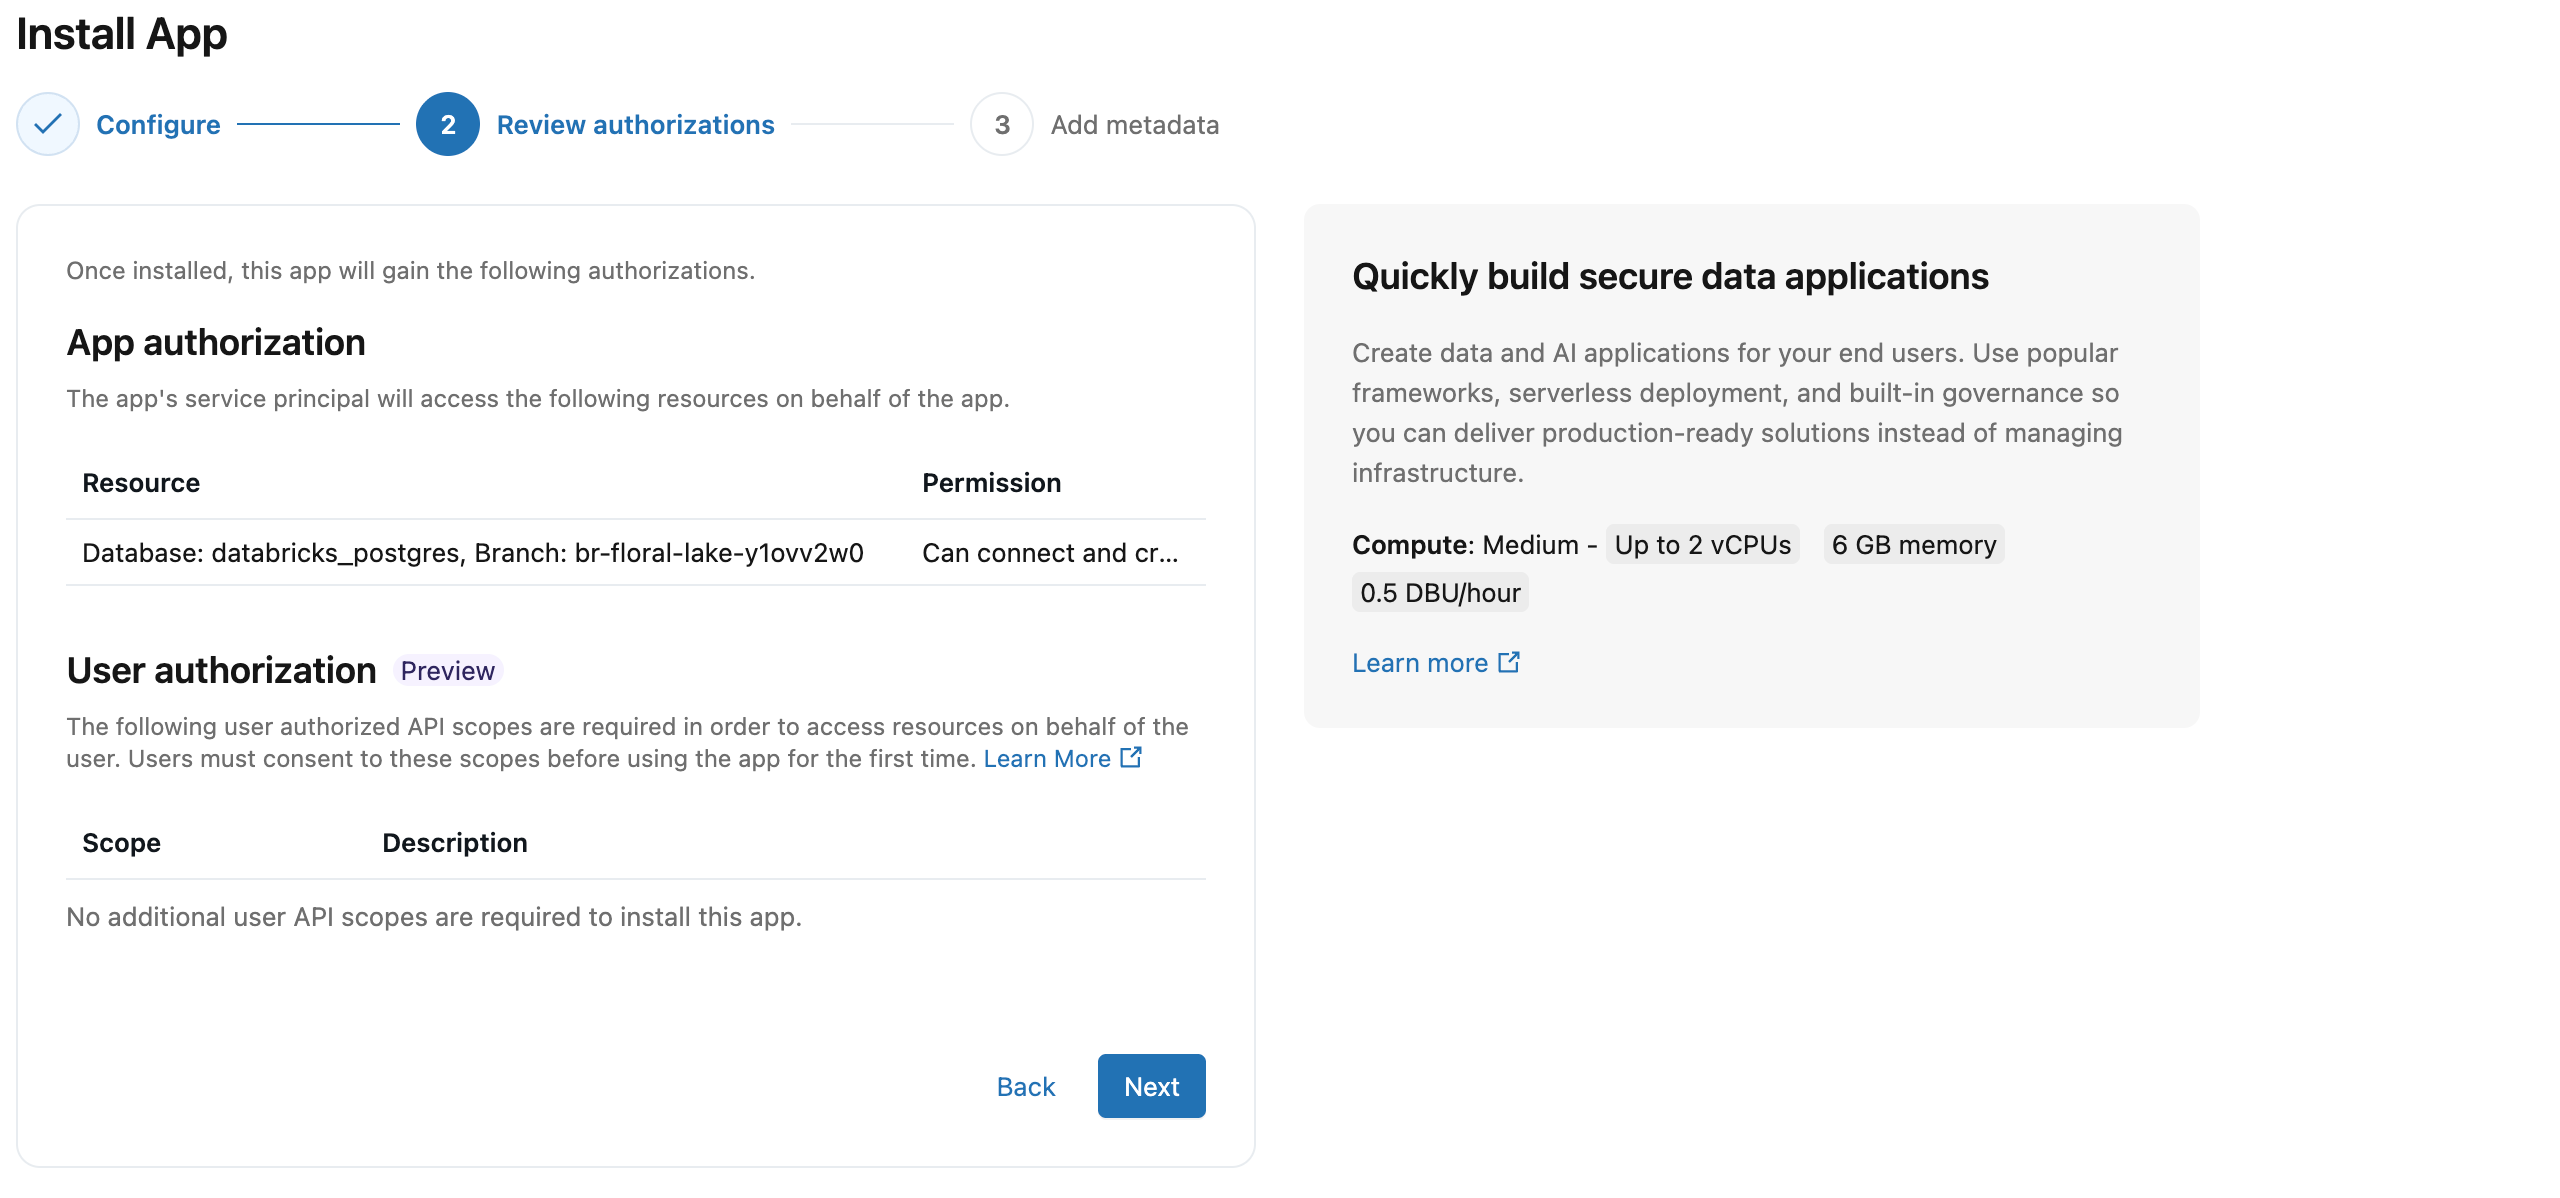
User authorization (Preview) lets your app act on behalf of the logged-in user rather than its own service principal, which is useful when different users should see different data based on their individual permissions. For this template, no additional user scopes are required. To enable on-behalf-of user access later, see User authorization.
Step 5: Name your app and install
The app name you choose here becomes part of the schema name that Lakebase automatically creates in your database. The client ID is the service principal assigned to your app, with hyphens removed. You can rename the schema later in Lakebase, but the app name itself cannot be changed after creation. The template defaults to lakebase-autoscaling-app.
App name:           lakebase-autoscaling-app

Service principal:  aeb6ff91-98ff-4752-af7d-fc6d4cf570d0

                                    ↓
                          (same ID, hyphens removed)

Schema name:        lakebase-autoscaling-app_schema_aeb6ff9198ff4752af7dfc6d4cf570d0
Confirm or change the app name, review the pre-filled description, and optionally set a serverless usage policy. Click Install to create the app configuration.
Step 6: Deploy the app
After you click Install, compute starts automatically and your app deploys without any further action. This takes 2-3 minutes. When the app status shows Running, click the URL next to it to open your app. For the full development workflow including local development and redeployment, see Develop Databricks apps.
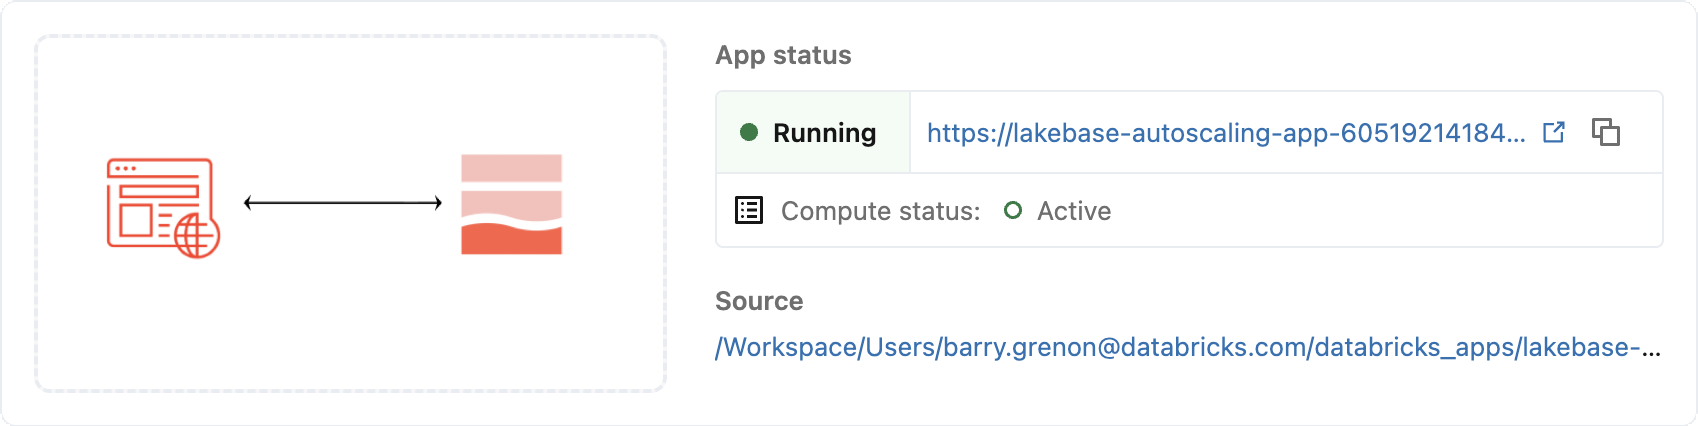
Use the Deploy button to redeploy after making code changes. If a deployment fails, check the Deployments tab. The step that failed (for example, "Packages installed" or "App started") tells you where to look.
Step 7: Verify the integration
Open your app at the provided URL and add a few todos. In your Lakebase project, open Tables and select the todos table under your app's schema. Your rows are there, written by the app's service principal using the injected connection details from Step 3.
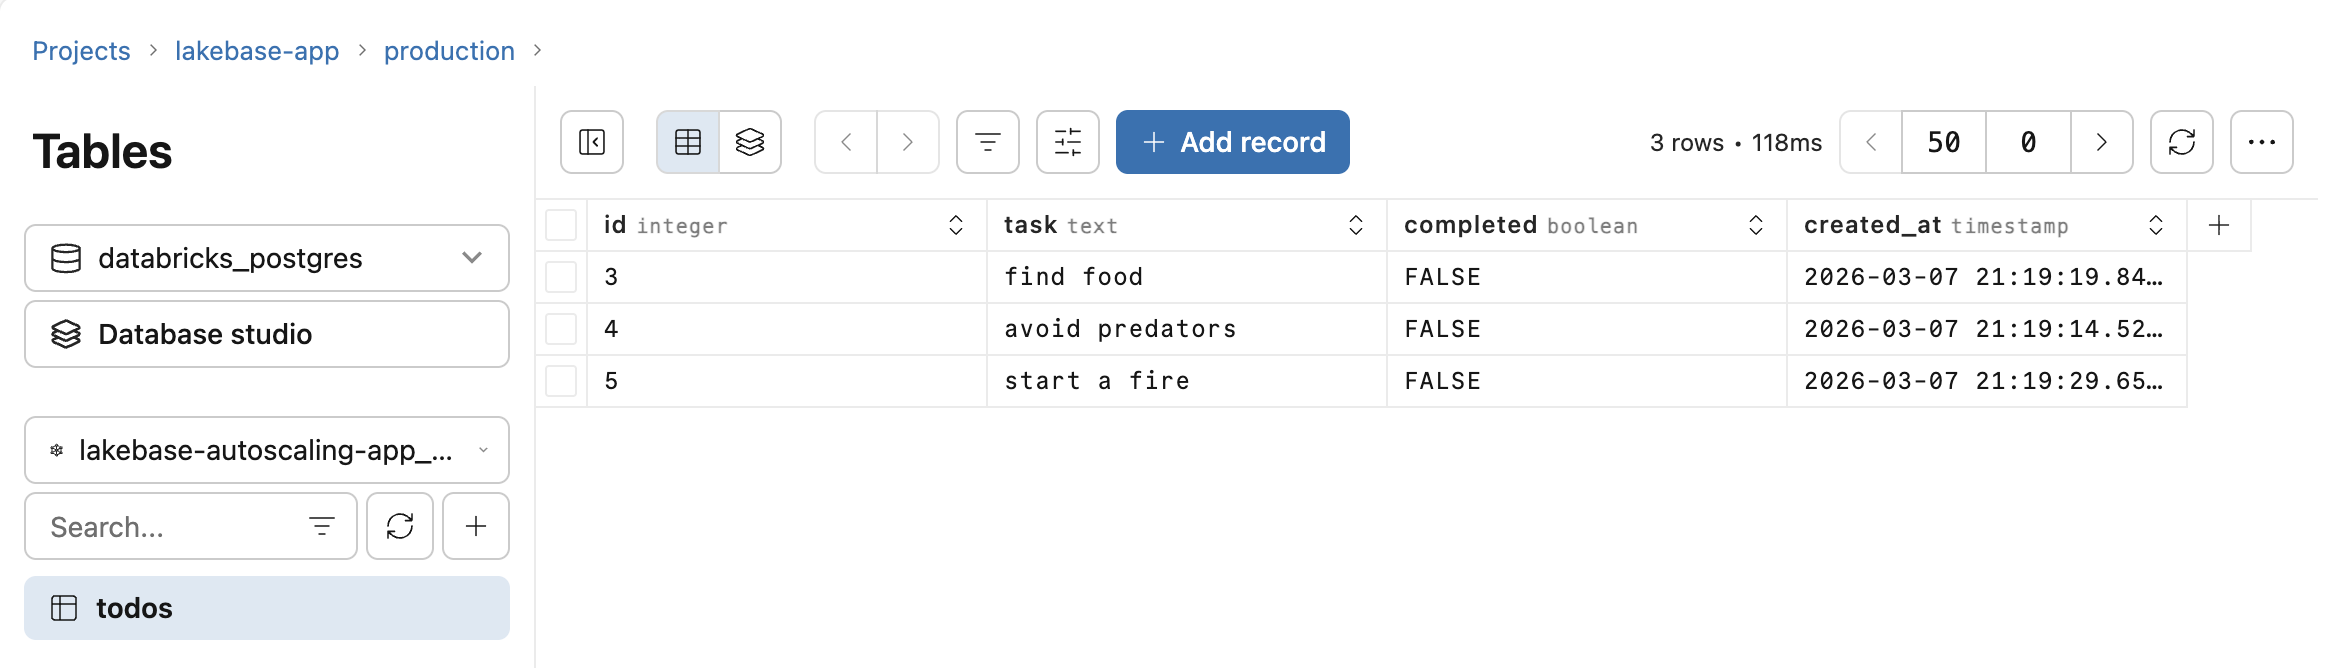
To run custom queries against the data, use the SQL Editor in your Lakebase project. Lakebase scales to zero after a period of inactivity, so after a period away you may find the first request takes a few seconds while the database warms up. For other connection options, see Connecting to your Lakebase project.
Step 8: Query through Unity Catalog (optional)
By default, your app's Lakebase data is accessible directly through Postgres connections. Registering it in Unity Catalog makes it queryable alongside your lakehouse data using standard Databricks SQL, enabling joins between your app's transactional tables and Delta tables in the same query.
To register, open Catalog Explorer and create a new catalog. Select Lakebase Postgres as the catalog type, choose Autoscaling, and select the same project and branch as your app. See Register your database in Unity Catalog for full details.
Once registered, note that schema names in Unity Catalog preserve hyphens from your app name. Both the catalog and schema names require backtick quoting:
SELECT * FROM `your-catalog-name`.`lakebase-autoscaling-app_schema_aeb6ff9198ff4752af7dfc6d4cf570d0`.todos;