Note
Access to this page requires authorization. You can try signing in or changing directories.
Access to this page requires authorization. You can try changing directories.
Apps hosted outside of Azure, such as on-premises or in a third-party data center, should use an application service principal through Microsoft Entra ID to authenticate to Azure services. In the sections ahead, you learn:
- How to register an application with Microsoft Entra to create a service principal
- How to assign roles to scope permissions
- How to authenticate using a service principal from your app code
Using dedicated application service principals allows you to adhere to the principle of least privilege when accessing Azure resources. Permissions are limited to the specific requirements of the app during development, preventing accidental access to Azure resources intended for other apps or services. This approach also helps avoid issues when the app is moved to production by ensuring it isn't over-privileged in the development environment.
A different app registration should be created for each environment the app is hosted in. This allows environment-specific resource permissions to be configured for each service principal and ensures an app deployed to one environment doesn't talk to Azure resources in another environment.
Register the app in Azure
Application service principal objects are created through an app registration in Azure using either the Azure portal or Azure CLI.
In the Azure portal, use the search bar to navigate to the App registrations page.
On the App registrations page, select + New registration.
On the Register an application page:
- For the Name field, enter a descriptive value that includes the app name and the target environment.
- For the Supported account types, select Accounts in this organizational directory only (Microsoft Customer Led only - Single tenant), or whichever option best fits your requirements.
Select Register to register your app and create the service principal.

On the App registration page for your app, copy the Application (client) ID and Directory (tenant) ID and paste them in a temporary location for later use in your app code configurations.
Select Add a certificate or secret to set up credentials for your app.
On the Certificates & secrets page, select + New client secret.
In the Add a client secret flyout panel that opens:
- For the Description, enter a value of Current.
- For the Expires value, leave the default recommended value of 180 days.
- Select Add to add the secret.
On the Certificates & secrets page, copy the Value property of the client secret for use in a future step.
Note
The client secret value is only displayed once after the app registration is created. You can add more client secrets without invalidating this client secret, but there's no way to display this value again.
Assign roles to the application service principal
Next, determine what roles (permissions) your app needs on what resources and assign those roles to the service principal you created. Roles can be assigned at the resource, resource group, or subscription scope. This example shows how to assign roles at the resource group scope, since most apps group all their Azure resources into a single resource group.
In the Azure portal, navigate to the Overview page of the resource group that contains your app.
Select Access control (IAM) from the left navigation.
On the Access control (IAM) page, select + Add and then choose Add role assignment from the drop-down menu. The Add role assignment page provides several tabs to configure and assign roles.
On the Role tab, use the search box to locate the role you want to assign. Select the role, and then choose Next.
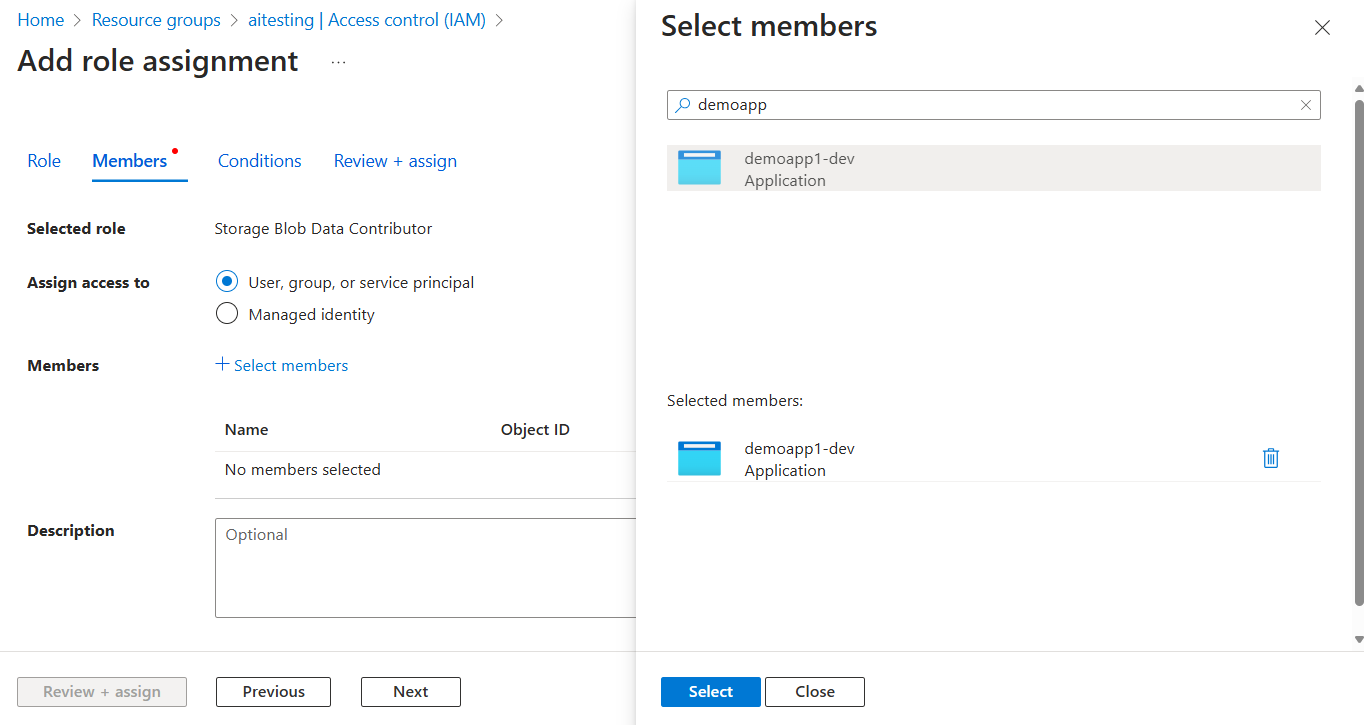
On the Members tab:
- For the Assign access to value, select User, group, or service principal .
- For the Members value, choose + Select members to open the Select members flyout panel.
- Search for the service principal you created earlier and select it from the filtered results. Choose Select to select the group and close the flyout panel.
- Select Review + assign at the bottom of the Members tab.
On the Review + assign tab, select Review + assign at the bottom of the page.
Set the app environment variables
At runtime, certain credentials from the Azure Identity library, such as DefaultAzureCredential, EnvironmentCredential, and ClientSecretCredential, search for service principal information by convention in the environment variables. There are multiple ways to configure environment variables when working with JavaScript, depending on your tooling and environment.
Regardless of the approach you choose, configure the following environment variables for a service principal:
AZURE_CLIENT_ID: Used to identify the registered app in Azure.AZURE_TENANT_ID: The ID of the Microsoft Entra tenant.AZURE_CLIENT_SECRET: The secret credential that was generated for the app.
In Visual Studio Code, environment variables can be set in the launch.json file of your project. These values are pulled in automatically when the app starts. However, these configurations don't travel with your app during deployment, so you need to set up environment variables on your target hosting environment.
"configurations": [
{
    "env": {
        "NODE_ENV": "development",
        "AZURE_CLIENT_ID": "<your-client-id>",
        "AZURE_TENANT_ID":"<your-tenant-id>",
        "AZURE_CLIENT_SECRET": "<your-client-secret>"
    }
}
Authenticate to Azure services from your app
The Azure Identity library provides various credentials—implementations of TokenCredential adapted to supporting different scenarios and Microsoft Entra authentication flows. The steps ahead demonstrate how to use ClientSecretCredential when working with service principals locally and in production.
Implement the code
Add the @azure/identity package in the Node.js project:
npm install @azure/identity
Azure services are accessed using specialized client classes from the various Azure SDK client libraries. For any JavaScript code that creates an Azure SDK client object in your app, follow these steps:
- Import the
ClientSecretCredentialclass from the@azure/identitymodule. - Create a
ClientSecretCredentialobject with thetenantId,clientId, andclientSecret. - Pass the
ClientSecretCredentialinstance to the Azure SDK client object constructor.
An example of this approach is shown in the following code segment:
import { BlobServiceClient } from '@azure/storage-blob';
import { ClientSecretCredential } from '@azure/identity';

// Authentication
const tenantId = process.env.AZURE_TENANT_ID;
const clientId = process.env.AZURE_CLIENT_ID;
const clientSecret = process.env.AZURE_CLIENT_SECRET;

// Azure Storage account name
const accountName = process.env.AZURE_STORAGE_ACCOUNT_NAME;

if (!tenantId || !clientId || !clientSecret || !accountName) {
  throw Error('Required environment variables not found');
}

const credential = new ClientSecretCredential(tenantId, clientId, clientSecret);

const blobServiceClient = new BlobServiceClient(
  `https://${accountName}.blob.core.windows.net`,
  credential
);
An alternative approach is to pass the ClientSecretCredential object directly to the Azure SDK client constructor:
const blobServiceClient = new BlobServiceClient(
  `https://${accountName}.blob.core.windows.net`,
  new ClientSecretCredential(tenantId, clientId, clientSecret)
);