Note
Access to this page requires authorization. You can try signing in or changing directories.
Access to this page requires authorization. You can try changing directories.
In this tutorial, you learn how to use a namespace topic to route data from MQTT clients to Azure Event Hubs.
Prerequisites
- If you don't have an Azure subscription, create an Azure free account before you begin.
- If you're new to Event Grid, read the Event Grid overview before you begin.
- Register the Event Grid resource provider according to the steps in Register the Event Grid resource provider.
- Make sure that port 8883 is open in your firewall. The sample in this tutorial uses the MQTT protocol, which communicates over port 8883. This port might be blocked in some corporate and educational network environments.
Create a namespace in the Azure portal
A namespace in Azure Event Grid is a logical container for one or more topics, clients, client groups, topic spaces, and permission bindings. With an Azure Event Grid namespace, you can group together related resources and manage them as a single unit in your Azure subscription. A unique namespace allows you to have multiple resources in the same Azure region.
To create a namespace:
Sign in to the Azure portal.
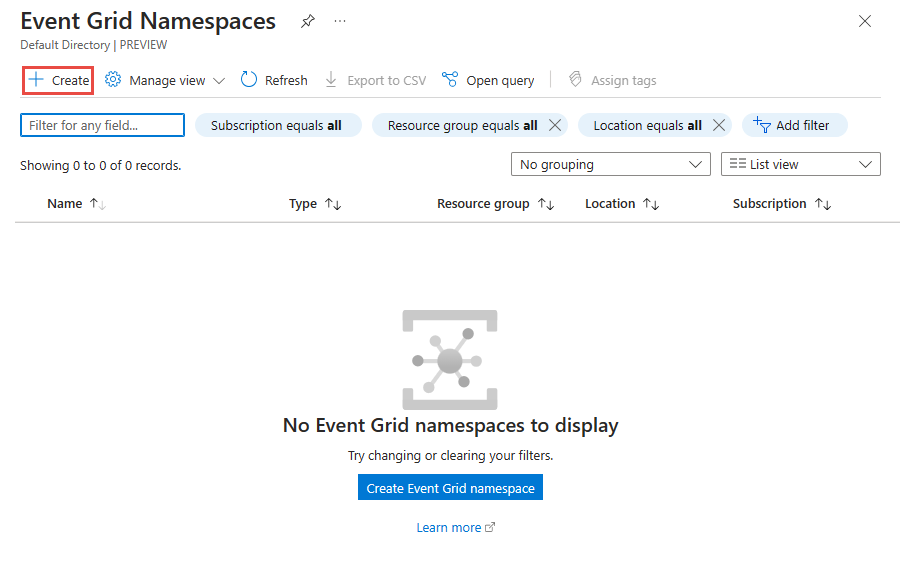
In the search box, enter Event Grid Namespaces and select Event Grid Namespaces from the results.

On the Event Grid Namespaces page, select + Create.
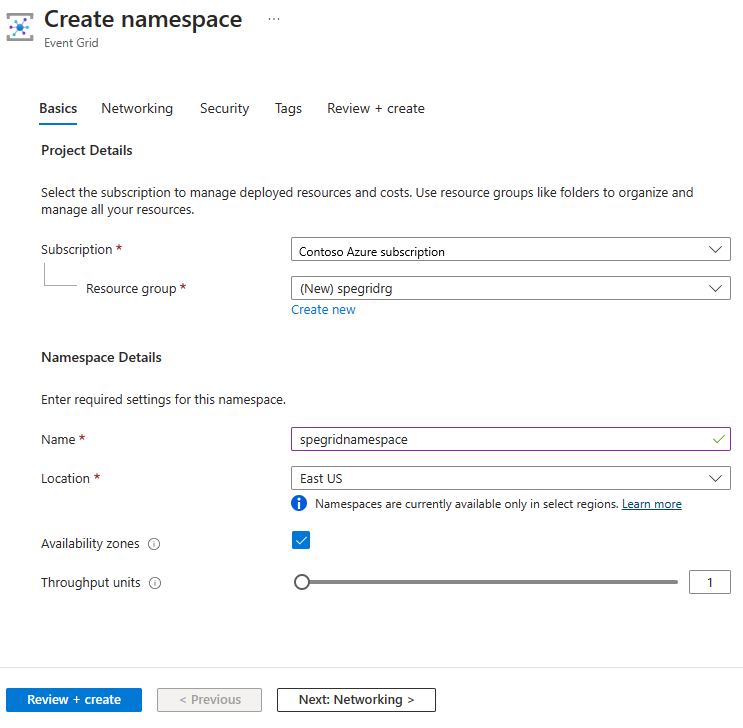
On the Basics page, follow these steps.
Select the Azure subscription in which to create the namespace.
Select an existing Resource group or create a resource group.
Enter a Name for the namespace.
Select the Location for the namespace.
Select Review + create.
On the Review + create tab, review your settings. Then select Create.
On the Deployment succeeded page, select Go to resource to navigate to your namespace.
Create a namespace topic
If you aren't on the Event Grid Namespace page, follow the create, view, and manage namespaces steps to view the namespace you want to use to create the topic.
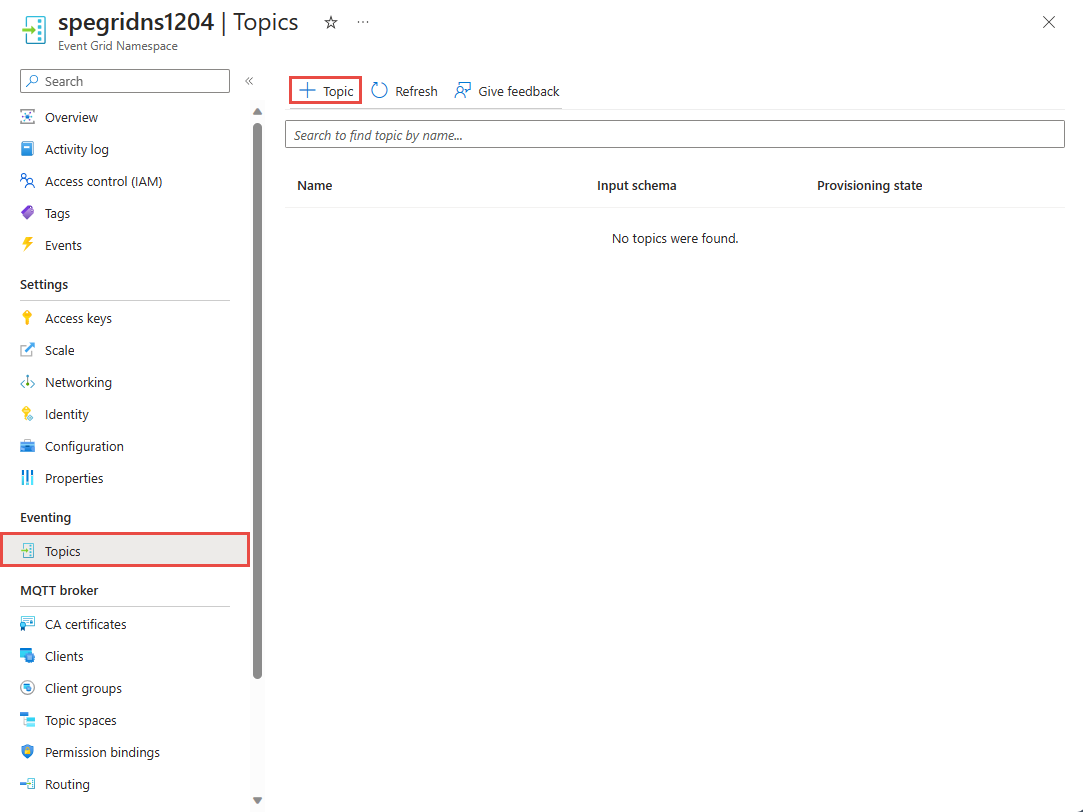
On the Event Grid Namespace page, under Event broker, select Topics.
On the Topics page, select + Topic.
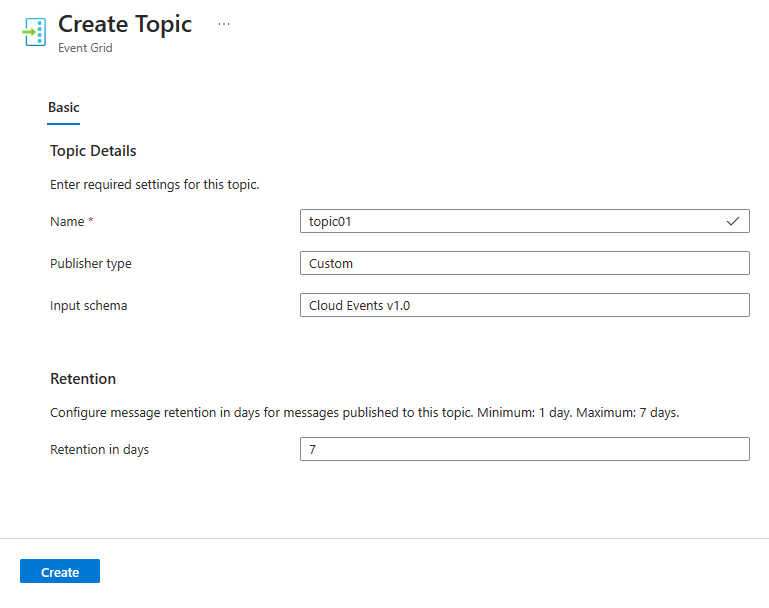
On the Create Topic page, type the name of the topic you want to create and select Create.

Enable managed identity for the Event Grid namespace
On the Event Grid Namespace page, under Settings, select Identity.
To enable a system assigned managed identity, select On.
Select Save to save the setting.

On the confirmation message, select Yes.
Confirm that you see the object ID of the system-assigned managed identity and see a link to assign roles.

Check notifications in the Azure portal to confirm that the managed identity is enabled for the namespace.


Enable MQTT broker for the Event Grid namespace
On the Event Grid Namespace page, under Settings, select Configuration.
Select Enable MQTT broker.
Select Apply.

Check notifications in the Azure portal to confirm that the MQTT broker is enabled for the namespace.

In a separate tab of the Web browser or in a separate window, use the Azure portal to create an Event Hubs namespace with an event hub.
Create an Event Hubs namespace
An Event Hubs namespace provides a unique scoping container in which you create event hubs. To create a namespace in your resource group using the portal:
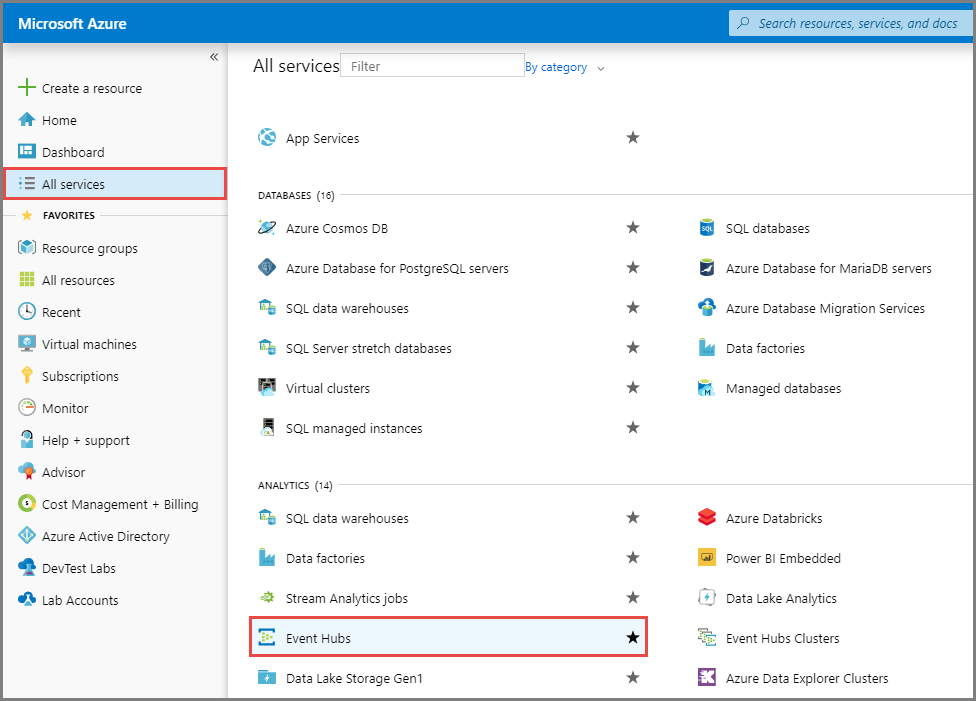
In the Azure portal, from the flyout menu, select All services. In the All services page, search for and select Event Hubs.
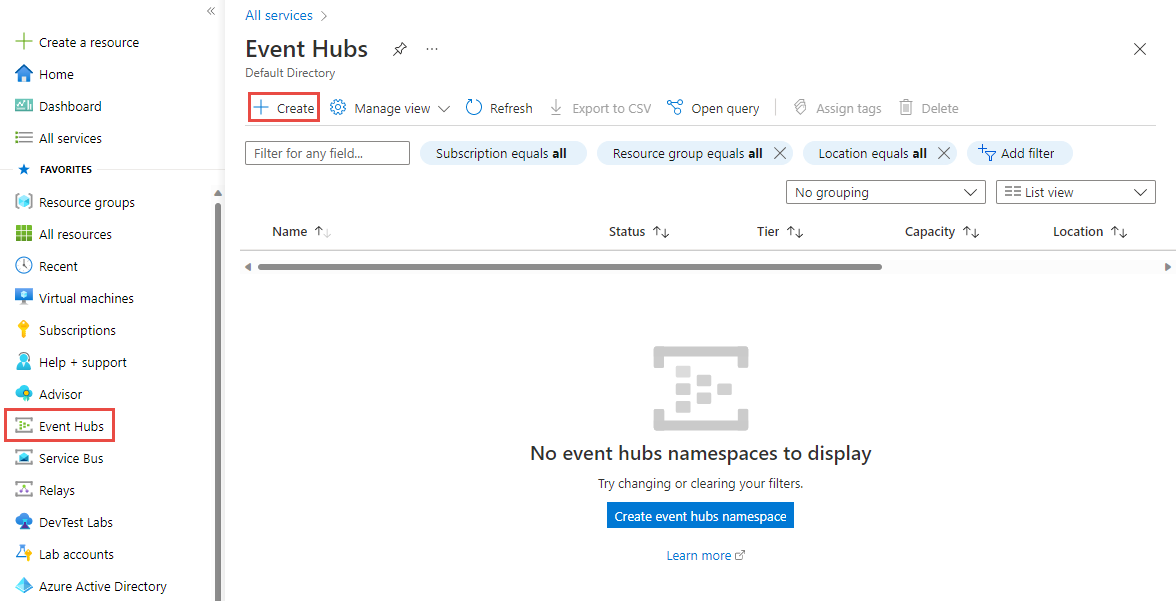
In the Event Hubs page, select Create.
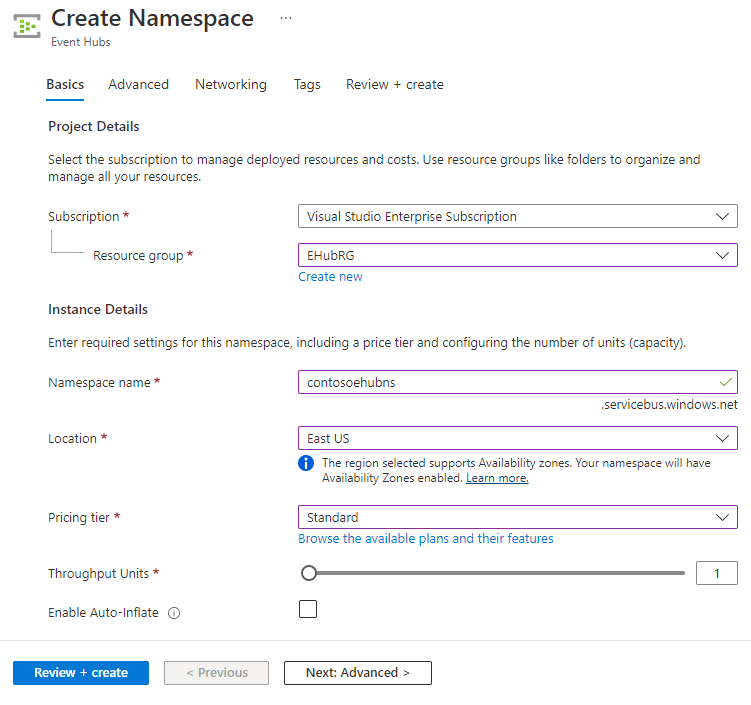
On the Create namespace page, take the following steps:
Select the Subscription in which you want to create the namespace.
Select the Resource group you created in the previous step.
Enter a name for the namespace. The system immediately checks to see if the name is available.
Select a Region for the namespace.
For the pricing tier, choose Basic.
Note
If you plan to use the namespace from Apache Kafka apps, use the Standard tier. The basic tier doesn't support Apache Kafka workloads. To learn about differences between tiers, see Quotas and limits, Event Hubs Premium, and Event Hubs Dedicated articles.
Leave the throughput units (for standard tier) or processing units (for premium tier) setting as it is. To learn about throughput units or processing units, see Event Hubs scalability.
Select Review + Create.
On the Review + Create page, review the settings, and select Create. Wait for the deployment to complete.
On the Deployment page, select Go to resource to navigate to the page for your namespace.
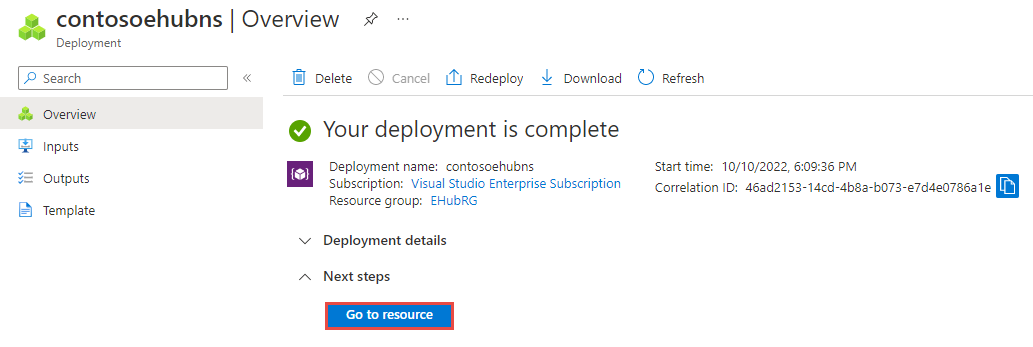
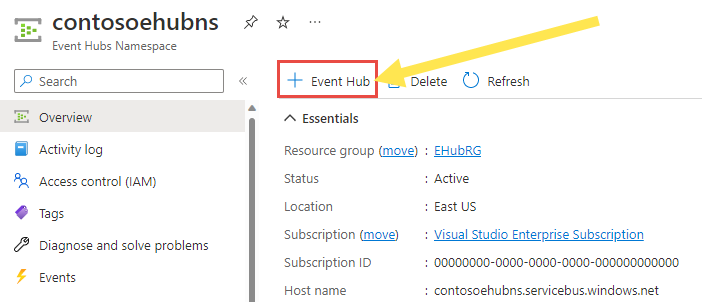
Confirm that you see the Event Hubs Namespace page similar to the following example:


Create an event hub
To create an event hub within the namespace, do the following actions:
On the Overview page, select + Event Hub.
Type a name for your event hub, then select Review + create.
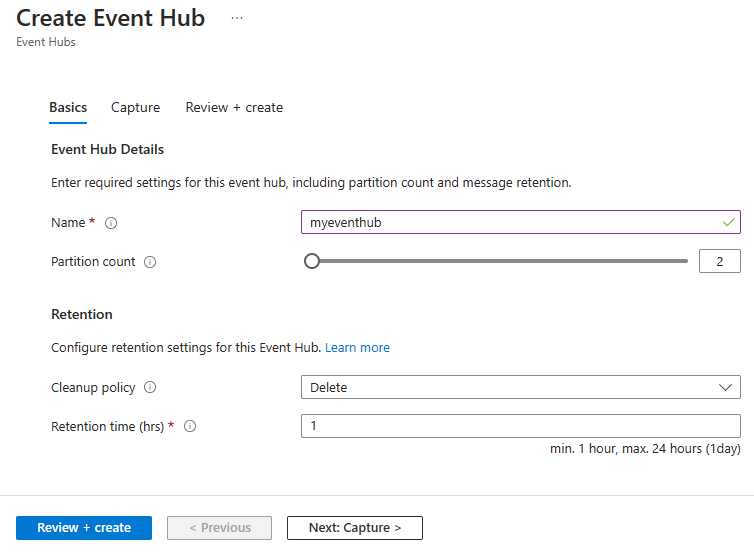
On the Review + create page, select Create.
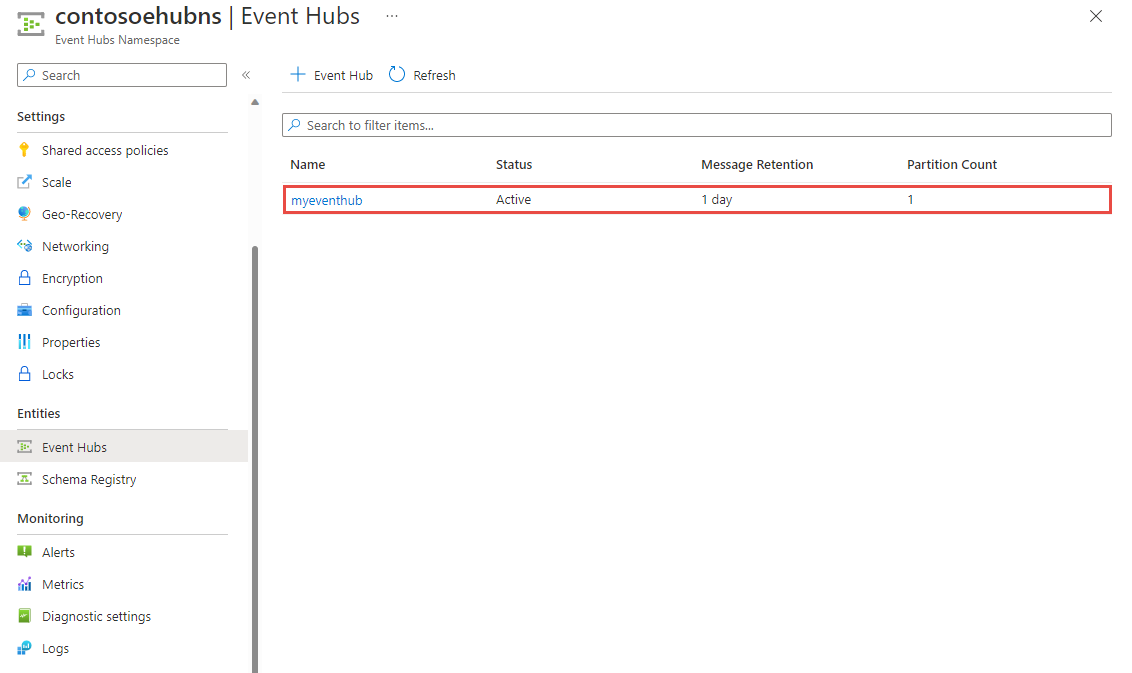
You can check the status of the event hub creation in alerts. After the event hub is created, you see it in the list of event hubs.
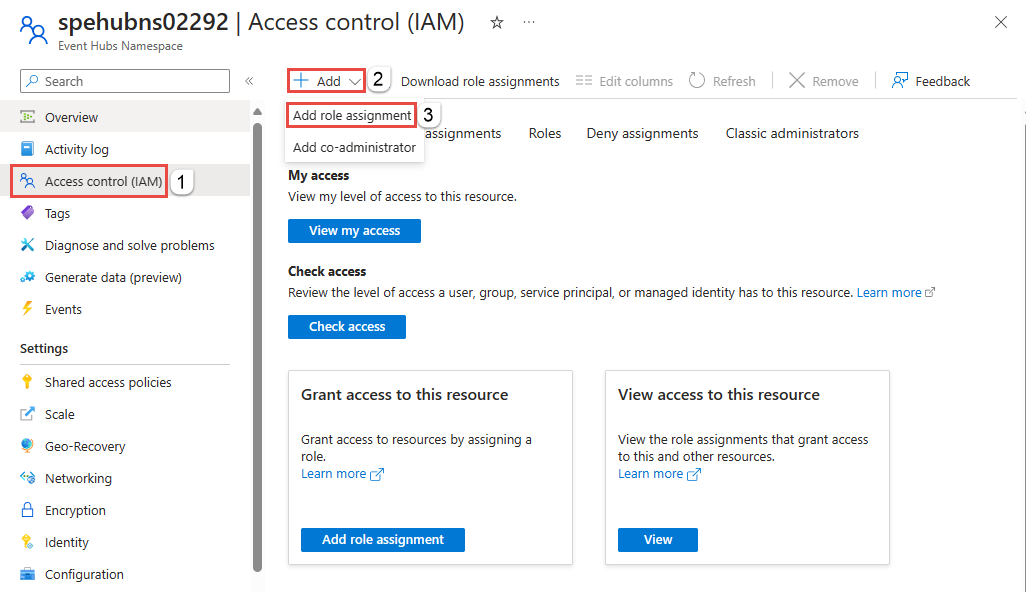
Give Event Grid namespace the access to send events to the event hub
On the Event Hubs Namespace page, select Access control (IAM).
On the Access control page, select + Add, and then select Add role assignment.
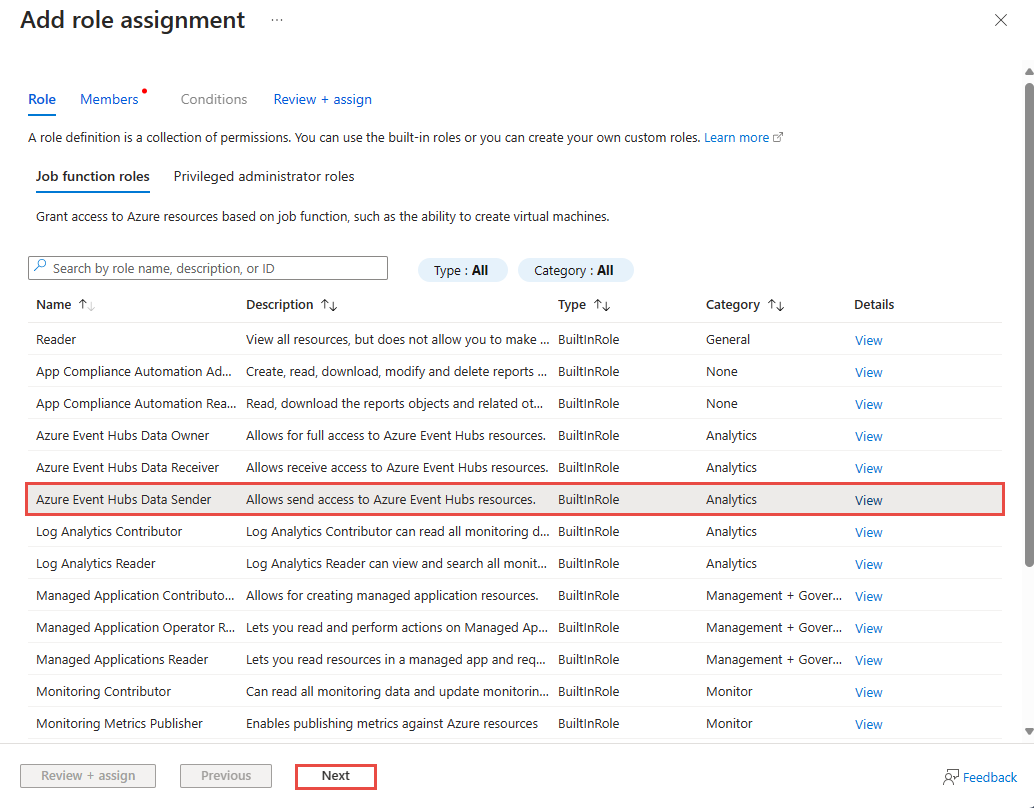
On the Add role assignment page, from the list of roles, select Azure Event Hubs Data Sender, and then select Next.
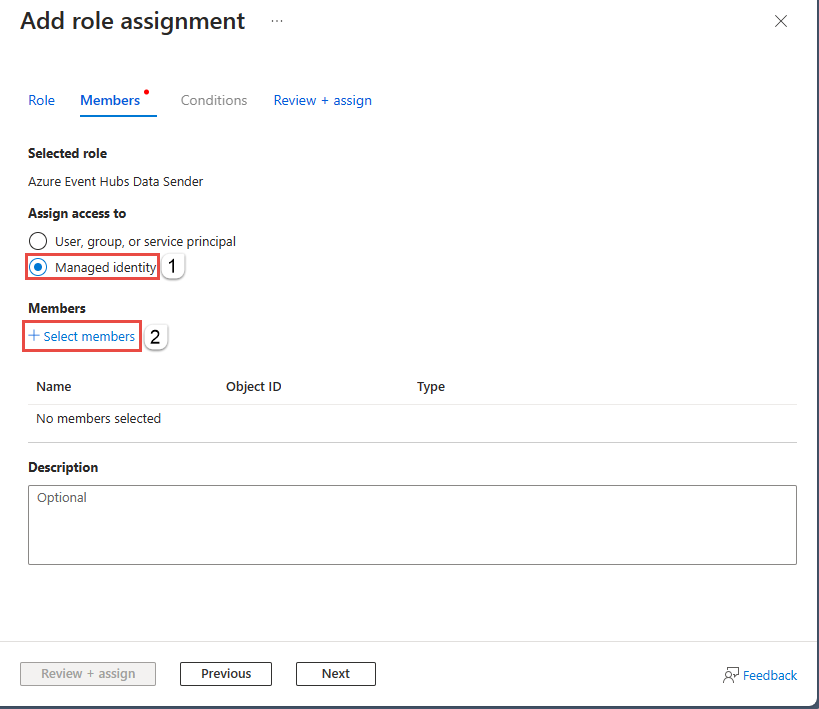
On the Members page, follow these steps:
For the Assign access to field, select Managed identity.
Choose + Select members.
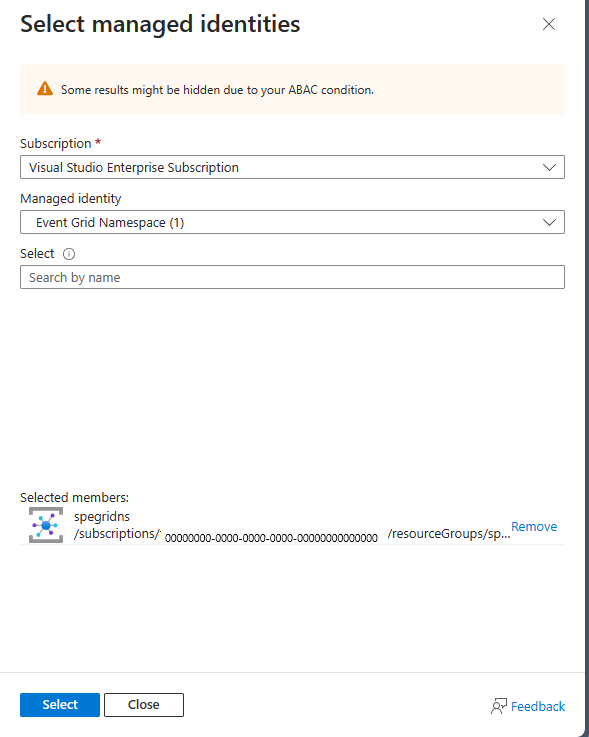
On the Select managed identities page, follow these steps:
Select your Azure subscription.
For Managed identity, select Event Grid Namespace.
Select the managed identity that has the same name as the Event Grid namespace.
Choose Select.
On the Add role assignment page, select Review + assign.
On the Review + assign page, select Review + assign.

Create an event subscription with Event Hubs as the endpoint
Switch to the tab of your Web browser window that has the Event Grid namespace open.
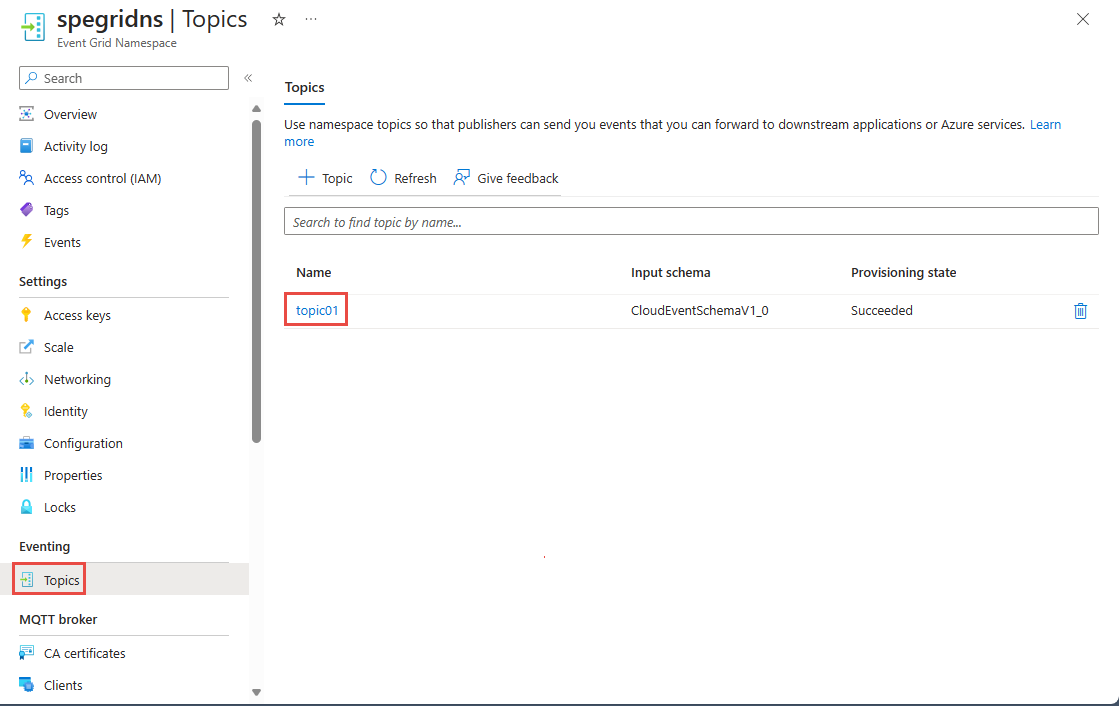
On the Event Grid Namespace page, select Topics.
On the Topics page, select the namespace topic you created earlier.
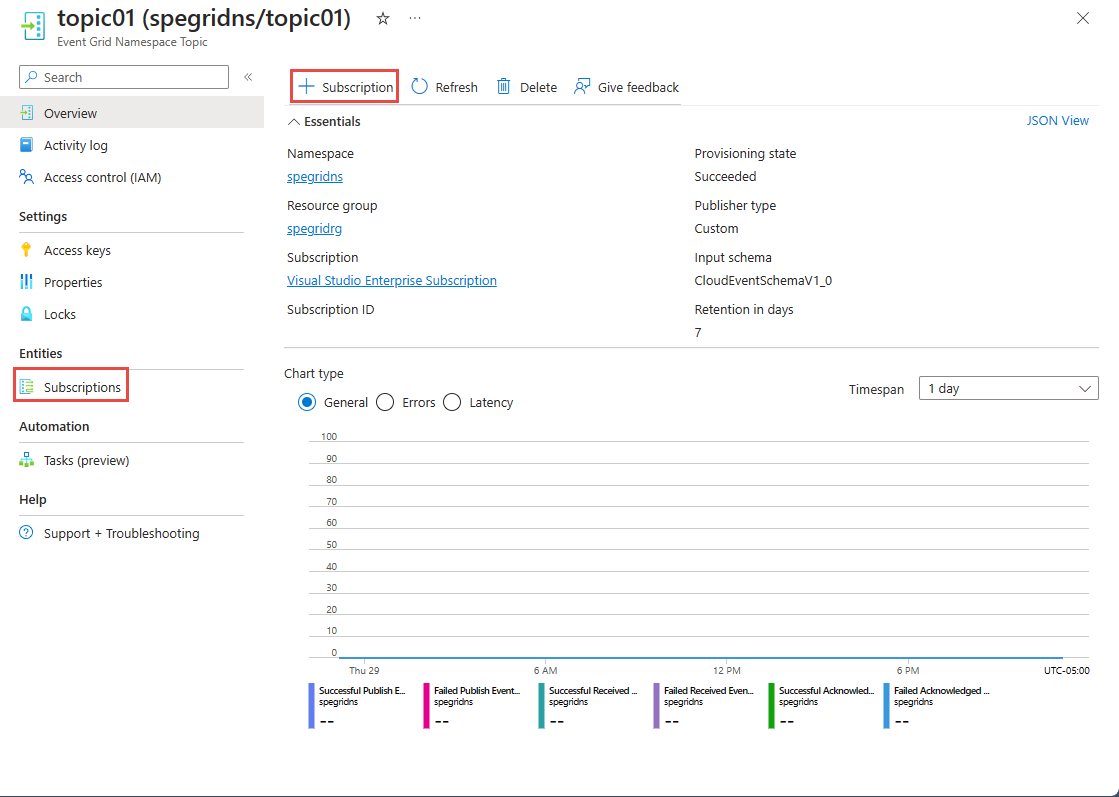
On the Event Grid Namespace Topic page, select + Subscription.
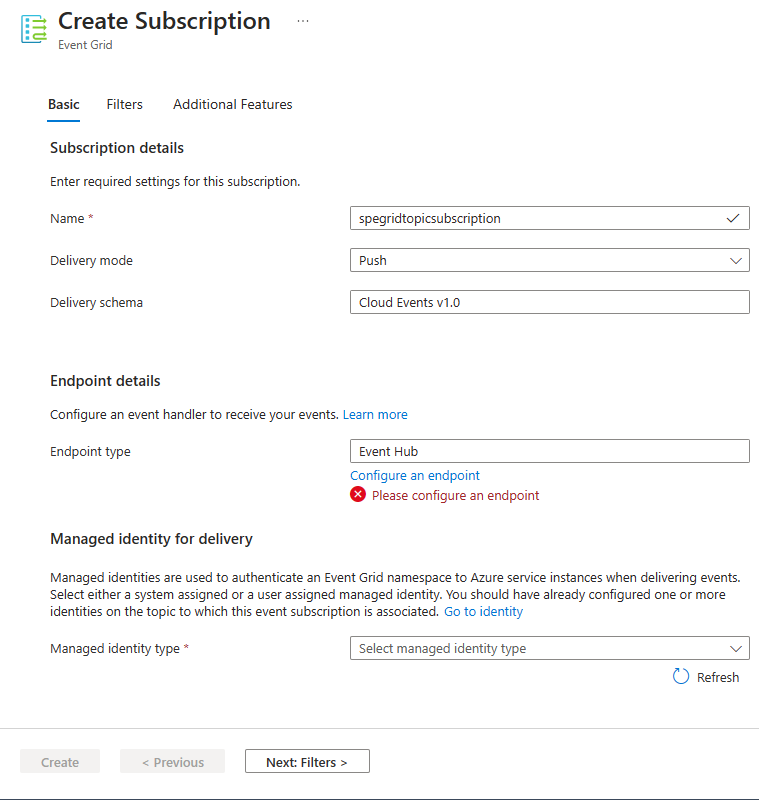
On the Create Subscription page, follow these steps:
Enter a Name for the event subscription.
For Delivery mode, select Push.
Confirm that Endpoint type is set to Event Hub.
Select Configure an endpoint.
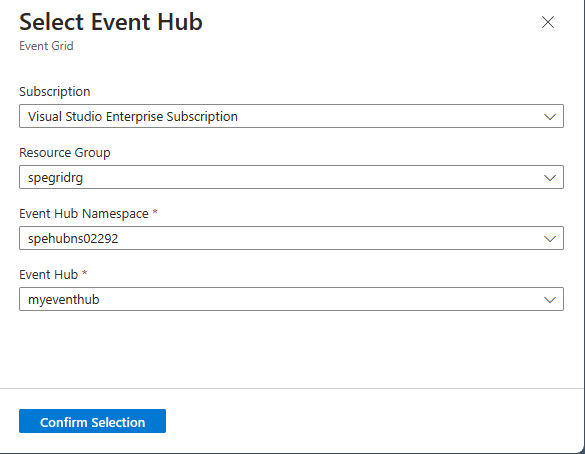
On the Select Event Hub page, follow these steps:
Select the Azure subscription that has the event hub.
Select the Resource Group that has the event hub.
Select the Event Hubs Namespace.
Select the Event Hub in the Event Hubs namespace.
Then, select Confirm selection.
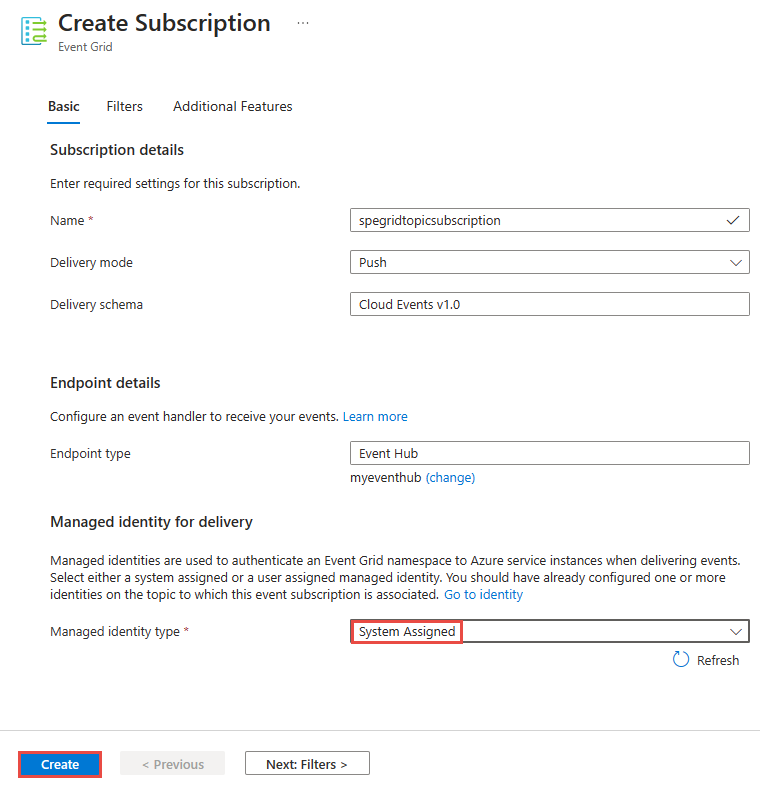
Back on the Create Subscription page, select System Assigned for Managed identity type.
Select Create.
Configure routing in the Event Grid namespace
Navigate back to the Event Grid Namespace page by selecting the namespace in the Essentials section of the Event Grid Namespace Topic page or by selecting the namespace name in the breadcrumb menu at the top.
On the Event Grid Namespace page, under MQTT broker, select Routing.
On the Routing page, select Enable routing.
For Topic type, select Namespace topic.
For Topic, select the Event Grid namespace topic that you created where all MQTT messages are routed.
Select Apply.
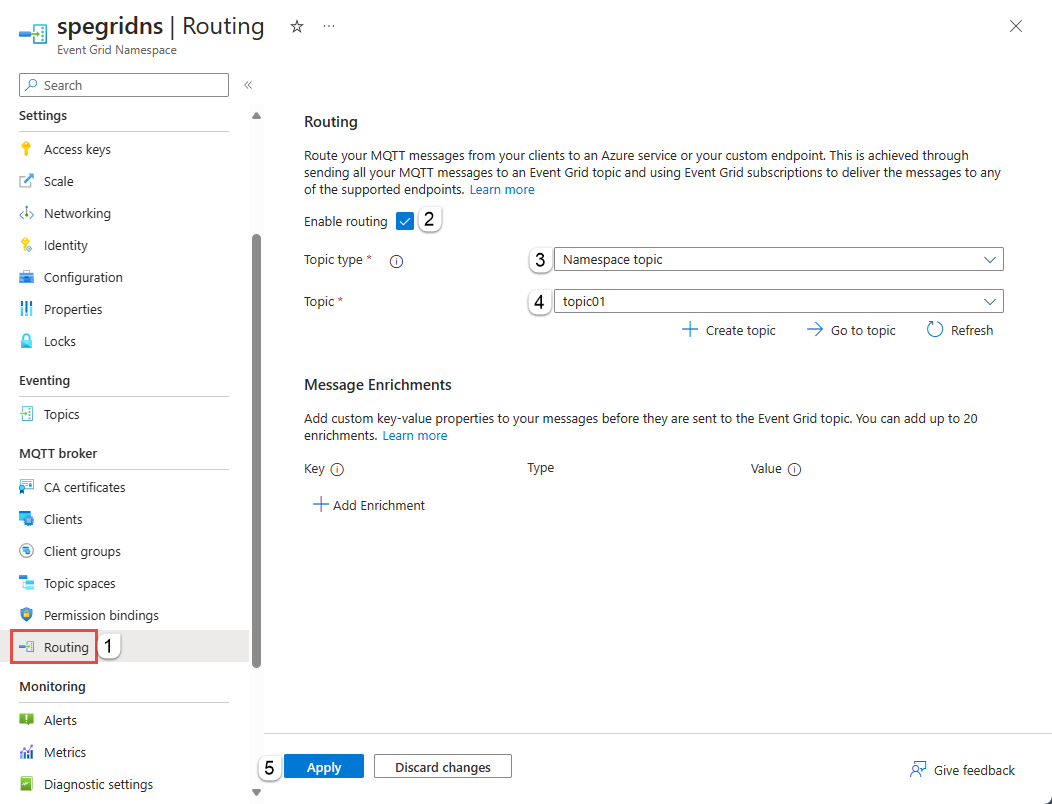
Check notifications to confirm that the namespace is enabled with the routing information.
Create clients, topic space, and permission bindings
Follow steps in this quickstart: Publish and subscribe on an MQTT topic to:
Create a client. You can create the second client if you want to, but it's optional.
Create a topic space.
Create publisher and subscriber permission bindings.
Use MQTTX to send a few messages.
Verify that the event hub received those messages on the Overview page for your Event Hubs namespace.


View routed MQTT messages in Event Hubs by using a Stream Analytics query
Navigate to the Event Hubs instance (event hub) in your event subscription in the Azure portal. Process data from your event hub by using Stream Analytics. For more information, see Process data from your event hub using Azure Stream Analytics. You can see the MQTT messages in the query.

Next step
For code samples, go to the MqttApplicationSamples GitHub repository.