Set up networking in Azure Modeling and Simulation Workbench
In Azure Modeling and Simulation Workbench, you can customize networking to meet your security and business requirements. You can connect to the workbench by using one of these methods:
- Allowlisted public IP addresses
- A virtual private network (VPN) and/or Azure ExpressRoute
Each chamber has a dedicated connector. Each connector can support either of the previously mentioned protocols to establish network access between a customer's on-premises or cloud environment and the workbench.
Add a VPN or ExpressRoute connection
If your organization set up an Azure network to oversee user access to the workbench, you can enforce stringent controls over the virtual network and subnet addresses employed to establish connections to the chamber.
When you create the connector, the Workbench Owner (Subscription Owner) can link a virtual network with a VPN gateway and/or ExpressRoute gateway. This link provides a secure connection between your on-premises network and the chamber.
To add a VPN or ExpressRoute connection:
Before you create a connector for private IP networking via VPN or ExpressRoute, perform this role assignment. Azure Modeling and Simulation Workbench needs the Network Contributor role set for the resource group in which you're hosting your virtual network connected with ExpressRoute or VPN.
Setting Value Role Network Contributor Assign access to User, group, or service principal Members Azure Modeling and Simulation Workbench When you create your connector, specify VPN or ExpressRoute as your method to connect to your on-premises network.
A list of available virtual network subnets within your subscription appears. Select a non-gateway subnet within the same virtual network that has the gateway subnet for the VPN gateway or ExpressRoute gateway.
Edit allowed public IP addresses
For organizations that don't have an Azure network set up or that prefer to use a public IP, the Azure portal allows IP addresses to be allowlisted to connect into the chamber. To use this connectivity method, you need to specify at least one IP address for the connector object when you create the workbench. Workbench Owners and Chamber Admins can add to and edit the allowlisted public addresses for a connector after the connector object is created.
To edit the list of allowed IP addresses:
In the Azure portal, go to the Networking pane for the connector object.
Select Edit allowed IP. From here, you can delete existing IP addresses or add new ones.
Select Submit to save your changes.
Refresh the view for connector networking and confirm that your changes appear.

Add redirect URIs for the application in Microsoft Entra ID
A redirect URI is the location where the Microsoft identity platform redirects a user's client and sends security tokens after authentication. Each time you create a new connector, you need to register the redirect URIs for your application registration in Microsoft Entra ID.
Follow these steps to get redirect URIs:
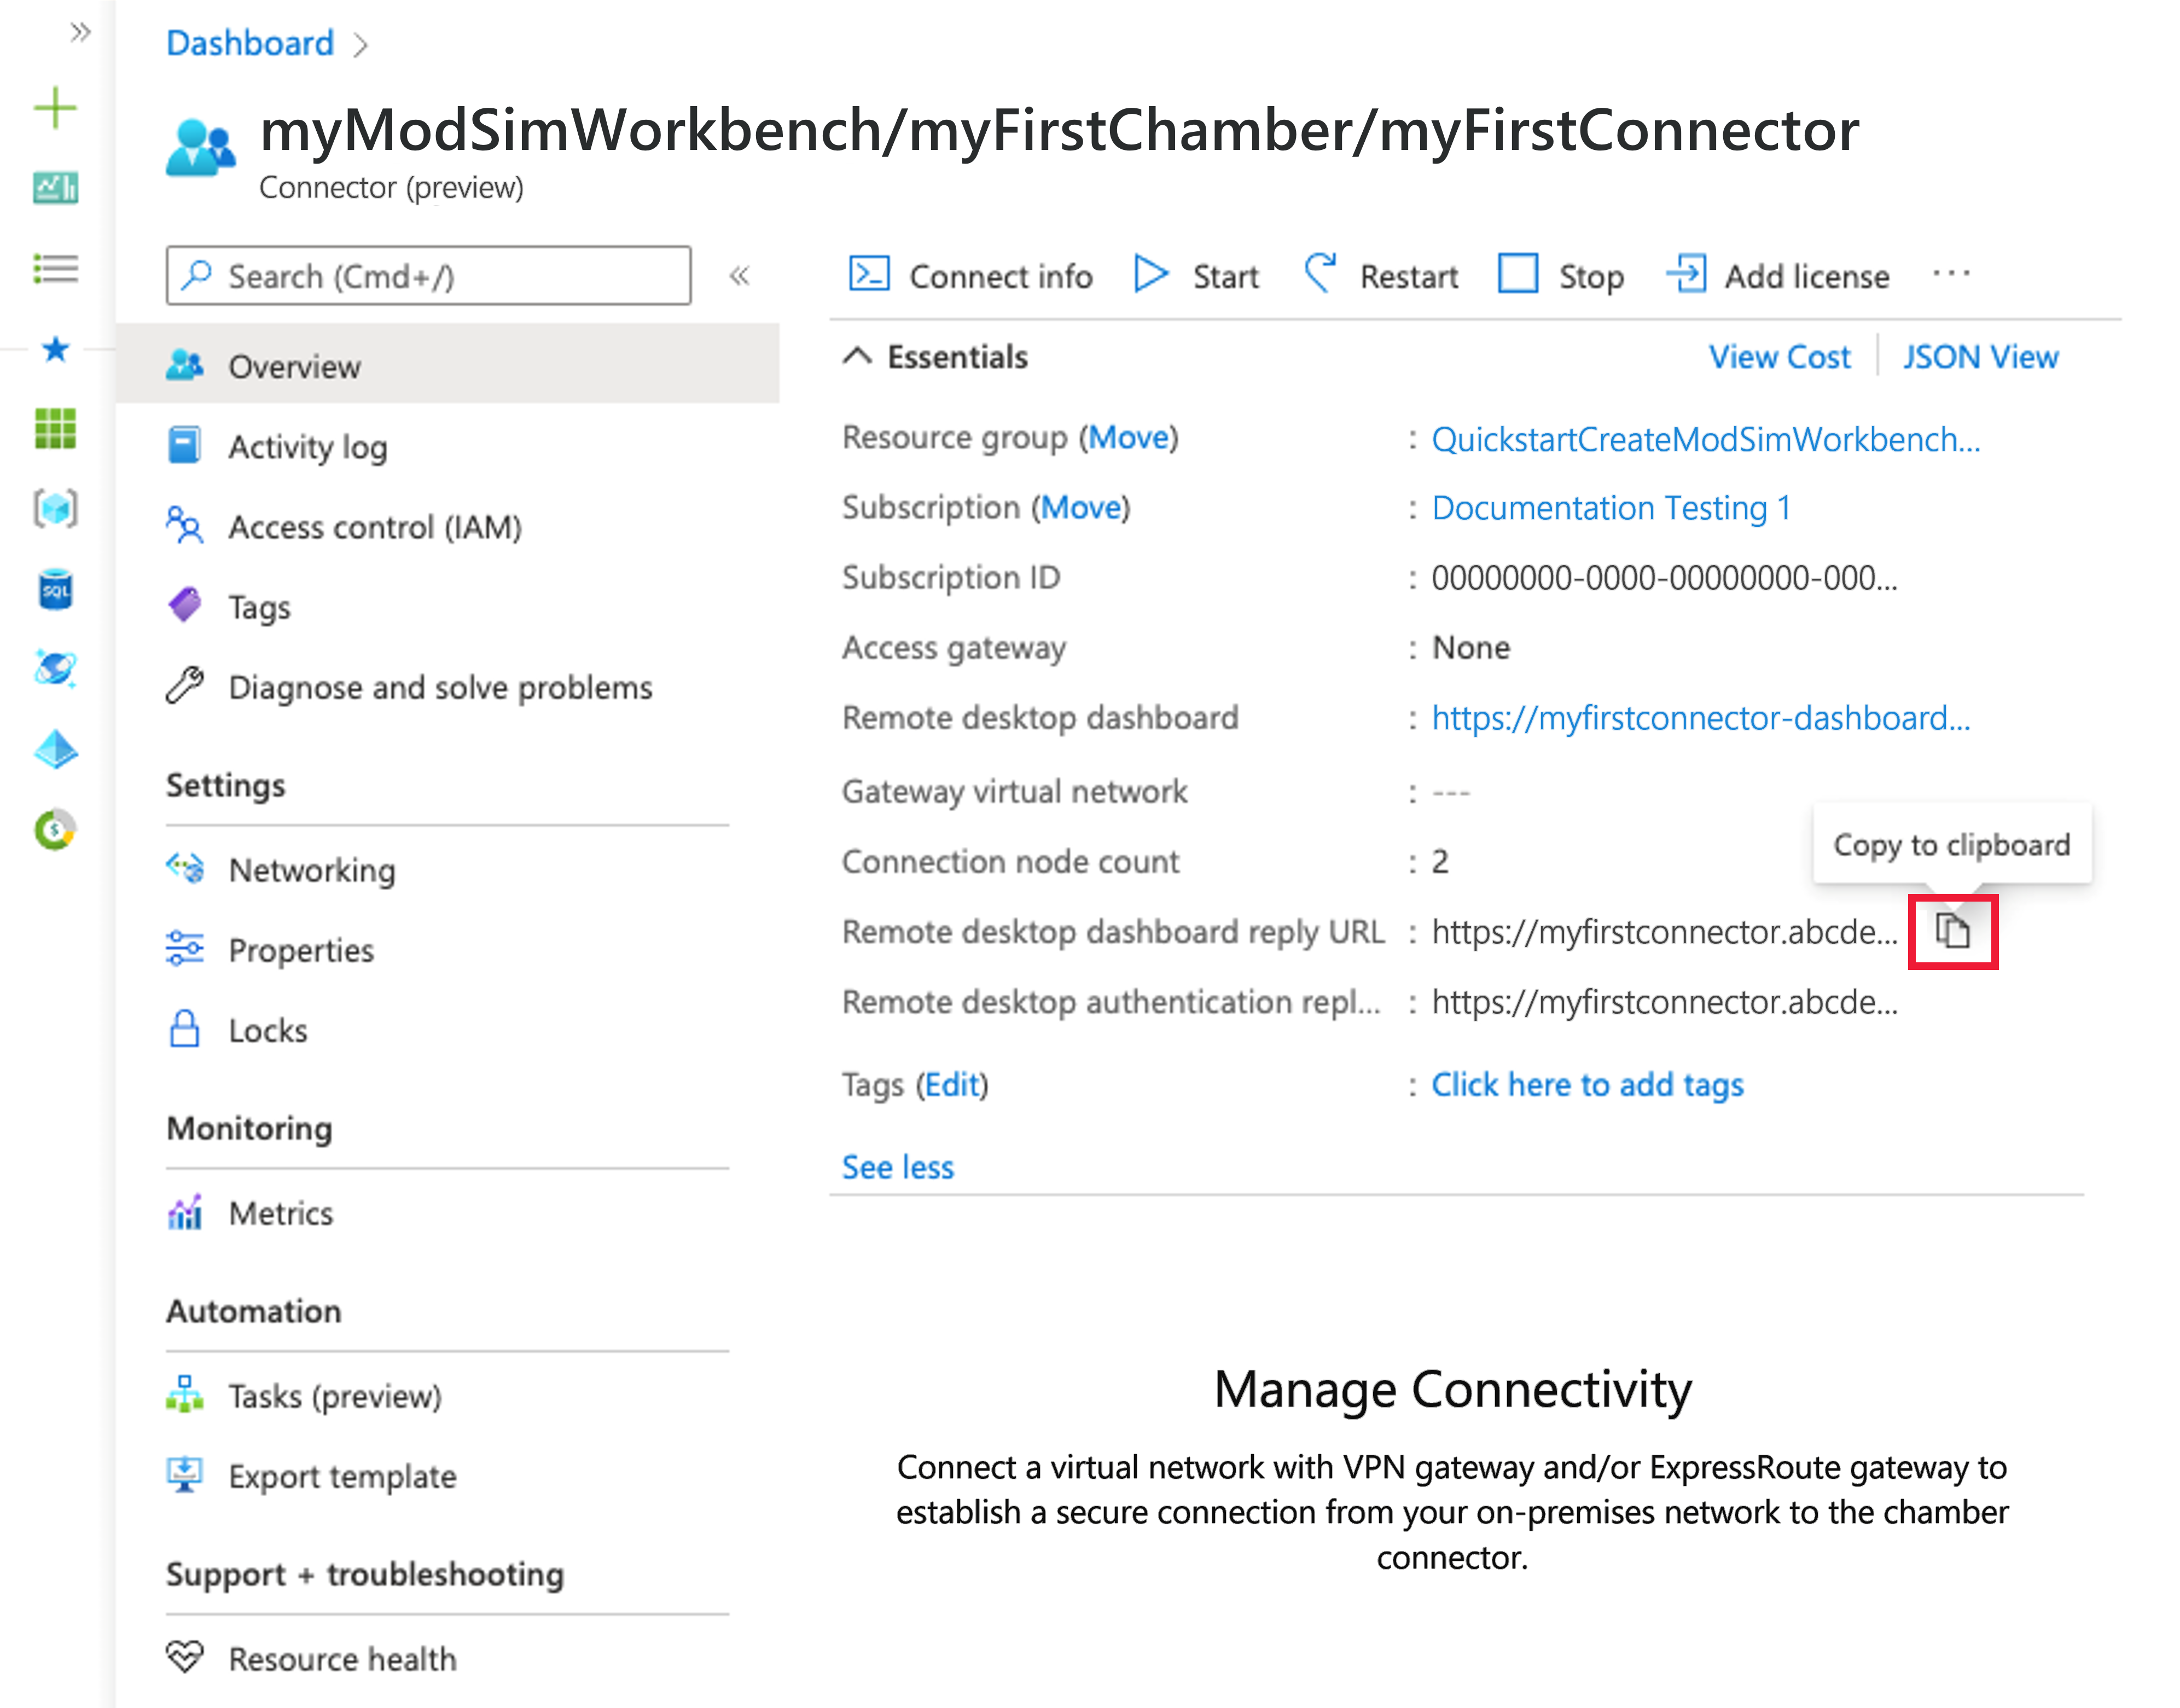
On the page for your new workbench in Azure Modeling and Simulation Workbench, select Connector on the left menu. Then select the connector in the resource list.
On the Overview page, locate and document the following two connector properties by using the Copy to clipboard icon. If these properties aren't visible, select the See More button to expand the window.
- Dashboard reply URL: For example, https://<dashboardFqdn>/etx/oauth2/code
- Authentication reply URL: For example, https://<authenticationFqdn>/otdsws/login?authhandler=AzureOIDC
Follow these steps to add redirect URIs:
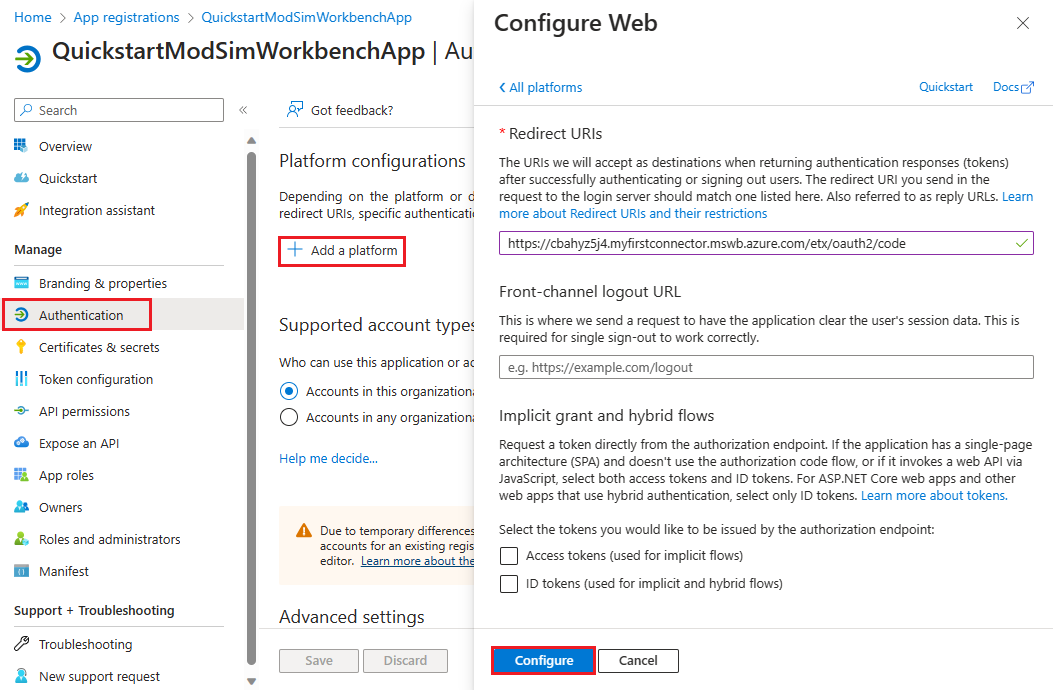
In the Azure portal, in Microsoft Entra ID > App registrations, select the application that you created in your Microsoft Entra instance.
Under Manage, select Authentication.
Under Platform configurations, select Add a platform.
Under Configure platforms, select the Web tile.
On the Configure Web pane, paste the Dashboard reply URL value that you documented earlier. Then select Configure.
Under Platform configurations > Web > Redirect URIs, select Add URI.
Paste the Authentication reply URL value that you documented earlier. Then select Save.
Next steps
To learn how to import data into an Azure Modeling and Simulation Workbench chamber, see Import data.
Feedback
Coming soon: Throughout 2024 we will be phasing out GitHub Issues as the feedback mechanism for content and replacing it with a new feedback system. For more information see: https://aka.ms/ContentUserFeedback.
Submit and view feedback for