Build a console application by using the Azure.Search.Documents client library to add semantic ranking to an existing search index.
Alternatively, you can download the source code to start with a finished project.
Set up your environment
Start Visual Studio and create a new project for a console app.
In Tools > NuGet Package Manager, select Manage NuGet Packages for Solution....
Select Browse.
Search for the Azure.Search.Documents package and select the latest stable version.
Select Install to add the assembly to your project and solution.
Create a search client
In Program.cs, add the following using directives.
using Azure;
using Azure.Search.Documents;
using Azure.Search.Documents.Indexes;
using Azure.Search.Documents.Indexes.Models;
using Azure.Search.Documents.Models;
Create two clients: SearchIndexClient creates the index, and SearchClient loads and queries an existing index.
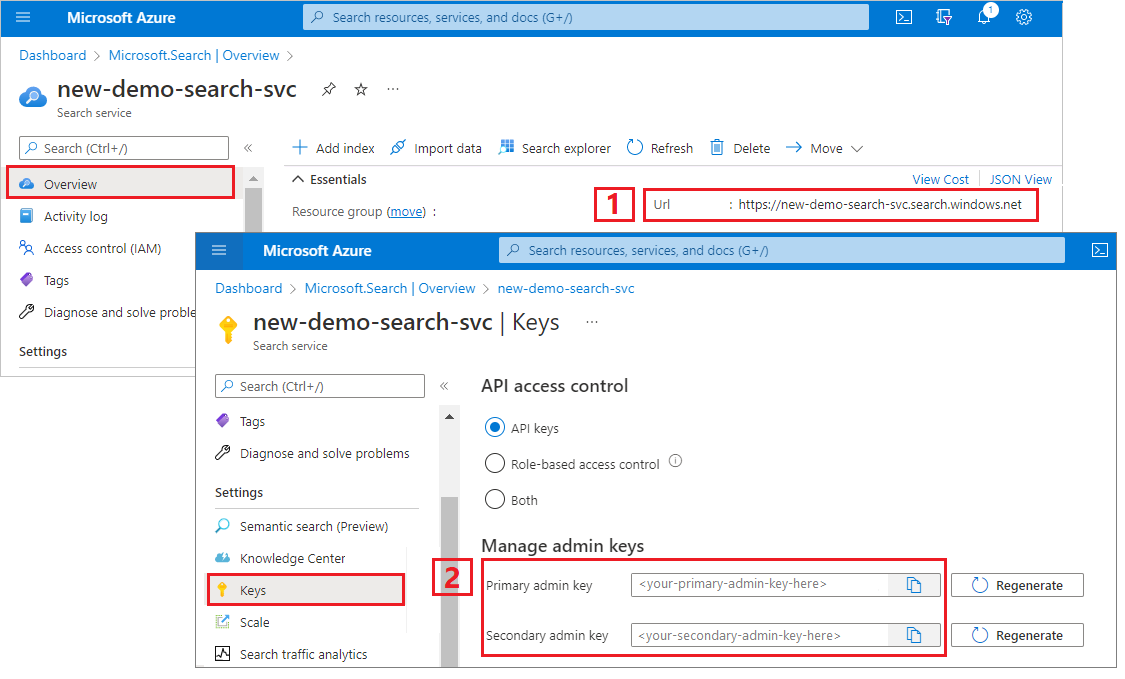
Both clients need the service endpoint and an admin API key for authentication with create/delete rights. However, the code builds out the URI for you, so specify only the search service name for the serviceName property. Don't include https:// or .search.windows.net.
 static void Main(string[] args)
 {
     string serviceName = "<YOUR-SEARCH-SERVICE-NAME>";
     string apiKey = "<YOUR-SEARCH-ADMIN-API-KEY>";
     string indexName = "hotels-quickstart";


     // Create a SearchIndexClient to send create/delete index commands
     Uri serviceEndpoint = new Uri($"https://{serviceName}.search.windows.net/");
     AzureKeyCredential credential = new AzureKeyCredential(apiKey);
     SearchIndexClient adminClient = new SearchIndexClient(serviceEndpoint, credential);

     // Create a SearchClient to load and query documents
     SearchClient srchclient = new SearchClient(serviceEndpoint, indexName, credential);
     . . .
 }
Create an index
Create or update an index schema to include a SemanticConfiguration. If you're updating an existing index, this modification doesn't require a reindexing because the structure of your documents is unchanged.
// Create hotels-quickstart index
private static void CreateIndex(string indexName, SearchIndexClient adminClient)
{

    FieldBuilder fieldBuilder = new FieldBuilder();
    var searchFields = fieldBuilder.Build(typeof(Hotel));

    var definition = new SearchIndex(indexName, searchFields);
    var suggester = new SearchSuggester("sg", new[] { "HotelName", "Category", "Address/City", "Address/StateProvince" });
    definition.Suggesters.Add(suggester);
    definition.SemanticSearch = new SemanticSearch
    {
        Configurations =
        {
            new SemanticConfiguration("my-semantic-config", new()
            {
                TitleField = new SemanticField("HotelName"),
                ContentFields =
                {
                    new SemanticField("Description"),
                    new SemanticField("Description_fr")
                },
                KeywordsFields =
                {
                    new SemanticField("Tags"),
                    new SemanticField("Category")
                }
            })
        }
    };

    adminClient.CreateOrUpdateIndex(definition);
}
The following code creates the index on your search service:
// Create index
Console.WriteLine("{0}", "Creating index...\n");
CreateIndex(indexName, adminClient);

SearchClient ingesterClient = adminClient.GetSearchClient(indexName);
Load documents
Azure AI Search searches over content stored in the service. The code for uploading documents is identical to the C# quickstart for full text search so we don't need to duplicate it here. You should have four hotels with names, addresses, and descriptions. Your solution should have types for Hotels and Addresses.
Search an index
Here's a query that invokes semantic ranker, with search options for specifying parameters:
Console.WriteLine("Example of a semantic query.");

options = new SearchOptions()
{
    QueryType = Azure.Search.Documents.Models.SearchQueryType.Semantic,
    SemanticSearch = new()
    {
        SemanticConfigurationName = "my-semantic-config",
        QueryCaption = new(QueryCaptionType.Extractive)
    }
};
options.Select.Add("HotelName");
options.Select.Add("Category");
options.Select.Add("Description");

// response = srchclient.Search<Hotel>("*", options);
response = srchclient.Search<Hotel>("what hotel has a good restaurant on site", options);
WriteDocuments(response);
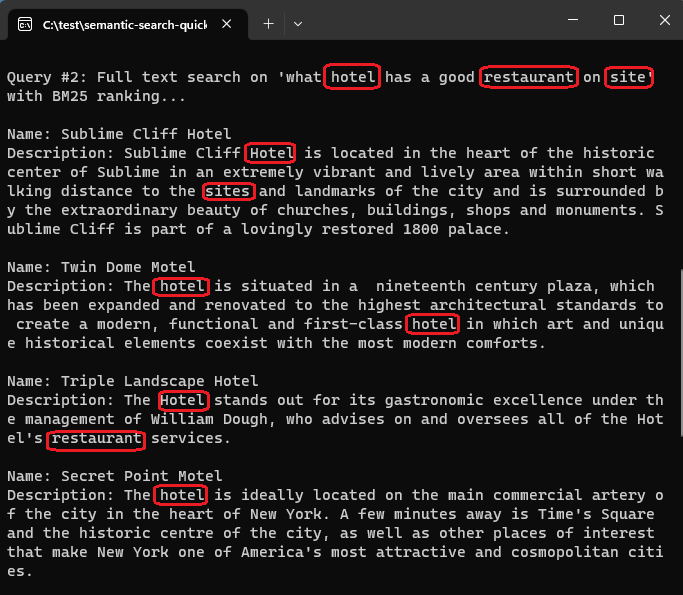
For comparison, here are results from a query that uses the default BM25 ranking, based on term frequency and proximity. Given the query "what hotel has a good restaurant on site", the BM25 ranking algorithm returns matches in the order shown in this screenshot:

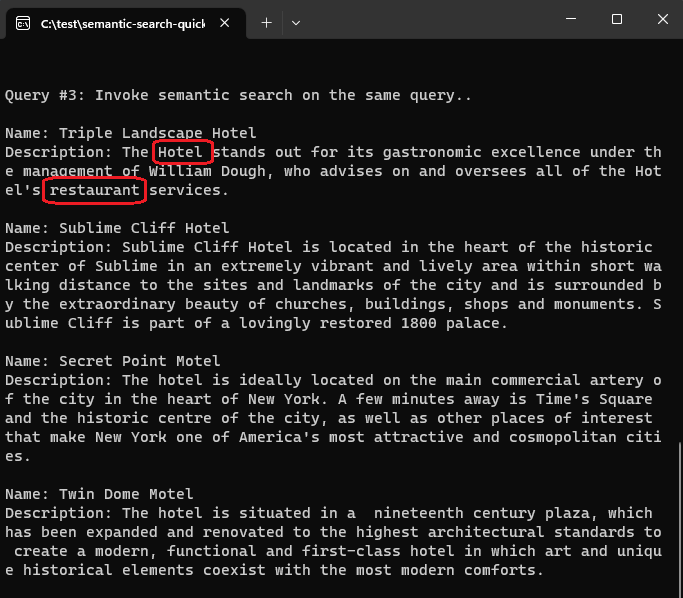
In contrast, when semantic ranking is applied to the same query ("what hotel has a good restaurant on site"), the results are reranked based on semantic relevance to the query. This time, the top result is the hotel with the restaurant, which aligns better to user expectations.

Run the program
Press F5 to rebuild the app and run the program in its entirety.
Output includes messages from Console.WriteLine, with the addition of query information and results.
Use a Jupyter notebook and the azure-search-documents library in the Azure SDK for Python to learn about semantic ranking.
Alternatively, you can download and run a finished notebook.
Set up your environment
Use Visual Studio Code with the Python extension, or equivalent IDE, with Python 3.10 or later.
We recommend a virtual environment for this quickstart:
Start Visual Studio Code.
Create a new ipynb file.
Open the Command Palette by using Ctrl+Shift+P.
Search for Python: Create Environment.
Select Venv.
Select a Python interpreter. Choose 3.10 or later.
It can take a minute to set up. If you run into problems, see Python environments in VS Code.
Install packages and set variables
Install packages, including azure-search-documents.
! pip install azure-search-documents==11.6.0b1 --quiet
! pip install azure-identity --quiet
! pip install python-dotenv --quiet
Provide your endpoint and API keys:
search_endpoint: str = "PUT-YOUR-SEARCH-SERVICE-ENDPOINT-HERE"
search_api_key: str = "PUT-YOUR-SEARCH-SERVICE-ADMIN-API-KEY-HERE"
index_name: str = "hotels-quickstart"
Create an index
Create or update an index schema to include a SemanticConfiguration. If you're updating an existing index, this modification doesn't require a reindexing because the structure of your documents is unchanged.
from azure.search.documents.indexes import SearchIndexClient
from azure.search.documents import SearchClient
from azure.search.documents.indexes.models import (
    ComplexField,
    SimpleField,
    SearchFieldDataType,
    SearchableField,
    SearchIndex,
    SemanticConfiguration,
    SemanticField,
    SemanticPrioritizedFields,
    SemanticSearch
)

# Create a search schema
index_client = SearchIndexClient(
    endpoint=search_endpoint, credential=credential)
fields = [
        SimpleField(name="HotelId", type=SearchFieldDataType.String, key=True),
        SearchableField(name="HotelName", type=SearchFieldDataType.String, sortable=True),
        SearchableField(name="Description", type=SearchFieldDataType.String, analyzer_name="en.lucene"),
        SearchableField(name="Description_fr", type=SearchFieldDataType.String, analyzer_name="fr.lucene"),
        SearchableField(name="Category", type=SearchFieldDataType.String, facetable=True, filterable=True, sortable=True),

        SearchableField(name="Tags", collection=True, type=SearchFieldDataType.String, facetable=True, filterable=True),

        SimpleField(name="ParkingIncluded", type=SearchFieldDataType.Boolean, facetable=True, filterable=True, sortable=True),
        SimpleField(name="LastRenovationDate", type=SearchFieldDataType.DateTimeOffset, facetable=True, filterable=True, sortable=True),
        SimpleField(name="Rating", type=SearchFieldDataType.Double, facetable=True, filterable=True, sortable=True),

        ComplexField(name="Address", fields=[
            SearchableField(name="StreetAddress", type=SearchFieldDataType.String),
            SearchableField(name="City", type=SearchFieldDataType.String, facetable=True, filterable=True, sortable=True),
            SearchableField(name="StateProvince", type=SearchFieldDataType.String, facetable=True, filterable=True, sortable=True),
            SearchableField(name="PostalCode", type=SearchFieldDataType.String, facetable=True, filterable=True, sortable=True),
            SearchableField(name="Country", type=SearchFieldDataType.String, facetable=True, filterable=True, sortable=True),
        ])
    ]

semantic_config = SemanticConfiguration(
    name="my-semantic-config",
    prioritized_fields=SemanticPrioritizedFields(
        title_field=SemanticField(field_name="HotelName"),
        keywords_fields=[SemanticField(field_name="Category")],
        content_fields=[SemanticField(field_name="Description")]
    )
)

# Create the semantic settings with the configuration
semantic_search = SemanticSearch(configurations=[semantic_config])

semantic_settings = SemanticSearch(configurations=[semantic_config])
scoring_profiles = []
suggester = [{'name': 'sg', 'source_fields': ['Tags', 'Address/City', 'Address/Country']}]

# Create the search index with the semantic settings
index = SearchIndex(name=index_name, fields=fields, suggesters=suggester, scoring_profiles=scoring_profiles, semantic_search=semantic_search)
result = index_client.create_or_update_index(index)
print(f' {result.name} created')
Create a documents payload
You can push JSON documents to a search index. Documents must match the index schema.
documents = [
    {
    "@search.action": "upload",
    "HotelId": "1",
    "HotelName": "Stay-Kay City Hotel",
    "Description": "The hotel is ideally located on the main commercial artery of the city in the heart of New York. A few minutes away is Time's Square and the historic centre of the city, as well as other places of interest that make New York one of America's most attractive and cosmopolitan cities.",
    "Description_fr": "L'hôtel est idéalement situé sur la principale artère commerciale de la ville en plein cœur de New York. A quelques minutes se trouve la place du temps et le centre historique de la ville, ainsi que d'autres lieux d'intérêt qui font de New York l'une des villes les plus attractives et cosmopolites de l'Amérique.",
    "Category": "Boutique",
    "Tags": [ "pool", "air conditioning", "concierge" ],
    "ParkingIncluded": "false",
    "LastRenovationDate": "1970-01-18T00:00:00Z",
    "Rating": 3.60,
    "Address": {
        "StreetAddress": "677 5th Ave",
        "City": "New York",
        "StateProvince": "NY",
        "PostalCode": "10022",
        "Country": "USA"
        }
    },
    {
    "@search.action": "upload",
    "HotelId": "2",
    "HotelName": "Old Century Hotel",
    "Description": "The hotel is situated in a  nineteenth century plaza, which has been expanded and renovated to the highest architectural standards to create a modern, functional and first-class hotel in which art and unique historical elements coexist with the most modern comforts.",
    "Description_fr": "L'hôtel est situé dans une place du XIXe siècle, qui a été agrandie et rénovée aux plus hautes normes architecturales pour créer un hôtel moderne, fonctionnel et de première classe dans lequel l'art et les éléments historiques uniques coexistent avec le confort le plus moderne.",
    "Category": "Boutique",
    "Tags": [ "pool", "free wifi", "concierge" ],
    "ParkingIncluded": "false",
    "LastRenovationDate": "1979-02-18T00:00:00Z",
    "Rating": 3.60,
    "Address": {
        "StreetAddress": "140 University Town Center Dr",
        "City": "Sarasota",
        "StateProvince": "FL",
        "PostalCode": "34243",
        "Country": "USA"
        }
    },
    {
    "@search.action": "upload",
    "HotelId": "3",
    "HotelName": "Gastronomic Landscape Hotel",
    "Description": "The Hotel stands out for its gastronomic excellence under the management of William Dough, who advises on and oversees all of the Hotel's restaurant services.",
    "Description_fr": "L'hôtel est situé dans une place du XIXe siècle, qui a été agrandie et rénovée aux plus hautes normes architecturales pour créer un hôtel moderne, fonctionnel et de première classe dans lequel l'art et les éléments historiques uniques coexistent avec le confort le plus moderne.",
    "Category": "Resort and Spa",
    "Tags": [ "air conditioning", "bar", "continental breakfast" ],
    "ParkingIncluded": "true",
    "LastRenovationDate": "2015-09-20T00:00:00Z",
    "Rating": 4.80,
    "Address": {
        "StreetAddress": "3393 Peachtree Rd",
        "City": "Atlanta",
        "StateProvince": "GA",
        "PostalCode": "30326",
        "Country": "USA"
        }
    },
    {
    "@search.action": "upload",
    "HotelId": "4",
    "HotelName": "Sublime Palace Hotel",
    "Description": "Sublime Palace Hotel is located in the heart of the historic center of Sublime in an extremely vibrant and lively area within short walking distance to the sites and landmarks of the city and is surrounded by the extraordinary beauty of churches, buildings, shops and monuments. Sublime Palace is part of a lovingly restored 1800 palace.",
    "Description_fr": "Le Sublime Palace Hotel est situé au coeur du centre historique de sublime dans un quartier extrêmement animé et vivant, à courte distance de marche des sites et monuments de la ville et est entouré par l'extraordinaire beauté des églises, des bâtiments, des commerces et Monuments. Sublime Palace fait partie d'un Palace 1800 restauré avec amour.",
    "Category": "Boutique",
    "Tags": [ "concierge", "view", "24-hour front desk service" ],
    "ParkingIncluded": "true",
    "LastRenovationDate": "1960-02-06T00:00:00Z",
    "Rating": 4.60,
    "Address": {
        "StreetAddress": "7400 San Pedro Ave",
        "City": "San Antonio",
        "StateProvince": "TX",
        "PostalCode": "78216",
        "Country": "USA"
        }
    }
]
Upload documents to the index
search_client = SearchClient(endpoint=search_endpoint,
                      index_name=index_name,
                      credential=credential)
try:
    result = search_client.upload_documents(documents=documents)
    print("Upload of new document succeeded: {}".format(result[0].succeeded))
except Exception as ex:
    print (ex.message)


    index_client = SearchIndexClient(
    endpoint=search_endpoint, credential=credential)
Run your first query
Start with an empty query as a verification step, proving that the index is operational. You should get an unordered list of hotel names and descriptions, with a count of 4 indicating that there are four documents in the index.
# Run an empty query (returns selected fields, all documents)
results =  search_client.search(query_type='simple',
    search_text="*" ,
    select='HotelName,Description',
    include_total_count=True)

print ('Total Documents Matching Query:', results.get_count())
for result in results:
    print(result["@search.score"])
    print(result["HotelName"])
    print(f"Description: {result['Description']}")
Run a text query
For comparison purposes, run a text query with BM25 relevance scoring. Full text search is invoked when you provide a query string. The response consists of ranked results, where higher scores are awarded to documents having more instances of matching terms, or more important terms.
In this query for what hotel has a good restaurant on site, Sublime Palace Hotel comes out on top because its description includes site. Terms that occur infrequently raise the search score of the document.
# Run a text query (returns a BM25-scored result set)
results =  search_client.search(query_type='simple',
    search_text="what hotel has a good restaurant on site" ,
    select='HotelName,HotelId,Description',
    include_total_count=True)

for result in results:
    print(result["@search.score"])
    print(result["HotelName"])
    print(f"Description: {result['Description']}")
Run a semantic query
Now add semantic ranking. New parameters include query_type and semantic_configuration_name.
It's the same query, but notice that the semantic ranker correctly identifies Gastronomic Landscape Hotel as a more relevant result given the initial query. This query also returns captions generated by the models. The inputs are too minimal in this sample to create interesting captions, but the example succeeds in demonstrating the syntax.
# Runs a semantic query (runs a BM25-ranked query and promotes the most relevant matches to the top)
results =  search_client.search(query_type='semantic', semantic_configuration_name='my-semantic-config',
    search_text="what hotel has a good restaurant on site",
    select='HotelName,Description,Category', query_caption='extractive')

for result in results:
    print(result["@search.reranker_score"])
    print(result["HotelName"])
    print(f"Description: {result['Description']}")

    captions = result["@search.captions"]
    if captions:
        caption = captions[0]
        if caption.highlights:
            print(f"Caption: {caption.highlights}\n")
        else:
            print(f"Caption: {caption.text}\n")
Return semantic answers
In this final query, return semantic answers.
Semantic ranker can generate answers to a query string that has the characteristics of a question. The generated answer is extracted verbatim from your content. To get a semantic answer, the question and answer must be closely aligned, and the model must find content that clearly answers the question. If potential answers fail to meet a confidence threshold, the model doesn't return an answer. For demonstration purposes, the question in this example is designed to get a response so that you can see the syntax.
# Run a semantic query that returns semantic answers
results =  search_client.search(query_type='semantic', semantic_configuration_name='my-semantic-config',
 search_text="what hotel is in a historic building",
 select='HotelName,Description,Category', query_caption='extractive', query_answer="extractive",)

semantic_answers = results.get_answers()
for answer in semantic_answers:
    if answer.highlights:
        print(f"Semantic Answer: {answer.highlights}")
    else:
        print(f"Semantic Answer: {answer.text}")
    print(f"Semantic Answer Score: {answer.score}\n")

for result in results:
    print(result["@search.reranker_score"])
    print(result["HotelName"])
    print(f"Description: {result['Description']}")

    captions = result["@search.captions"]
    if captions:
        caption = captions[0]
        if caption.highlights:
            print(f"Caption: {caption.highlights}\n")
        else:
            print(f"Caption: {caption.text}\n")


