Note
Access to this page requires authorization. You can try signing in or changing directories.
Access to this page requires authorization. You can try changing directories.
This article explains how SOC analysts can use incident tasks to manage their incident-handling workflow processes in Microsoft Sentinel in the Azure portal.
Incident tasks are typically created automatically by either automation rules or playbooks set up by senior analysts or SOC managers, but lower-tier analysts can create their own tasks on the spot, manually, right from within the incident.
You can see the list of tasks you need to perform for a particular incident on the incident details page, and mark them complete as you go.
Use cases for different roles
This article addresses the following scenarios, which apply to SOC analysts:
Other articles at the following links address scenarios that apply more to SOC managers, senior analysts, and automation engineers:
- View automation rules with incident task actions
- Add tasks to incidents with automation rules
- Add tasks to incidents with playbooks
Prerequisites
The Microsoft Sentinel Responder role is required to create automation rules and to view and edit incidents, both of which are necessary to add, view, and edit tasks.
View and follow incident tasks
In the Incidents page, select an incident from the list, and select View full details under Tasks in the details panel, or select View full details at the bottom of the details panel.
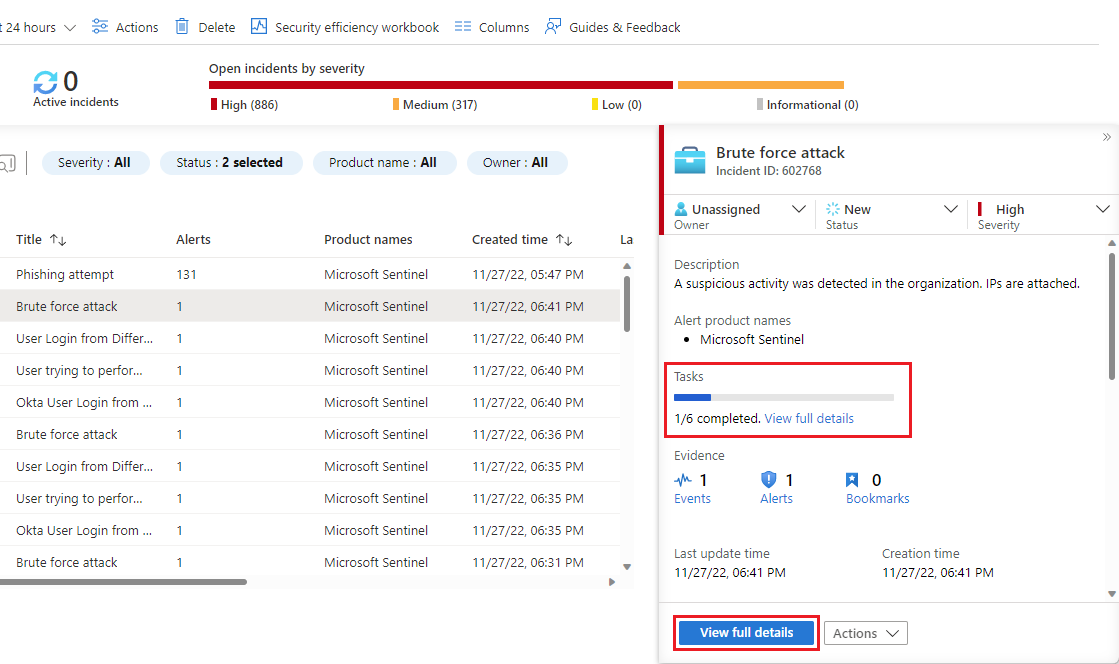
If you opted to enter the full details page, select Tasks from the top banner.

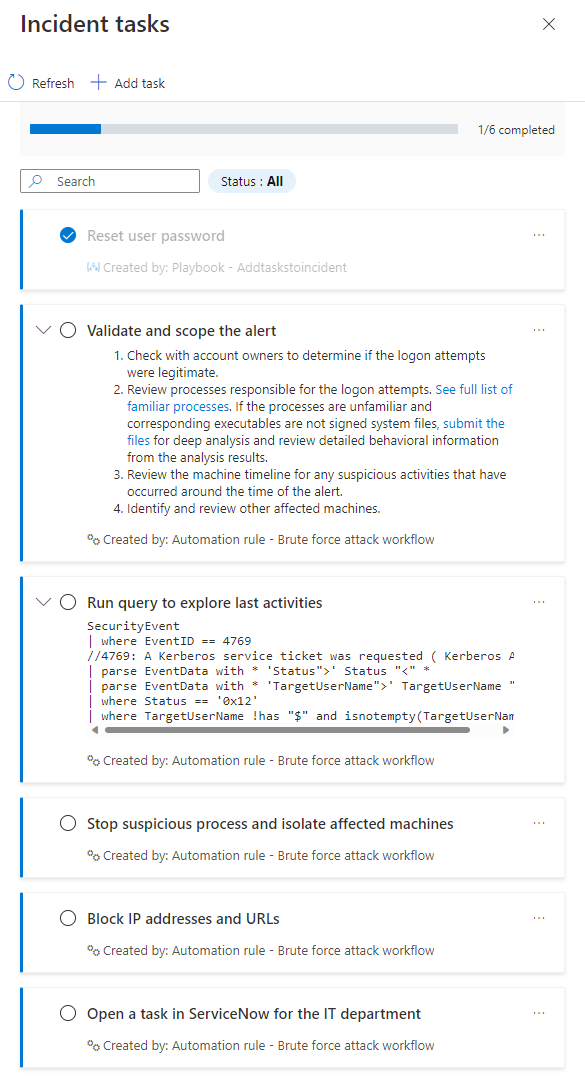
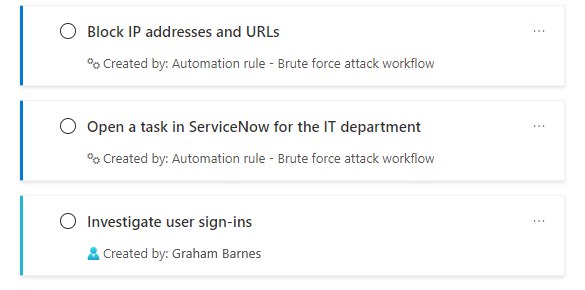
The Incident tasks panel will open on the right side of whichever screen you were in (the main incidents page or the incident details page). You'll see the list of tasks defined for this incident, along with how or by whom it was created - whether manually or by an automation rule or a playbook.
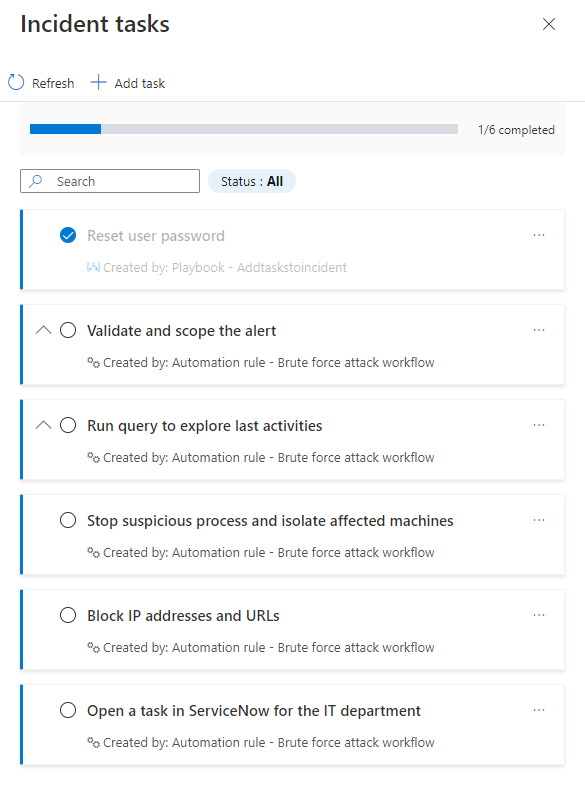
The tasks that have descriptions will be marked with an expansion arrow. Expand a task to see its full description.
Mark a task complete by marking the circle next to the task name. A check mark will appear in the circle, and the text of the task will be grayed out. See the "Reset user password" example in the screenshots above.

Manually add an ad-hoc task to an incident
You can also add tasks for yourself, on the spot, to an incident's task list. This task will apply only to the open incident. This helps if your investigation leads you in new directions and you think of new things you need to check. Adding these as tasks ensures that you won't forget to do them, and that there will be a record of what you did, that other analysts and managers can benefit from.
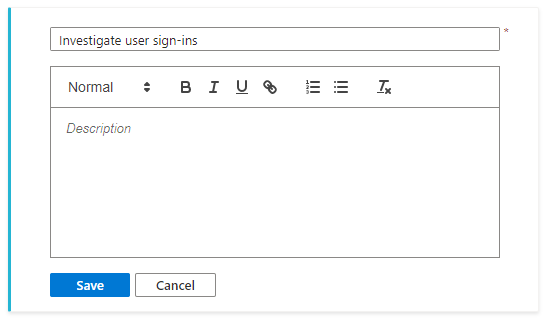
Select + Add task from the top of the Incident tasks panel.

Enter a Title for your task, and a Description if you choose.
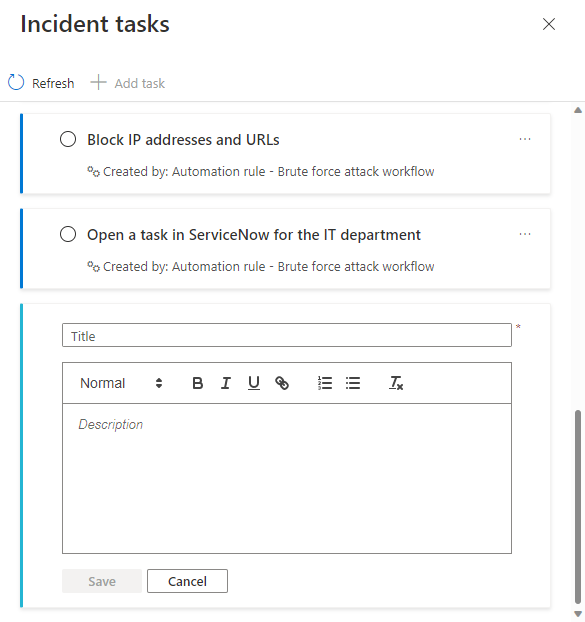
Select Save when you've finished.
See your new task at the bottom of the task list. Note that manually created tasks have a different color band on the left border, and that your name appears as Created by: under the task title and description.
Next steps
- Learn more about incident tasks.
- Learn how to investigate incidents.
- Learn how to add tasks to groups of incidents automatically using automation rules or playbooks, and when to use which.
- Learn about keeping track of your tasks.
- Learn more about automation rules and how to create them.
- Learn more about playbooks and how to create them.