Note
Access to this page requires authorization. You can try signing in or changing directories.
Access to this page requires authorization. You can try changing directories.
The Azure Storage blob inventory feature provides an overview of your containers, blobs, snapshots, and blob versions within a storage account. Use the inventory report to understand various attributes of blobs and containers such as your total data size, age, encryption status, immutability policy, and legal hold and so on. The report provides an overview of your data for business and compliance requirements.
To learn more about blob inventory reports, see Azure Storage blob inventory.
Enable blob inventory reports by adding a policy with one or more rules to your storage account. Add, edit, or remove a policy by using the Azure portal.
Enable inventory reports
Sign in to the Azure portal to get started.
Locate your storage account and display the account overview.
Under Data management, select Blob inventory.
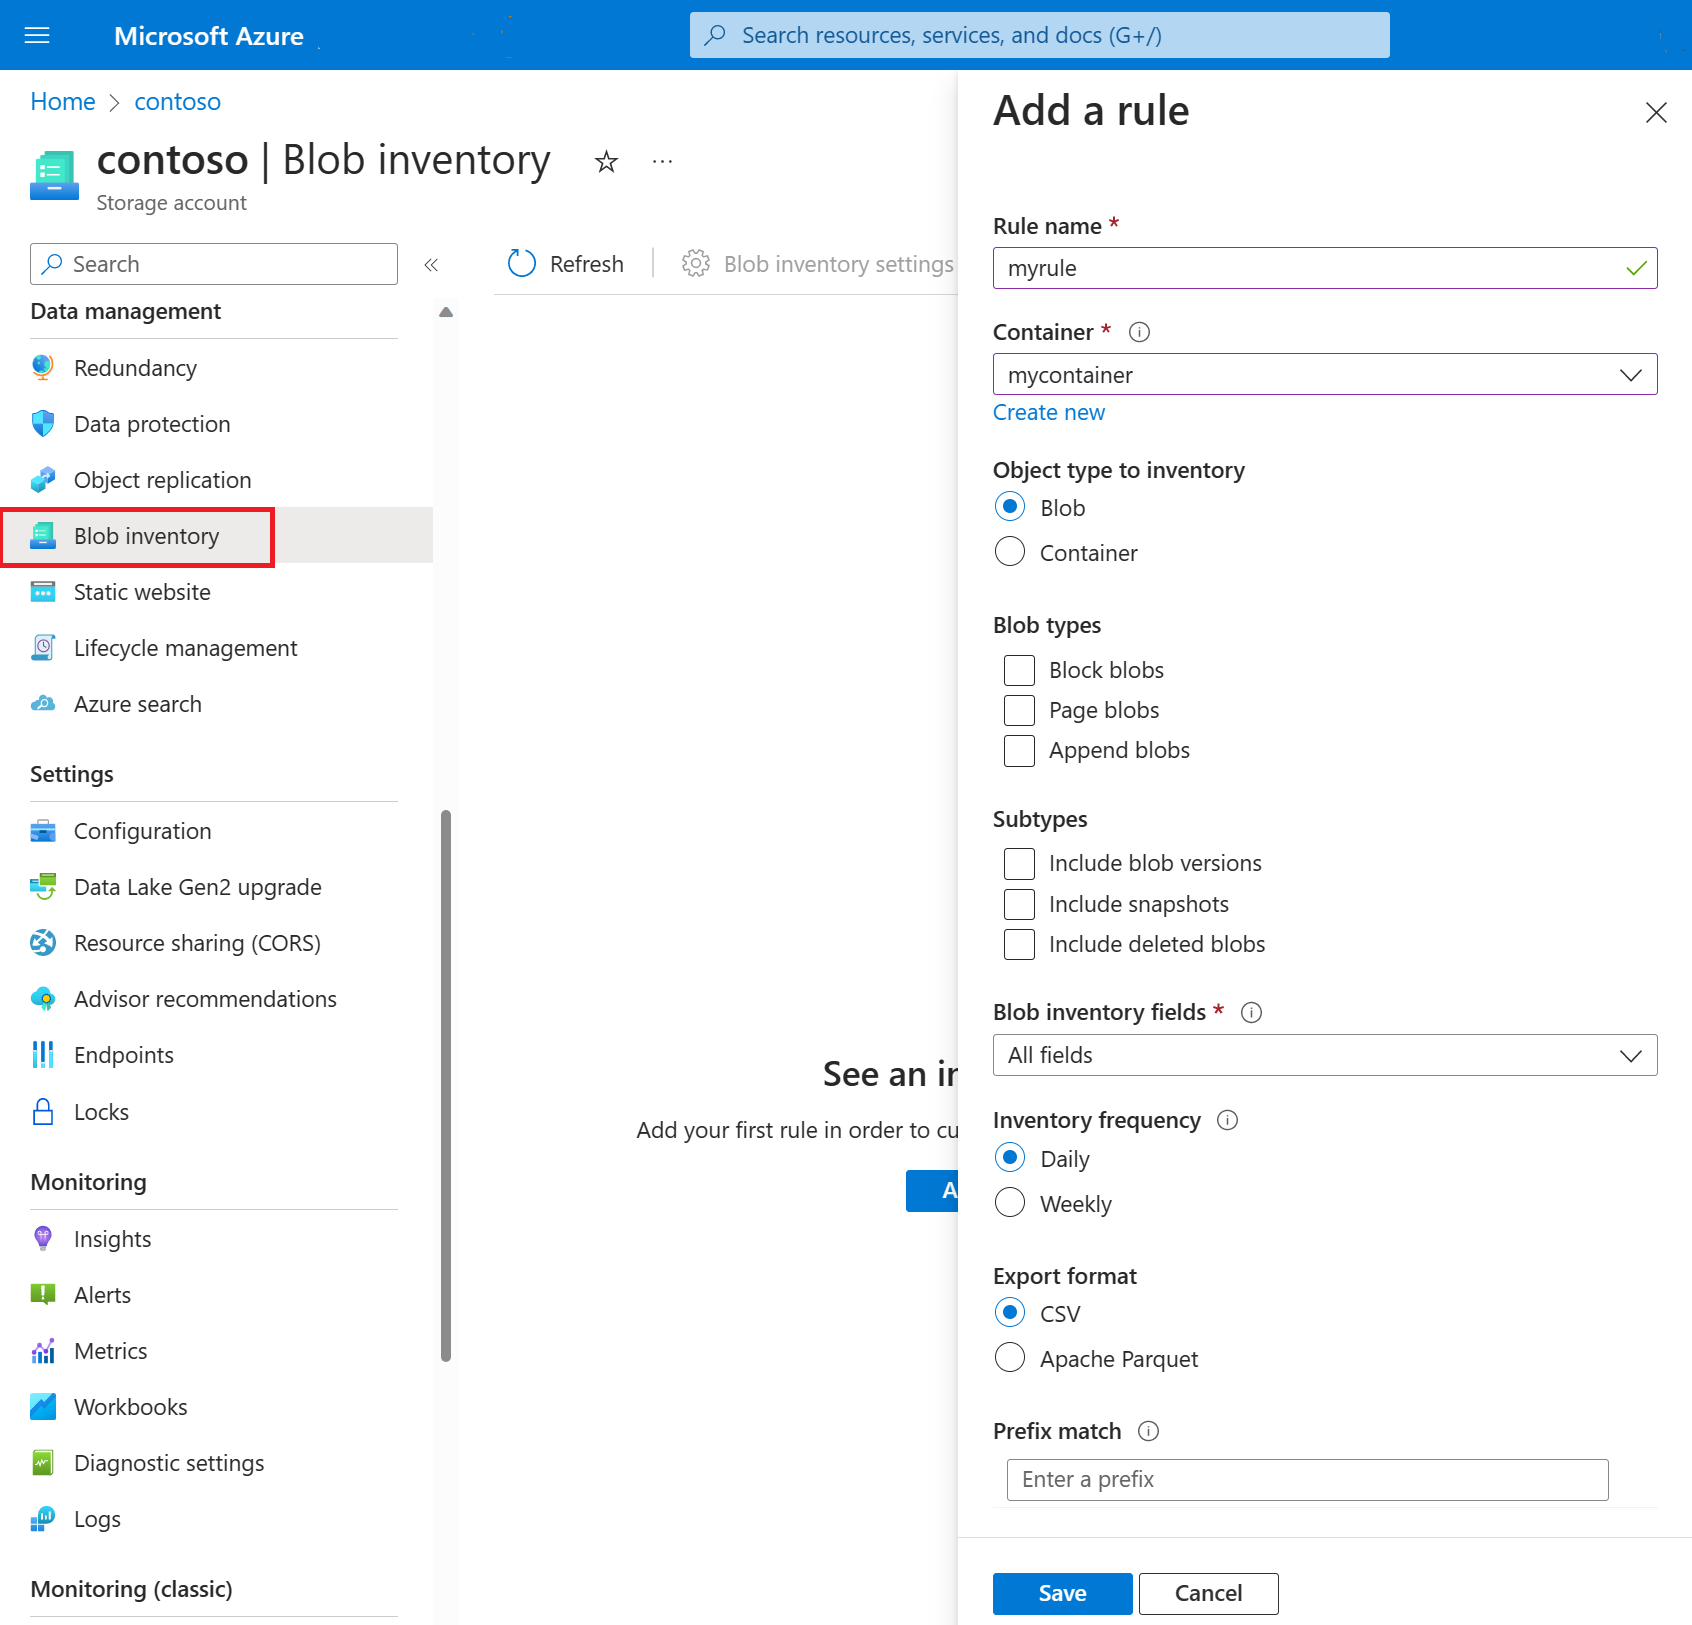
Select Add your first inventory rule.
The Add a rule page appears.
In the Add a rule page, name your new rule.
Choose the container that will store inventory reports.
Under Object type to inventory, choose whether to create a report for blobs or containers.
If you select Blob, then under Blob subtype, choose the types of blobs that you want to include in your report, and whether to include blob versions and/or snapshots in your inventory report.
Note
The option to include blob versions appears only for accounts that don't have the hierarchical namespace feature enabled. Versions and snapshots must be enabled on the account to save a new rule with the corresponding option enabled.
Select the fields that you would like to include in your report, and the format of your reports.
Choose how often you want to generate reports.
Optionally, add a prefix match to filter blobs in your inventory report.
Select Save.
Disable inventory reports
While you can disable individual reports, you can also prevent blob inventory from running at all.
Sign in to the Azure portal.
Locate your storage account and display the account overview.
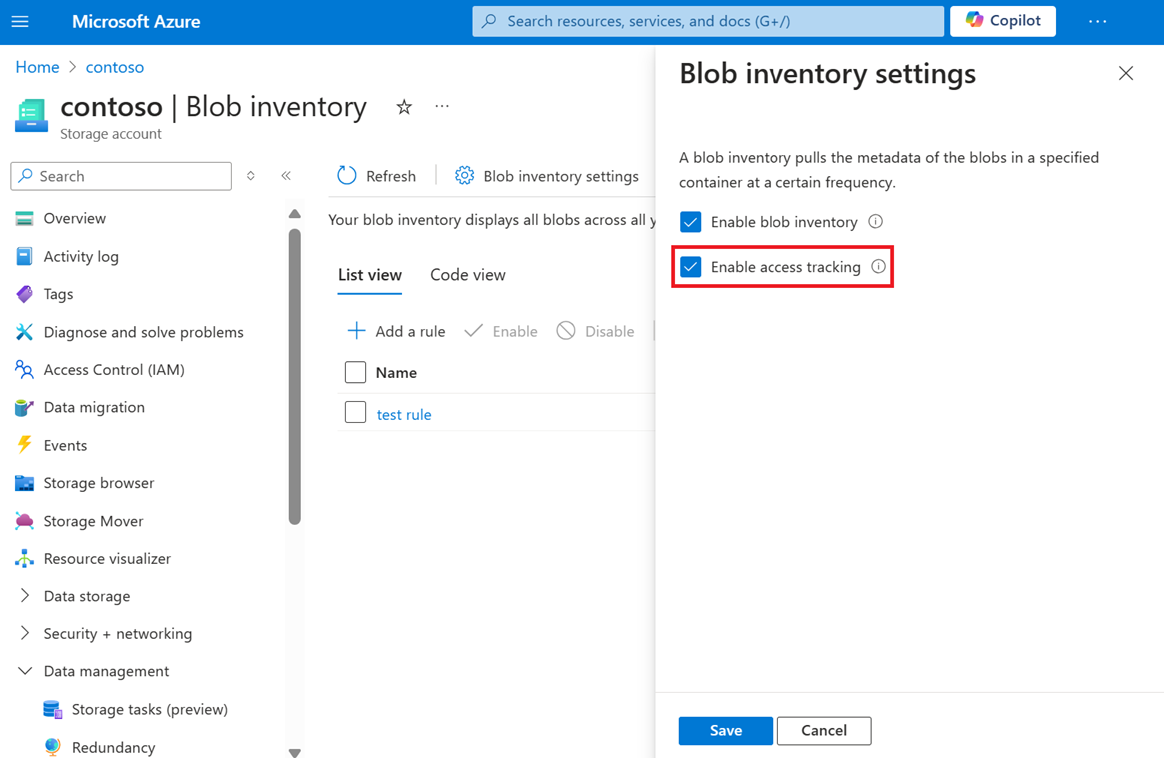
Under Data management, select Blob inventory.
Select Blob inventory settings, and in the Blob inventory settings pane, clear the Enable blob inventory checkbox, and then select Save.
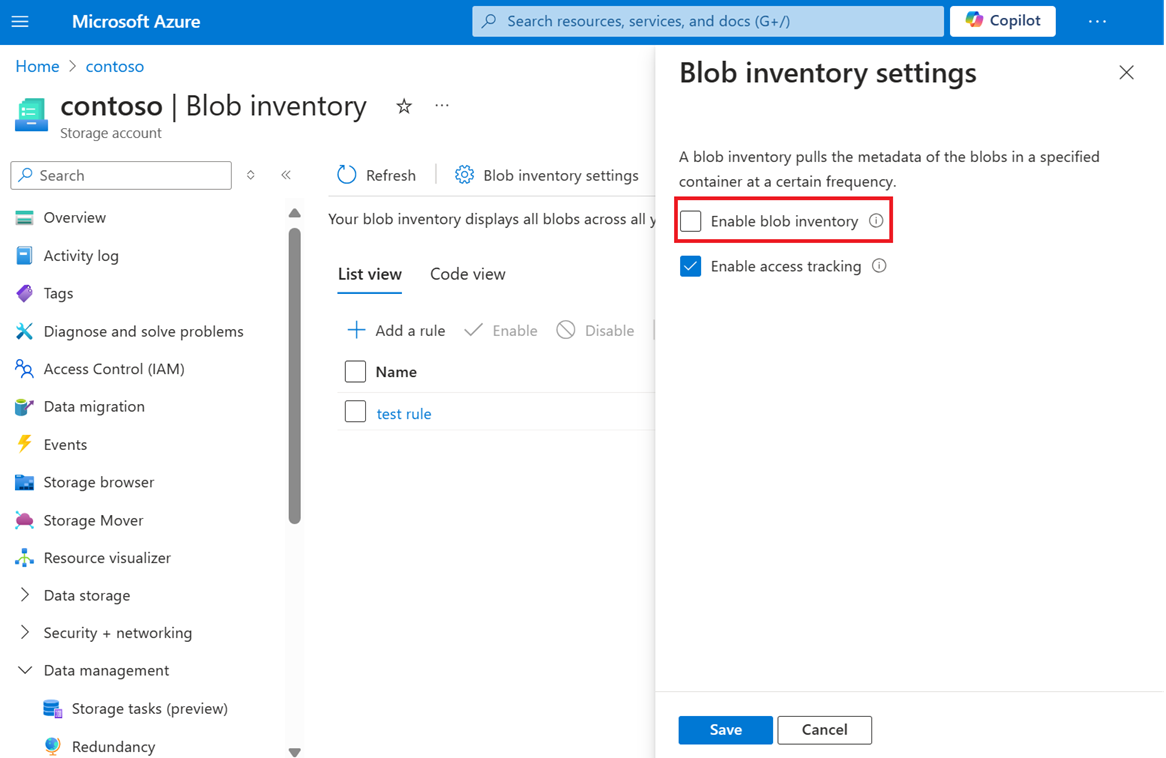
Clearing the Enable blob inventory checkbox suspends all blob inventory runs. You can select this checkbox later if you want to resume inventory runs.
Subscribe to blob inventory policy completed event
You can subscribe to blob inventory completed event to receive information on the outcome of your inventory runs. This event gets triggered when the inventory run completes for a rule that is defined an inventory policy. This event also occurs if the inventory run fails with a user error before it starts to run. For example, an invalid policy, or an error that occurs when a destination container isn't present will trigger the event.
Sign in to the Azure portal.
Locate your storage account and display the account overview.
In the left menu, select Events.
Select + Event Subscription.
The Create Event Subscription page appears.
In the Create Event Subscription page, name your event subscription and use default schema, Event Grid Schema.
Under EVENT TYPES, choose Blob Inventory Completed.
Under ENDPOINT DETAILS, choose Storage Queue as the Endpoint Type and select Configure an endpoint.
In the Queues page, choose the subscription, the storage account and create a new queue. Name your queue then click Create.
Optionally, select the Filters tab if you want to filter the subject of the event or its attributes.
Optionally, select the Additional Features tab if you want to enable dead-lettering, retry policies and set event subscription expiration time.
Optionally, select Delivery Properties tab to set the storage queue message time to live.
Select Create
To view the delivered queue messages
Locate your storage account and display the account overview.
Under Data Storage, select Queues and open the newly create queue used to configure the endpoint to access the messages.
Select the message for the desired inventory run time to access the message properties the review the message body for the event status.
For more methods on how to subscribe to blob storage events, see Azure Blob Storage as Event Grid source - Azure Event Grid | Microsoft Learn
Optionally enable access time tracking
You can choose to enable blob access time tracking. When access time tracking is enabled, inventory reports will include the LastAccessTime field based on the time that the blob was last accessed with a read or write operation. To minimize the effect on read access latency, only the first read of the last 24 hours updates the last access time. Subsequent reads in the same 24-hour period don't update the last access time. If a blob is modified between reads, the last access time is the more recent of the two values.
To enable last access time tracking with the Azure portal, follow these steps:
Sign in to the Azure portal.
Locate your storage account and display the account overview.
Under Data management, select Blob inventory.
Select Blob inventory settings, and in the Blob inventory settings pane, select the Enable last access tracking checkbox.