Note
Access to this page requires authorization. You can try signing in or changing directories.
Access to this page requires authorization. You can try changing directories.
Applies to: ✔️ Linux VMs ✔️ Windows VMs
When you enable encryption at host, data stored on the VM host is encrypted at rest and flows encrypted to the Storage service. For conceptual information on encryption at host, and other managed disk encryption types, see: Encryption at host - End-to-end encryption for your VM data.
Temporary disks and ephemeral OS disks are encrypted at rest with platform-managed keys when you enable end-to-end encryption. The OS and data disk caches are encrypted at rest with either customer-managed or platform-managed keys, depending on the selected disk encryption type. For example, if a disk is encrypted with customer-managed keys, then the cache for the disk is encrypted with customer-managed keys, and if a disk is encrypted with platform-managed keys then the cache for the disk is encrypted with platform-managed keys.
Restrictions
- Can't be enabled on virtual machines (VMs) or virtual machine scale sets that currently or ever had Azure Disk Encryption enabled.
- Azure Disk Encryption can't be enabled on disks that have encryption at host enabled.
- The encryption can be enabled on existing virtual machine scale sets. However, only new VMs created after enabling the encryption are automatically encrypted.
- Existing VMs must be deallocated and reallocated in order to be encrypted.
The following restrictions only apply to Ultra Disks and Premium SSD v2:
- Disks using a 512e sector size need to have been created after 5/13/2023.
- If your disk was created before this date, snapshot your disk, and create a new disk using the snapshot.
Supported VM sizes
Legacy VM Sizes aren't supported. You can find the list of supported VM sizes by either using the Azure PowerShell module or Azure CLI.
Prerequisites
You must enable the feature for your subscription before you can use encryption at host for either your VM or Virtual Machine Scale Set. Use the following steps to enable the feature for your subscription:
Azure portal: Select the Cloud Shell icon on the Azure portal:

Execute the following command to set context to current subscription
Set-AzContext -SubscriptionId "<yourSubIDHere>"Execute the following command to register the feature for your subscription
Register-AzProviderFeature -FeatureName "EncryptionAtHost" -ProviderNamespace "Microsoft.Compute"Confirm that the registration state is Registered (registration might take a few minutes) using the following command before trying out the feature.
Get-AzProviderFeature -FeatureName "EncryptionAtHost" -ProviderNamespace "Microsoft.Compute"
Deploy a VM with platform-managed keys
Sign in to the Azure portal.
Search for Virtual Machines and select + Create to create a VM.
Select an appropriate region and a supported VM size.
Fill in the other values on the Basic pane as you like, and then proceed to the Disks pane.
On the Disks pane, select Encryption at host.
Make the remaining selections as you like.

For the rest of the VM deployment process, make selections that fit your environment, and complete the deployment.

You've now deployed a VM with encryption at host enabled, and the cache for the disk is encrypted using platform-managed keys.
Deploy a VM with customer-managed keys
Alternatively, you can use customer-managed keys to encrypt your disk caches.
Create an Azure Key Vault and disk encryption set
Once the feature is enabled, you need to set up an Azure Key Vault and a disk encryption set, if you haven't already.
Setting up customer-managed keys for your disks requires you to create resources in a particular order, if you're doing it for the first time. First, you'll need to create and set up an Azure Key Vault.
Set up your Azure Key Vault
Sign in to the Azure portal.
Search for and select Key Vaults.

Important
Your disk encryption set, VM, disks, and snapshots must all be in the same region and subscription for deployment to succeed. Azure Key Vaults may be used from a different subscription but must be in the same region and tenant as your disk encryption set.
Select +Create to create a new Key Vault.
Create a new resource group.
Enter a key vault name, select a region, and select a pricing tier.
Note
When creating the Key Vault instance, you must enable soft delete and purge protection. Soft delete ensures that the Key Vault holds a deleted key for a given retention period (90 day default). Purge protection ensures that a deleted key cannot be permanently deleted until the retention period lapses. These settings protect you from losing data due to accidental deletion. These settings are mandatory when using a Key Vault for encrypting managed disks.
Select Review + Create, verify your choices, then select Create.

Once your key vault finishes deploying, select it.
Select Keys under Objects.
Select Generate/Import.

Leave both Key Type set to RSA and RSA Key Size set to 2048.
Fill in the remaining selections as you like and then select Create.


Add an Azure RBAC role
Now that you've created the Azure key vault and a key, you must add an Azure RBAC role, so you can use your Azure key vault with your disk encryption set.
- Select Access control (IAM) and add a role.
- Add either the Key Vault Administrator, Owner, or Contributor roles.
Set up your disk encryption set
Search for Disk Encryption Sets and select it.
On the Disk Encryption Sets pane, select +Create.
Select your resource group, name your encryption set, and select the same region as your key vault.
For Encryption type, select Encryption at-rest with a customer-managed key.
Note
Once you create a disk encryption set with a particular encryption type, it cannot be changed. If you want to use a different encryption type, you must create a new disk encryption set.
Make sure Select Azure key vault and key is selected.
Select the key vault and key you created previously, and the version.
If you want to enable automatic rotation of customer managed keys, select Auto key rotation.
Select Review + Create and then Create.

Navigate to the disk encryption set once it's deployed, and select the displayed alert.

This will grant your key vault permissions to the disk encryption set.


Deploy a VM
Now that you have setup an Azure Key Vault and disk encryption set, you can deploy a VM and it uses encryption at host.
Sign in to the Azure portal.
Search for Virtual Machines and select + Add to create a VM.
Create a new virtual machine, select an appropriate region and a supported VM size.
Fill in the other values on the Basic pane as you like, then proceed to the Disks pane.
On the Disks pane, select Encryption at host.
Select Key management and select one of your customer-managed keys.
Make the remaining selections as you like.

For the rest of the VM deployment process, make selections that fit your environment, and complete the deployment.

You've now deployed a VM with encryption at host enabled using customer-managed keys.
Disable host based encryption
Deallocate your VM first, encryption at host can't be disabled unless your VM is deallocated.
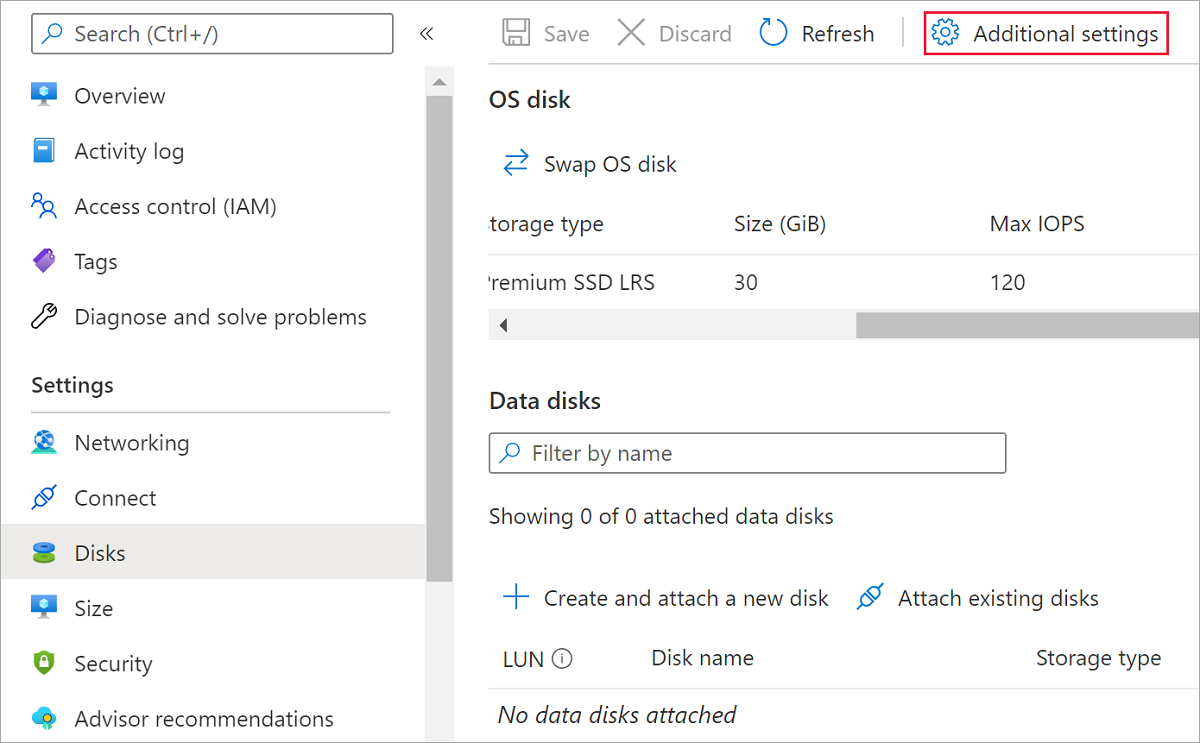
On your VM, select Disks and then select Additional settings.
Select No for Encryption at host then select Save.