Note
Access to this page requires authorization. You can try signing in or changing directories.
Access to this page requires authorization. You can try changing directories.
Applies to: ✔️ Windows VMs
Each virtual machine (VM) in Azure is created from an image that defines the Windows distribution and OS version. Images can include pre-installed applications and configurations. The Azure Marketplace provides many first and third-party images for most common OS' and application environments, or you can create your own custom images tailored to your needs. This article details how to use the open-source tool Packer to define and build custom images in Azure.
This article was last tested on 8/5/2020 using Packer version 1.8.1.
Note
Azure now has a service, Azure Image Builder, for defining and creating your own custom images. Azure Image Builder is built on Packer, so you can even use your existing Packer shell provisioner scripts with it. To get started with Azure Image Builder, see Create a Windows VM with Azure Image Builder.
Create Azure resource group
During the build process, Packer creates temporary Azure resources as it builds the source VM. To capture that source VM for use as an image, you must define a resource group. The output from the Packer build process is stored in this resource group.
Create a resource group with New-AzResourceGroup. The following example creates a resource group named myPackerGroup in the eastus location:
$rgName = "myPackerGroup"
$location = "East US"
New-AzResourceGroup -Name $rgName -Location $location
Create Azure credentials
Packer authenticates with Azure using a service principal. An Azure service principal is a security identity that you can use with apps, services, and automation tools like Packer. You control and define the permissions as to what operations the service principal can perform in Azure.
Create a service principal with New-AzADServicePrincipal. The value for -DisplayName needs to be unique; replace with your own value as needed.
$sp = New-AzADServicePrincipal -DisplayName "PackerPrincipal" -role Contributor -scope /subscriptions/yyyyyyy-yyyy-yyyy-yyyy-yyyyyyyyyyy
$plainPassword = (New-AzADSpCredential -ObjectId $sp.Id).SecretText
Then output the password and application ID.
$plainPassword
$sp.AppId
To authenticate to Azure, you also need to obtain your Azure tenant and subscription IDs with Get-AzSubscription:
$subName = "mySubscriptionName"
$sub = Get-AzSubscription -SubscriptionName $subName
Define Packer template
To build images, you create a template as a JSON file. In the template, you define builders and provisioners that carry out the actual build process. Packer has a builder for Azure that allows you to define Azure resources, such as the service principal credentials created in the preceding step.
Create a file named windows.json and paste the following content. Enter your own values for the following:
| Parameter | Where to obtain |
|---|---|
| client_id | View service principal ID with $sp.AppId |
| client_secret | View the auto-generated password with $plainPassword |
| tenant_id | Output from $sub.TenantId command |
| subscription_id | Output from $sub.SubscriptionId command |
| managed_image_resource_group_name | Name of resource group you created in the first step |
| managed_image_name | Name for the managed disk image that is created |
{
  "builders": [{
    "type": "azure-arm",

    "client_id": "xxxxxxxx-xxxx-xxxx-xxxx-xxxxxxxxxxx",
    "client_secret": "ppppppp-pppp-pppp-pppp-ppppppppppp",
    "tenant_id": "zzzzzzz-zzzz-zzzz-zzzz-zzzzzzzzzzzz",
    "subscription_id": "yyyyyyy-yyyy-yyyy-yyyy-yyyyyyyyyyy",

    "managed_image_resource_group_name": "myPackerGroup",
    "managed_image_name": "myPackerImage",

    "os_type": "Windows",
    "image_publisher": "MicrosoftWindowsServer",
    "image_offer": "WindowsServer",
    "image_sku": "2016-Datacenter",

    "communicator": "winrm",
    "winrm_use_ssl": true,
    "winrm_insecure": true,
    "winrm_timeout": "5m",
    "winrm_username": "packer",

    "azure_tags": {
        "dept": "Engineering",
        "task": "Image deployment"
    },

    "build_resource_group_name": "myPackerGroup",
    "vm_size": "Standard_D2_v2"
  }],
  "provisioners": [{
    "type": "powershell",
    "inline": [
      "Add-WindowsFeature Web-Server",
      "while ((Get-Service RdAgent).Status -ne 'Running') { Start-Sleep -s 5 }",
      "while ((Get-Service WindowsAzureGuestAgent).Status -ne 'Running') { Start-Sleep -s 5 }",
      "& $env:SystemRoot\\System32\\Sysprep\\Sysprep.exe /oobe /generalize /quiet /quit",
      "while($true) { $imageState = Get-ItemProperty HKLM:\\SOFTWARE\\Microsoft\\Windows\\CurrentVersion\\Setup\\State | Select ImageState; if($imageState.ImageState -ne 'IMAGE_STATE_GENERALIZE_RESEAL_TO_OOBE') { Write-Output $imageState.ImageState; Start-Sleep -s 10  } else { break } }"
    ]
  }]
}
You can also create a file named windows.pkr.hcl and paste the following content with your own values as used for the above parameters table.
source "azure-arm" "autogenerated_1" {
  azure_tags = {
    dept = "Engineering"
    task = "Image deployment"
  }
  build_resource_group_name         = "myPackerGroup"
  client_id                         = "xxxxxxxx-xxxx-xxxx-xxxx-xxxxxxxxxxx"
  client_secret                     = "ppppppp-pppp-pppp-pppp-ppppppppppp"
  communicator                      = "winrm"
  image_offer                       = "WindowsServer"
  image_publisher                   = "MicrosoftWindowsServer"
  image_sku                         = "2016-Datacenter"
  managed_image_name                = "myPackerImage"
  managed_image_resource_group_name = "myPackerGroup"
  os_type                           = "Windows"
  subscription_id                   = "yyyyyyy-yyyy-yyyy-yyyy-yyyyyyyyyyy"
  tenant_id                         = "zzzzzzz-zzzz-zzzz-zzzz-zzzzzzzzzzzz"
  vm_size                           = "Standard_D2_v2"
  winrm_insecure                    = true
  winrm_timeout                     = "5m"
  winrm_use_ssl                     = true
  winrm_username                    = "packer"
}

build {
  sources = ["source.azure-arm.autogenerated_1"]

  provisioner "powershell" {
    inline = ["Add-WindowsFeature Web-Server", "while ((Get-Service RdAgent).Status -ne 'Running') { Start-Sleep -s 5 }", "while ((Get-Service WindowsAzureGuestAgent).Status -ne 'Running') { Start-Sleep -s 5 }", "& $env:SystemRoot\\System32\\Sysprep\\Sysprep.exe /oobe /generalize /quiet /quit", "while($true) { $imageState = Get-ItemProperty HKLM:\\SOFTWARE\\Microsoft\\Windows\\CurrentVersion\\Setup\\State | Select ImageState; if($imageState.ImageState -ne 'IMAGE_STATE_GENERALIZE_RESEAL_TO_OOBE') { Write-Output $imageState.ImageState; Start-Sleep -s 10  } else { break } }"]
  }

}
This template builds a Windows Server 2016 VM, installs IIS, then generalizes the VM with Sysprep. The IIS install shows how you can use the PowerShell provisioner to run additional commands. The final Packer image then includes the required software install and configuration.
The Windows Guest Agent participates in the Sysprep process. The agent must be fully installed before the VM can be sysprep'ed. To ensure that this is true, all agent services must be running before you execute sysprep.exe. The preceding JSON snippet shows one way to do this in the PowerShell provisioner. This snippet is required only if the VM is configured to install the agent, which is the default.
Build Packer image
If you don't already have Packer installed on your local machine, follow the Packer installation instructions.
Build the image by opening a cmd prompt and specifying your Packer template file as follows:
packer build windows.json
You can also build the image by specifying the windows.pkr.hcl file as follows:
packer build windows.pkr.hcl
An example of the output from the preceding commands is as follows:
azure-arm output will be in this color.

==> azure-arm: Running builder ...
    azure-arm: Creating Azure Resource Manager (ARM) client ...
==> azure-arm: Creating resource group ...
==> azure-arm:  -> ResourceGroupName : ‘packer-Resource-Group-pq0mthtbtt’
==> azure-arm:  -> Location          : ‘East US’
==> azure-arm:  -> Tags              :
==> azure-arm:  ->> task : Image deployment
==> azure-arm:  ->> dept : Engineering
==> azure-arm: Validating deployment template ...
==> azure-arm:  -> ResourceGroupName : ‘packer-Resource-Group-pq0mthtbtt’
==> azure-arm:  -> DeploymentName    : ‘pkrdppq0mthtbtt’
==> azure-arm: Deploying deployment template ...
==> azure-arm:  -> ResourceGroupName : ‘packer-Resource-Group-pq0mthtbtt’
==> azure-arm:  -> DeploymentName    : ‘pkrdppq0mthtbtt’
==> azure-arm: Getting the certificate’s URL ...
==> azure-arm:  -> Key Vault Name        : ‘pkrkvpq0mthtbtt’
==> azure-arm:  -> Key Vault Secret Name : ‘packerKeyVaultSecret’
==> azure-arm:  -> Certificate URL       : ‘https://pkrkvpq0mthtbtt.vault.azure.net/secrets/packerKeyVaultSecret/8c7bd823e4fa44e1abb747636128adbb'
==> azure-arm: Setting the certificate’s URL ...
==> azure-arm: Validating deployment template ...
==> azure-arm:  -> ResourceGroupName : ‘packer-Resource-Group-pq0mthtbtt’
==> azure-arm:  -> DeploymentName    : ‘pkrdppq0mthtbtt’
==> azure-arm: Deploying deployment template ...
==> azure-arm:  -> ResourceGroupName : ‘packer-Resource-Group-pq0mthtbtt’
==> azure-arm:  -> DeploymentName    : ‘pkrdppq0mthtbtt’
==> azure-arm: Getting the VM’s IP address ...
==> azure-arm:  -> ResourceGroupName   : ‘packer-Resource-Group-pq0mthtbtt’
==> azure-arm:  -> PublicIPAddressName : ‘packerPublicIP’
==> azure-arm:  -> NicName             : ‘packerNic’
==> azure-arm:  -> Network Connection  : ‘PublicEndpoint’
==> azure-arm:  -> IP Address          : ‘40.76.55.35’
==> azure-arm: Waiting for WinRM to become available...
==> azure-arm: Connected to WinRM!
==> azure-arm: Provisioning with Powershell...
==> azure-arm: Provisioning with shell script: /var/folders/h1/ymh5bdx15wgdn5hvgj1wc0zh0000gn/T/packer-powershell-provisioner902510110
    azure-arm: #< CLIXML
    azure-arm:
    azure-arm: Success Restart Needed Exit Code      Feature Result
    azure-arm: ------- -------------- ---------      --------------
    azure-arm: True    No             Success        {Common HTTP Features, Default Document, D...
    azure-arm: <Objs Version=“1.1.0.1” xmlns=“http://schemas.microsoft.com/powershell/2004/04"><Obj S=“progress” RefId=“0"><TN RefId=“0”><T>System.Management.Automation.PSCustomObject</T><T>System.Object</T></TN><MS><I64 N=“SourceId”>1</I64><PR N=“Record”><AV>Preparing modules for first use.</AV><AI>0</AI><Nil /><PI>-1</PI><PC>-1</PC><T>Completed</T><SR>-1</SR><SD> </SD></PR></MS></Obj></Objs>
==> azure-arm: Querying the machine’s properties ...
==> azure-arm:  -> ResourceGroupName : ‘packer-Resource-Group-pq0mthtbtt’
==> azure-arm:  -> ComputeName       : ‘pkrvmpq0mthtbtt’
==> azure-arm:  -> Managed OS Disk   : ‘/subscriptions/guid/resourceGroups/packer-Resource-Group-pq0mthtbtt/providers/Microsoft.Compute/disks/osdisk’
==> azure-arm: Powering off machine ...
==> azure-arm:  -> ResourceGroupName : ‘packer-Resource-Group-pq0mthtbtt’
==> azure-arm:  -> ComputeName       : ‘pkrvmpq0mthtbtt’
==> azure-arm: Capturing image ...
==> azure-arm:  -> Compute ResourceGroupName : ‘packer-Resource-Group-pq0mthtbtt’
==> azure-arm:  -> Compute Name              : ‘pkrvmpq0mthtbtt’
==> azure-arm:  -> Compute Location          : ‘East US’
==> azure-arm:  -> Image ResourceGroupName   : ‘myResourceGroup’
==> azure-arm:  -> Image Name                : ‘myPackerImage’
==> azure-arm:  -> Image Location            : ‘eastus’
==> azure-arm: Deleting resource group ...
==> azure-arm:  -> ResourceGroupName : ‘packer-Resource-Group-pq0mthtbtt’
==> azure-arm: Deleting the temporary OS disk ...
==> azure-arm:  -> OS Disk : skipping, managed disk was used...
Build ‘azure-arm’ finished.

==> Builds finished. The artifacts of successful builds are:
--> azure-arm: Azure.ResourceManagement.VMImage:

ManagedImageResourceGroupName: myResourceGroup
ManagedImageName: myPackerImage
ManagedImageLocation: eastus
It takes a few minutes for Packer to build the VM, run the provisioners, and clean up the deployment.
Create a VM from the Packer image
You can now create a VM from your Image with New-AzVM. The supporting network resources are created if they do not already exist. When prompted, enter an administrative username and password to be created on the VM. The following example creates a VM named myVM from myPackerImage:
New-AzVm `
    -ResourceGroupName $rgName `
    -Name "myVM" `
    -Location $location `
    -VirtualNetworkName "myVnet" `
    -SubnetName "mySubnet" `
    -SecurityGroupName "myNetworkSecurityGroup" `
    -PublicIpAddressName "myPublicIpAddress" `
    -OpenPorts 80 `
    -Image "myPackerImage"
If you wish to create VMs in a different resource group or region than your Packer image, specify the image ID rather than image name. You can obtain the image ID with Get-AzImage.
It takes a few minutes to create the VM from your Packer image.
Test VM and webserver
Obtain the public IP address of your VM with Get-AzPublicIPAddress. The following example obtains the IP address for myPublicIP created earlier:
Get-AzPublicIPAddress `
    -ResourceGroupName $rgName `
    -Name "myPublicIPAddress" | select "IpAddress"
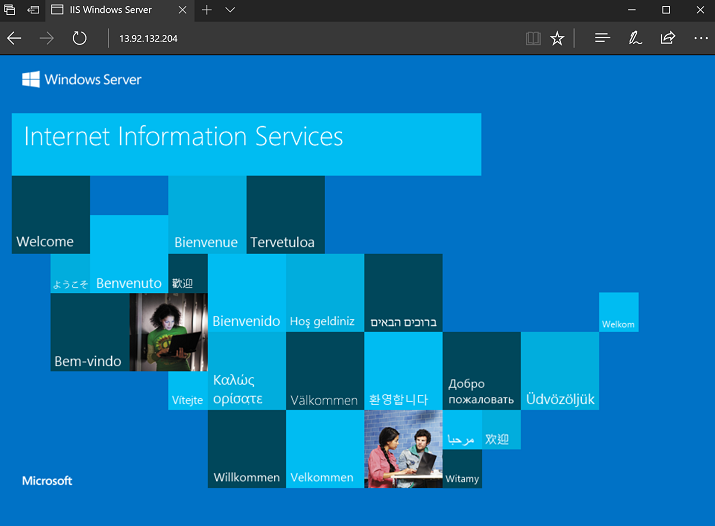
To see your VM, that includes the IIS install from the Packer provisioner, in action, enter the public IP address in to a web browser.
Next steps
You can also use existing Packer provisioner scripts with Azure Image Builder.