Protect high-risk network ports with Security Admin Rules in Azure Virtual Network Manager
In this article, you learn to block high risk network ports using Azure Virtual Network Manager and Security Admin Rules. You walk through the creation of an Azure Virtual Network Manager instance, group your virtual networks (VNets) with network groups, and create & deploy security admin configurations for your organization. You deploy a general block rule for high risk ports. Then you create an exception rule for managing a specific application's VNet using network security groups.
While this article focuses on a single port, SSH, you can protect any high-risk ports in your environment with the same steps. To learn more, review this list of high risk ports
Important
Azure Virtual Network Manager is generally available for hub-and-spoke connectivity configurations and security configurations with security admin rules. Mesh connectivity configurations remain in public preview.
This preview version is provided without a service level agreement, and it's not recommended for production workloads. Certain features might not be supported or might have constrained capabilities. For more information, see Supplemental Terms of Use for Microsoft Azure Previews.
Prerequisites
- You understand how to create an Azure Virtual Network Manager
- You understand each element in a Security admin rule.
- An Azure account with an active subscription. Create an account for free.
- A group of virtual networks that can be split into network groups for applying granular security admin rules.
- To modify dynamic network groups, you must be granted access via Azure RBAC role assignment only. Classic Admin/legacy authorization is not supported
Deploy virtual network environment
You need a virtual network environment that includes virtual networks that can be segregated for allowing and blocking specific network traffic. You may use the following table or your own configuration of virtual networks:
| Name | IPv4 address space | subnet |
|---|---|---|
| vnetA-gen | 10.0.0.0/16 | default - 10.0.0.0/24 |
| vnetB-gen | 10.1.0.0/16 | default - 10.1.0.0/24 |
| vnetC-gen | 10.2.0.0/16 | default - 10.2.0.0/24 |
| vnetD-app | 10.3.0.0/16 | default - 10.3.0.0/24 |
| vnetE-app | 10.4.0.0/16 | default - 10.4.0.0/24 |
- Place all virtual networks in the same subscription, region, and resource group
Not sure how to build a virtual network? Learn more in Quickstart: Create a virtual network using the Azure portal.
Create a virtual network manager instance
In this section, you deploy a Virtual Network Manager instance with the Security admin feature in your organization.
Select + Create a resource and search for Network Manager. Then select Create to begin setting up Azure Virtual Network Manager.
On the Basics tab, enter or select the information for your organization:
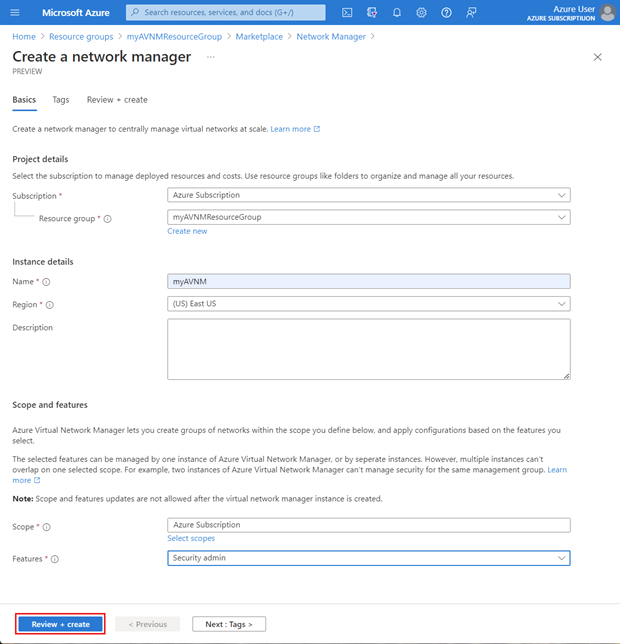
Setting Value Subscription Select the subscription you want to deploy Azure Virtual Network Manager to. Resource group Select or create a resource group to store Azure Virtual Network Manager. This example uses the myAVNMResourceGroup previously created. Name Enter a name for this Azure Virtual Network Manager instance. This example uses the name myAVNM. Region Select the region for this deployment. Azure Virtual Network Manager can manage virtual networks in any region. The region selected is for where the Virtual Network Manager instance will be deployed. Description (Optional) Provide a description about this Virtual Network Manager instance and the task it's managing. Scope Define the scope for which Azure Virtual Network Manager can manage. This example uses a subscription-level scope. Features Select the features you want to enable for Azure Virtual Network Manager. Available features are Connectivity, SecurityAdmin, or Select All.
Connectivity - Enables the ability to create a full mesh or hub and spoke network topology between virtual networks within the scope.
SecurityAdmin - Enables the ability to create global network security rules.Select Review + create and then select Create once validation has passed.
Select Go to resource when deployment is complete and review the virtual network manager configuration

Create a network group for all virtual networks
With your virtual network manager created, you now create a network group containing all of the VNets in the organization, and you manually add all of the VNets.
- Select Network Groups, under Settings.
- Select + Create, enter a name for the network group, and select Add.
- On the Network groups page, select the network group you created.
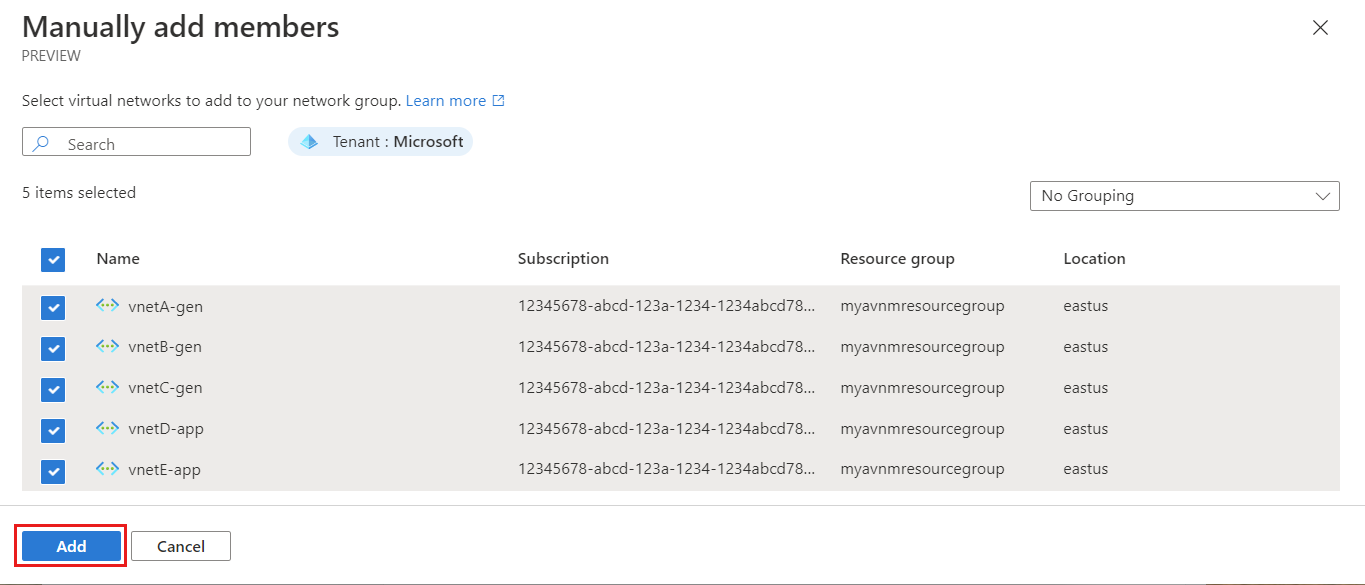
- Select Add, under Static Membership to manually add all the VNets.
- On the Add static members page, select all of the virtual networks you wish to include, and select Add.
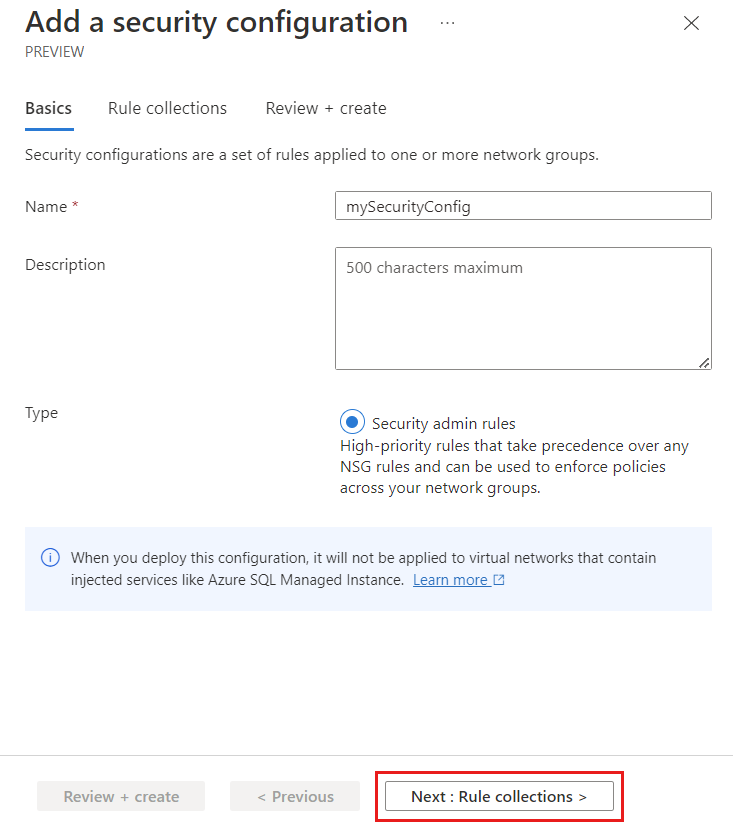
Create a security admin configuration for all virtual networks
It’s time to construct our security admin rules within a configuration in order to apply those rules to all the VNets within your network group at once. In this section, you create a security admin configuration. Then you create a rule collection and add rules for high risks ports like SSH or RDP. This configuration denies network traffic to all virtual networks in the network group.
Return to your virtual network manager resource.
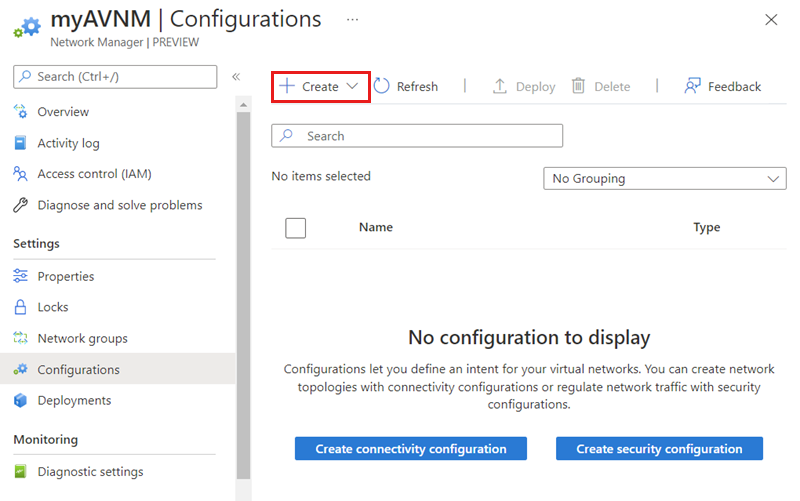
Select Configurations under Settings and then select + Create.
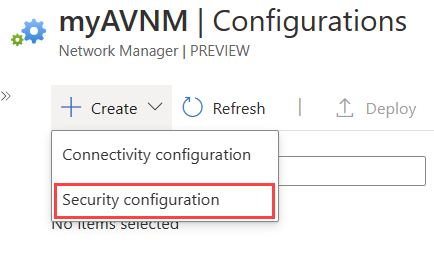
Select Security configuration from the drop-down menu.
On the Basics tab, enter a Name to identify this security configuration and select Next: Rule collections.
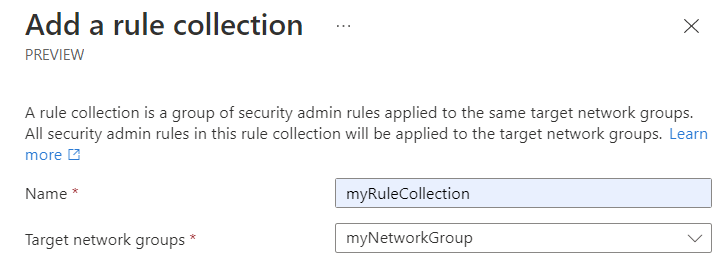
Select + Add from the Add a security configuration page.
Enter a Name to identify this rule collection and then select the Target network groups you want to apply the set of rules to. The target group is the network group containing all of your virtual networks.
Add a security rule for denying high-risk network traffic
In this section, you define the security rule to block high-risk network traffic to all virtual networks. When assigning priority, keep in mind future exception rules. Set the priority so that exception rules are applied over this rule.
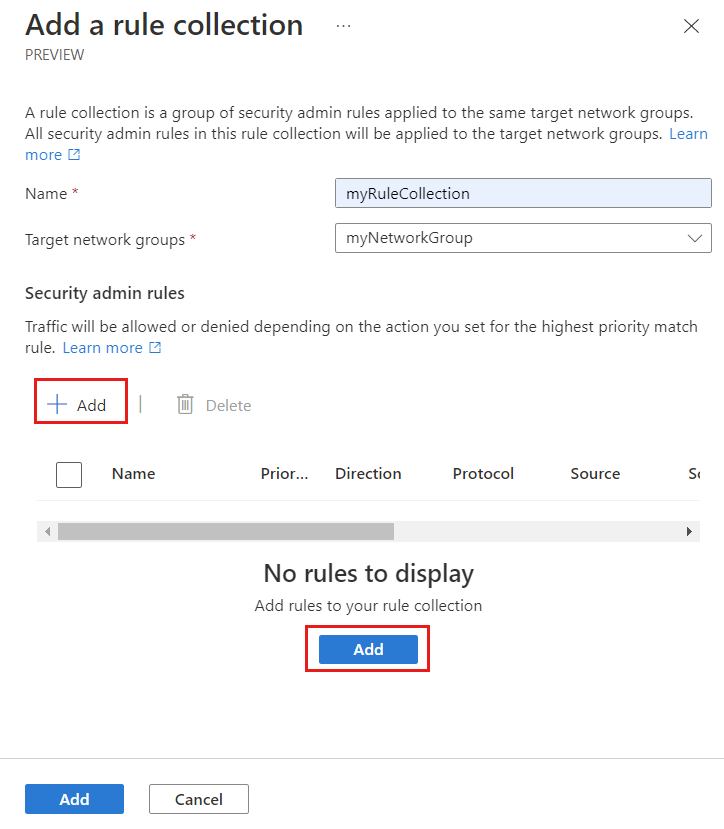
Select + Add under Security admin rules.
Enter the information needed to define your security rule, then select Add to add the rule to the rule collection.
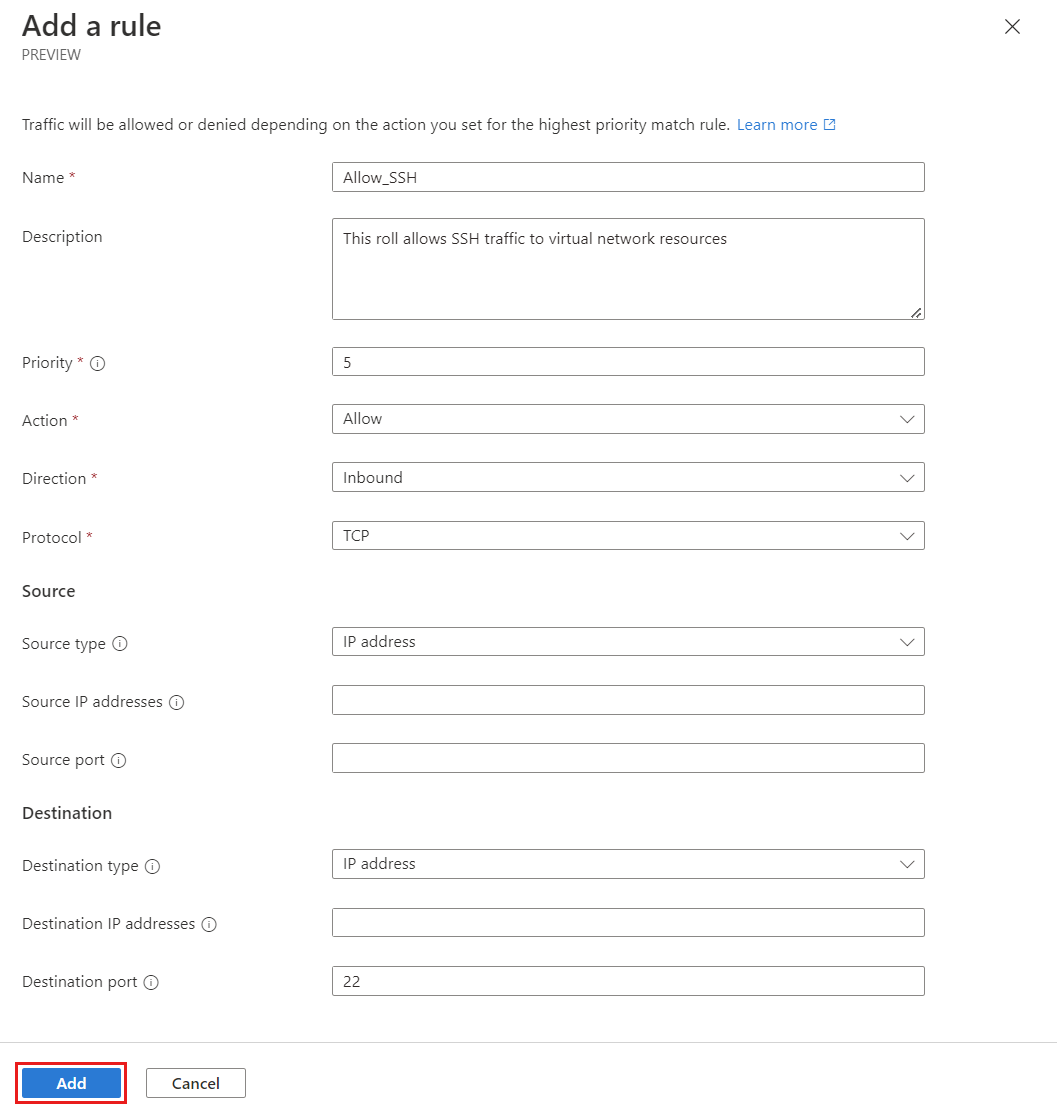
Setting Value Name Enter a rule name. Description Enter a description about the rule. Priority* Enter a value between 1 and 4096 to determine the priority of the rule. The lower the value the higher the priority. Action* Select Deny to block traffic. For more information, see Action Direction* Select Inbound as you want to deny inbound traffic with this rule. Protocol* Select the network protocol for the port. Source Source type Select the source type of either IP address or Service tags. Source IP addresses This field appears when you select the source type of IP address. Enter an IPv4 or IPv6 address or a range using CIDR notation. When defining more than one address or blocks of addresses separate using a comma. Leave blank for this example. Source service tag This field appears when you select the source type of Service tag. Select service tag(s) for services you want to specify as the source. See Available service tags, for the list of supported tags. Source port Enter a single port number or a port range such as (1024-65535). When defining more than one port or port ranges, separate them using a comma. To specify any port, enter *. Leave blank for this example. Destination Destination type Select the destination type of either IP address or Service tags. Destination IP addresses This field appears when you select the destination type of IP address. Enter an IPv4 or IPv6 address or a range using CIDR notation. When defining more than one address or blocks of addresses separate using a comma. Destination service tag This field appears when you select the destination type of Service tag. Select service tag(s) for services you want to specify as the destination. See Available service tags, for the list of supported tags. Destination port Enter a single port number or a port range such as (1024-65535). When defining more than one port or port ranges, separate them using a comma. To specify any port, enter *. Enter 3389 for this example. Repeat steps 1-3 again if you want to add more rules to the rule collection.
Once you're satisfied with all the rules you wanted to create, select Add to add the rule collection to the security admin configuration.
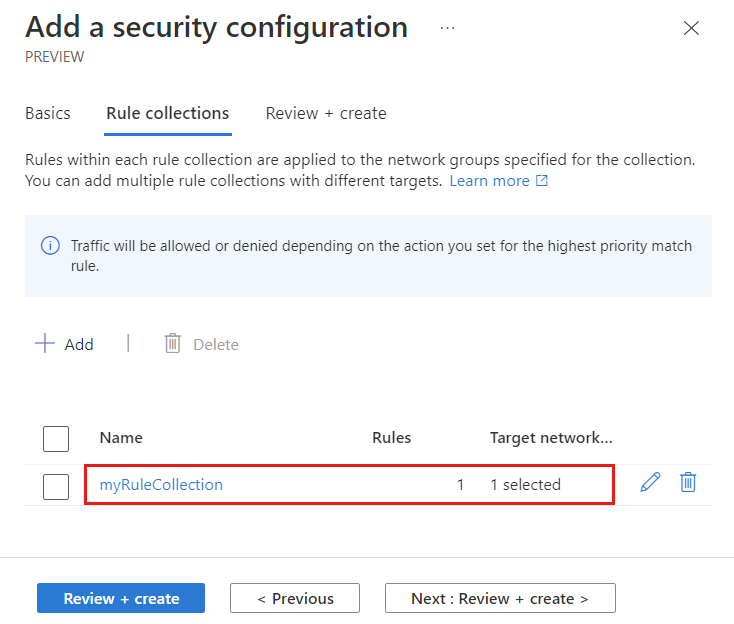
Then select Review + Create and Create to complete the security configuration.
Deploy a security admin configuration for blocking network traffic
In this section, the rules created take effect when you deploy the security admin configuration.
Select Deployments under Settings, then select Deploy configuration.
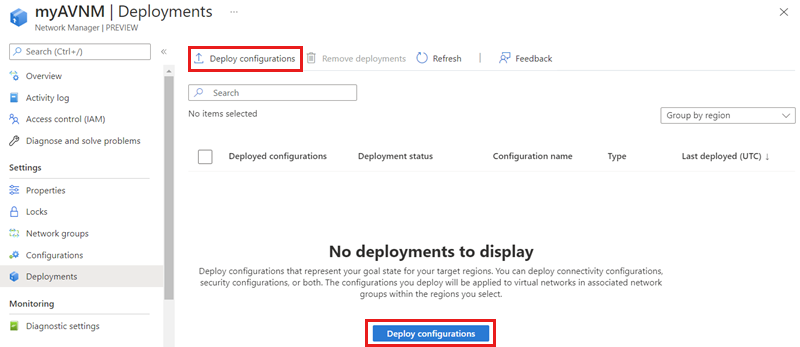
Select the Include security admin in your goal state checkbox and choose the security configuration you created in the last section from the dropdown menu. Then choose the region(s) you would like to deploy this configuration to.

Select Next and Deploy to deploy the security admin configuration.
Create a network group for traffic exception rule
With traffic blocked across all of your VNets, you need an exception to allow traffic to specific virtual networks. You create a network group specifically for the VNets needing exclusion from the other security admin rule.
- From your virtual network manager, select Network Groups, under Settings.
- Select + Create, enter a name for the application network group, and select Add.
- Under Define Dynamic Membership, select Define.
- Enter or select the values to allow traffic to your application virtual network.
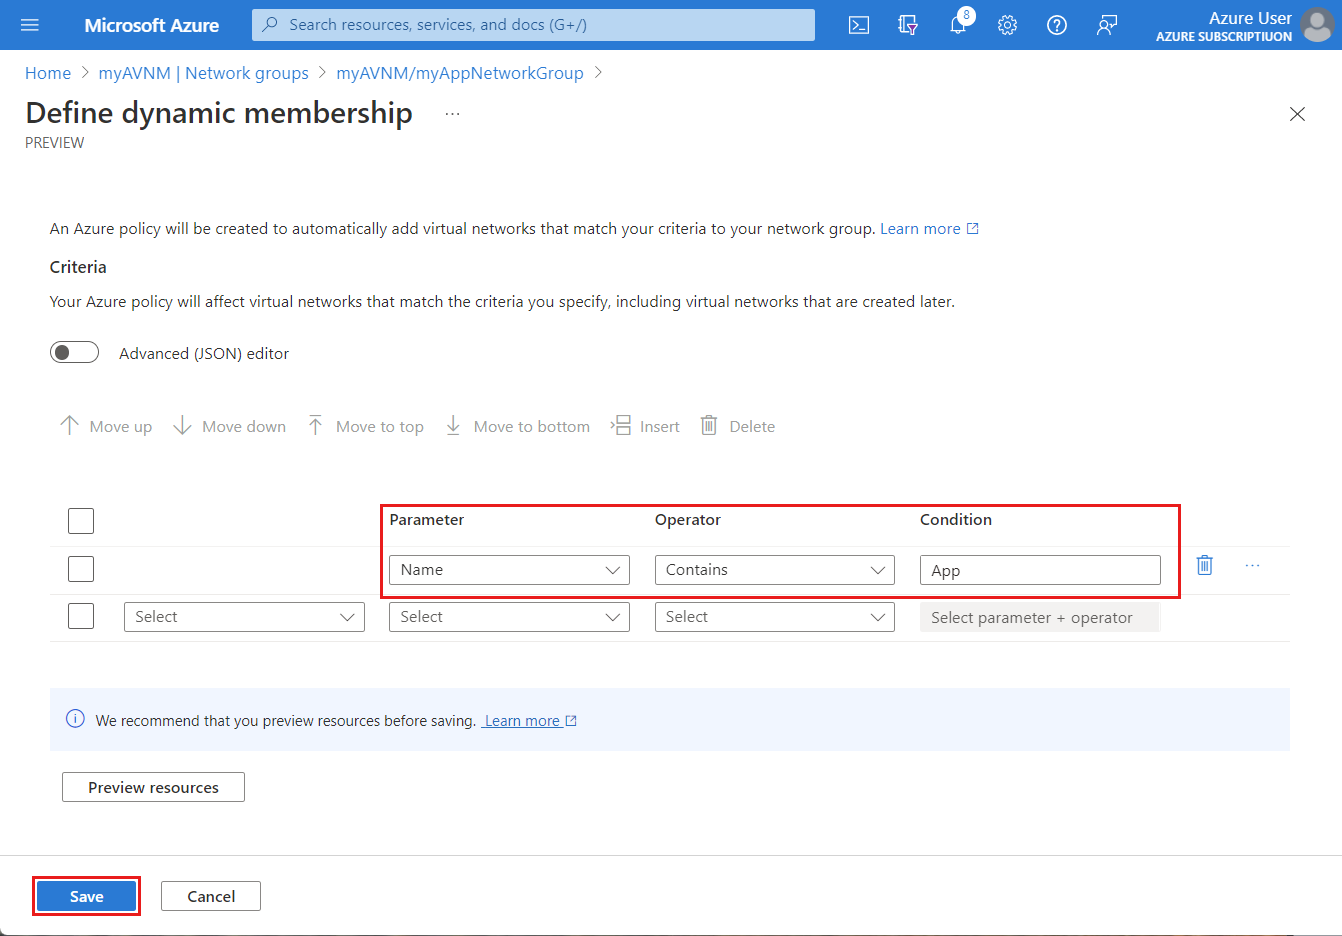
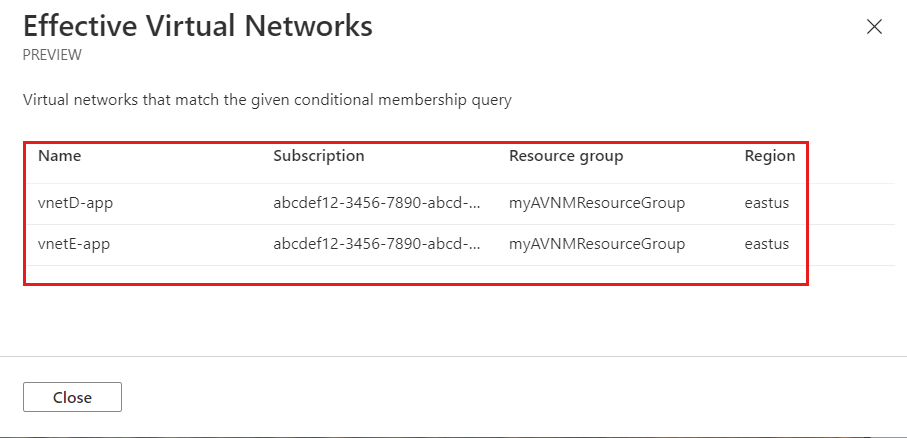
- Select Preview Resources to review the Effective Virtual Networks included, and select Close.
- Select Save.
Create a traffic exception security admin rule and collection
In this section, you create a new rule collection and security admin rule that allows high-risk traffic to the subset of virtual networks you've defined as exceptions. Next, you add it to your existing security admin configuration.
Important
In order for your security admin rule to allow traffic to your application virtual networks, the priority needs to be set to a lower number than existing rules blocking traffic.
For example, an all network rule blocking SSH has a priority of 10 so your allow rule should have a priority from 1 to 9.
- From your virtual network manager, select Configurations and select your security configuration.
- Select Rule collections under Settings, then select + Create to create a new rule collection.
- On the Add a rule collection page, enter a name for your application rule collection and choose the application network group you created.
- Under the Security admin rules, select + Add.
- Enter or select the values to allow specific network traffic to your application network group, and select add when completed.
- Repeat the add rule process for all traffic needing an exception.
- Select Save when you're done.
Redeploy the security admin configuration with exception rule
To apply the new rule collection, you redeploy your security admin configuration since it was modified by adding a rule collection.
- From your virtual network manager, select Configurations.
- Select your security admin configuration and select Deploy
- On the Deploy Configuration page, select all target regions receiving the deployment and
- Select Next and Deploy.
Next steps
Feedback
Coming soon: Throughout 2024 we will be phasing out GitHub Issues as the feedback mechanism for content and replacing it with a new feedback system. For more information see: https://aka.ms/ContentUserFeedback.
Submit and view feedback for