How-to: Create a credential entity
Important
Starting on the 20th of September, 2023 you won’t be able to create new Metrics Advisor resources. The Metrics Advisor service is being retired on the 1st of October, 2026.
When onboarding a data feed, you should select an authentication type, some authentication types like Azure SQL Connection String and Service Principal need a credential entity to store credential-related information, in order to manage your credential in secure. This article will tell how to create a credential entity for different credential types in Metrics Advisor.
Basic procedure: Create a credential entity
You can create a credential entity to store credential-related information, and use it for authenticating to your data sources. You can share the credential entity to others and enable them to connect to your data sources without sharing the real credentials. It can be created in 'Adding data feed' tab or 'Credential entity' tab. After creating a credential entity for a specific authentication type, you can just choose one credential entity you created when adding new data feed, this will be helpful when creating multiple data feeds. The general procedure of creating and using a credential entity is shown below:
Select '+' to create a new credential entity in 'Adding data feed' tab (you can also create one in 'Credential entity feed' tab).

Set the credential entity name, description (if needed), credential type (equals to authentication type) and other settings.

After creating a credential entity, you can choose it when specifying authentication type.

There are four credential types in Metrics Advisor: Azure SQL Connection String, Azure Data Lake Storage Gen2 Shared Key Entity, Service Principal, Service Principal from Key Vault. For different credential type settings, see following instructions.
Azure SQL Connection String
You should set the Name and Connection String, then select 'create'.

Azure Data Lake Storage Gen2 Shared Key Entity
You should set the Name and Account Key, then select 'create'. Account key could be found in Azure Storage Account (Azure Data Lake Storage Gen2) resource in Access keys setting.

Service principal
To create service principal for your data source, you can follow detailed instructions in Connect different data sources. After creating a service principal, you need to fill in the following configurations in credential entity.

Name: Set a name for your service principal credential entity.
Tenant ID & Client ID: After creating a service principal in Azure portal, you can find
Tenant IDandClient IDin Overview.
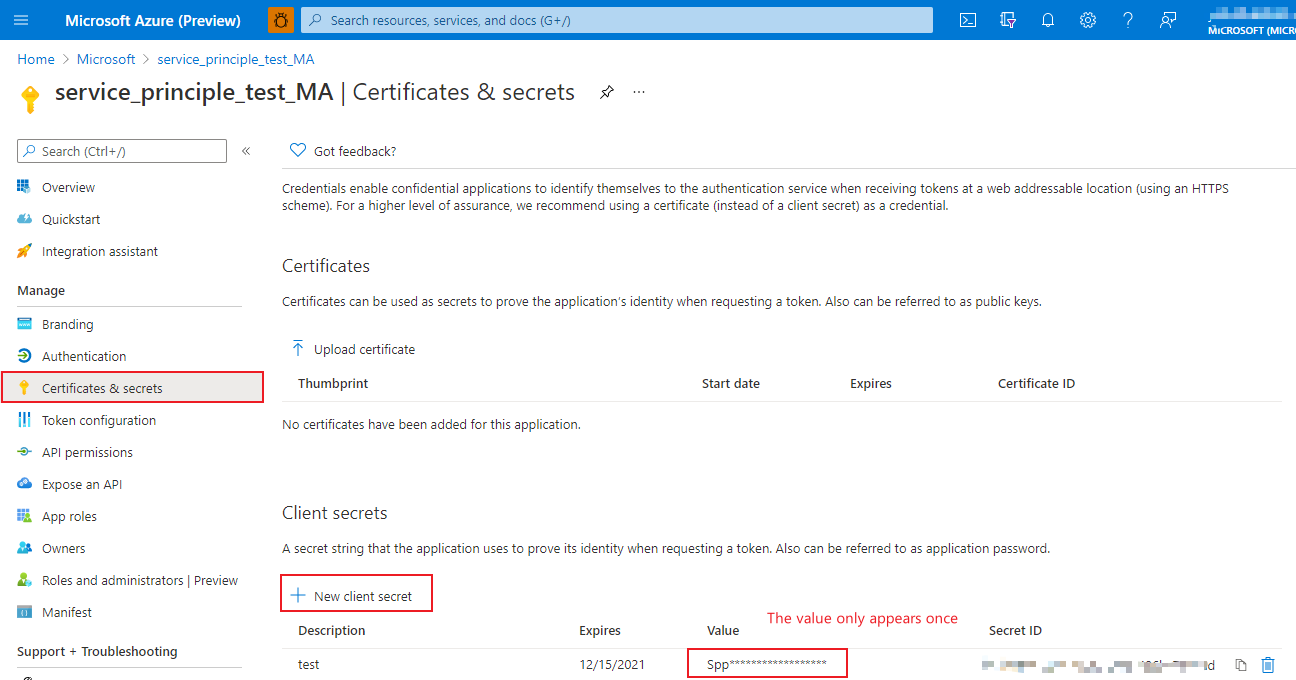
Client Secret: After creating a service principal in Azure portal, you should go to Certificates & Secrets to create a new client secret, and the value should be used as
Client Secretin credential entity. (Note: The value only appears once, so it's better to store it somewhere.)
Service principal from Key Vault
There are several steps to create a service principal from key vault.
Step 1: Create a Service Principal and grant it access to your database. You can follow detailed instructions in Connect different data sources, in creating service principal section for each data source.
After creating a service principal in Azure portal, you can find Tenant ID and Client ID in Overview. The Directory (tenant) ID should be Tenant ID in credential entity configurations.

Step 2: Create a new client secret. You should go to Certificates & Secrets to create a new client secret, and the value will be used in next steps. (Note: The value only appears once, so it's better to store it somewhere.)

Step 3: Create a key vault. In Azure portal, select Key vaults to create one.

After creating a key vault, the Vault URI is the Key Vault Endpoint in MA (Metrics Advisor) credential entity.

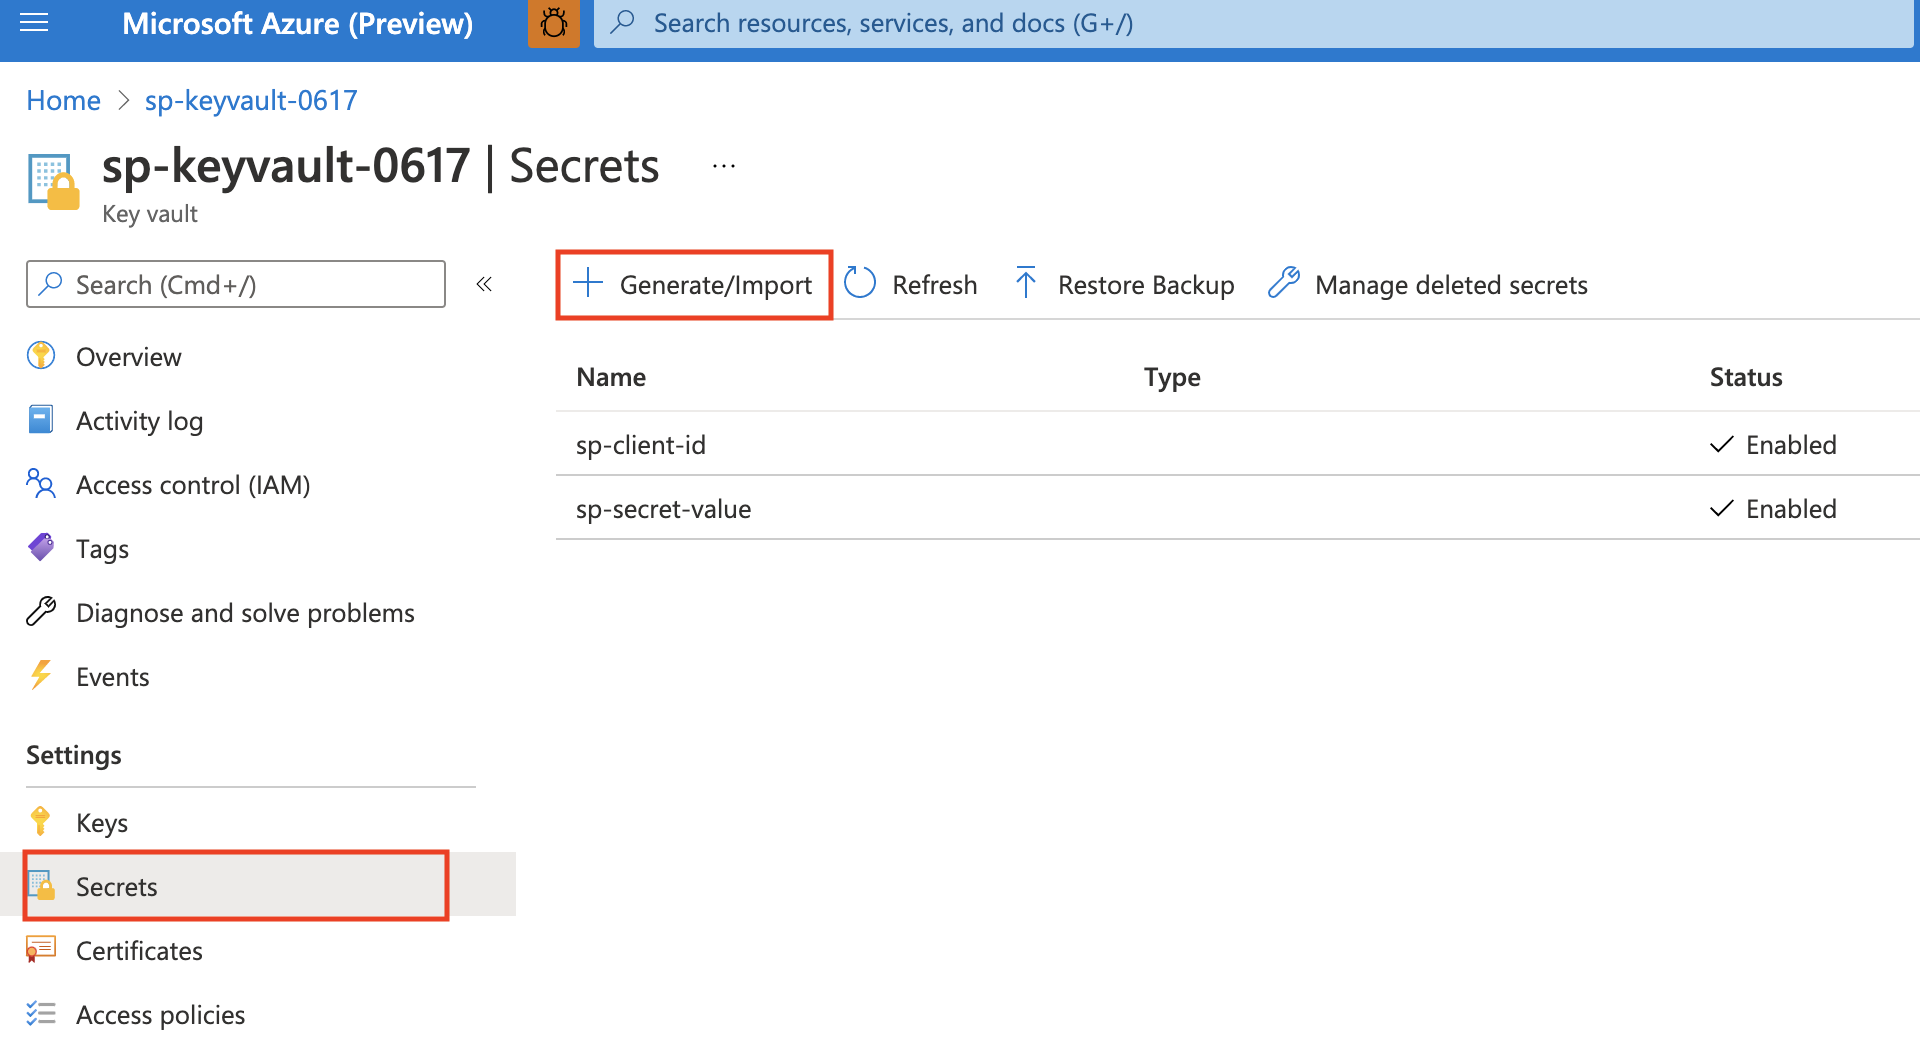
Step 4: Create secrets for Key Vault. In Azure portal for key vault, generate two secrets in Settings->Secrets.
The first is for Service Principal Client Id, the other is for Service Principal Client Secret, both of their name will be used in credential entity configurations.

Service Principal Client ID: Set a
Namefor this secret, the name will be used in credential entity configuration, and the value should be your Service PrincipalClient IDin Step 1.
Service Principal Client Secret: Set a
Namefor this secret, the name will be used in credential entity configuration, and the value should be your Service PrincipalClient Secret Valuein Step 2.
Until now, the client ID and client secret of service principal are finally stored in Key Vault. Next, you need to create another service principal to store the key vault. Therefore, you should create two service principals, one to save client ID and client secret, which will be stored in a key vault, the other is to store the key vault.
Step 5: Create a service principal to store the key vault.
Go to Azure portal Microsoft Entra ID and create a new registration.

After creating the service principal, the Application (client) ID in Overview will be the
Key Vault Client IDin credential entity configuration.In Manage->Certificates & Secrets, create a client secret by selecting 'New client secret'. Then you should copy down the value, because it appears only once. The value is
Key Vault Client Secretin credential entity configuration.
Step 6: Grant Service Principal access to Key Vault. Go to the key vault resource you created, in Settings->Access polices, by selecting 'Add Access Policy' to make connection between key vault and the second service principal in Step 5, and 'Save'.

Configurations conclusion
To conclude, the credential entity configurations in Metrics Advisor for Service Principal from Key Vault and the way to get them are shown in table below:
| Configuration | How to get |
|---|---|
| Key Vault Endpoint | Step 3: Vault URI of key vault. |
| Tenant ID | Step 1: Directory (tenant) ID of your first service principal. |
| Key Vault Client ID | Step 5: The Application (client) ID of your second service principal. |
| Key Vault Client Secret | Step 5: The client secret value of your second service principal. |
| Service Principal Client ID Name | Step 4: The secret name you set for Client ID. |
| Service Principal Client Secret Name | Step 4: The secret name you set for Client Secret Value. |