Create a container in Azure Cosmos DB for Table
APPLIES TO:
Table
This article explains the different ways to create a container in Azure Cosmos DB for Table. It shows how to create a container using Azure portal, Azure CLI, PowerShell, or supported SDKs. This article demonstrates how to create a container, specify the partition key, and provision throughput.
This article explains the different ways to create a container in Azure Cosmos DB for Table. If you are using a different API, see API for MongoDB, API for Cassandra, API for Gremlin, and API for NoSQL articles to create the container.
Note
When creating containers, make sure you don't create two containers with the same name but different casing. That's because some parts of the Azure platform are not case-sensitive, and this can result in confusion/collision of telemetry and actions on containers with such names.
Create using Azure portal
Sign in to the Azure portal.
Create a new Azure Cosmos DB account, or select an existing account.
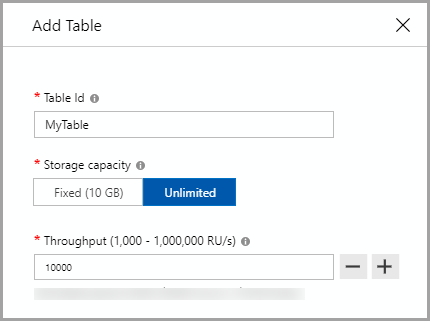
Open the Data Explorer pane, and select New Table. Next, provide the following details:
- Enter a Table ID.
- Enter a throughput to be provisioned (for example, 1000 RUs).
- Select OK.

Note
For API for Table, the partition key is specified each time you add a new row.
Create using Azure CLI
Create a API for Table table with Azure CLI. For a listing of all Azure CLI samples across all Azure Cosmos DB APIs see, Azure CLI samples for Azure Cosmos DB.
Create using PowerShell
Create a API for Table table with PowerShell. For a listing of all PowerShell samples across all Azure Cosmos DB APIs see, PowerShell Samples