Complete, abandon, or revert pull requests
Azure DevOps Services | Azure DevOps Server 2022 - Azure DevOps Server 2019
Visual Studio 2019 | Visual Studio 2022
Once all required reviewers approve your pull request (PR) and the PR meets all branch policy requirements, you can merge your changes into the target branch and complete the PR. Or if you decide not to proceed with the changes in the PR, you can abandon the PR.
To address reviewers' changes, and respond to and resolve review comments, see Address comments.
Prerequisites
| Category | Requirements |
|---|---|
| Project access | Member of a project. |
| Permissions | - View code in private projects: At least Basic access. - Clone or contribute to code in private projects: Member of the Contributors security group or corresponding permissions in the project. - Set branch or repository permissions: Manage permissions permissions for the branch or repository. - Change default branch: Edit policies permissions for the repository. - Import a repository: Member of the Project Administrators security group or Git project-level Create repository permission set to Allow. For more information, see Set Git repository permissions. |
| Services | Repos enabled. |
| Tools | Optional. Use az repos commands: Azure DevOps CLI. |
Note
In public projects, users with Stakeholder access have full access to Azure Repos, including viewing, cloning, and contributing to code.
| Category | Requirements |
|---|---|
| Project access | Member of a project. |
| Permissions | - View code: At least Basic access. - Clone or contribute to code: Member of the Contributors security group or corresponding permissions in the project. |
| Services | Repos enabled. |
For more information about permissions and access, see Default Git repository and branch permissions and About access levels.
In Azure DevOps Services, you can manage PRs and other resources from the Azure command-line interface (CLI) with the azure-devops extension. To learn how to work with the Azure DevOps Services CLI, see Get started with Azure DevOps CLI. Azure Repos CLI commands for PRs use az repos pr.
Check merge changes
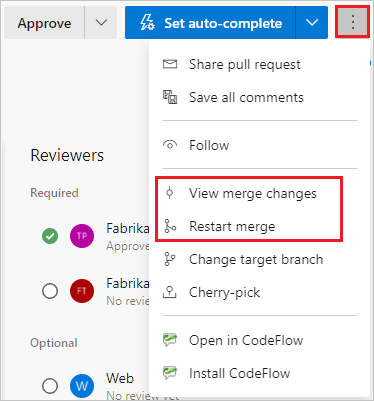
When you complete a PR, Git adds a new merge commit to the end of the main branch. This merge commit links the earlier histories of the main branch and the PR source branch. To see the preview merge commit and check for merge conflicts, select the More options menu at upper right on a PR Overview page, and then select View merge changes.
If you changed the target branch after creating the PR, select Restart merge to create a new preview merge commit and update the merge change diff view.
Review branch policies
Teams can set branch policies that require PRs in protected branches to meet specific criteria before the PRs can merge. You can see the branch policies in effect for your PR, whether they're required for merge, and whether the PR is passing or failing.
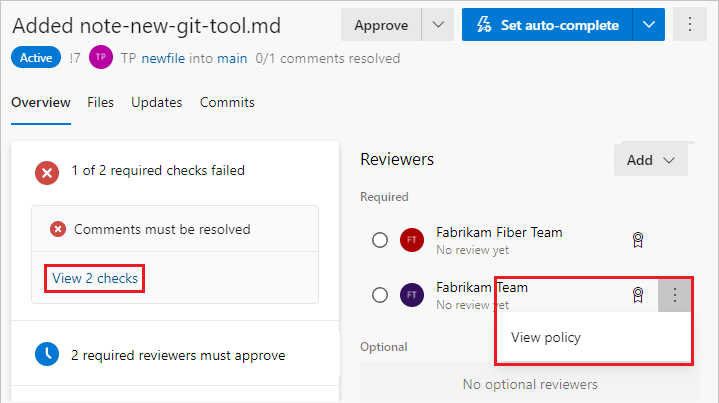
The PR Overview tab summarizes branch policies that are passing or failing for the PR. The overview lists only failed policies, but you can see all the policy checks by selecting View <n> checks.
On the PR Overview page, branch policy requirements have an ![]() icon. Select More options next to the requirement and then select View policy to go to the branch's Branch Policies page in Project Settings.
icon. Select More options next to the requirement and then select View policy to go to the branch's Branch Policies page in Project Settings.
Complete a pull request
After you resolve any merge conflicts, and the PR meets all branch policies and has all required approvals, you can complete the PR.
Select Complete at upper right to complete the PR. Or select the dropdown arrow next to the Complete button, and select one of the options.
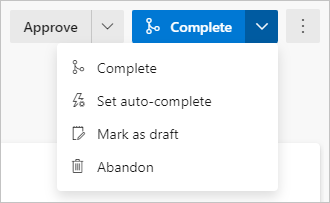
- Complete: Complete the PR now, and merge the changes to the target branch.
- Set auto-complete: Configure the PR to complete and merge once it meets all required branch policies.
- Mark as draft: Return the PR to draft status and remove all votes.
- Abandon: Close the PR without merging the changes.
In the Complete pull request pane, under Merge type, select one of the merge options.
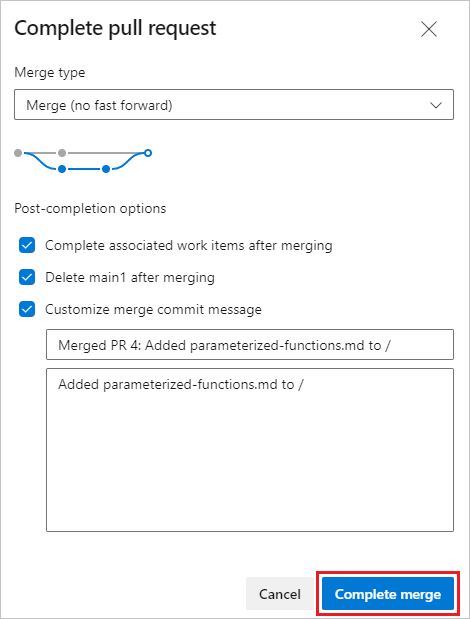
- Merge (no fast forward): Merge with a non-linear history that preserves all commits.
- Squash commit: Merge with a linear history that combines all source commits into a single commit on the target, or squash merges the PR. Be aware that a new commit will be created for the target branch without keeping the commit history from the source branch.
- Rebase and fast-forward: Rebase the source commits onto the target and fast-forward.
- Semi-linear merge: Rebase source commits onto the target and create a two-parent merge.
Note
Existing policies are enforced. For example, if your branch currently has a "squash merge only" policy, you have to change that policy if you want to use another merge type.
Select any of the following post-completion options. Some options aren't available for some merge types.
- Complete associated work items after merging: Complete any linked work items.
- Delete <branch name> after merging: Delete the PR's source branch after merging.
- Customize merge commit message: Add a custom merge commit message. If you select this option, update the merge commit message.
- Override branch policies and enable merge. Force the merge even if the PR doesn't satisfy all branch policies. This option is only available if you have Exempt from policy enforcement permission.
Select Complete merge.
Select Complete at upper right to complete the PR. Or, select the dropdown arrow next to the Complete button, and select one of the following options:
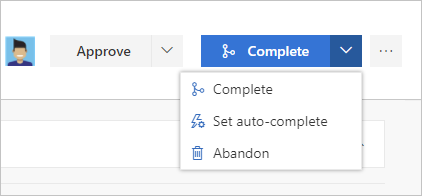
- Complete: Complete the PR now, and merge the changes to the target branch.
- Set auto-complete: If you have branch policies, configure the PR to complete and merge once it meets all required branch policies.
- Abandon: Close the PR without merging the changes.
On the Complete pull request screen, enter the message for the merge commit and update the PR description.
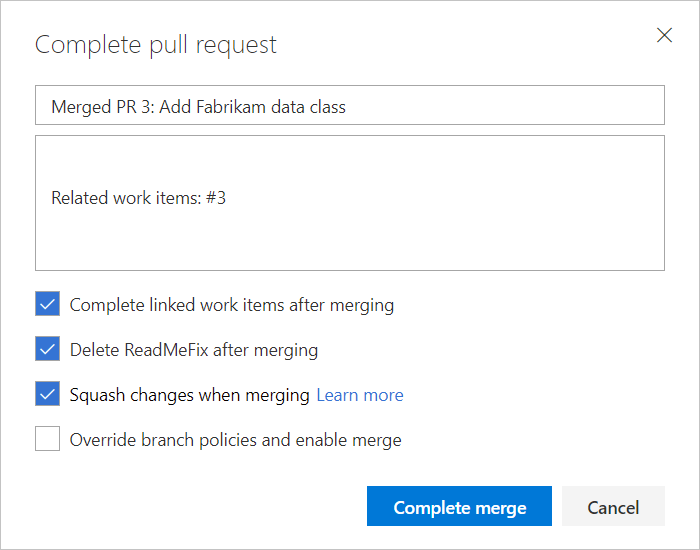
Select any of the following options:
Complete linked work items after merging to complete any linked work items.
Delete
<branch name>after merging to delete the source branch from the PR.Squash changes when merging to squash merge your PR. Be aware that a new commit will be created for the target branch without keeping the commit history from the source branch.
Override branch policies and enable merge to force a branch to merge even if it doesn't satisfy all branch policies. This option is only available if you have Exempt from policy enforcement permissions.
Note
Existing policies are still enforced. For example, if your branch currently has a "squash merge only" policy in place, you have to edit that policy in order to use the other merge types.
Select Complete merge.
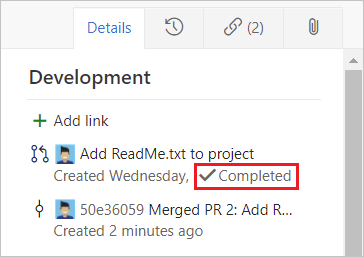
When you complete the merge, any linked work items automatically update to show the PR completion.
Rebase during PR completion
There are a few situations when rebasing during PR completion isn't possible:
- If a policy on the target branch prohibits using rebase strategies, you need Override branch policies permission to rebase.
- If the PR source branch has policies, you can't rebase it. Rebasing would modify the source branch without going through the policy approval process.
- If you used the Merge Conflict Extension to resolve merge conflicts, you can't rebase. Conflict resolutions applied to a three-way merge are seldom successful or valid when rebasing all the PR commits individually.
In all these cases, you can still rebase your branch locally and then push upstream, or squash-merge your changes when you complete the PR.
Multiple merge base issue
In some cases, a PR has more than one true merge base, and this situation can cause security issues. If the files in the PR have different versions between the merge bases, a multiple merge base warning happens. For more information and remediation, see Multiple merge bases.
Resolve merge conflicts
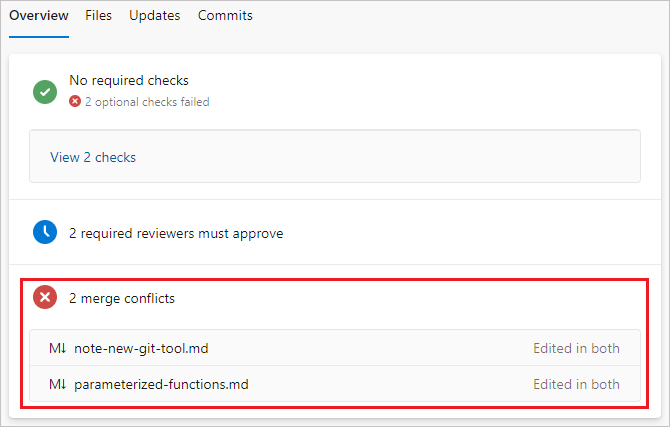
File changes in your branch can conflict with changes in another branch. When it isn't clear how to merge changes, Git shows the files that conflict on the PR's Overview page. You must resolve any merge conflicts between the PR branch and the target branch before you can merge a PR or set the PR to autocomplete. For instructions on resolving merge conflicts, see Resolve merge conflicts.
Set a pull request to autocomplete
Select Set auto-complete from the Complete dropdown list to complete and merge the PR changes as soon as conditions satisfy all branch policies. When the PR is completed, you receive an email notification. If a conflict or error prevents PR completion, email notifies you of the issue.
Note
The Set auto-complete option is available in Azure Repos and TFS 2017 and higher when you have branch policies. If you don't see Set auto-complete, you don't have any branch policies. For more information, see Branch policies.
By default, a PR that's set to autocomplete waits only on required policies. In the Enable automatic completion panel, you can choose to wait on optional policies as well.
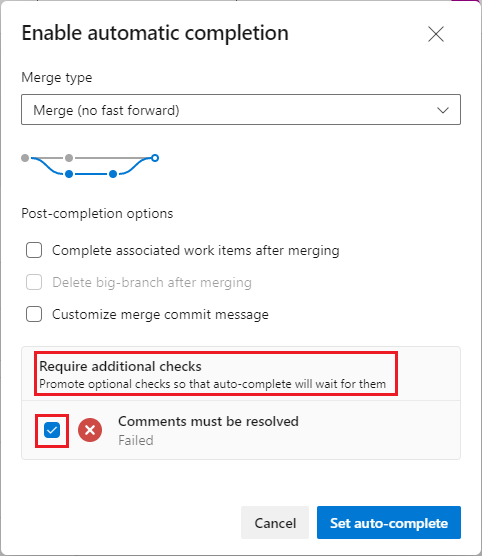
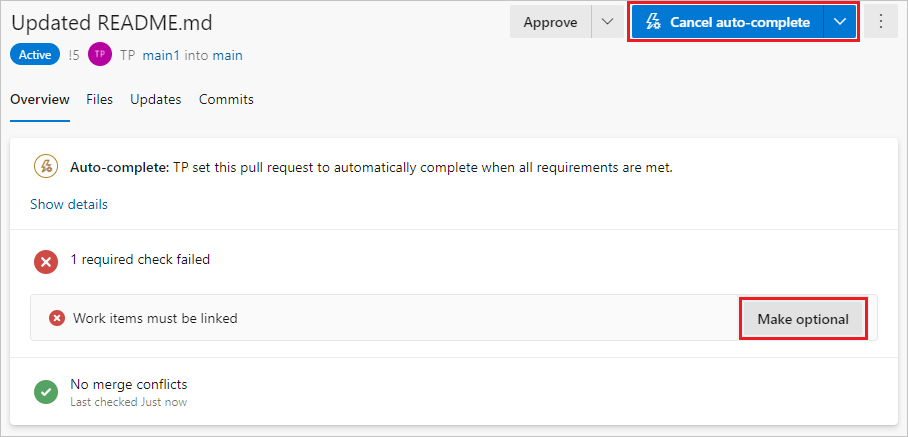
Starting with TFS 2018 Update 2, the PR Overview page displays the list of outstanding policy criteria the PR is waiting for. If you set a policy to be required in the Enable automatic completion panel, you can set it back to optional on the Overview page.
Select Cancel auto-complete to turn off autocomplete.
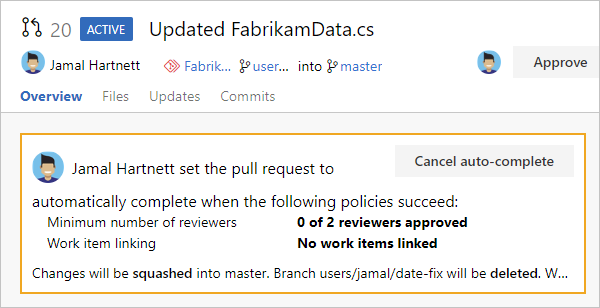
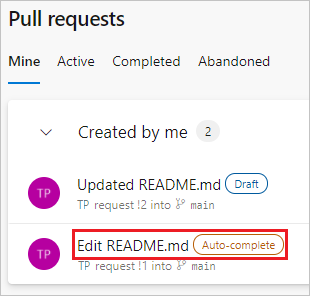
A PR set to autocomplete displays an Auto-complete badge on the Pull requests page.
Abandon or reactivate a pull request
To abandon your changes and your PR without merging, select Abandon from the dropdown list on the Complete button. You can still view the abandoned PR, and it stays linked to work items.
To reactivate an abandoned PR at any time, open the PR from the Abandoned tab in the Pull Request view, and select Reactivate at upper right.
Revert a completed pull request
To undo the changes from a PR, follow these steps. For more information, see Undo changes.
Open the completed PR and select Revert. This action creates a new branch with changes that undo the PR in an existing target branch in your repo.
In the Revert pull request pane:
- Under Target branch, select the branch where you want to undo the PR changes.
- Under Topic branch name required, change the revert PR branch name if you want.
- Select Revert.
On the New pull request screen, select Create.
Merge the new PR to complete the revert.
Note
The branch created during this revert has a single commit that reverts all the file changes from the original PR. The branch doesn't contain a reverted commit for each of the commits in the original PR.