How to configure an origin for Azure Front Door
This article shows you how to create an Azure Front Door origin in a new origin group. The origin group can be then associated with a route to determine how traffic reaches your origins.
Note
An Origin and a origin group in this article refers to the backend and backend pool of the Azure Front Door (classic) configuration.
Prerequisites
Before you can create an Azure Front Door origin, you must have an Azure Front Door Standard or Premium tier profile. For more information, see create a Azure Front Door.
Create a new origin group
Sign in to the Azure portal and navigate to your Azure Front Door profile.
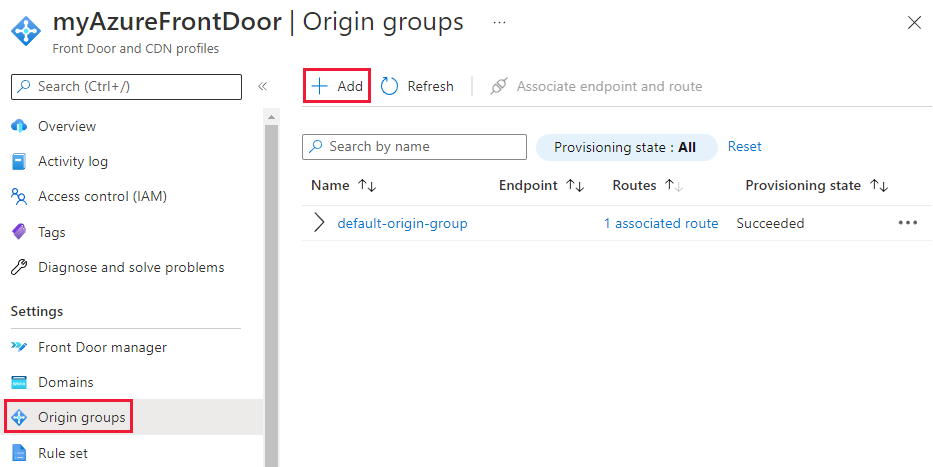
Select Origin groups from under Settings* in the left hand side menu pane and then select + Add to create a new origin group.
On the Add an origin group page, enter a unique Name for the new origin group. Then select + Add an origin to add a new origin.
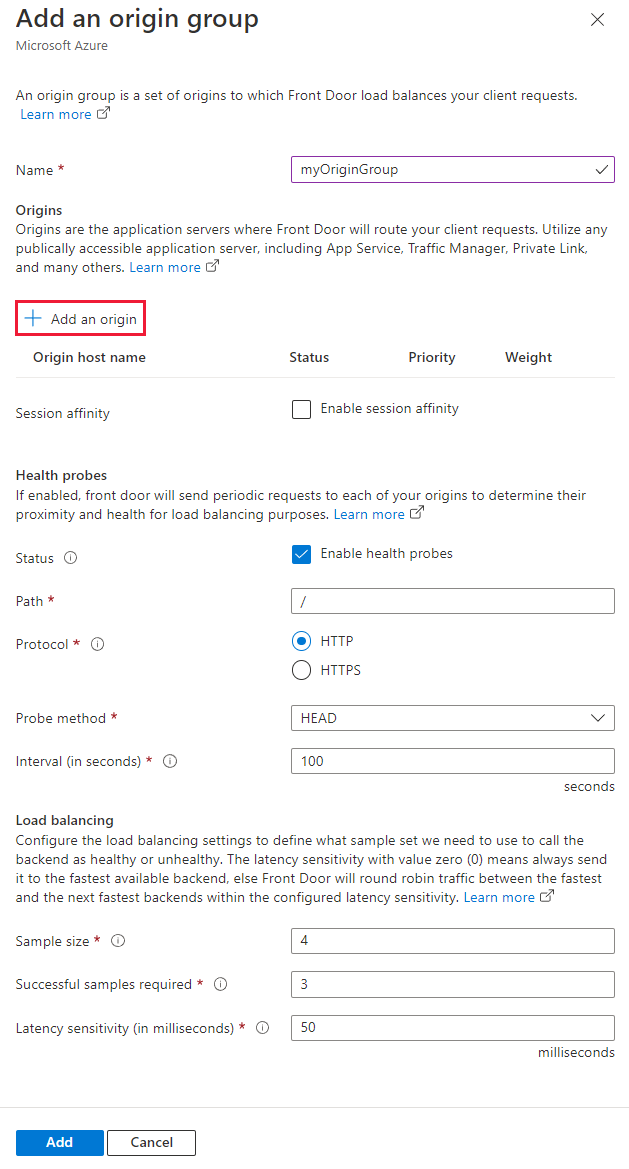
Add an origin
On the Add an origin page, enter, or select the values based on your requirements:
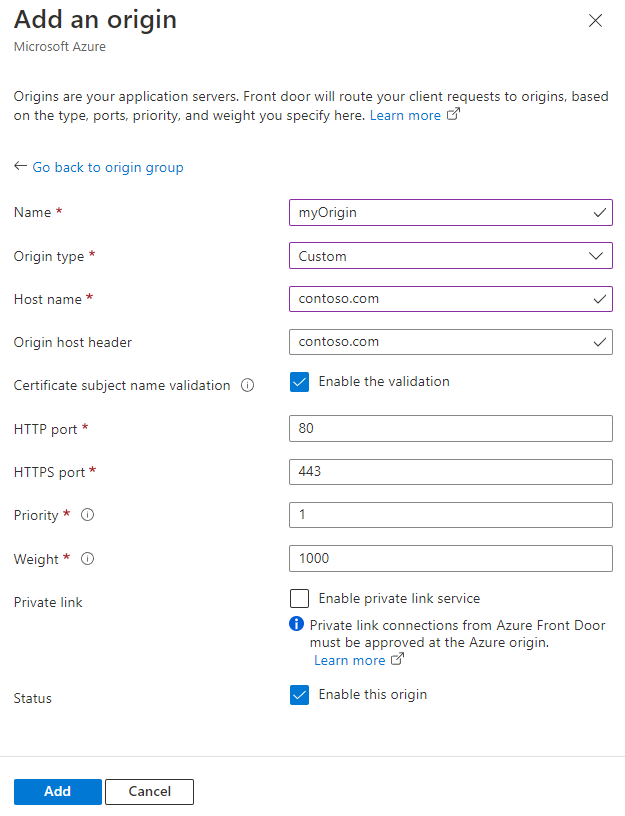
- Name - Enter a unique name for the new origin.
- Origin type - The type of resource you want to add. Front Door supports autodiscovery of your Azure origin such as Azure App services, Azure Cloud service, and Azure Storage. If you want a non-Azure backend, you can select Custom.
- Host name - Select your backend origin host name in the dropdown. If you selected Custom as origin host type, then enter the host name of your backend origin.
- Origin host header - Enter the host header value being sent to the backend for each request. For more information, see origin host header.
- Certificate subject name validation - During the Azure Front Door and origin TLS connection, Azure Front Door validates if the request host name matches the host name in the certificate provided by the origin. For more information, see End-to-end TLS.
- HTTP Port - Default value is 80. Enter the value for the port that the origin supports for HTTP protocol.
- HTTPS Port - Default value is 443. Enter the value for the port that the origin supports for HTTPS protocol.
- Priority - You can determine if this origin has higher priority than other origins in the origin group. With this value you can set primary, secondary, and backup origins. Default value is 1 for all origins. For more information, see Priority.
- Weight - Default value is 1000. Assign weights to your origins to determine how traffic gets distributed. For example, if you have two origins with weights 1000 and 2000, then the second origin receives twice as much traffic as the first origin. For more information, see Weights.
- Private link- You can enable the private link service to secure connectivity to your origin. Supported origin types are Azure blob storages, Azure static websites, App services, and internal load balancers.
- Status - Select this option to enable the origin.
Important
- During configuration, the Azure portal doesn't validate if the origin is accessible from Azure Front Door environments. You need to verify that Azure Front Door can reach your origin.
- When an origin is disabled, both routing and health probes to the origin are also disabled.
Select Add once you have completed the origin settings. The origin should now appear in the origin group.
Configure the rest of the origin group settings. You can update Health probes and Load balancing settings to meet your requirements.
Note
- You can configure session affinity to ensure requests from the same end user gets directed to the same origin. For more information, see session affinity.
- The health probe path is case sensitive.
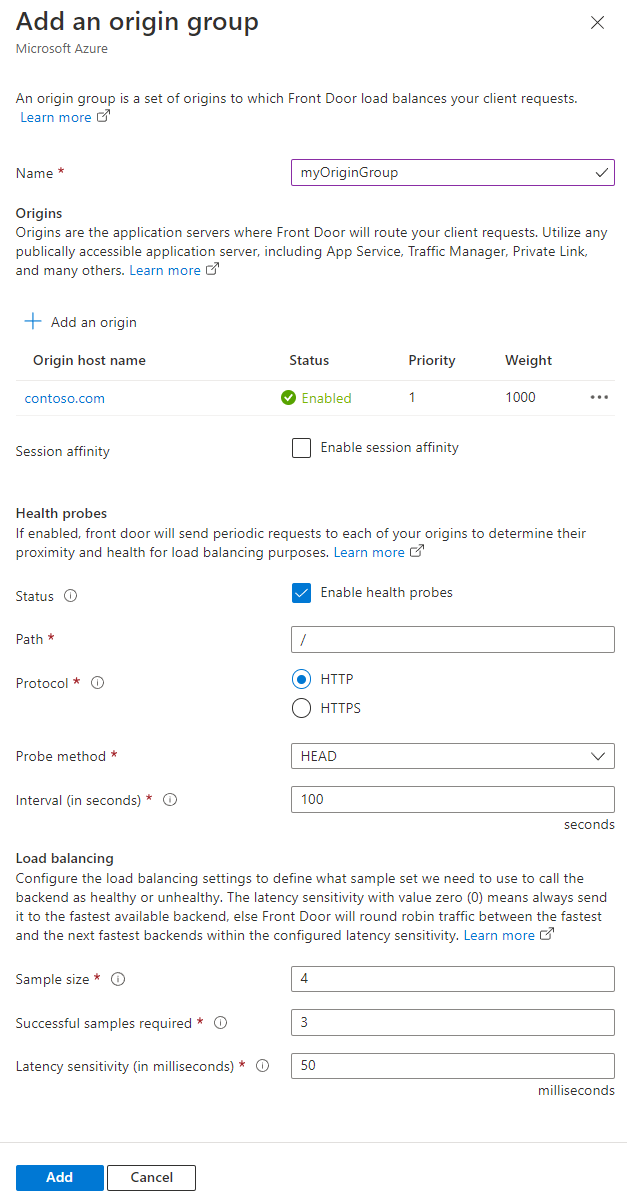
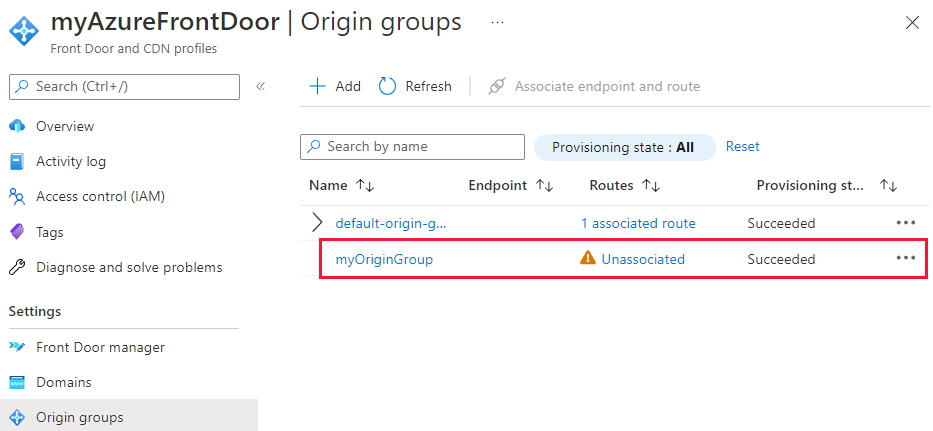
Select Add to save the origin group configuration. The new origin group should appear on the origin group page.
Origin response timeout
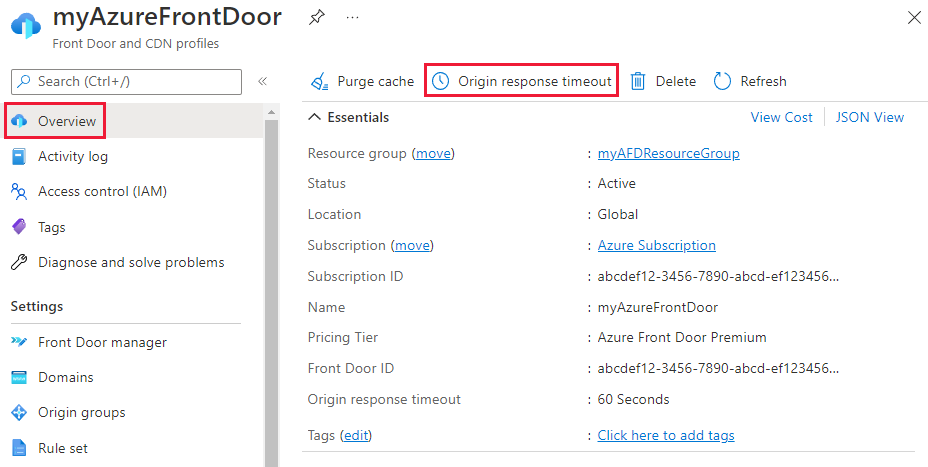
Origin response timeout can be found on the Overview page of your Azure Front Door profile.
Important
This timeout value is applied to all endpoints in the Azure Front Door profile.
The value of the response timeout must be between 16 and 240 seconds.

Clean up resources
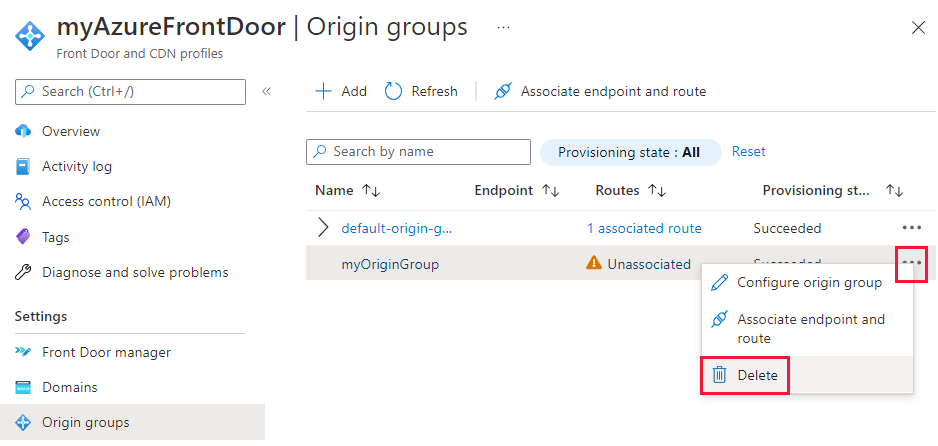
To delete an origin group when you no longer needed it, select the ... and then select Delete from the drop-down.
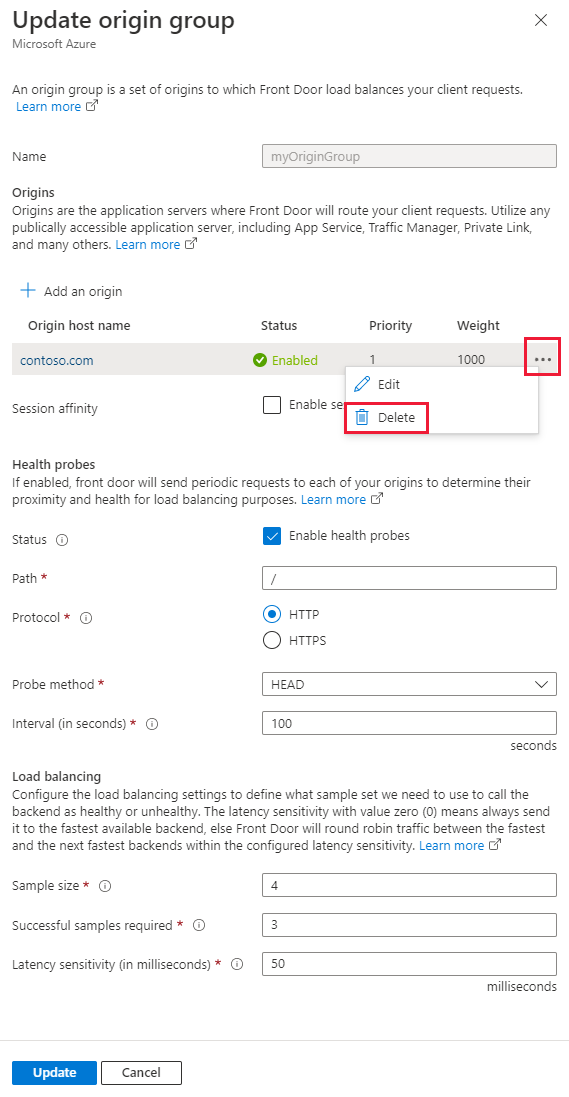
To remove an origin when you no longer need it, select the ... and then select Delete from the drop-down.
Next steps
To learn about custom domains, see adding a custom domain to your Azure Front Door endpoint.