Quickstart: Create and connect to a lab in Azure Lab Services
Important
Azure Lab Services will be retired on June 28, 2027. For more information, see the retirement guide.
In this quickstart, you create a Windows-based lab virtual machine (VM) with Azure Lab Services and connect to it by using remote desktop (RDP). Azure Lab Services enables you to create labs with infrastructure managed by Azure. You can create labs for running classroom trainings, hackathons, or for experimenting.
To create the lab VM, you first create a lab plan in the Azure portal. Use the Azure Lab Services website to add a lab based on an Azure Marketplace VM image. After you publish the VM, you can register for the lab and connect to it by using remote desktop.
After you complete this quickstart, you'll have a lab that you can connect to and use for your own experimentation, or you can invite other lab users.
Prerequisites
- An Azure account with an active subscription. If you don't have an Azure subscription, create a free account before you begin.
- An Azure account with permission to manage a lab, such as the Lab Creator, Owner, Contributor, or Lab Services Contributor Azure RBAC role. Learn more about the Azure Lab Services built-in roles and assignment scopes.
- An Azure lab plan. If you don't have a lab plan yet, follow the steps in Quickstart: Set up resources to create labs.
Create a lab
A lab contains the configuration and settings for creating lab VMs. All lab VMs within a lab are identical. You use the Azure Lab Services website to create a lab in the lab plan.
Note
To create a lab, your Azure account needs the Lab Creator Microsoft Entra role. As the owner of the lab plan, you can automatically create labs and you don't need the Lab Creator role.
Follow these steps to add a lab to the lab plan you created earlier:
Sign in to the Azure Lab Services website by using the credentials for your Azure subscription.
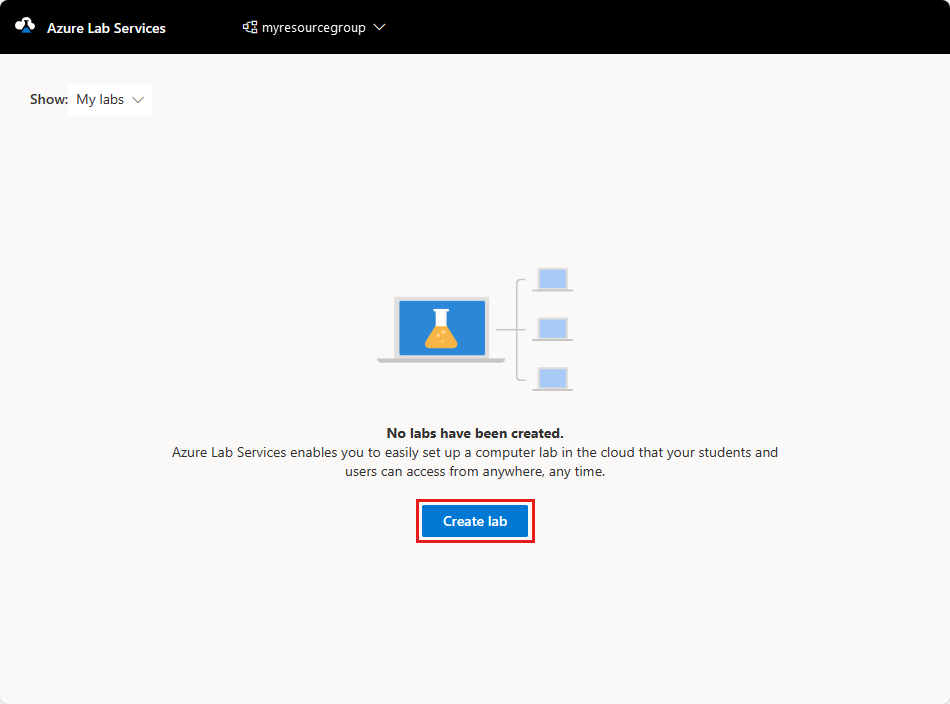
Select Create lab.
On the New lab page, enter the following information, and then select Next.
Field Description Name Enter Lab-101. Virtual machine image Select Windows 11 Pro. Virtual machine size Select Medium. Location Leave the default value. Some virtual machine sizes might not be available depending on the lab plan region and your subscription core limit. Learn more about virtual machine sizes in the administrator's guide and how to request more capacity.
You can enable or disable specific virtual machine images by configuring the lab plan.
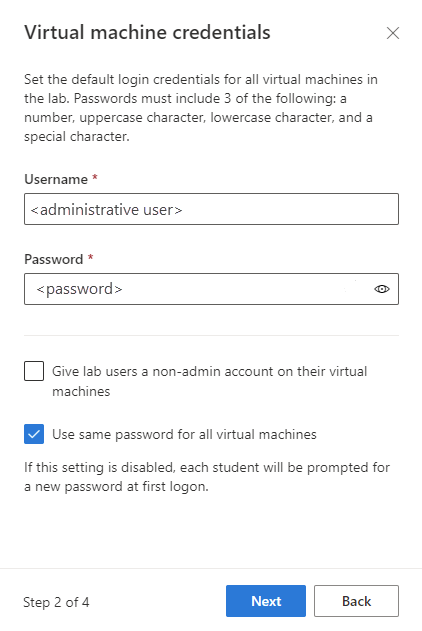
On the Virtual machine credentials page, specify the default Username and Password. Select Next.
By default, all the lab VMs use the same credentials.
Important
Make a note of username and password. They won't be shown again.

On the Lab policies page, accept the default values and select Next.
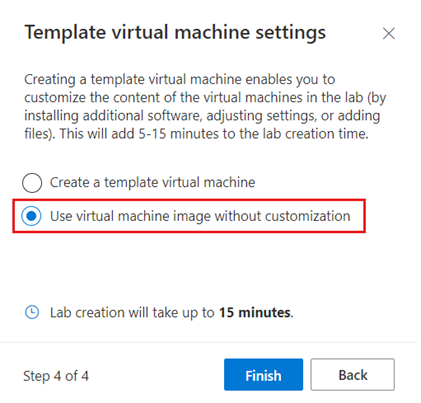
On the Template virtual machine settings page, select Use virtual machine image without customization.
In this quickstart, you use the VM image as-is, known as a templateless VM. Azure Lab Services also supports creating a template VM, which lets you configure the VM and install software in the VM image.

Select Finish to start the lab creation. It might take several minutes to create the lab.
When the lab creation finishes, you can see the lab details in the Template page.
Publish your lab
Before Azure Lab Services can create lab VMs for your lab, you need to publish the lab. When you publish the lab, specify the maximum number of lab VMs that Azure Lab Services creates. All VMs in the lab share the same configuration as the lab template.
To publish the lab and create one lab VM:
On the Template page, select Publish on the toolbar.
Warning
Publishing is an irreversible action, and can't be undone.
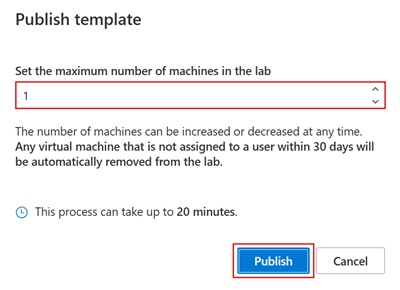
On the Publish template page, enter 1 for the number of VMs, and then select Publish.

Wait until the publishing finishes. You can track the publishing status on the Template page.
On the Virtual machine pool page, confirm that there's one lab VM, named Unassigned, that is in the Stopped state.
Start and connect to lab VM
After you publish the lab, you can start the lab VM and connect to it by using Remote Desktop. In this quickstart, you use the lab VM yourself. You don't assign it to another user.
On the Virtual machine pool page, toggle the lab VM State, and then select Start to start the lab VM.
Starting the lab VM can take a few minutes.
When the lab VM is in the Running state, select the Connect icon to download the remote desktop connection file to your computer.
Open the downloaded remote desktop connection file to connect to the lab VM.
Use the credentials you specified when you created the lab previously to sign in to the VM.
You can now explore and experiment within the lab virtual machine.
Note
When a lab creator starts a lab VM, the lab user's quota is not affected. Quota for a user specifies the number of lab hours available to the user, outside of scheduled events. Learn more about lab user quotas.
Clean up resources
When no longer needed, you can delete the resource group, lab plan, and all related resources.
In the Azure portal, on the Overview page for the lab plan, select Resource group.
At the top of the page for the resource group, select Delete resource group.
Enter the resource group name. Then select Delete.
To delete resources by using the Azure CLI, enter the following command:
az group delete --name <yourresourcegroup>
Remember, deleting the resource group deletes all of the resources within it.
Troubleshooting
Lab creation fails with You are not authorized to access this resource
When you create a new lab plan, it might take a few minutes for the permissions to propagate to the lab level. You can assign the Lab Creator role at the resource group level to prevent this behavior:
- In the Azure portal, go to the resource group that contains the lab plan.
- Select Access control (IAM) from the left navigation.
- Select Add > Add role assignment.
- Assign the Lab Creator role to the user account.
Lab creation fails with Subscription has labs in 2 regions, and the regional limit for this subscription is 2
The default limit for the total number of regions you can use for creating labs varies by offer category type. If you have reached the Azure regions limit for your subscription, you can only create labs in regions that you're already using.
Learn more about how to resolve region restrictions.
Next step
You created a lab virtual machine for experimenting inside the VM. You created a lab plan in the Azure portal and added a lab from the Azure Lab Services website. You published the lab to create the lab VM, and connected to it with Remote Desktop.
Azure Lab Services supports different Microsoft Entra roles to delegate specific tasks and responsibilities to different people in your organization. In the next tutorial, you learn how to set up a lab for classroom teaching. You assign permissions to lab creators and invite lab users to connect to the lab VMs.


