Събитие
31.03, 23 ч. - 2.04, 23 ч.
Най-голямото събитие за обучение на Fabric, Power BI и SQL. 31 март – 2 април. Използвайте код FABINSIDER, за да спестите $400.
Регистрирайте се днесТози браузър вече не се поддържа.
Надстройте до Microsoft Edge, за да се възползвате от най-новите функции, актуализации на защитата и техническа поддръжка.
Важно
Support for Azure Machine Learning Studio (classic) will end on August 31, 2024. We recommend that you transition to Azure Machine Learning by that date.
As of December 1, 2021, you can't create new Machine Learning Studio (classic) resources (workspace and web service plan). Through August 31, 2024, you can continue to use the existing Machine Learning Studio (classic) experiments and web services. For more information, see:
Machine Learning Studio (classic) documentation is being retired and might not be updated in the future.
This article shows you how to set up a simple Azure Stream Analytics job that uses Machine Learning Studio (classic) for sentiment analysis. You use a Studio (classic) sentiment analytics model from the Cortana Intelligence Gallery to analyze streaming text data and determine the sentiment score.
Съвет
It is highly recommended to use Azure Machine Learning UDFs instead of Machine Learning Studio (classic) UDF for improved performance and reliability.
You can apply what you learn from this article to scenarios such as these:
The Streaming Analytics job that you create applies the sentiment analytics model as a user-defined function (UDF) on the sample text data from the blob store. The output (the result of the sentiment analysis) is written to the same blob store in a different CSV file.
Before you start, make sure you have the following:
An active Azure subscription.
A CSV file with some X data in it. You can download a sample file from GitHub, or you can create your own file. In a real-world scenario, you would get the data directly from a X data stream.
In this step, you upload a CSV file to your storage container.
In the Azure portal, select Create a resource > Storage > Storage account.
Fill out the Basics tab with the following details and leave the default values for the remaining fields:
| Field | Value |
|---|---|
| Subscription | Choose your subscription. |
| Resource group | Choose your resource group. |
| Storage account name | Enter a name for your storage account. The name must be unique across Azure. |
| Location | Choose a location. All resources should use the same location. |
| Account kind | BlobStorage |

Select Review + Create. Then, select Create to deploy your storage account.
When the deployment is complete, navigate to your storage account. Under Blob service, select Containers. Then select + Container to create a new container.
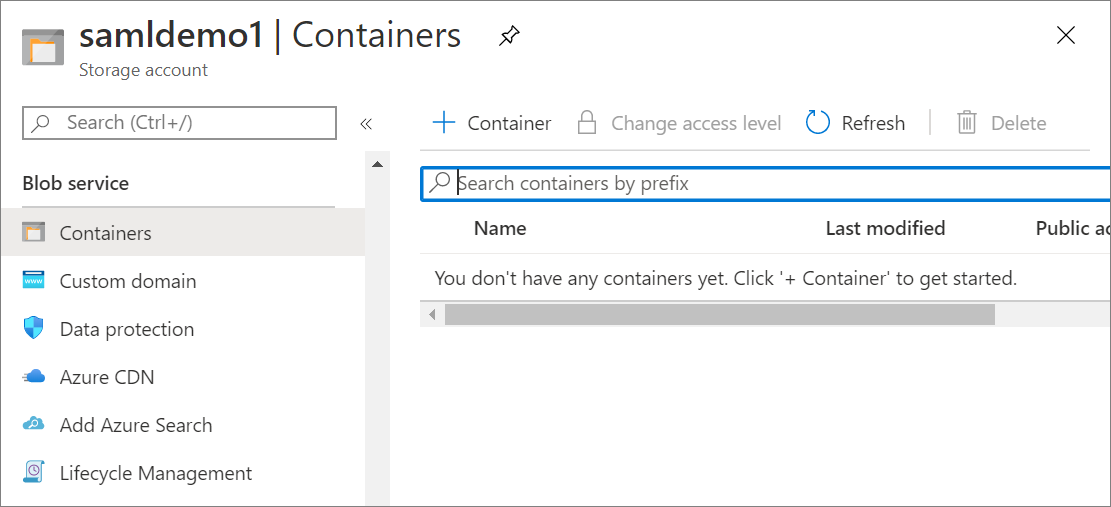
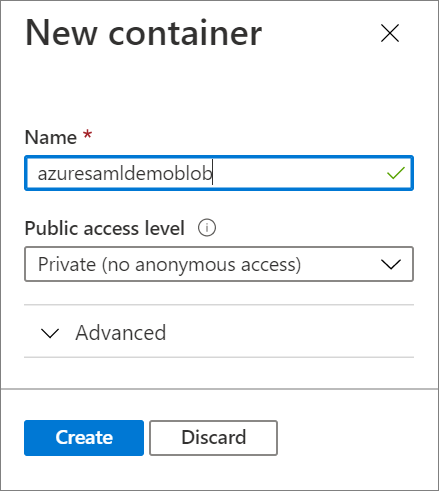
Provide a name for the container and verify that Public access level is set to Private. When you're done, select Create.
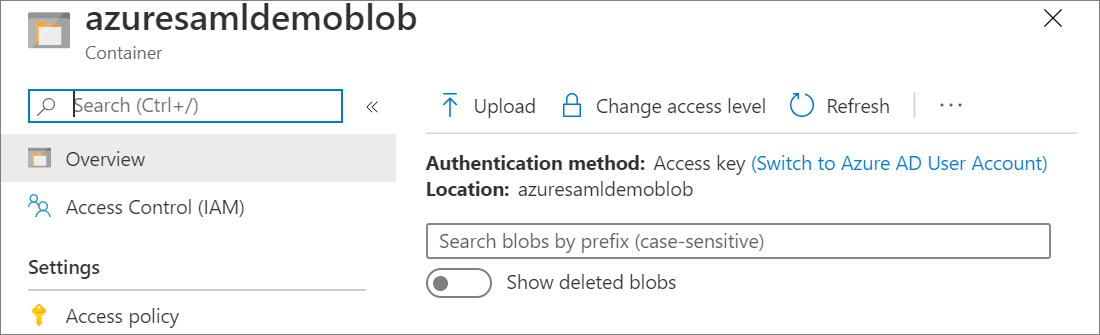
Navigate to the newly created container and select Upload. Upload the sampleinput.csv file that you downloaded earlier.
Now that the sample data is in a blob, you can enable the sentiment analysis model in Cortana Intelligence Gallery.
Go to the predictive sentiment analytics model page in the Cortana Intelligence Gallery.
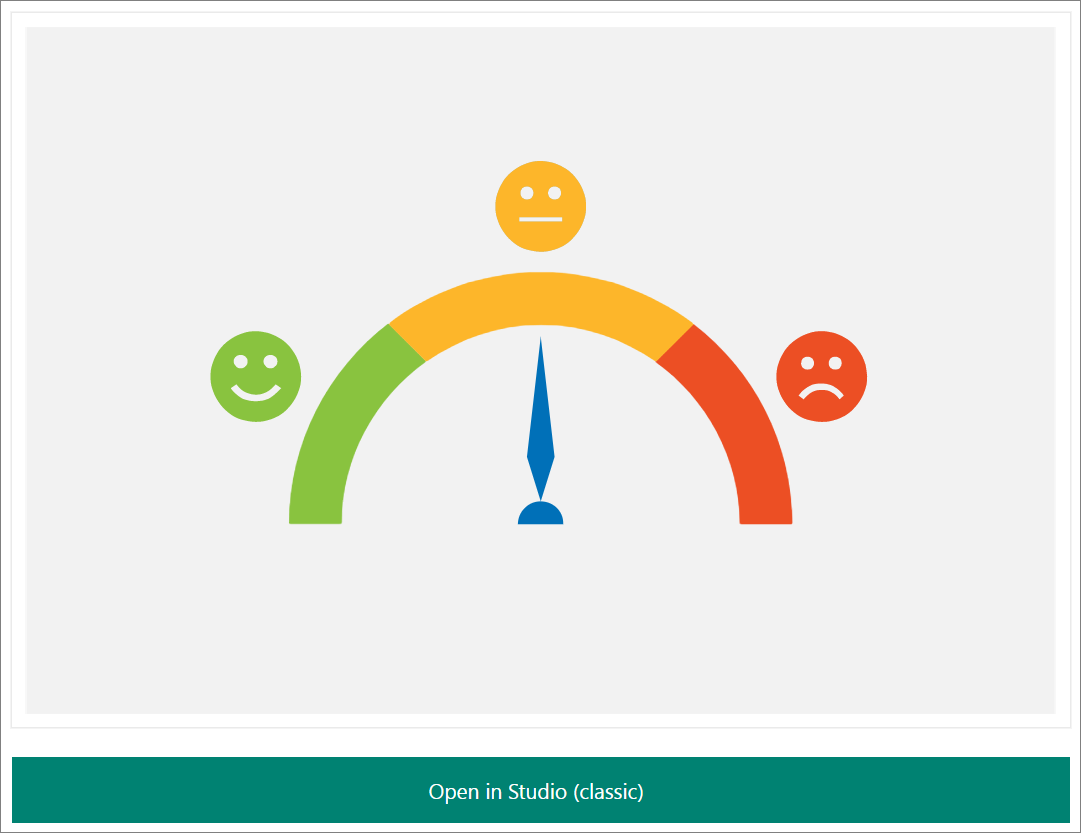
Select Open in Studio (classic).
Sign in to go to the workspace. Select a location.
Select Run at the bottom of the page. The process runs, which takes about a minute.

After the process has run successfully, select Deploy Web Service at the bottom of the page.

To validate that the sentiment analytics model is ready to use, select the Test button. Provide text input such as "I love Microsoft".
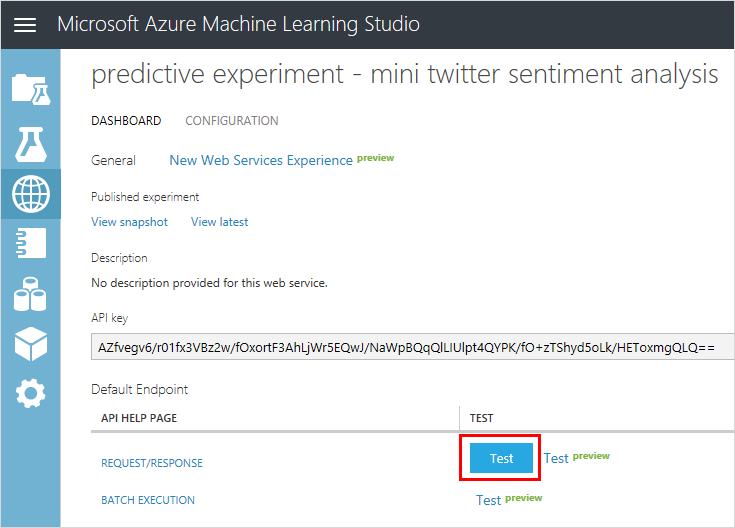
If the test works, you see a result similar to the following example:

In the Apps column, select the Excel 2010 or earlier workbook link to download an Excel workbook. The workbook contains the API key and the URL that you need later to set up the Stream Analytics job.

You can now create a Stream Analytics job that reads the sample tweets from the CSV file in blob storage.
Go to the Azure portal and create a Stream Analytics job. If you're not familiar with this process, see Create a Stream Analytics job by using the Azure portal.
The job gets its input from the CSV file that you uploaded earlier to blob storage.
Navigate to your Stream Analytics job. Under Job Topology, select the Inputs option. Select Add Stream Input >Blob storage.
Fill out the Blob Storage details with the following values:
| Field | Value |
|---|---|
| Input alias | Give your input a name. Remember this alias for when you write your query. |
| Subscription | Select your subscription. |
| Storage account | Select the storage account you made in the previous step. |
| Container | Select the container you created in the previous step. |
| Event serialization format | CSV |
Select Save.
The job sends results to the same blob storage where it gets input.
Navigate to your Stream Analytics job. Under Job Topology, select the Outputs option. Select Add > Blob storage.
Fill out the Blob Storage form with these values:
| Field | Value |
|---|---|
| Input alias | Give your input a name. Remember this alias for when you write your query. |
| Subscription | Select your subscription. |
| Storage account | Select the storage account you made in the previous step. |
| Container | Select the container you created in the previous step. |
| Event serialization format | CSV |
Select Save.
Earlier you published a Studio (classic) model to a web service. In this scenario, when the Stream Analysis job runs, it sends each sample tweet from the input to the web service for sentiment analysis. The Studio (classic) web service returns a sentiment (positive, neutral, or negative) and a probability of the tweet being positive.
In this section, you define a function in the Stream Analysis job. The function can be invoked to send a tweet to the web service and get the response back.
Make sure you have the web service URL and API key that you downloaded earlier in the Excel workbook.
Navigate to your Stream Analytics job. Then select Functions > + Add > Azure ML Studio
Fill out the Azure Machine Learning function form with the following values:
| Field | Value |
|---|---|
| Function alias | Use the name sentiment and select Provide Azure Machine Learning function settings manually, which gives you an option to enter the URL and key. |
| URL | Paste the web service URL. |
| Key | Paste the API key. |
select Save.
Stream Analytics uses a declarative, SQL-based query to examine the input and process it. In this section, you create a query that reads each tweet from input and then invokes the Studio (classic) function to perform sentiment analysis. The query then sends the result to the output that you defined (blob storage).
Return to the Stream Analytics job overview.
Under Job Topology, select Query.
Enter the following query:
WITH sentiment AS (
SELECT text, sentiment1(text) as result
FROM <input>
)

SELECT text, result.[Score]
INTO <output>
FROM sentiment
The query invokes the function you created earlier (sentiment) to perform sentiment analysis on each tweet in the input.
select Save to save the query.
You can now start the Stream Analytics job.
Return to the Stream Analytics job overview.
select Start at the top of the page.
In Start job, select Custom, and then select one day prior to when you uploaded the CSV file to blob storage. When you're done, select Start.
Let the job run for a few minutes until you see activity in the Monitoring box.
If you have a tool that you normally use to examine the contents of blob storage, use that tool to examine the container. Alternatively, do the following steps in the Azure portal:
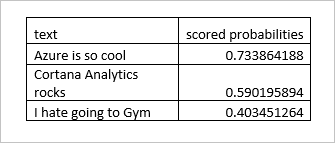
Open the generated CSV file. You see something like the following example:
You also can view Studio (classic) function-related metrics. The following function-related metrics are displayed in the Monitoring box of the job overview:
Събитие
31.03, 23 ч. - 2.04, 23 ч.
Най-голямото събитие за обучение на Fabric, Power BI и SQL. 31 март – 2 април. Използвайте код FABINSIDER, за да спестите $400.
Регистрирайте се днесОбучение
Сертифициране
Microsoft Certified: Azure Data Scientist Associate - Certifications
Manage data ingestion and preparation, model training and deployment, and machine learning solution monitoring with Python, Azure Machine Learning and MLflow.