Configure VPN gateway transit for virtual network peering
This article helps you configure gateway transit for virtual network peering. Virtual network peering seamlessly connects two Azure virtual networks, merging the two virtual networks into one for connectivity purposes. Gateway transit is a peering property that lets one virtual network use the VPN gateway in the peered virtual network for cross-premises or VNet-to-VNet connectivity.
The following diagram shows how gateway transit works with virtual network peering. In the diagram, gateway transit allows the peered virtual networks to use the Azure VPN gateway in Hub-RM. Connectivity available on the VPN gateway, including S2S, P2S, and VNet-to-VNet connections, applies to all three virtual networks.

The transit option can be used with all VPN Gateway SKUs except the Basic SKU.
In hub-and-spoke network architecture, gateway transit allows spoke virtual networks to share the VPN gateway in the hub, instead of deploying VPN gateways in every spoke virtual network. Routes to the gateway-connected virtual networks or on-premises networks propagate to the routing tables for the peered virtual networks using gateway transit.
You can disable the automatic route propagation from the VPN gateway. Create a routing table with the "Disable BGP route propagation" option, and associate the routing table to the subnets to prevent the route distribution to those subnets. For more information, see Virtual network routing table.
Note
If you make a change to the topology of your network and have Windows VPN clients, the VPN client package for Windows clients must be downloaded and installed again in order for the changes to be applied to the client.
Prerequisites
This article requires the following VNets and permissions.
Virtual networks
| VNet | Configuration steps | Virtual network gateway |
|---|---|---|
| Hub-RM | Resource Manager | Yes |
| Spoke-RM | Resource Manager | No |
Permissions
The accounts you use to create a virtual network peering must have the necessary roles or permissions. In the example below, if you were peering the two virtual networks named Hub-RM and Spoke-Classic, your account must have the following roles or permissions for each virtual network:
| VNet | Deployment model | Role | Permissions |
|---|---|---|---|
| Hub-RM | Resource Manager | Network Contributor | Microsoft.Network/virtualNetworks/virtualNetworkPeerings/write |
| Spoke-RM | Resource Manager | Network Contributor | Microsoft.Network/virtualNetworks/peer |
Learn more about built-in roles and assigning specific permissions to custom roles (Resource Manager only).
To add a peering and enable transit
In the Azure portal, create or update the virtual network peering from the Hub-RM. Go to the Hub-RM virtual network. Select Peerings, then + Add to open Add peering.
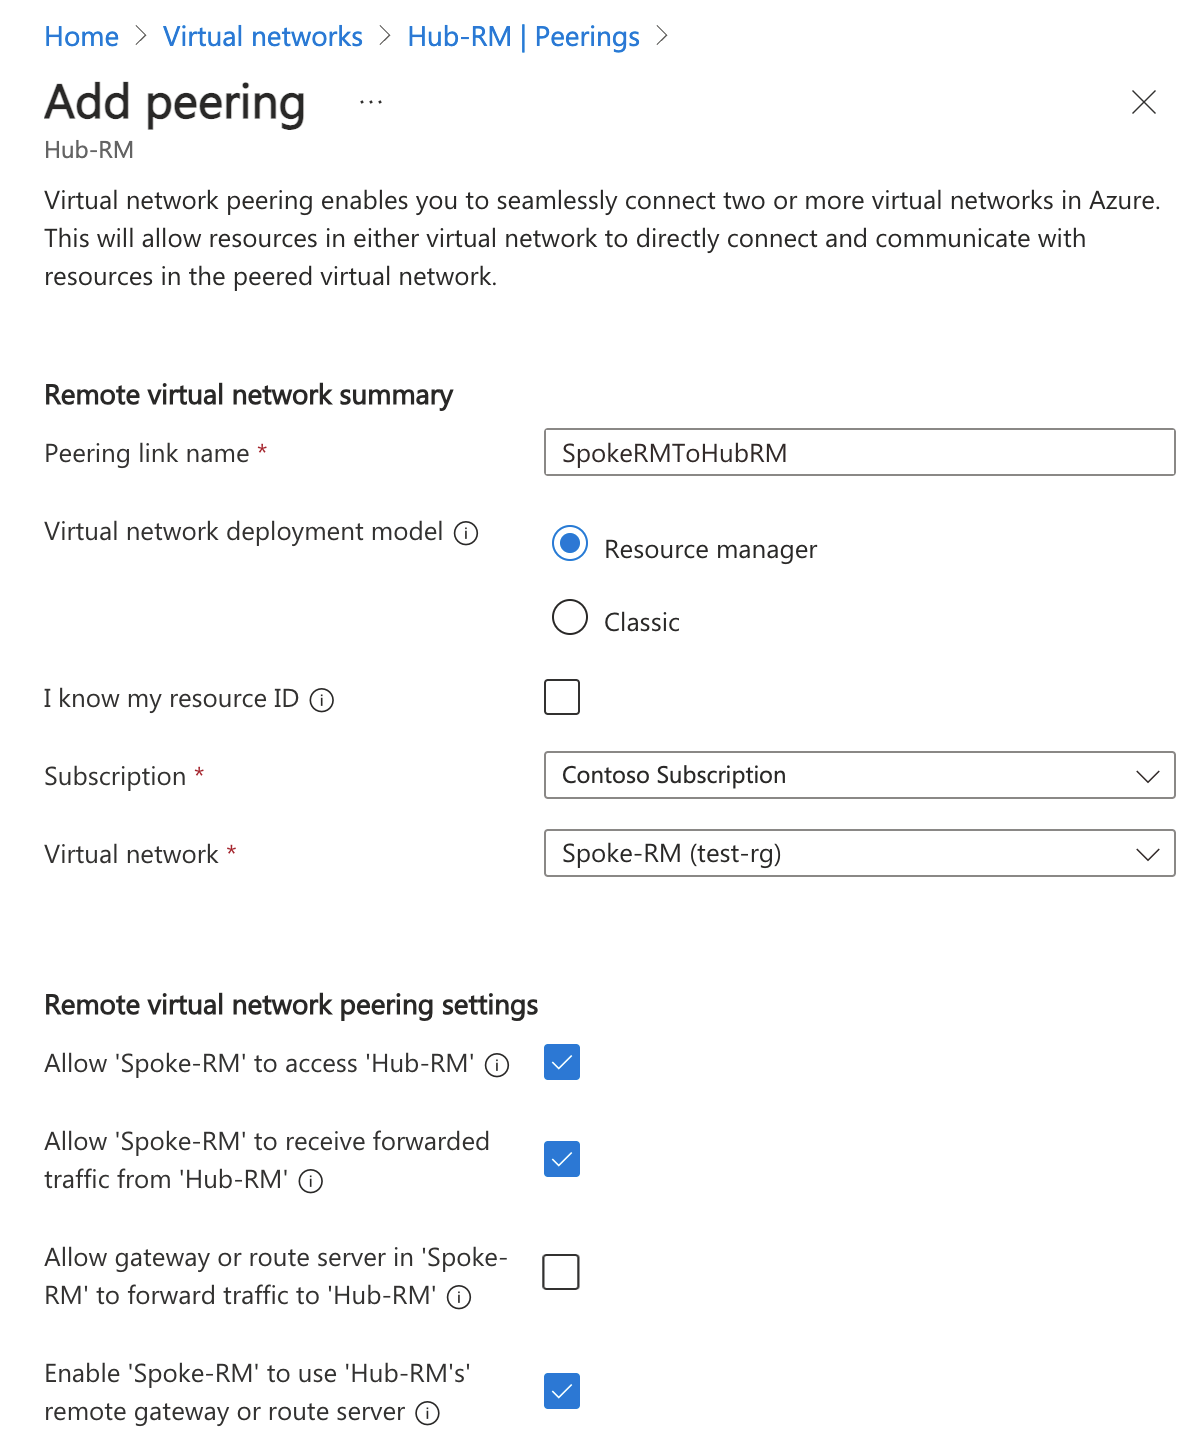
On the Add peering page, configure the values for Remote virtual network summary.
- Peering link name: Name the link. Example: SpokeRMToHubRM
- Virtual network deployment model: Resource Manager
- I know my resource ID: Leave blank. You only need to select this if you don't have read access to the virtual network or subscription you want to peer with.
- Subscription: Select the subscription.
- Virtual Network: Spoke-RM
On the Add peering page, configure the values for Remote virtual network peering settings.
- Allow 'Spoke-RM' to access 'Hub-RM': Leave the default of selected.
- Allow 'Spoke-RM' to receive forwarded traffic from 'Hub-RM': Select the checkbox.
- Allow gateway or route server in the peered virtual network to forward traffic to 'Hub-RM': Leave the default of un-selected.
- Enable 'SpokeRM' to use 'Hub-RM's' remote gateway or route server: Select the checkbox.
On the Add peering page, configure the values for Local virtual network summary.
- Peering link name: Name the link. Example: HubRMToSpokeRM
On the Add peering page, configure the values for Local virtual network peering settings.
- Allow 'Hub-RM' to access the peered virtual network: Leave the default of selected.
- Allow 'Hub-RM' to receive forwarded traffic from the peered virtual network: Select the checkbox.
- Allow gateway or route server in 'Hub-RM' to forward traffic to the peered virtual network: Select the checkbox.
- Enable 'Hub-RM' to use the peered virtual network's remote gateway or route server: Leave the default of un-selected.
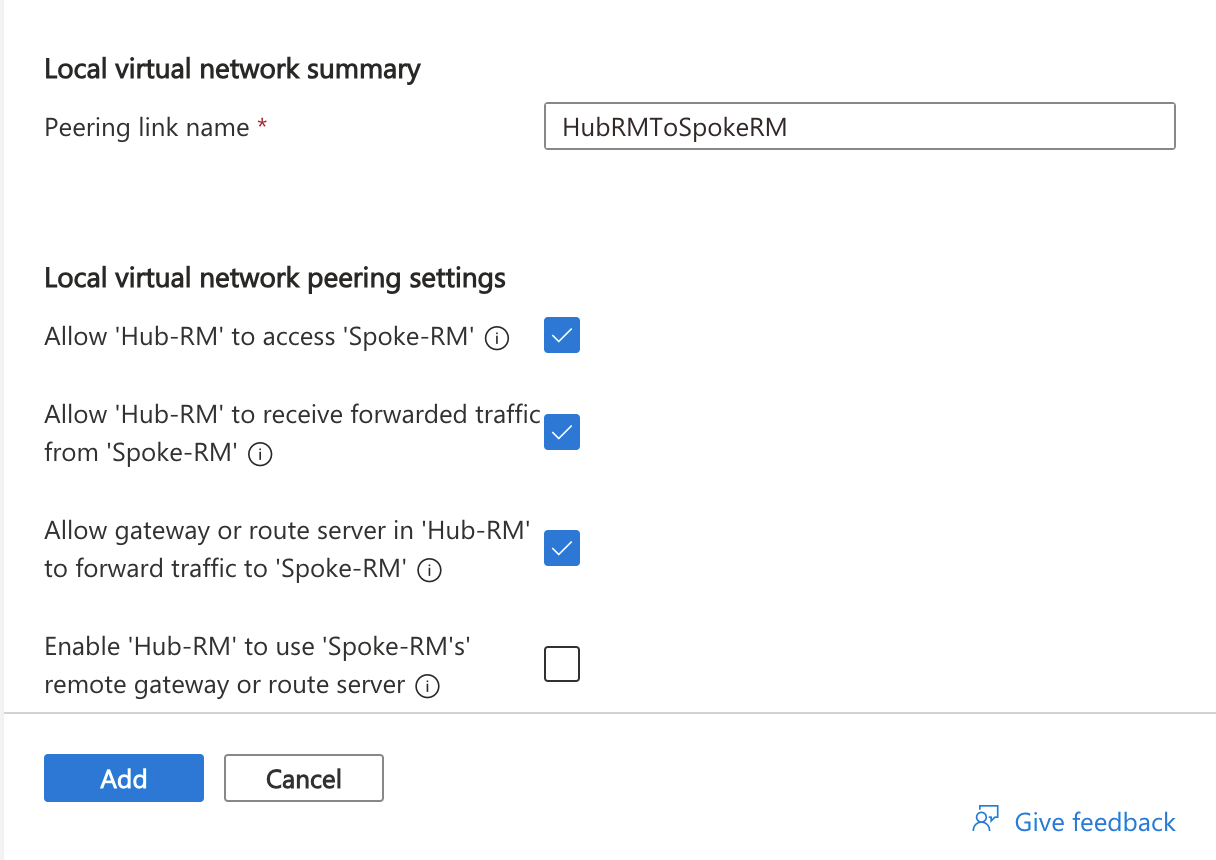
Select Add to create the peering.
Verify the peering status as Connected on both virtual networks.


To modify an existing peering for transit
If you have an already existing peering, you can modify the peering for transit.
Go to the virtual network. Select Peerings and select the peering that you want to modify. For example, on the Spoke-RM VNet, select the SpokeRMtoHubRM peering.
Update the VNet peering.
Enable 'Spoke-RM' to use 'Hub-RM's' remote gateway or route server: Select the checkbox.
Save the peering settings.
PowerShell sample
You can also use PowerShell to create or update the peering. Replace the variables with the names of your virtual networks and resource groups.
$SpokeRG = "SpokeRG1"
$SpokeRM = "Spoke-RM"
$HubRG   = "HubRG1"
$HubRM   = "Hub-RM"

$spokermvnet = Get-AzVirtualNetwork -Name $SpokeRM -ResourceGroup $SpokeRG
$hubrmvnet   = Get-AzVirtualNetwork -Name $HubRM -ResourceGroup $HubRG

Add-AzVirtualNetworkPeering `
  -Name SpokeRMtoHubRM `
  -VirtualNetwork $spokermvnet `
  -RemoteVirtualNetworkId $hubrmvnet.Id `
  -UseRemoteGateways

Add-AzVirtualNetworkPeering `
  -Name HubRMToSpokeRM `
  -VirtualNetwork $hubrmvnet `
  -RemoteVirtualNetworkId $spokermvnet.Id `
  -AllowGatewayTransit
Next steps
- Learn more about virtual network peering constraints and behaviors and virtual network peering settings before creating a virtual network peering for production use.
- Learn how to create a hub and spoke network topology with virtual network peering and gateway transit.
- Create virtual network peering with the same deployment model.
- Create virtual network peering with different deployment models.
Обратна връзка
Очаквайте скоро: През цялата 2024 г. постепенно ще отстраняваме проблемите в GitHub като механизъм за обратна връзка за съдържание и ще го заменим с нова система за обратна връзка. За повече информация вижте: https://aka.ms/ContentUserFeedback.
Подаване и преглед на обратна връзка за