Configure SQL Server Reporting Services for on-premises deployments
Use the steps in this article to configure SQL Server Reporting Services (SSRS) for your Microsoft Dynamics 365 Finance + Operations (on-premises) deployment.
Important
Only follow this guide if your environment was deployed using a base deployment older than Application version 10.0.17 (with Platform update 41).
Open the Reporting Services Configuration Manager application.
Leave the default Server name, which should be the name of the current machine, and the Report Server Instance, MSSQLSERVER.
Click Connect.
Click the Service Account tab and verify that the settings match the following graphic.
Note
SQL Server Reporting Services 2019 no longer allows choosing the Local System account. Instead you need to use NETWORK SERVICE account.
Click the Web Service URL tab and verify that the settings match the following graphic.
Click the Database tab and verify that the Database Name and Credential settings match the following graphic.
Note
You will need to create a new database. To do this, click Change Database, and then verify that the new database name is: DynamicsAxReportServer.
Click the Web Portal URL tab and verify that the settings match the following graphic.
Note
You must click Apply to create and properly configure the Portal.
After the Portal is configured, the Web Portal tab will match the following graphic.
Click the reports URL to view the SQL Server Reporting Services web portal.
When you are in the portal, create a new folder named Dynamics.
In the Reporting Services Configuration Manager, click the E-mail Settings tab and verify that the settings match the following graphic.
Click the Execution Account tab and verify that the settings match the following graphic.
Don't change the default settings on the Encryption Keys tab.
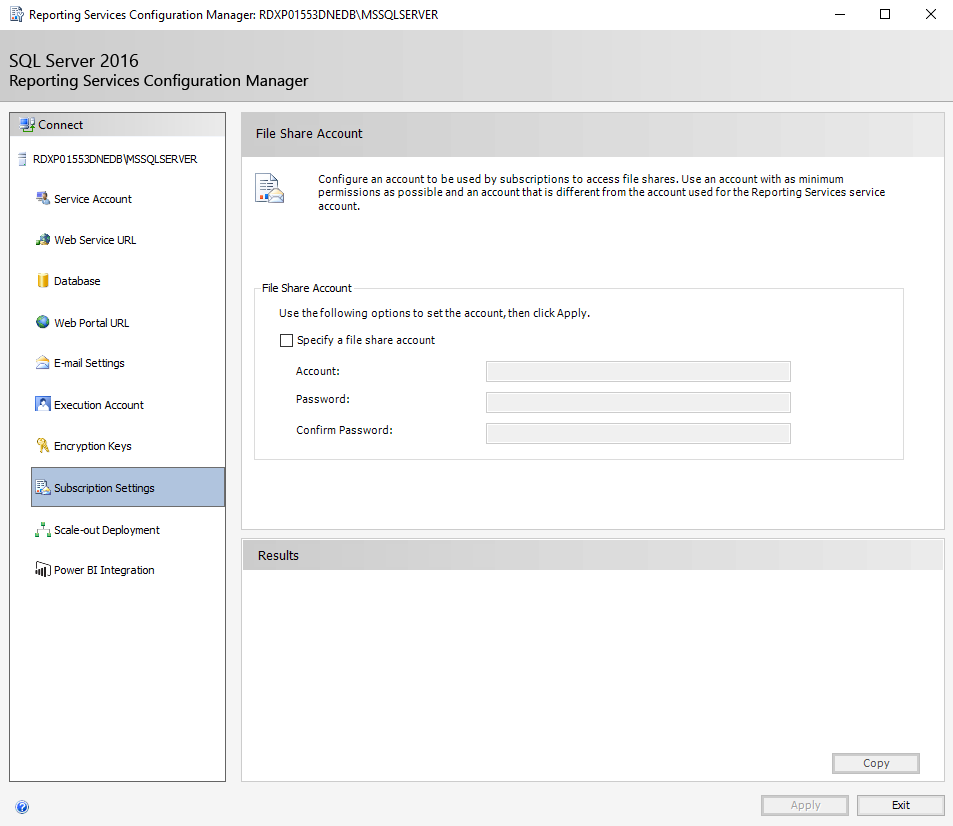
Click the Subscription Settings tab, and verify that the settings match the following graphic.
Don't change the default settings on the Scale-out Deployment tab.
Don't change the default settings on the Power BI Integration tab.
Click Exit to close the Reporting Services Configuration Manager.
For SQL Server 2019 only, you need to manually grant NETWORK SERVICE the permissions to read the private keys of these certificates.
- DataEncryption
- DataSigning
- ReportingService


