Бележка
Достъпът до тази страница изисква удостоверяване. Можете да опитате да влезете или да промените директориите.
Достъпът до тази страница изисква удостоверяване. Можете да опитате да промените директориите.
Note
The following connector article is provided by Cognite, the owner of this connector and a member of the Microsoft Power Query Connector Certification Program. If you have questions regarding the content of this article or have changes you would like to see made to this article, visit the Cognite website and use the support channels there.
Summary
| Item | Description |
|---|---|
| Release State | General Availability |
| Products | Power BI (Semantic models) Power BI (Dataflows) Fabric (Dataflow Gen2) |
| Authentication Types Supported | Organizational account |
Prerequisites
This connector works with Cognite Data Fusion (CDF) environments that are federated with Microsoft Entra ID (formerly Azure Active Directory). To use this connector, you need:
- A valid Cognite Data Fusion project that's federated with Microsoft Entra ID
- A user account with access to the CDF project through Microsoft Entra ID
- Appropriate access permissions within the CDF project
Capabilities supported
- Import
Connect to Cognite Data Fusion from Power Query Desktop
To connect to Cognite Data Fusion from Power Query Desktop, take the following steps:
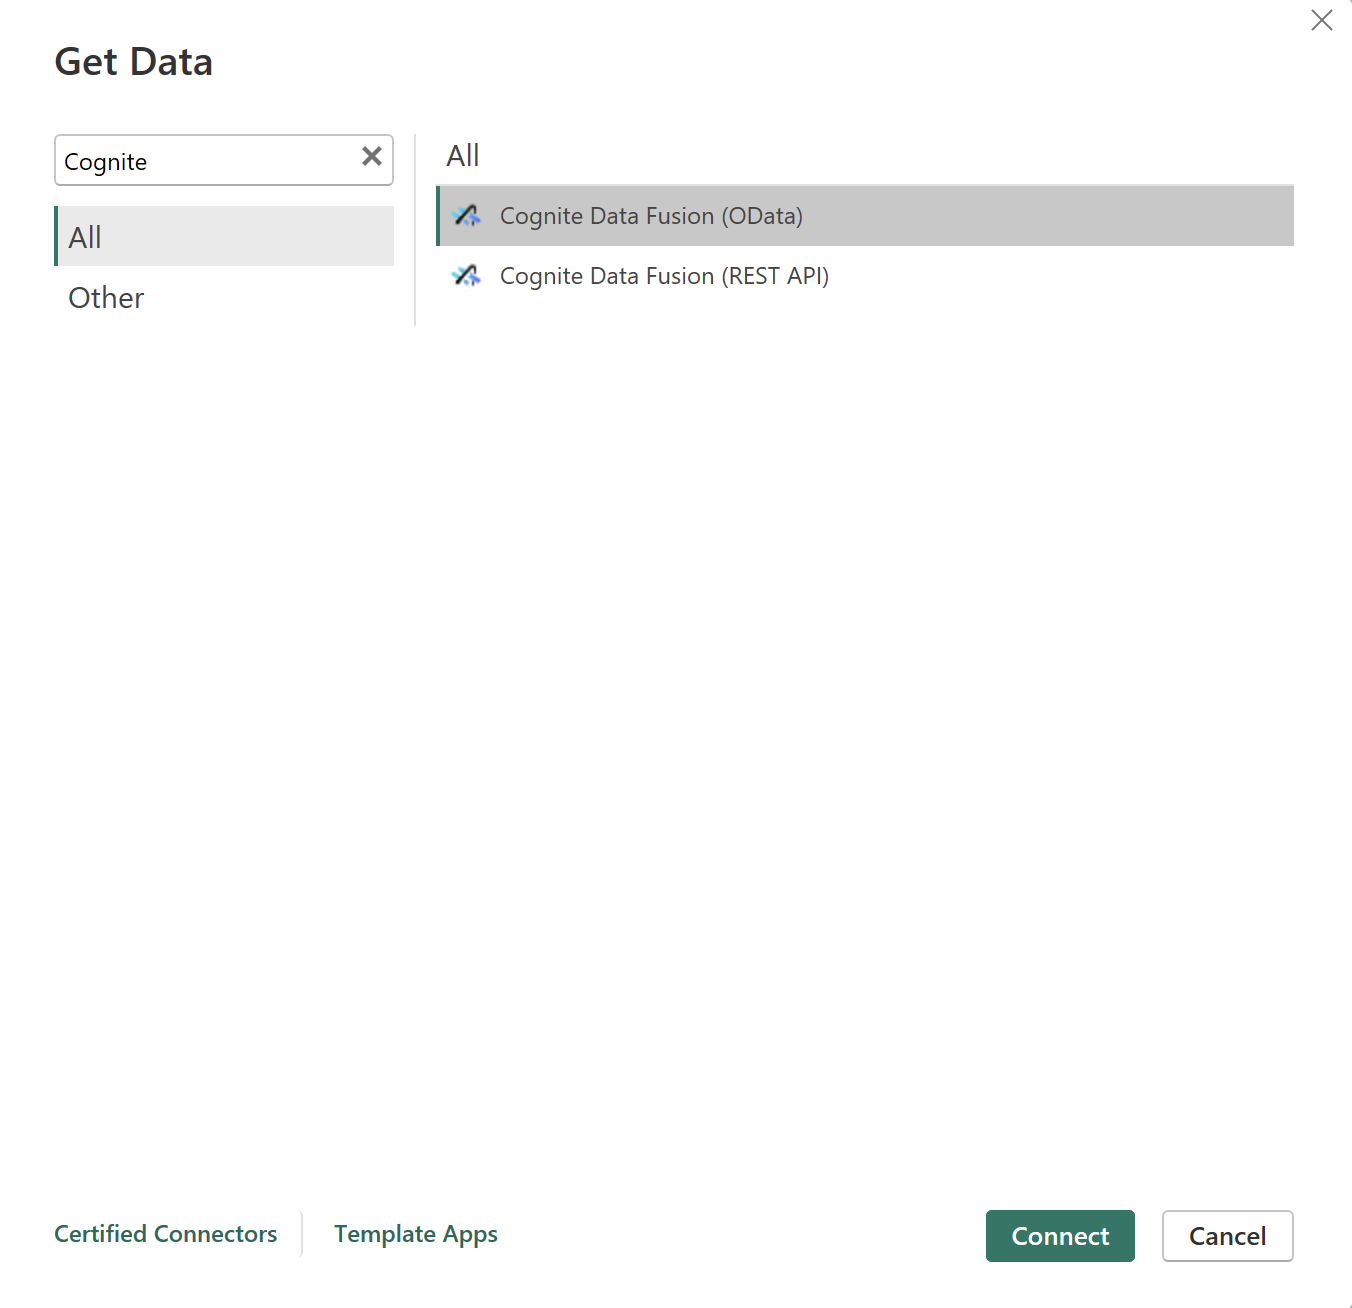
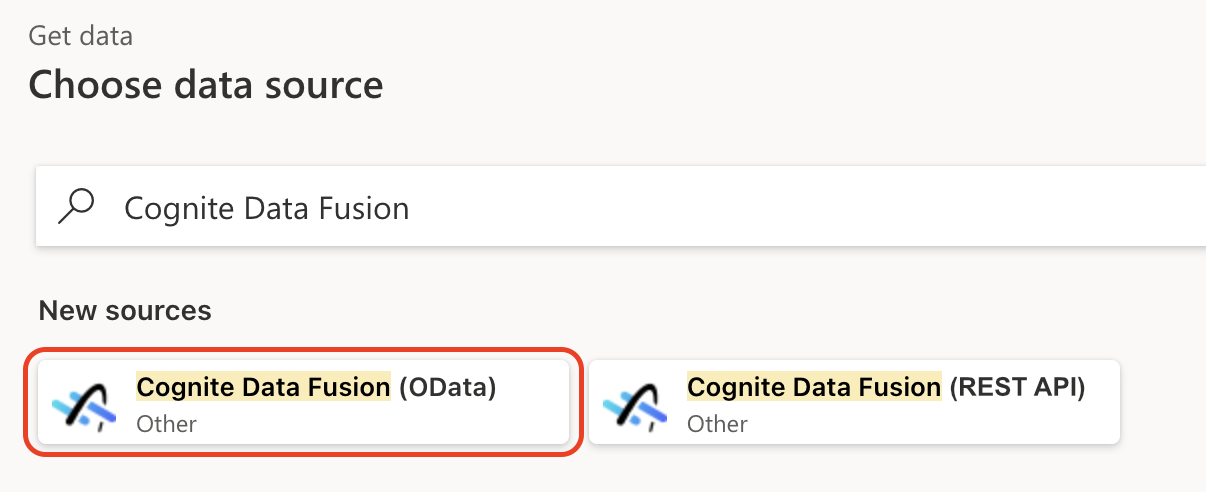
Select Get Data from the Home ribbon in Power BI Desktop. In the Get Data dialog, search for Cognite, select the Cognite Data Fusion (OData) connector, and then select Connect.
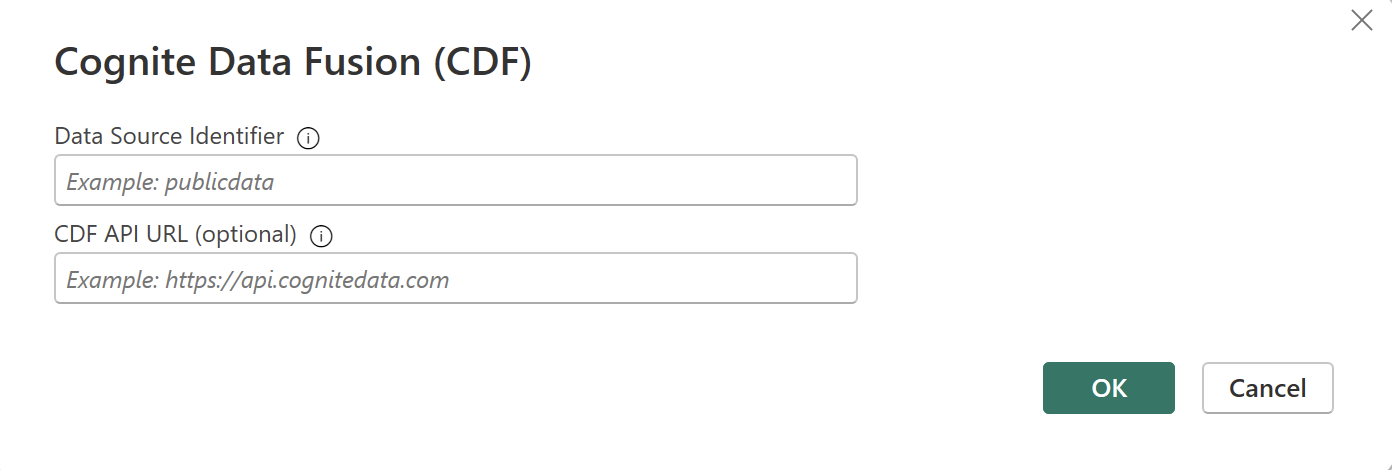
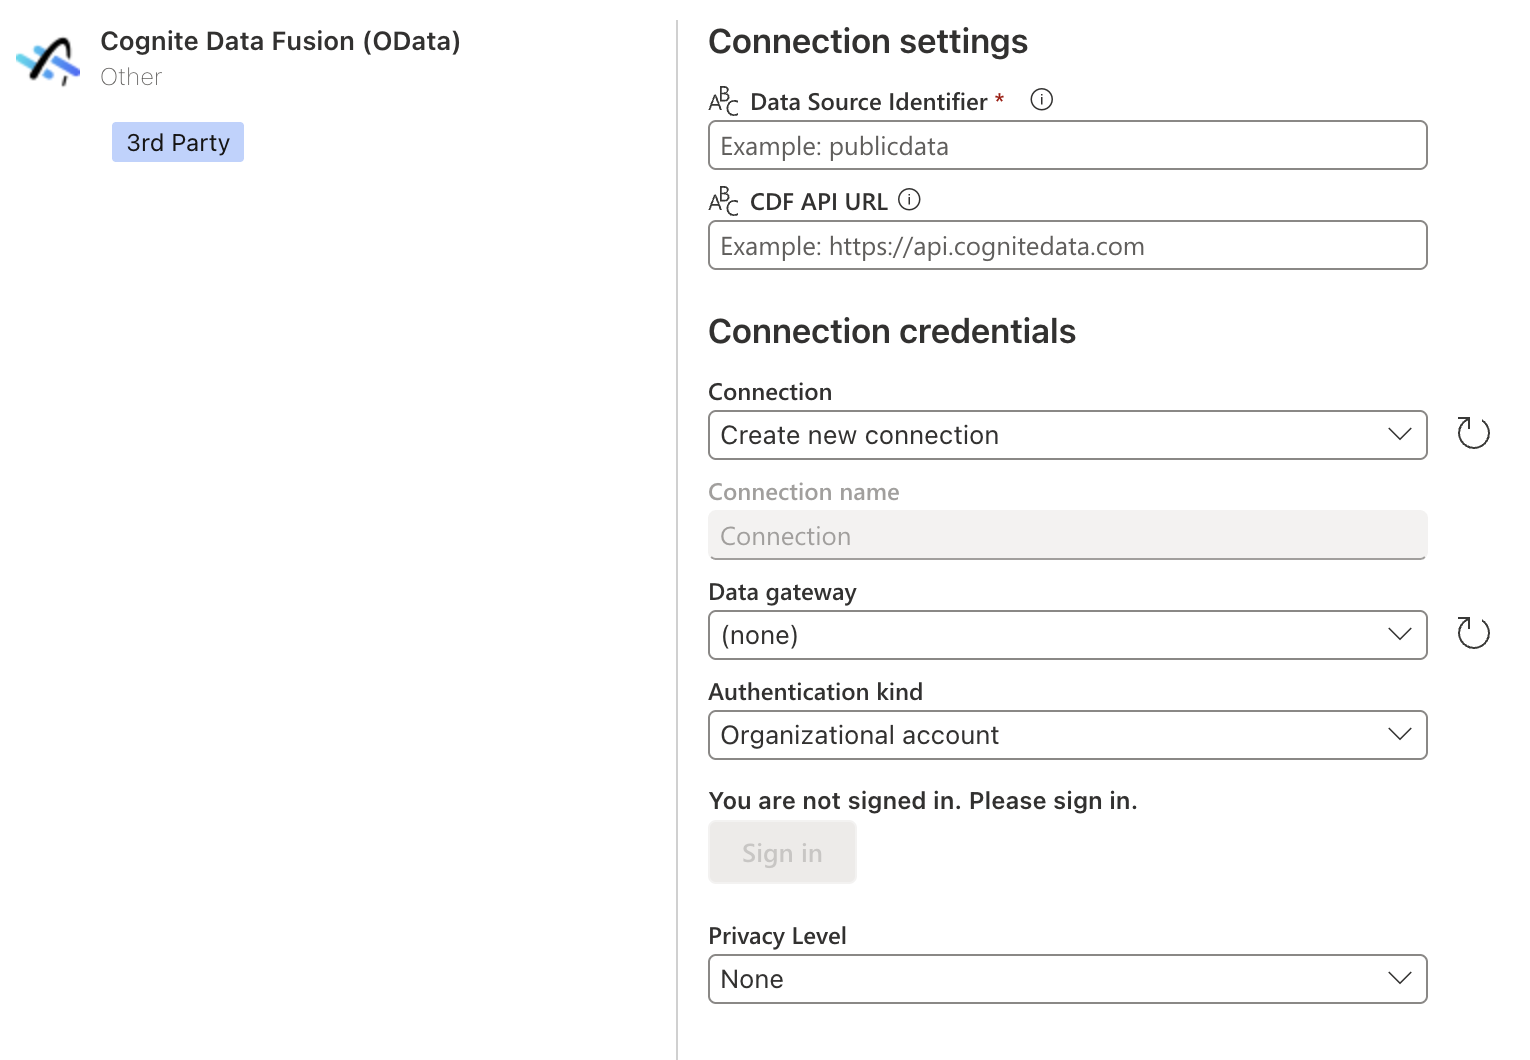
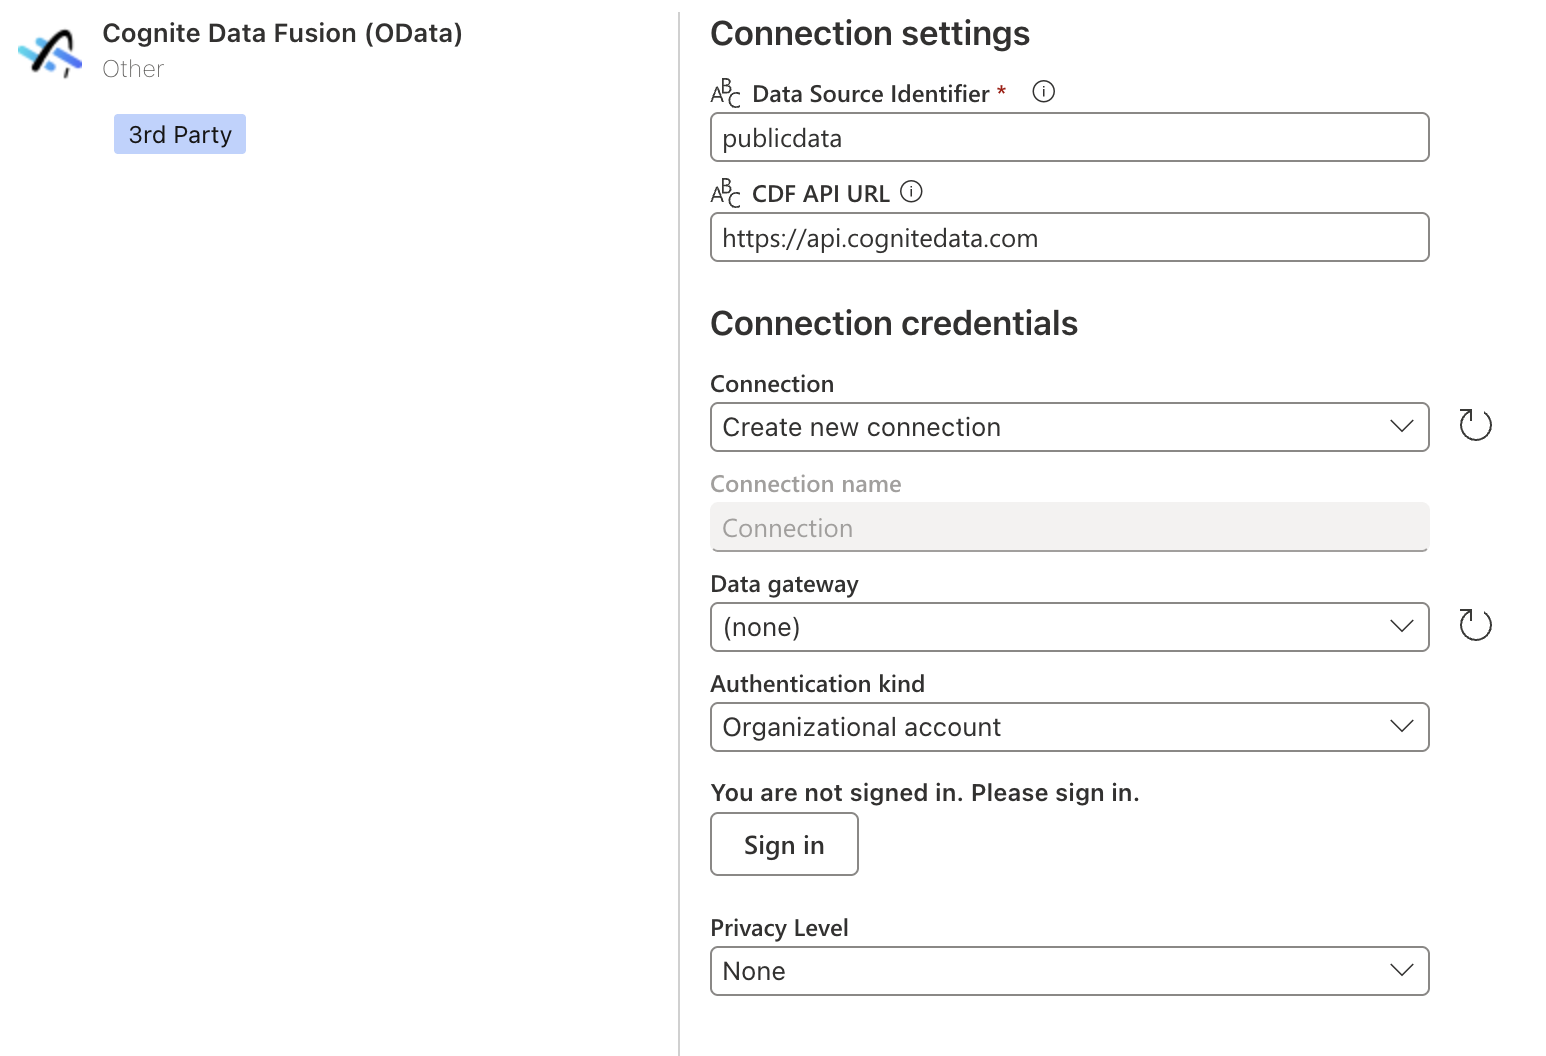
In the Cognite Data Fusion (CDF) dialog, enter details to configure the connection to CDF, and the select OK:
Data Source Identifier: To retrieve data from CDF, enter the CDF project name, a data model URL, or a custom OData query.
- To authenticate as a guest user in Microsoft Entra ID, add the Entra ID tenant ID, for example,
dataSource?tenantId=MyEntraIDTenant.onmicrosoft.com. - If you're passing a custom OData URL that already contains query parameters, then you can add the
tenantIdat the end with this syntax:dataSource?$filter={Filter}&tenantId=MyEntraIDTenant.onmicrosoft.com.
- To authenticate as a guest user in Microsoft Entra ID, add the Entra ID tenant ID, for example,
CDF API URL: Enter the URL to the Cognite API, for example,
https://api.cognitedata.comorhttps://az-eastus-1.cognitedata.com. To access some OData services, you might also need to add the API version, for example,https://bluefield.cognitedata.com/20230821.
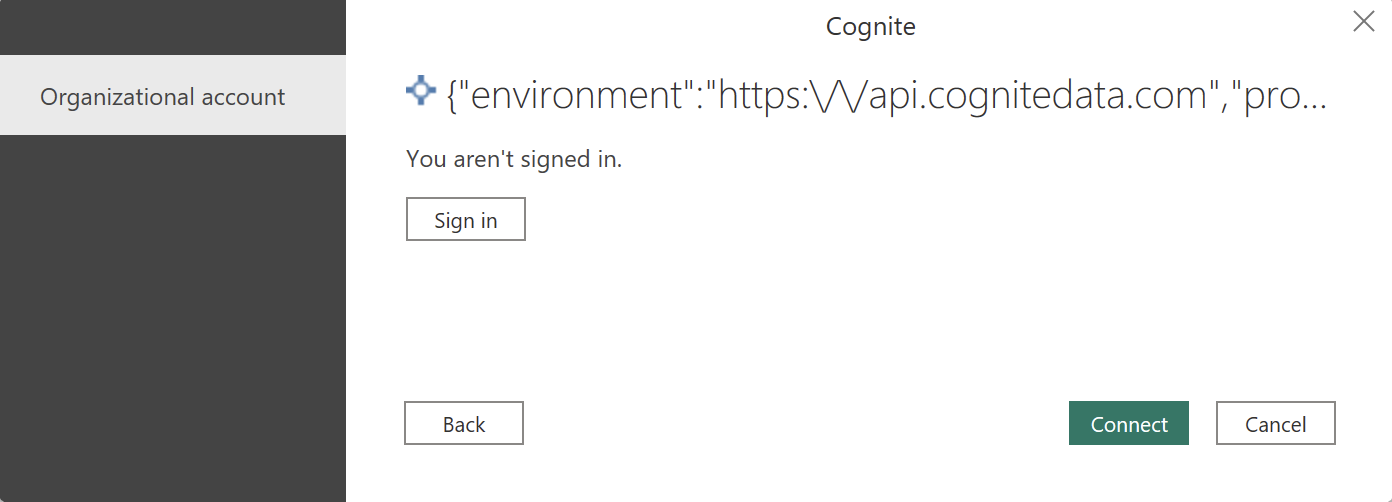
To sign in to your CDF account, select Sign in and follow the authentication process with your Microsoft Entra ID account credentials.
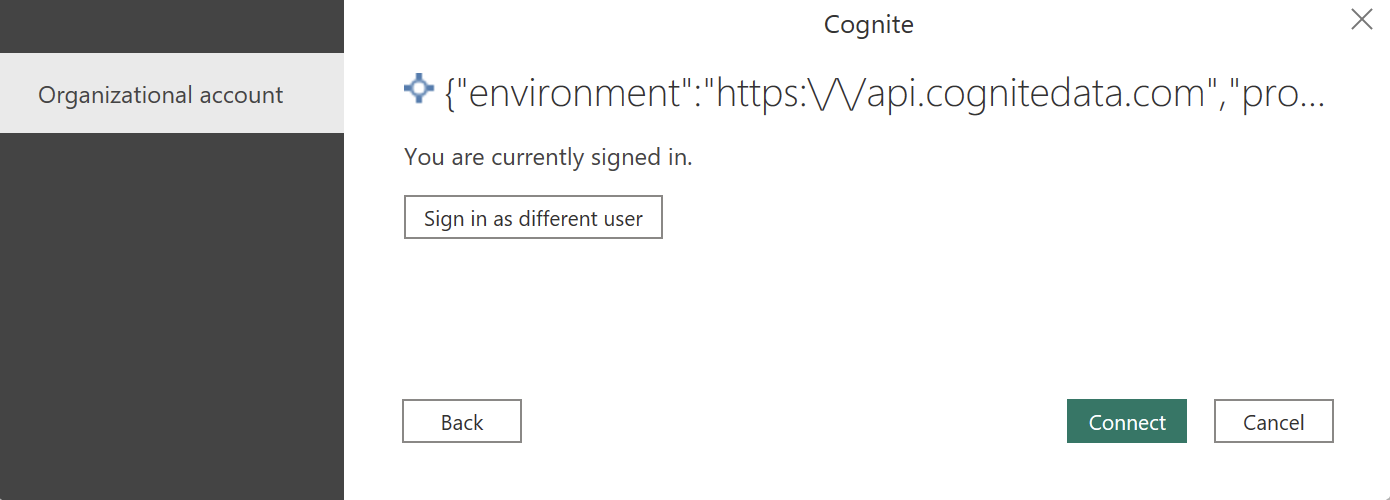
Once you successfully sign in, select Connect.
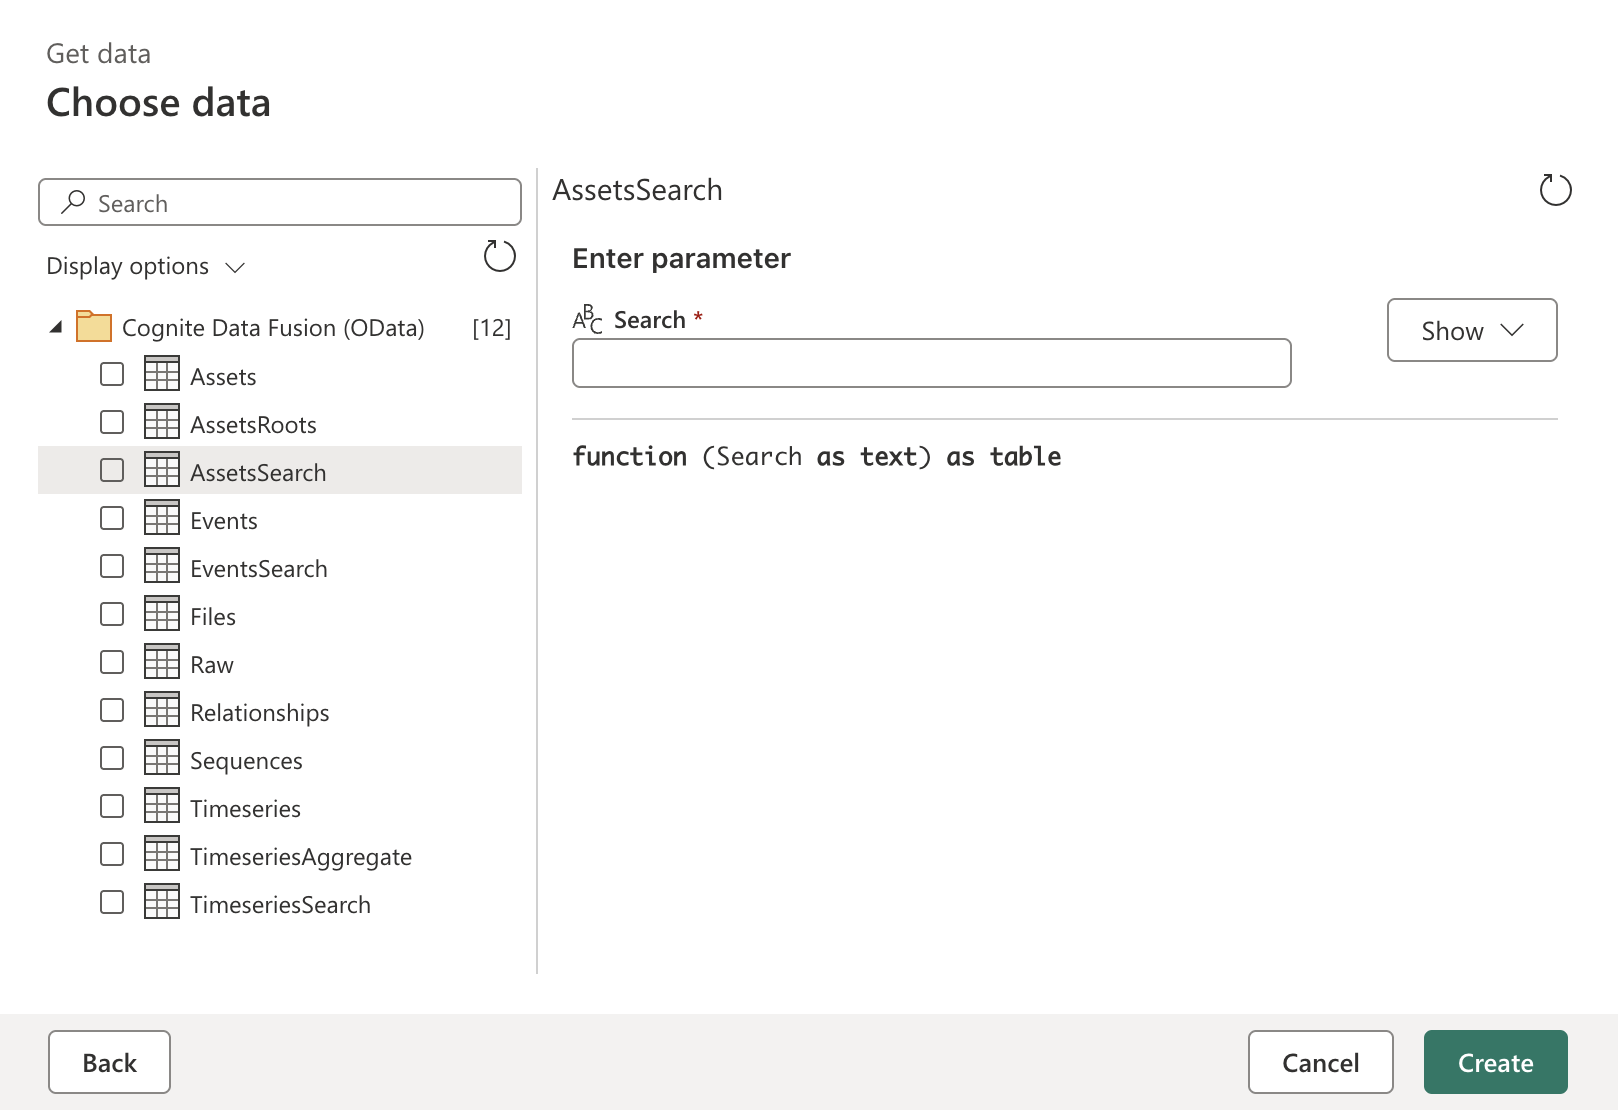
In the Navigator, select the data you want to load or transform.
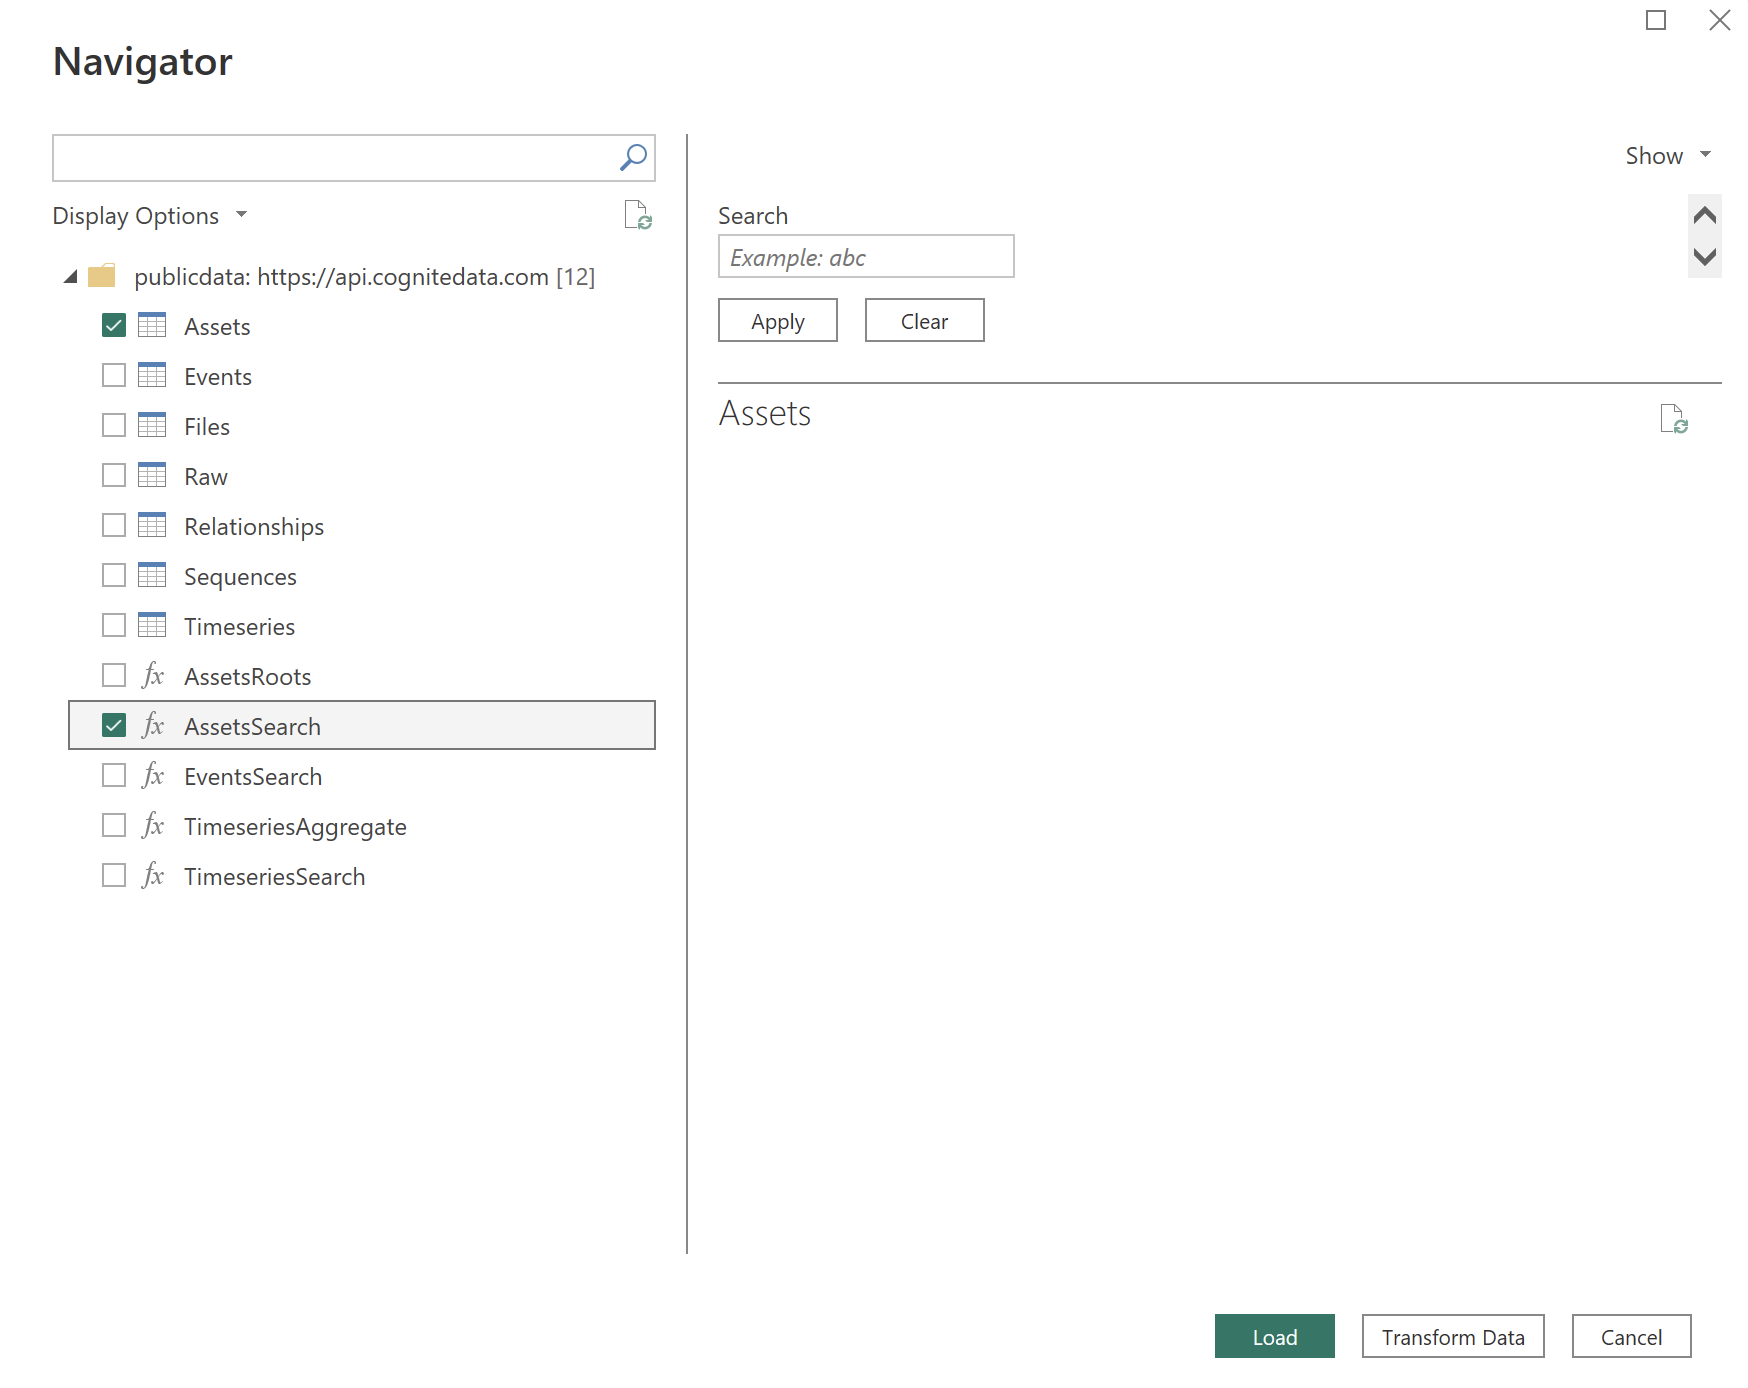
Select Load to import the data directly or Transform Data to open the Power Query editor for data filtering and transformation.
Connect to Cognite Data Fusion from Power Query Online
To connect to Cognite Data Fusion from Power Query Online, take the following steps:
Select the Cognite Data Fusion (OData) option in the get data experience. Different apps have different ways of getting to the Power Query Online get data experience. For more information about how to get to the Power Query Online get data experience from your app, go to Where to get data.
In the Connection settings section, enter the following information:
- Data Source Identifier: To retrieve data from CDF, enter the CDF project name, a data model URL, or a custom OData query.
- To authenticate as a guest user in Microsoft Entra ID, add the Entra ID tenant ID, for example,
dataSource?tenantId=MyEntraIDTenant.onmicrosoft.com. - If you're passing a custom OData URL that already contains query parameters, then you can add the
tenantIdat the end with this syntax:dataSource?$filter={Filter}&tenantId=MyEntraIDTenant.onmicrosoft.com.
- To authenticate as a guest user in Microsoft Entra ID, add the Entra ID tenant ID, for example,
- CDF API URL: Enter the URL to the Cognite API, for example,
https://api.cognitedata.comorhttps://az-eastus-1.cognitedata.com. To access some OData services, you might also need to add the API version, for example,https://bluefield.cognitedata.com/20230821.
- Data Source Identifier: To retrieve data from CDF, enter the CDF project name, a data model URL, or a custom OData query.
In the Connection credentials section:
- If you're connecting to CDF for the first time, select Create new connection from the Connection dropdown menu.
- If you connected previously, you can select an existing connection from the Connection dropdown menu.
- For the data gateway: If your organization uses a gateway to access CDF, select the appropriate gateway from the dropdown menu. If data gateway is set to (none), the connector uses the Power BI service to connect to CDF directly.
- You can also select the Privacy Level for the data connection at this stage.
- For new connections, select Sign in and follow the authentication process.
Once you successfully sign in, select Next.
In the Choose data section, select the data you require, and then select Create to open the Power Query editor and retrieve data from CDF.
Additional information
- Connect to Cognite Data Fusion in Power BI using the Cognite Data Fusion (OData) connector.