Tutorial: Create a picture viewer Windows Forms App (.NET Framework)
In this series of three tutorials, you create a Windows Forms application that loads a picture and displays it. The Visual Studio Integrated Design Environment (IDE) provides the tools you need to create the app.
In this first tutorial, you learn how to:
- Create a Visual Studio project that uses Windows Forms
- Add a layout element
- Run your application
To create a new Windows Forms App with .NET, follow the tutorial Create a Windows Forms app with .NET. See the Desktop Guide on Windows Forms .NET to learn more.
Prerequisites
- You need Visual Studio to complete this tutorial. Visit the Visual Studio downloads page for a free version.
- The .NET desktop development workload. To verify or install this workload in Visual Studio, select Tools > Get Tools and Features. For more information, see Change workloads or individual components.
Create your Windows Forms project
When you create a picture viewer, the first step is to create a Windows Forms App project.
Open Visual Studio.
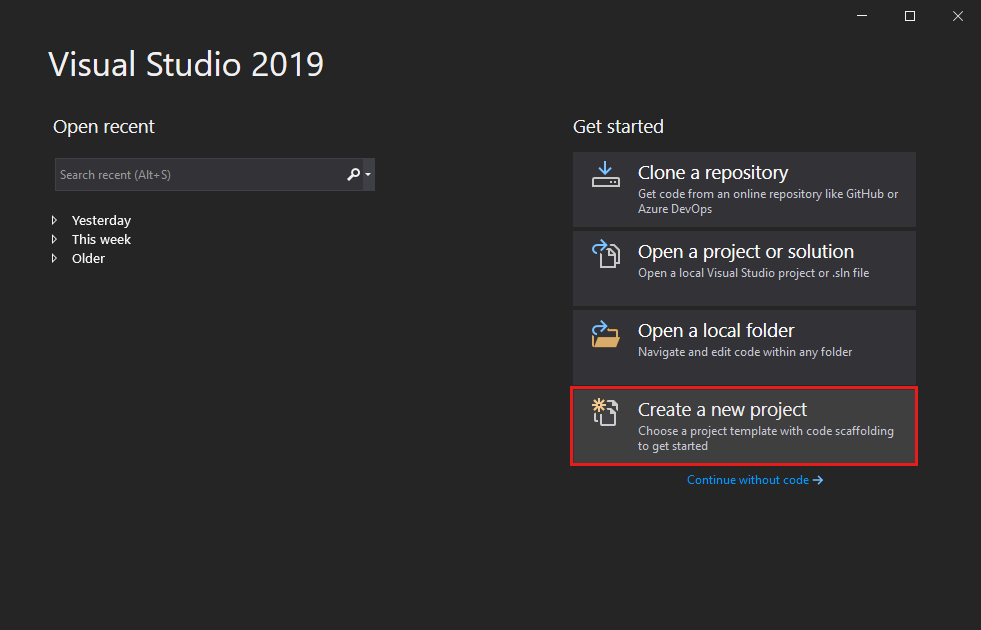
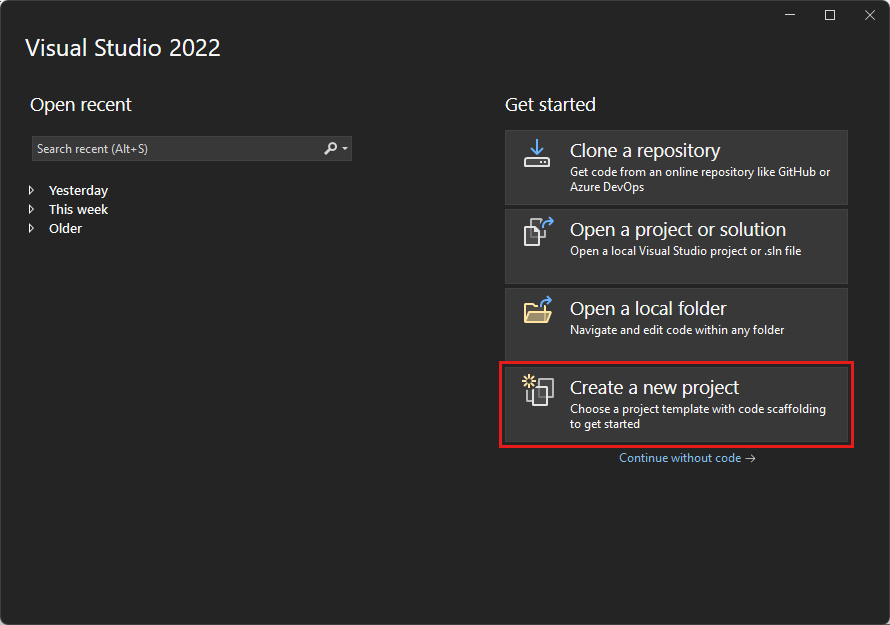
On the start window, select Create a new project.
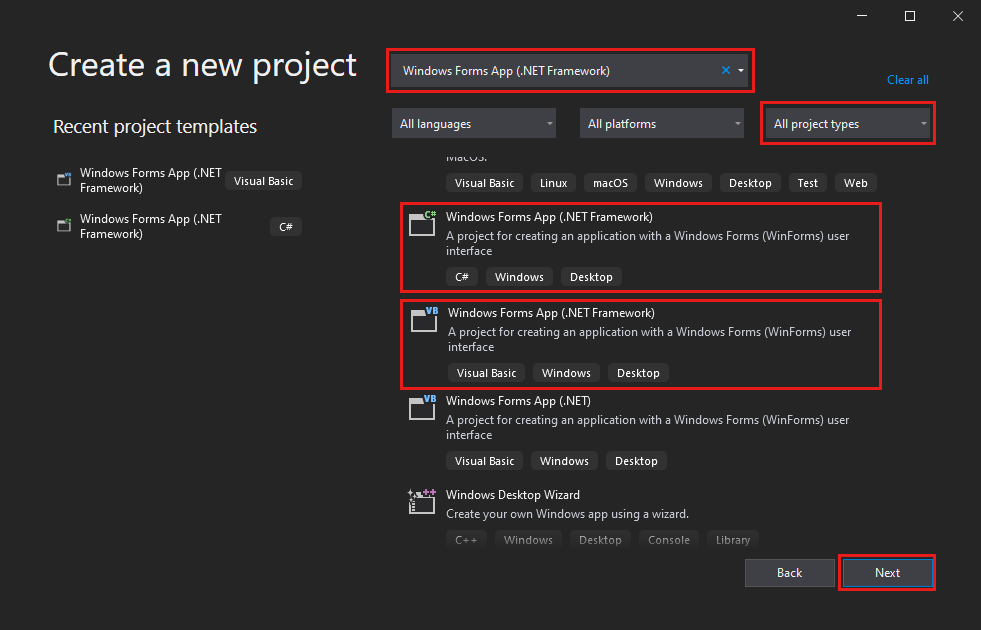
On the Create a new project window, search for Windows Forms. Then select Desktop from the Project type list.
Select the Windows Forms App (.NET Framework) template for either C# or Visual Basic, and then select Next.
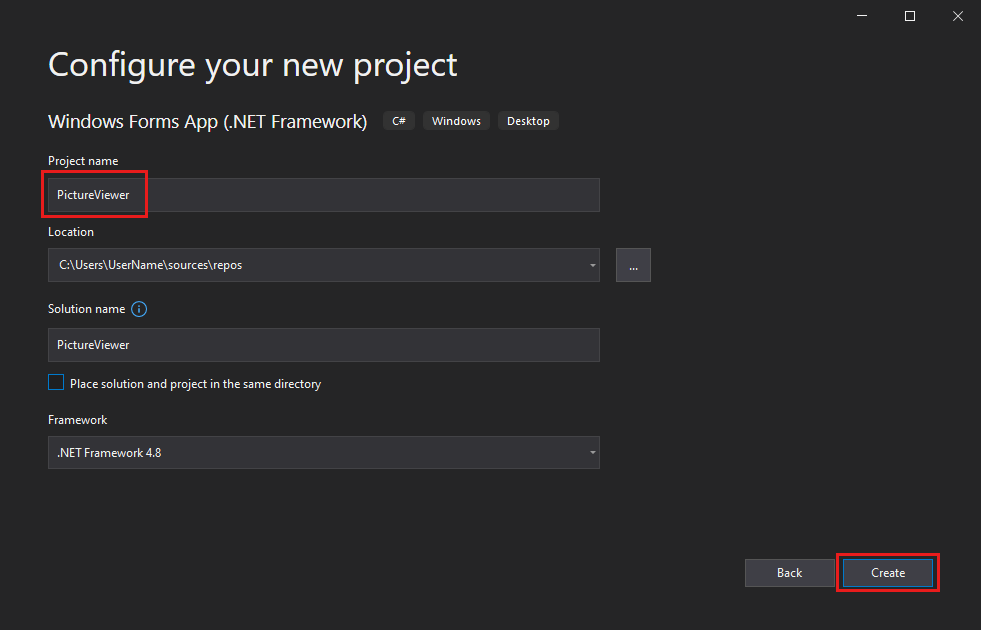
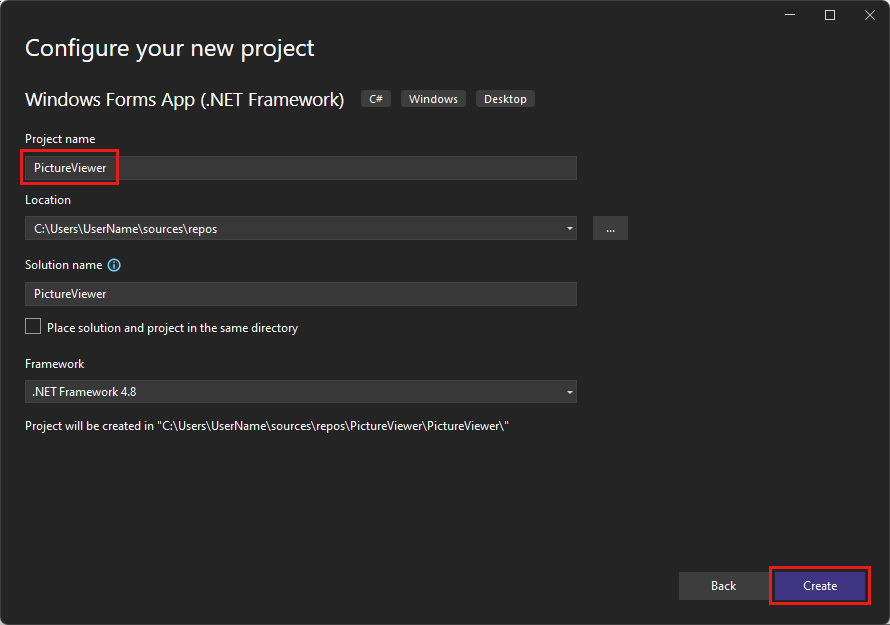
In the Configure your new project window, name your project PictureViewer, then select Create.
Open Visual Studio.
On the start window, select Create a new project.
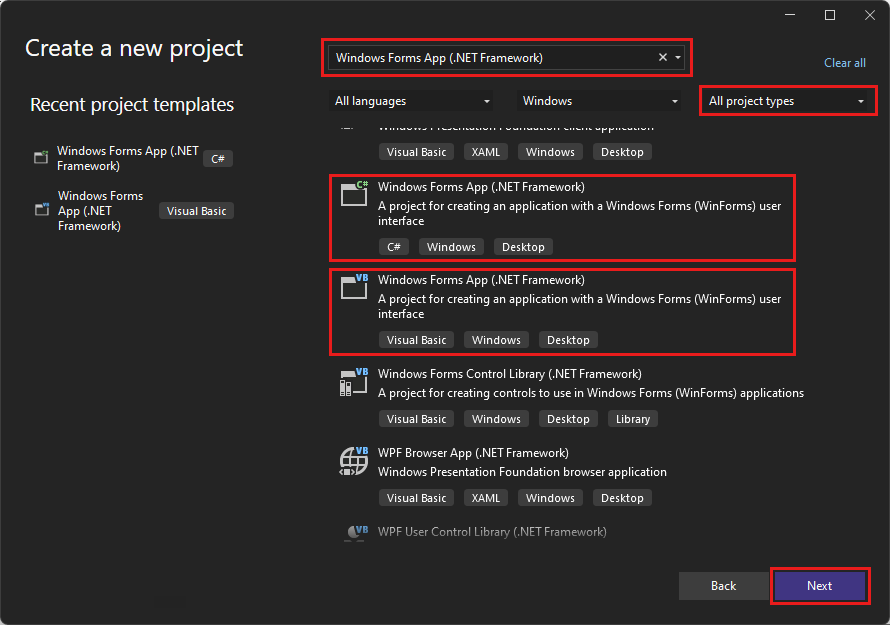
On the Create a new project window, search for Windows Forms. Then select Desktop from the Project type list.
Select the Windows Forms App (.NET Framework) template for either C# or Visual Basic, and then select Next.
In the Configure your new project window, name your project PictureViewer, then select Create.
Visual Studio creates a solution for your app. A solution is a container for all of the projects and files needed by your app.
At this point, Visual Studio displays an empty form in the Windows Form Designer.
Add a layout element
Your picture viewing app contains a picture box, a checkbox, and four buttons, which you add in the next tutorial. The layout element controls their location on the form. This section shows you how to change the title of your form, resize the form, and add a layout element.
In your project, select the Windows Forms Designer. The tab reads Form1.cs [Design] for C# or Form1.vb [Design] for Visual Basic.
Select anywhere in Form1.
The Properties window now displays properties for the form. The Properties window is usually in the lower right of Visual Studio. This section controls various properties, such as foreground and background color, title text that appears at the top of the form, and the size of the form.
If you don't see Properties, select View > Properties Window.
Find the Text property in the Properties window. Depending on how the list is sorted, you might need to scroll down. Enter the value Picture Viewer, and then choose Enter.
Your form now has the text Picture Viewer in its title bar.
Note
You can display properties by category or alphabetically. Use the buttons on the Properties window to switch back and forth.
Select the form, again. Select the form's lower-right drag handle. The handle is a small white square in the lower-right corner of the form.
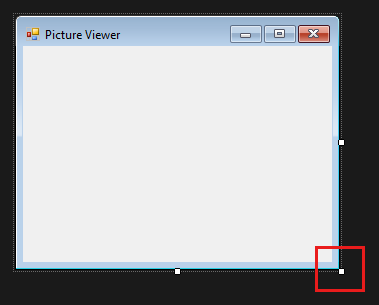
Drag the handle to resize the form so the form is wider and a bit taller. If you look at the Properties window, the Size property is different. You can also change the size of the form by changing the Size property.
On the left side of the Visual Studio IDE, select the Toolbox tab. If you don't see it, select View > Toolbox from the menu bar or Ctrl+Alt+X.
Select the small triangle symbol next to Containers to open the group.
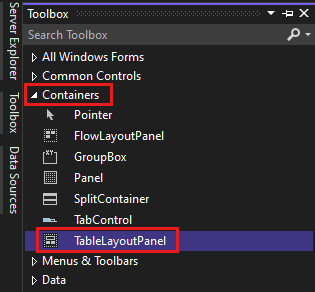
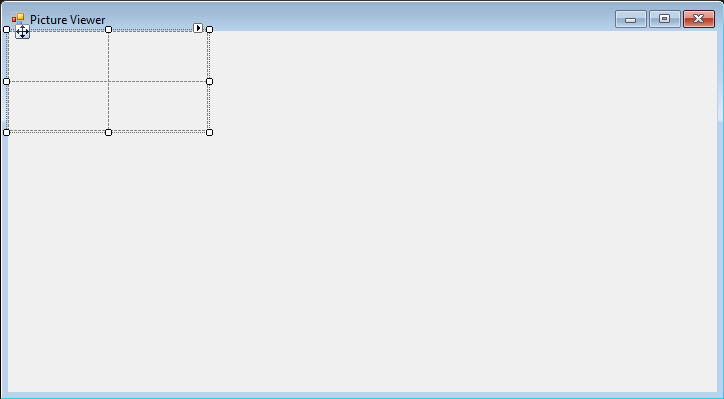
Double-click TableLayoutPanel in the Toolbox. You can also drag a control from the toolbox onto the form. The TableLayoutPanel control appears in your form.
Note
After you add your TableLayoutPanel, if a window appears inside your form with the title TableLayoutPanel Tasks, select anywhere inside the form to close it.
Select the TableLayoutPanel. You can verify what control is selected by looking at the Properties window.

With the TableLayoutPanel selected, find the Dock property, which has the value None. Select the dropdown arrow and then select Fill, which is the large button in the middle of the dropdown menu.
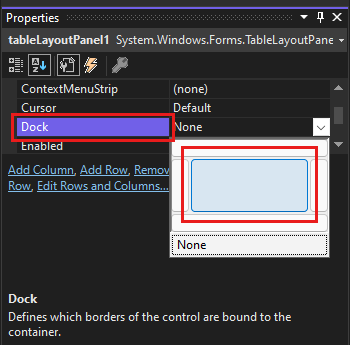
Docking refers to how a window is attached to another window or area.
The TableLayoutPanel now fills the entire form. If you resize the form again, the TableLayoutPanel stays docked, and resizes itself to fit.
In the form, select the TableLayoutPanel. In the upper-right corner, there's a small black triangle button.
Select the triangle to display the control's task list.
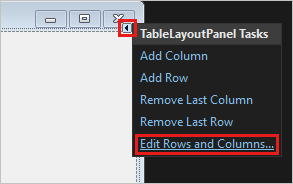
Select Edit Rows and Columns to display the Column and Row Styles dialog box.
Select Column1 and set its size to 15 percent. Be sure the Percent option is selected.
Select Column2 and set it to 85 percent.
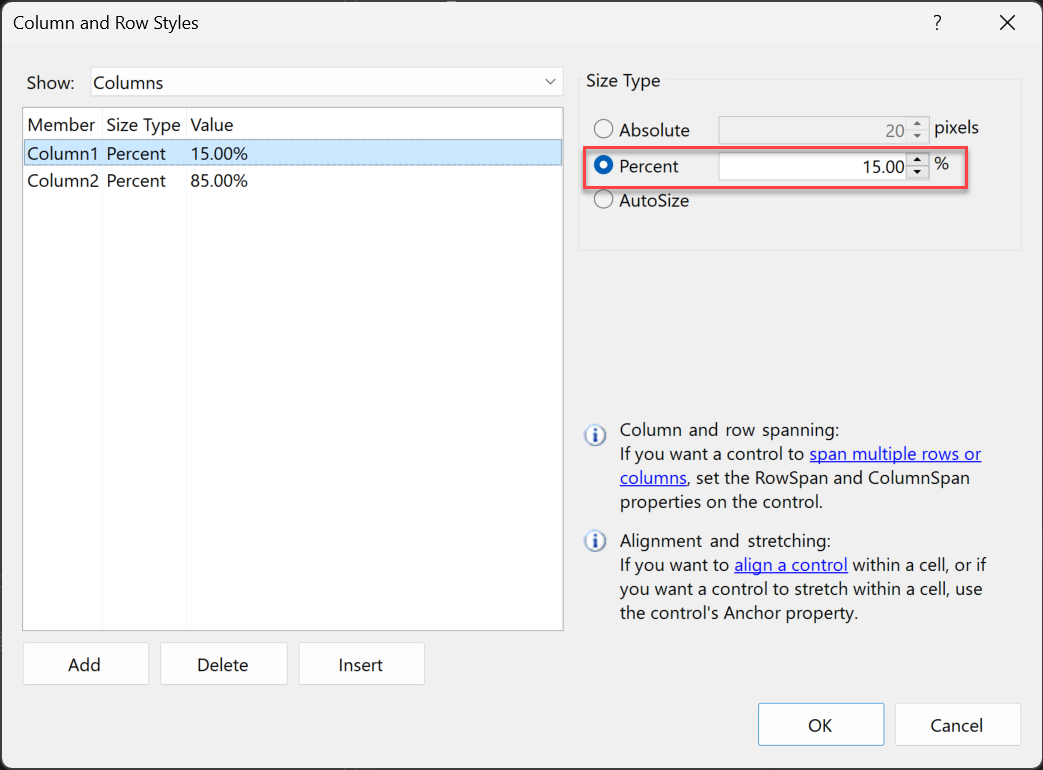
From Show at the top of the Column and Row Styles dialog box, select Rows. Set Row1 to 90 percent and Row2 to 10 percent. Select OK to save your changes.
Your TableLayoutPanel now has a large top row, a small bottom row, a small left column, and a large right column.
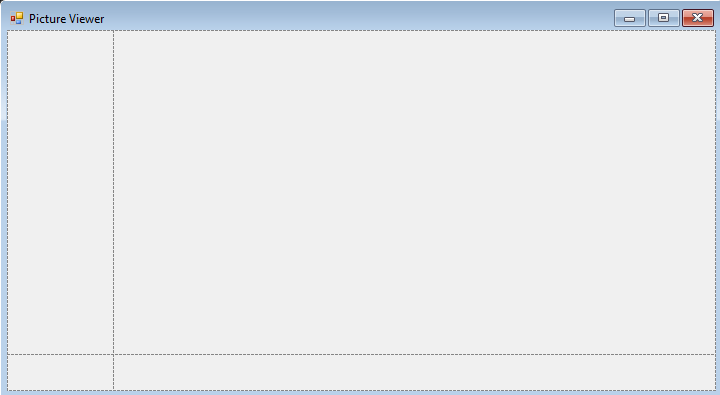
Your layout is complete.
Note
Before you run your application, save your app by choosing the Save All toolbar button. Alternatively, to save your app, choose File > Save All from the menu bar, or press Ctrl+Shift+S. It's a best practice to save early and often.
Run your app
When you create a Windows Forms App project, you build a program that runs. At this stage, your Picture Viewer app doesn't do much. For now, it displays an empty window that shows Picture Viewer in the title bar.
To run the app, follow these steps.
Use one of the following methods:
- Select the F5 key.
- On the menu bar, select Debug > Start Debugging.
- On the toolbar, select the Start button.
Visual Studio runs your app. A window with the title Picture Viewer appears.
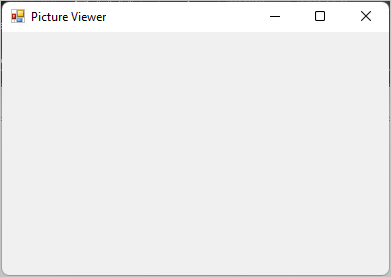
Look at the Visual Studio IDE toolbar. More buttons appear on the toolbar when you run an application. These buttons let you do things like stop and start your app, and help you track down any errors.

Use one of the following methods to stop your app:
- On the toolbar, select the Stop Debugging button.
- On the menu bar, select Debug > Stop Debugging.
- From the keyboard, enter Shift+F5.
- Select X in the upper corner of the Picture Viewer window.
When you run your app from inside the Visual Studio IDE, it's called debugging. You run your application to find and fix bugs. You follow the same procedure to run and debug other programs. To learn more about debugging, see First look at the debugger.
Next step
Advance to the next tutorial to learn how to add controls to your Picture Viewer program.
