Tutorial: Learn to use the code editor with Visual Basic
In this tutorial, you'll try out the code editor in Visual Studio. You'll add code to a file to learn some of the ways that Visual Studio makes writing, navigating, and understanding Visual Basic code easier.
This article assumes you're already familiar with Visual Basic. If you aren't, you might want to start with a tutorial like Create a simple Visual Basic (VB) console app.
To complete this tutorial, make sure you have the Visual Basic settings selected for Visual Studio. For information about selecting settings for the integrated development environment (IDE), see Select environment settings.
If you haven't already installed Visual Studio, go to the Visual Studio downloads page to install it for free.
Create a code file
Start by creating a file and adding some code to it.
Open Visual Studio. Press Esc or select Continue without code on the start window to open the development environment.
On the File menu on the menu bar, select New File.
In the New File dialog, under the General category, select Visual Basic Class, and then select Open.
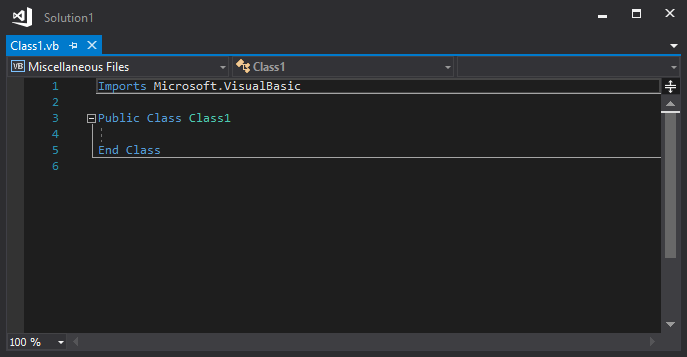
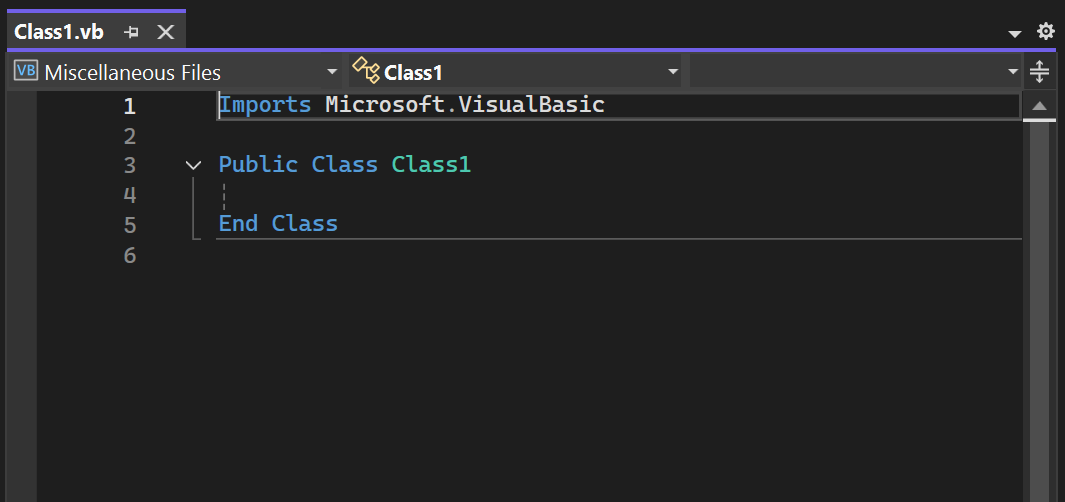
A new file opens in the editor with the skeleton of a Visual Basic class. (You can already notice that you don't have to create a full Visual Studio project to gain some of the benefits that the code editor provides, such as syntax highlighting. All you need is a code file.)
Open Visual Studio. Press Esc or select Continue without code on the start window to open the development environment.
On the File menu on the menu bar, select New File.
In the New File dialog, under the General category, select Visual Basic Class, and then select Open.
A new file opens in the editor with the skeleton of a Visual Basic class. (You can already notice that you don't have to create a full Visual Studio project to gain some of the benefits that the code editor provides, such as syntax highlighting. All you need is a code file.)
Use code snippets
Visual Studio provides code snippets that you can use to quickly and easily generate commonly used code blocks. Code snippets are available for various programming languages, including Visual Basic, C#, and C++. You'll now add the Visual Basic Sub snippet to the file.
Place your cursor above the line that says
End Class, and type sub.A pop-up dialog box appears with information about the
Subkeyword and how to insert the Sub code snippet.
Press Tab twice to insert the code snippet.
The outline for the Sub procedure
MySub()is added to the file.
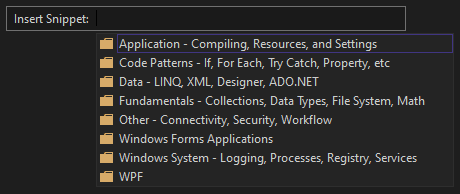
The available code snippets vary for different programming languages. You can look at the available code snippets for Visual Basic by choosing Edit > IntelliSense > Insert Snippet (or press Ctrl+K, Ctrl+X). For Visual Basic, code snippets are available for the following categories:
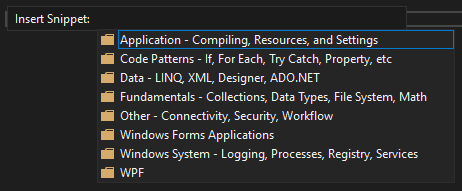
There are snippets for determining if a file exists on the computer, writing to a text file, reading a registry value, executing a SQL query, or creating a For Each...Next statement, and many more.
Place your cursor above the line that says
End Class, and type sub.A pop-up window appears with information about the
Subkeyword and how to insert the Sub code snippet.
Select Tab twice to insert the code snippet.
The outline for the Sub procedure
MySub()is added to the file.
The available code snippets vary for different programming languages. You can view the available code snippets for Visual Basic by right-clicking in the code editor and selecting Snippet > Insert Snippet (or by pressing Ctrl+K, Ctrl+X). For Visual Basic, code snippets are available for the following categories:
Comment out code
In this section, you'll comment out some code.

Paste the following code into the
MySub()procedure body.' _words is a string array that we'll sort alphabetically Dim _words = New String() { "the", "quick", "brown", "fox", "jumps" } Dim morewords = New String() { "over", "the", "lazy", "dog" } Dim query = From word In _words Order By word.Length Select wordSay you're not using the
morewordsarray, but you might use it later, so you don't want to delete it. Instead, you can comment out those lines. Select the entire definition ofmorewordsto the closing curly brace, and then select the Comment out the selected lines button on the toolbar. If you prefer to use the keyboard, select Ctrl+K, Ctrl+C.
The Visual Basic comment character
'is added to the beginning of each selected line to comment out the code.
Collapse code blocks
You can collapse sections of code to focus just on the parts that interest you. To practice, try collapsing the _words array to one line of code. Select the small box with the minus sign inside it in the margin of the line that says Dim _words = New String() {. Or, if you're a keyboard user, place the cursor anywhere in the array definition and select Ctrl+M, Ctrl+M.
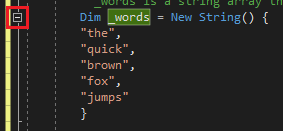
The code block collapses to just the first line, followed by an ellipsis (...). To expand the code block, select the same box, which now has a plus sign in it, or select Ctrl+M, Ctrl+M again. This feature is called outlining and is especially useful when you're collapsing long methods or entire classes.
You can collapse sections of code to focus just on the parts that interest you. To practice, try collapsing the _words array to one line of code. Select the down arrow in the margin of the line that says Dim _words = New String() {. Or, if you're a keyboard user, place the cursor anywhere in the array definition and select Ctrl+M, Ctrl+M.
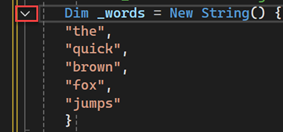
The code block collapses to just the first line, followed by an ellipsis (...). The down arrow in the margin is now an arrow that points to the right. To expand the code block, select the > arrow, or press Ctrl+M, Ctrl+M again. This feature is called outlining and is especially useful when you're collapsing long methods or entire classes.
View symbol definitions
The Visual Studio editor makes it easy to inspect the definition of a type or class member. You can do that by navigating to the file that contains the definition, for example by right-clicking and selecting Go to Definition anywhere the symbol is referenced. An even quicker way that doesn't move your focus away from the file you're working in is to use Peek Definition. You'll now peek at the definition of the String type.
Right-click the word
Stringand select Peek Definition. Or press Alt+F12.A pop-up window containing the definition of the
Stringclass appears. You can scroll within the pop-up window, or even peek at the definition of another type from the peeked code.
Close the Peek Definition window by selecting the close button at the upper-right corner of the pop-up window.

Use IntelliSense to complete words
IntelliSense is a valuable resource when you're coding. It can show you information about available members of a type, or parameter details for different overloads of a method. You can also use IntelliSense to complete a word after you type enough characters to disambiguate it. You'll now add a line of code to print the ordered strings to the console window, which is the standard place for output from a program to go.
Below the
queryvariable, start typing the following code:For Each str In quYou see IntelliSense show you Quick Info about the
querysymbol.
To insert the rest of the word
queryby using IntelliSense's word completion functionality, press Tab.Finish off the code block to look like the following code.
For Each str In query
    Console.WriteLine(str)
Next
IntelliSense is a valuable resource when you're coding. It can show you information about available members of a type, or parameter details for different overloads of a method. You can also use IntelliSense to complete a word after you type enough characters to disambiguate it. You'll now add a line of code to print the ordered strings to the console window, which is the standard place for output from the program to go.
Below the
queryvariable, start typing the following code:For Each str In quIntelliSense shows you Quick Info about the
querysymbol.
To insert the rest of the word
queryby using the IntelliSense word completion functionality, select Tab.Finish off the code block to look like the following code.
For Each str In query
    Console.WriteLine(str)
Next
Refactor a name
Nobody gets code right the first time, and one of the things you might have to change is the name of a variable or method. You'll now try the Visual Studio refactor functionality to rename the _words variable to words.
Right-click the definition of the
_wordsvariable and select Rename.A Rename window appears at the upper-right corner of the editor.
With the variable
_wordsstill selected, enter the desired name: words. Notice that the reference towordsin the query is automatically renamed. Before you press Enter or select Apply, select the Include comments checkbox in the Rename window.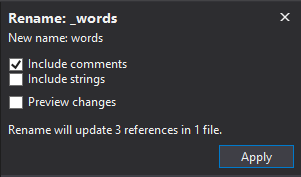
Press Enter or select Apply.
Both occurrences of
wordsare renamed, in addition to the reference towordsin the code comment.
Nobody gets code right the first time, and one of the things you might have to change is the name of a variable or method. You'll now try the Visual Studio refactor functionality to rename the _words variable to words.
Right-click the definition of the
_wordsvariable and select Rename.A rename window appears.
With the variable
_wordsstill selected, enter the desired name: words. Notice that the reference towordsin the query is automatically renamed. Before you select Enter, select the Include comments checkbox in the Rename window.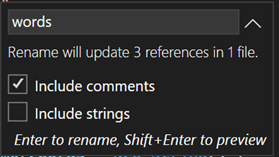
Select Enter.
Both occurrences of
wordsare renamed, in addition to the reference towordsin the code comment.
Related content
- Code snippets
- Navigate code
- Outlining
- Go To Definition and Peek Definition
- Refactoring
- Use IntelliSense