Import or export installation configurations
You can use installation configuration files to configure what Visual Studio installs. To do so, export the workloads, components, and Marketplace extension information into a .vsconfig file by using the Visual Studio Installer. Once you have a .vsconfig file, you can further refine it manually and add or remove additional items. The structure and syntax of the .vsconfig file is described in the vsconfig file format section.
You can also import the configuration file into a new or existing Visual Studio installation, use it to create or modify a layout or an offline installation, put it in a solution directory or repo and trigger an install of missing components, and share it with others.
Export a configuration using the Visual Studio Installer
You can export an installation configuration file from a previously installed instance of Visual Studio.
Note
Starting with Visual Studio 2022 version 17.10 Preview, you can export Visual Studio Marketplace extensions that were loaded in an instance-wide context into a .vsconfig file. If you'd like the export functionality to be able to export other types of extensions such as those loaded from a network share or those loaded in user context, please let us know.
Use the Visual Studio Installer UI
From the Start menu, open the Visual Studio Installer.
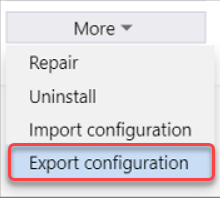
On the product card, choose the More button, and then select Export configuration.

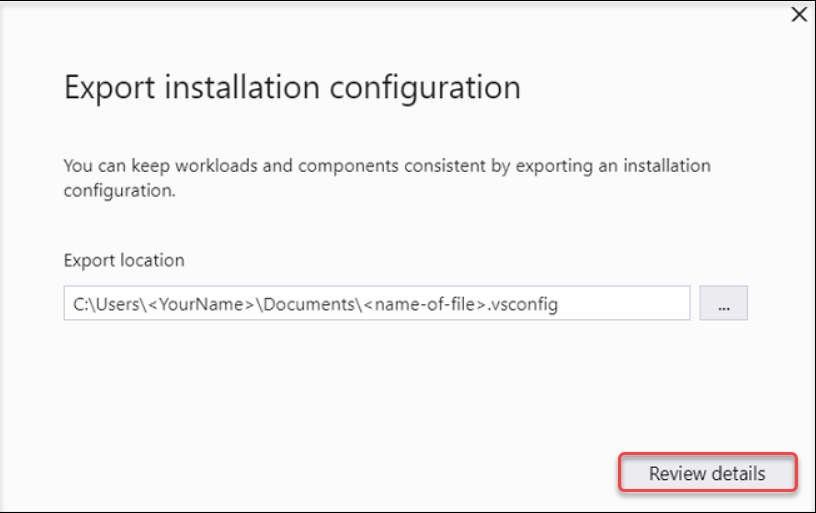
Browse to or type the location where you want to save your .vsconfig file, and then choose Review details.
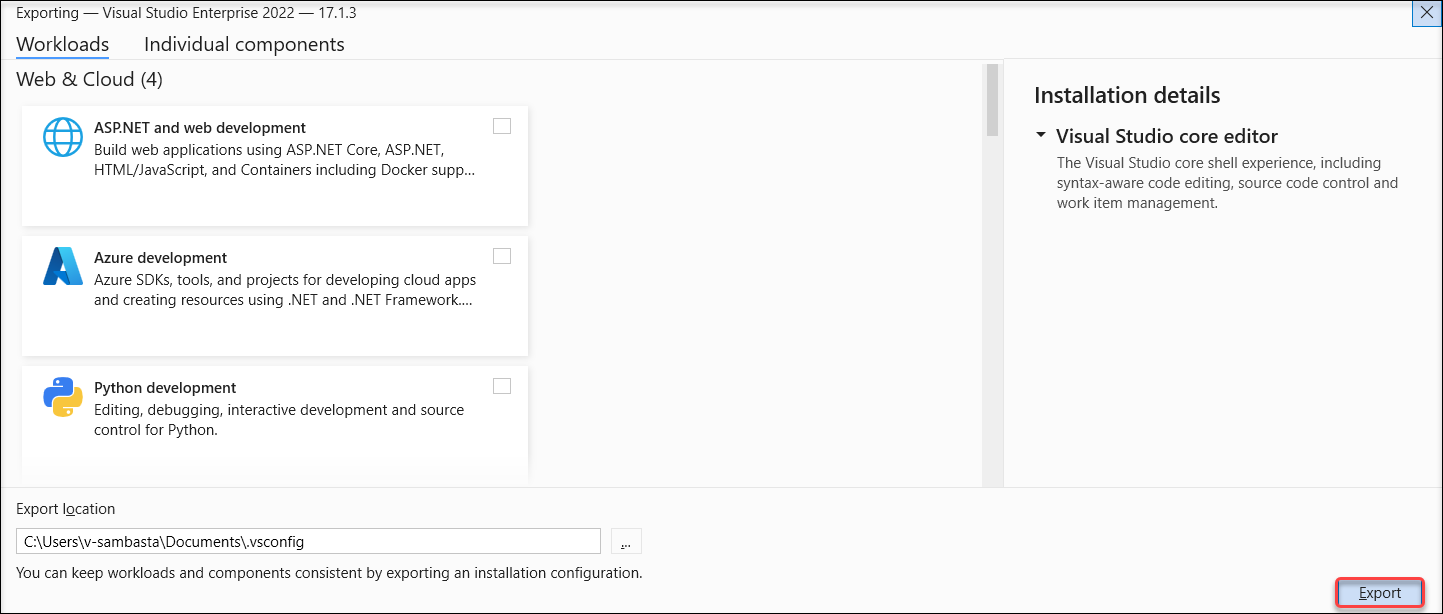
Verify that your selections are accurate, and then choose Export.
Export a configuration file programmatically
You can programmatically export a configuration file of a particular Visual Studio instance by using the export verb. For more information, see Use command-line parameters to install, update, and manage Visual Studio.
Import a configuration using the Visual Studio Installer
You can import an installation configuration file into a previously installed instance of Visual Studio, or you can use it to initialize a new installation of Visual Studio. Importing a configuration file into Visual Studio installs anything listed in the config file that's not already installed.
Use the Visual Studio Installer UI
When you're ready to import an installation configuration file, follow these steps.
Open the Visual Studio Installer and close Visual Studio. Most Installer operations require that the Visual Studio product itself is closed.
On either the Installed tab or the Available tab, select More > Import configuration on the Visual Studio product card.
Locate the .vsconfig file that you want to import, and then choose Review details.
Verify that your selections are accurate, and then choose Modify.
Programmatically use a configuration file to add components to an existing installation
You can use the --config parameter to either initialize or modify an existing installation and add components. The following example uses the installer on the client machine to modify an existing installation.
"C:\Program Files (x86)\Microsoft Visual Studio\Installer\setup.exe" modify --installPath "C:\Program Files\Microsoft Visual Studio\2022\Professional" --config "C:\myconfig.vsconfig" --passive --allowUnsignedExtensions
Note
To add components to an existing installation by using a .vsconfig file, you need to use modify and not update. The update command just updates existing installed components to the latest version. To learn more about the different installer operations, refer to the Install Visual Studio from the command line documentation.
Use a configuration file to initialize the contents of a layout
Using the correct bootstrapper that corresponds to the version and edition of Visual Studio that you want, open an administrator command prompt and run the following command to use the --config parameter to configure the contents of a layout. For more information about using .vsconfig files to initialize and install from layouts, see
Use a configuration file to initialize the contents of a layout.
vs_enterprise.exe --layout "c:\localVSlayout" --config "c:\myconfig.vsconfig" --lang en-US
Use a configuration file to automatically install missing components
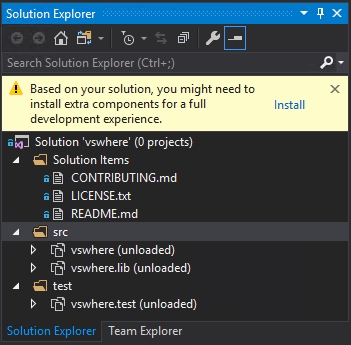
If you save a .vsconfig file into your solution root directory and then open a solution, Visual Studio automatically detects any missing components and prompts you to install them.
Note
If your .vsconfig file contains extensions, then currently, only those extensions that are hosted on the Visual Studio Marketplace trigger the automatic is-missing detection and installation. If you would like this logic to include extensions that were installed from a non-Marketplace location, please provide details about your scenario here.

You can also generate a .vsconfig file right from Solution Explorer.
Right-click on your solution file.
Choose Add > Installation Configuration File.
Confirm the location where you want to save the .vsconfig file, and then choose Review details.
Make sure you've got the workloads and components that you want, and then choose Export.
We also created an open source utility that locates Visual Studio installation configuration .vsconfig files downstream recursively and merges them all together. To learn more about this utility, see VSConfigFinder on GitHub.
vsconfig file format
The .vsconfig file is a json file format that contains a components section and optionally an extensions section. The components section contains workloads and components and looks like this:
{
  "version": "1.0",
  "components": [
    "Microsoft.VisualStudio.Component.CoreEditor",
    "Microsoft.VisualStudio.Workload.CoreEditor",
    "Microsoft.VisualStudio.Component.NuGet"
    ]
}
Extensions
Starting in Visual Studio 2022 version 17.9, you can specify extensions in the .vsconfig file and use the Visual Studio Installer to load them machine wide making them available for all users. Starting in Visual Studio 2022 version 17.10 Preview, you can use the Visual Studio Installer to export Visual Studio Marketplace extensions into the .vsconfig file that were loaded in an instance-wide context as described previously.
There are a few known caveats with supporting extensions in the config file.
- Since the extensions loaded via a config file are installed instance wide, you must have admin permissions or have been granted control of the installer via the AllowStandardUserControl policy in order to install them. Any extensions previously installed by the Visual Studio Extension Manager had the capability of being (and were typically) installed per user, not instance wide, and the user didn't need to have admin permissions to install.
- The Visual Studio Installer currently only supports importing certain types of extensions, such as those contained in a
*.vsixpackage or those that aren't exceedingly complicated. If you have an extension that isn't being loaded via a config file properly, please let us know about it via a new Developer Community suggestion. - Only extensions that are hosted on the Visual Studio Marketplace trigger the automatic missing detection and installation if the .vsconfig file is in a solution directory. If you'd like this logic to include extensions that were installed from a non-Marketplace location, please provide details about your scenario here.
- If you're programmatically using a .vsconfig file to add extensions, then you also need to use the
--allowUnsignedExtensionsparameter to allow unsigned extensions to be loaded in--passiveor--quietcontext. If you're installing from a layout, you can add the"allowUnsignedExtensions" : truesyntax to yourresponse.jsonfile to achieve a similar effect.
All instance-wide extensions are automatically updated approximately once a day via a scheduled task. For more information, see Automatic extension updates.
The .vsconfig file format that includes extensions should look like this.
{
  "version": "1.0",
  "components": [
    // Whatever components you want to install come here, in quotes, separated by commas.
    // You can use the installer to select the components you want to install and then export them,
    // Or you can specify the ones you want according to the [component-id's](https://learn.microsoft.com/en-us/visualstudio/install/workload-and-component-ids).
    // This array should not be null! If you don't want to install any component, just leave the array empty.
  ],
  "extensions": [
    // The extensions you want to install are specified in this section, in quotes, separated by commas.
    // Extensions are optional in .vsconfig, so if you don't want any, you can delete the entire extensions section.
    // The extensions must be in a *.vsix package
    // Make sure that the extensions you specify are designed to work with that version of Visual Studio.
    // examples below
    "https://marketplace.visualstudio.com/items?itemName=MadsKristensen.ImageOptimizer64bit",   //unsigned extension
    "https://marketplace.visualstudio.com/items?itemName=vsext.RegexMatchVisualizer",  //signed extension
    "c:\\mylocaldrive\\someextension.vsix",
    "\\\\server\\share\\myextension.vsix",
    "https://myweb/anotherextension.vsix"
  ]
}
Support or troubleshooting
Sometimes, things can go wrong. If your Visual Studio installation fails, see Troubleshoot Visual Studio installation and upgrade issues for step-by-step guidance.
Here are a few more support options:
- Use the installation chat (English only) support option for installation-related issues.
- Report product issues to us by using the Report a Problem tool that appears both in the Visual Studio Installer and in the Visual Studio IDE. If you're an IT Administrator and don't have Visual Studio installed, you can submit IT Admin feedback.
- Suggest a feature, track product issues, and find answers in the Visual Studio Developer Community.

