Subscribe to events in Dataverse
Important
Before you subscribe to finance and operations apps business events and data events in Microsoft Dataverse, you must enable the Microsoft Power Platform integration. For information about how to enable the Microsoft Power Platform integration for a finance and operations apps environment, see Enabling the Power Platform integration.
You can subscribe to finance and operations apps business events and data events in Dataverse by registering plug-ins and software development kit (SDK) steps on the events in Dataverse. This article describes how to use the Power Platform Tools extension for Visual Studio to register a plug-in for a finance and operations apps event. The subscriptions are shown together with other subscriptions in the business event catalog in finance and operations apps. The endpoint then works like other endpoints in the finance and operations apps business event catalog.
Set up your development environment
Install the Power Platform Tools extension
Power Platform Tools for Visual Studio is an extension that provides code templates for Dataverse plug-ins. In includes a Dataverse explorer that shows tables, business events, and virtual entity data events. The explorer lets you register plug-ins directly from Visual Studio. The C# code for the plug-in can then be deployed directly to Dataverse from the solution.
For information about how to install the Power Platform Tools extension, see Install Power Platform Tools.
Create a project
After you've installed the Power Platform Tools extension, create a new project.
Open Visual Studio 2019 or later.
In the Get started dialog box, select Create a new project.
In the Create a new project dialog box, search for Power Platform Solution Template, select it, and then select Next.

In the Configure your new project dialog box, enter a project name, select the location where you want to save the solution file, and then select Create.
In the Configure Microsoft Power Platform Solution dialog box, under 1. Solution Type to Configure, select Start from Dataverse.
In the Power Platform Tools dialog box, under 2. Connect to Dataverse, follow these steps:
- In the Deployment Type field group, select the Office 365 option.
- Select the Display list of available organizations checkbox.
- Select Login, and enter the credentials to sign in to the Dataverse environment that is linked to your finance and operations apps environment.
- In the list of organizations, select the Microsoft Power Platform environment that you want to work with. Then select Login.
- Select Next.

Under 3. Select Solution, select the Microsoft Power Platform solution where you want to create the event subscription. If you haven't yet created a solution, you can create one in the Power Apps maker portal by following the steps in Create a solution.

Select Done.
In the Visual Studio Template Selection Microsoft Power Platform dialog box, under 1. Select Items for Template, select Add New Templates.

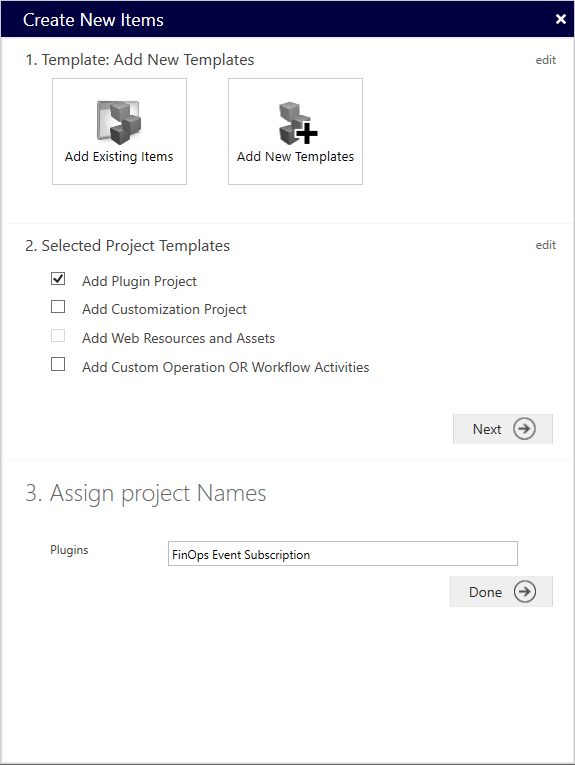
In the Create New Items dialog box, under 2. Selected Template Projects, select the Add Plugin Project checkbox, and then select Next.
Under 3. Assign project Names, in the Plugins field, enter a name for the plug-in project. The name will be the name of the Visual Studio project. By default, it will also be the name of the assembly.

Select Done.
For more information about how to use the Power Platform Tools extension to create a project, see Quickstart: Create a Power Platform Tools project.
Sign the assemblies
Dataverse assemblies must be signed. You can either set up a self-signed key in the solution or provide another key if you have one available. To create a self-signed key, follow these steps.
- In Visual Studio, in Solution Explorer, select and hold (or right-click) the project name, and then select Properties.
- On the Signing tab, select the Sign the assembly checkbox.
- In the Choose a strong name key file field, select New.
- Enter a name and password for the key, and then select OK.
Subscribe to a finance and operations apps event
After you've finished setting up the development environment, you can begin to write code. You can create a C# class library that runs business logic in Dataverse when a finance and operations apps business event or data event that the plug-in is subscribed to occurs.
Register a new step
In Visual Studio, on the View menu, select Power Platform Explorer.
Power Platform Explorer shows a list of components from the Dataverse environment that you selected during the setup of the development environment. These components include tables, choices, and event catalogs.
Under the Event Catalog node, expand finance and operations.
Under the finance and operations node, you should see a list of catalogs that are available in the Dynamics 365 ERP Virtual Entities solution in the selected Microsoft Power Platform environment. Under each catalog, you should see a list of the virtual entities that have been generated for that category in the environment, and the data events that are available for each of those virtual entities (Created, Updated, and Deleted).
(If you don't see any catalogs under the finance and operations node, you might have to generate and enable the virtual entities that are required for your solution. For more information about how to generate virtual entities in a Dataverse environment, see Enable Microsoft Dataverse virtual entities. After you've enabled the required virtual entities, select Refresh in Power Platform Explorer to update the list so that it shows the entities.)
Under each catalog, under the Global node, you should see all the finance and operations apps business events that have been activated for the category.
Select and hold (or right-click) the data event under the virtual entity that should trigger your business logic, and then select Add Plugin.

In the Register New Step dialog box, follow these steps:
- In the Class Name field, change the value to the name of the class that you want to create.
- Under Event Pipeline Stage of Execution, select PostOperation in the drop-down list.
- Under Execution Mode, select the Asynchronous option.
- Select Register New Step.
Note
The PreValidation and PreOperation execution stages and the Synchronous execution mode aren't currently supported for virtual entities.

When the new step is registered, a new class is generated that has the base code for the plug-in. In the ExecuteCdsPlugin method of the new class, you can write the custom business logic in the place that is indicated by the TODO. You can then build your solution and deploy the plug-in to your environment.
Deploy the plug-in
You can now deploy your plug-in to the Microsoft Power Platform solution.
- In Visual Studio, in Solution Explorer, select and hold (or right-click) the project, and the select Deploy.
To verify that deployment was successful, you can view the plug-in assembly in the Power Apps maker portal. Go to the Microsoft Power Platform solution that you deployed the plug-in to, and then, in the navigation on the left, select Plug-in assemblies. To view the registered plug-in step, select Plug-in steps in the navigation.

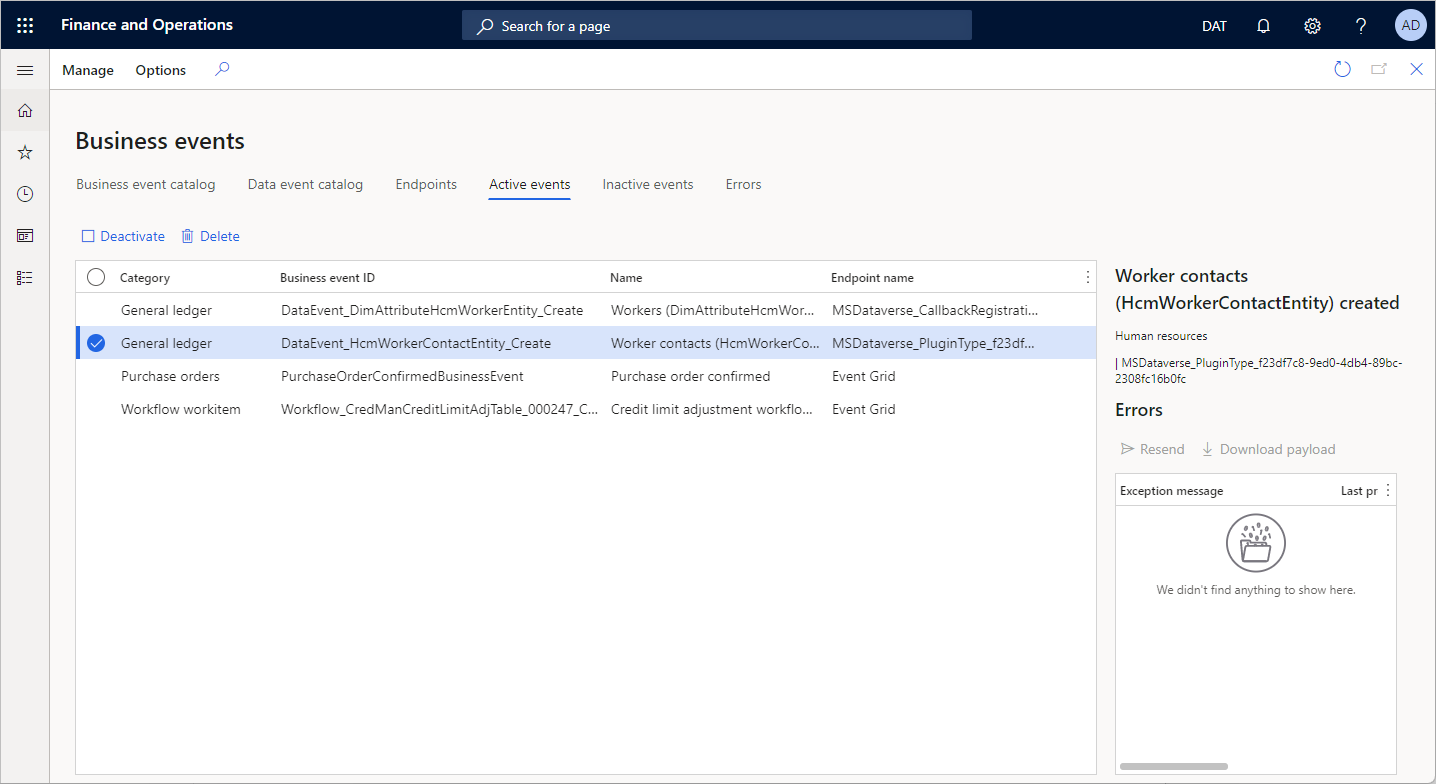
You can also verify that the new endpoint appears correctly on the Endpoints tab of the Business events page in the finance and operations app, and that the new event appears on the Active events tab.

Troubleshooting
If deployment fails, you can troubleshoot the issue by turning on verbose logging.
- In Visual Studio, on the Tools menu, select Options.
- In the Options dialog box, under the Power Platform Tools node, select General.
- Select Display Detailed Log Data and (Diagnostics) Capture Detailed Dataverse Communications Log.
- Select OK.