Build hunting queries using guided mode in Microsoft Defender XDR
Applies to:
- Microsoft Defender XDR
Important
Some information relates to prereleased product which may be substantially modified before it's commercially released. Microsoft makes no warranties, express or implied, with respect to the information provided here.
The query builder in guided mode allows analysts to craft meaningful hunting queries without knowing Kusto Query Language (KQL) or the data schema. Analysts from every tier of experience can use the query builder to filter through data from the last 30 days to look for threats, expand incident investigations, perform data analytics on threat data, or focus on specific threat areas.
The analyst can choose which data set to look at and which filters and conditions to use to narrow the data down to what they need.
You can watch this video to get an overview of guided hunting:
Open Query in builder
In the Advanced hunting page, select Create new to open a new query tab and select Query in builder.
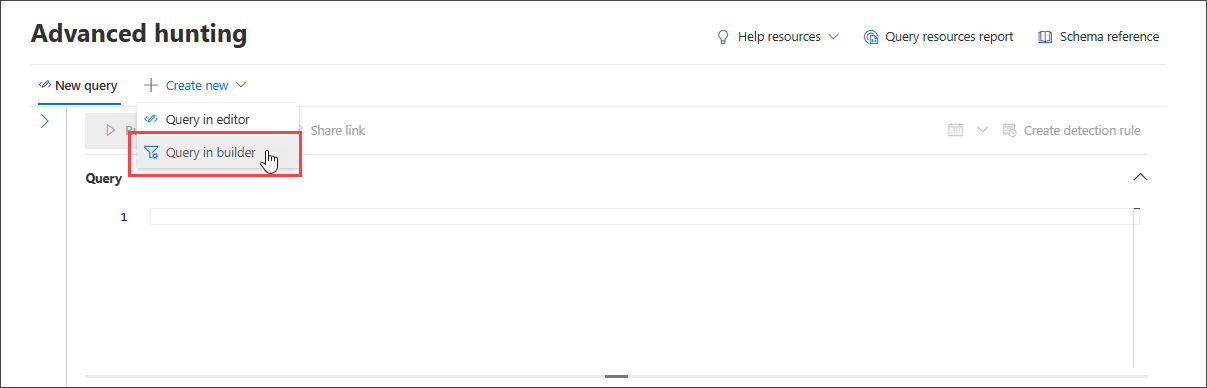
This brings you to the guided mode, where you can then construct your query by selecting different components using dropdown menus.
Specify the data domain to hunt in
You can control the scope of the hunt by selecting which domain the query covers:
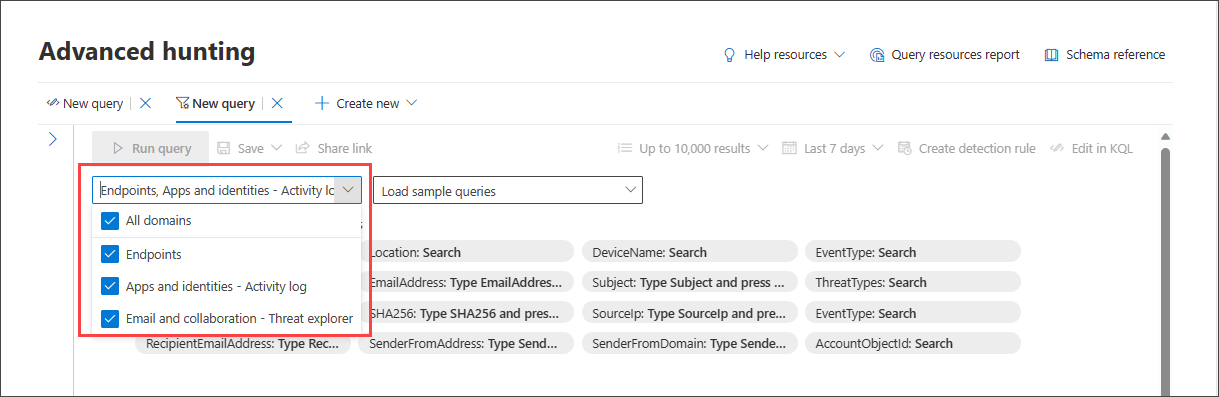
Selecting All includes data from all domains you currently have access to. Narrowing down to a specific domain allows filters relevant to that domain only.
You can choose from:
- All domains - to look through all available data in your query
- Endpoints - to look through endpoint data as provided by Microsoft Defender for Endpoint
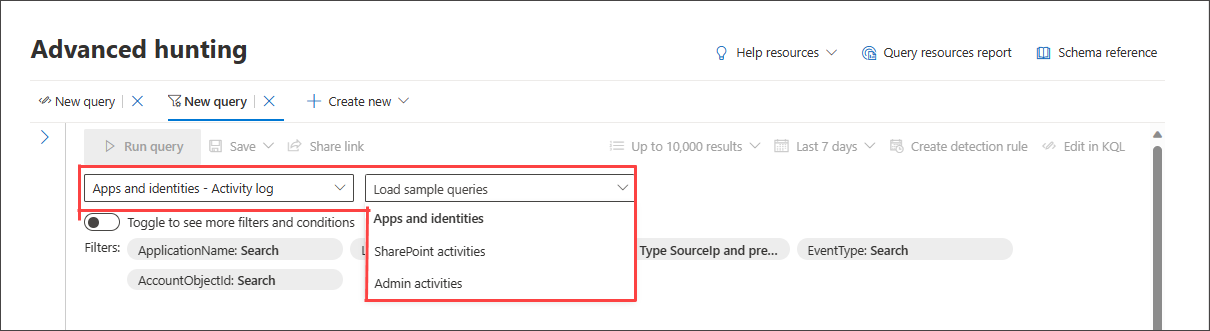
- Apps and identities - to look through application and identity data as provided by Microsoft Defender for Cloud Apps and Microsoft Defender for Identity; users familiar with Activity log can find the same data here
- Email and collaboration - to look through email and collaboration apps data like SharePoint, OneDrive and others; users familiar with Threat Explorer can find the same data here
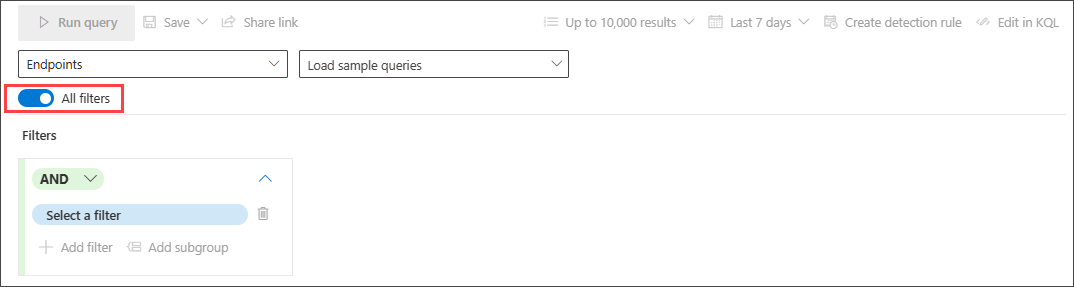
Use basic filters
By default, guided hunting includes a few basic filters to get you started fast.
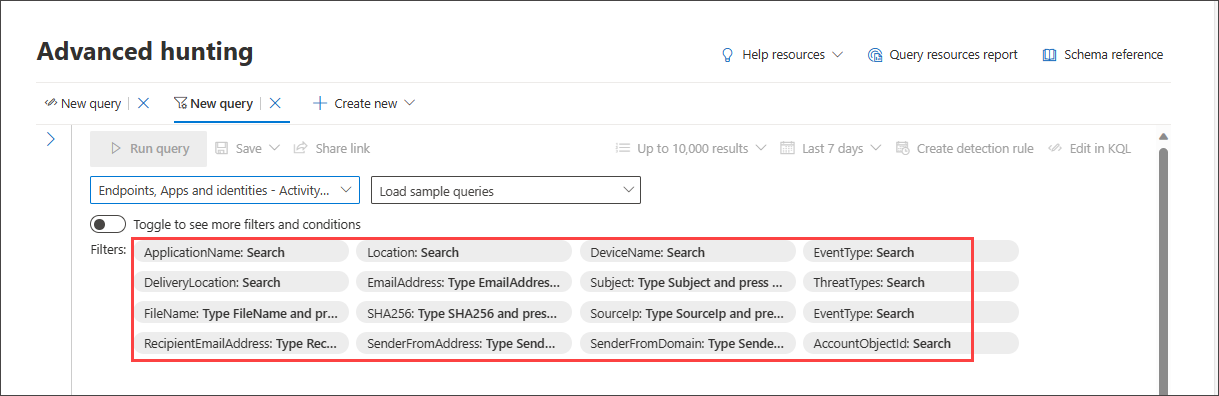
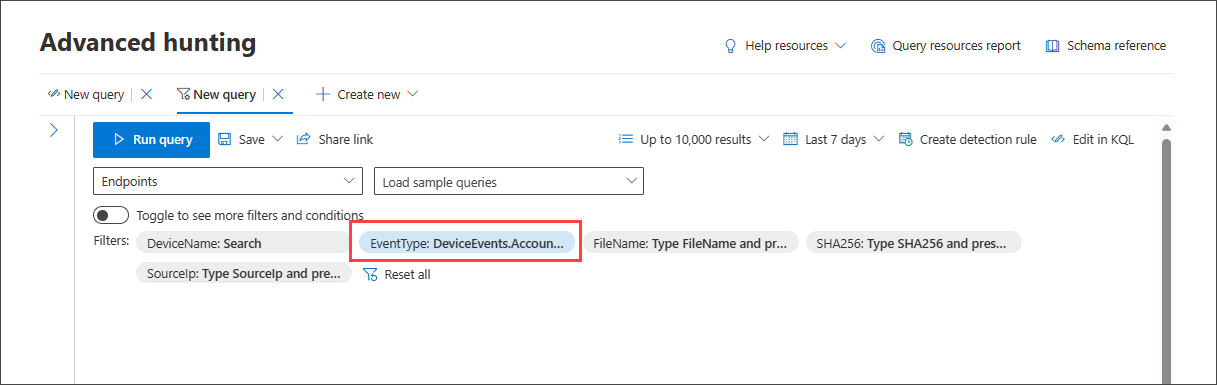
When you choose one data source, for instance, Endpoints, the query builder displays only the applicable filter groups. You can then choose a filter you are interested in narrowing down by selecting that filter group, for instance, EventType, and selecting the filter of your choice.
Once the query is ready, select the blue Run query button. If the button is grayed out, it means the query needs to be filled out or edited further.
Note
The basic filter view uses the AND operator only, meaning running the query generates results for which all set filters are true.
Load sample queries
Another quick way to get familiar with guided hunting is to load sample queries using the Load sample queries dropdown menu.
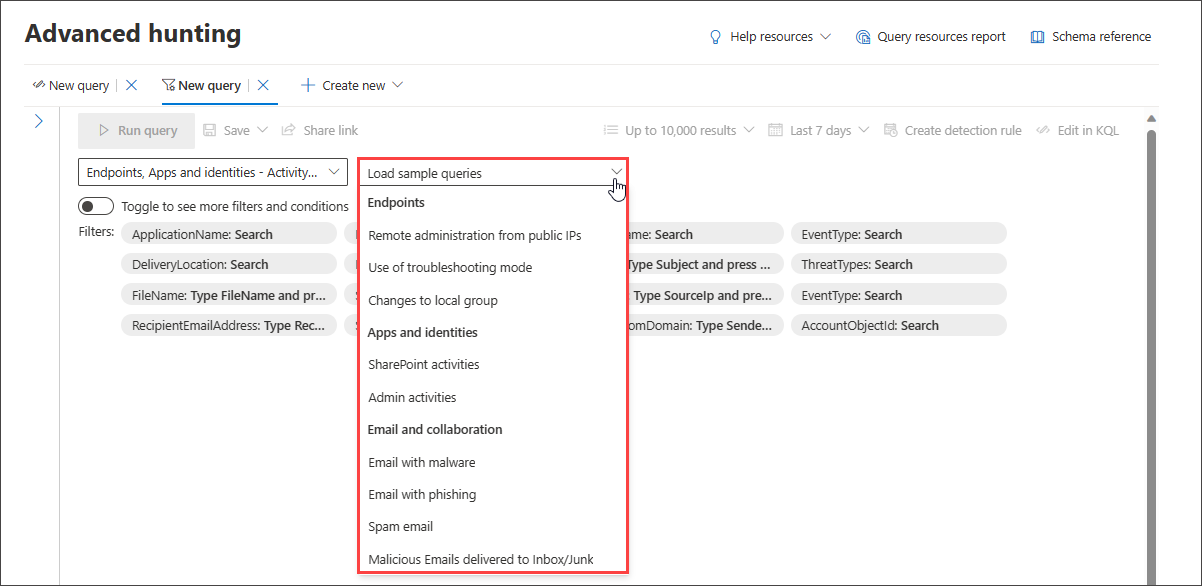
Note
Selecting a sample query overrides the existing query.
Once the sample query is loaded, select Run query.
If you have previously selected a domain, the list of available sample queries changes accordingly.
To restore the complete list of sample queries, select All domains then reopen Load sample queries.
If the loaded sample query uses filters outside of the basic filter set, the toggle button is grayed out. To go back to the basic filter set, select Clear all then toggle All filters.
Use more filters
To view more filter groups and conditions, select Toggle to see more filters and conditions.
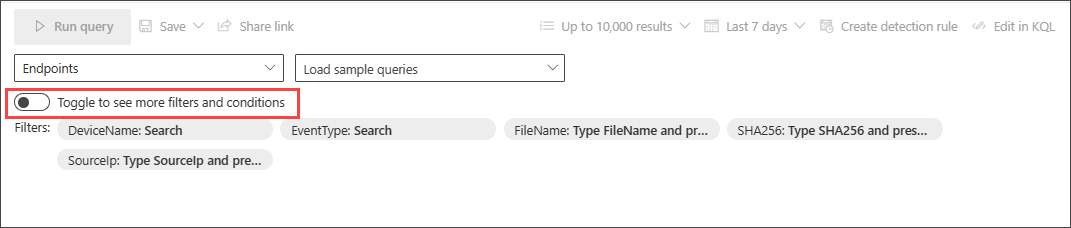
When the All filters toggle is active, you can now use the full range of filters and conditions in guided mode.
Create conditions
To specify a set of data to be used in the query, select Select a filter. Explore the different filter sections to find what is available to you.
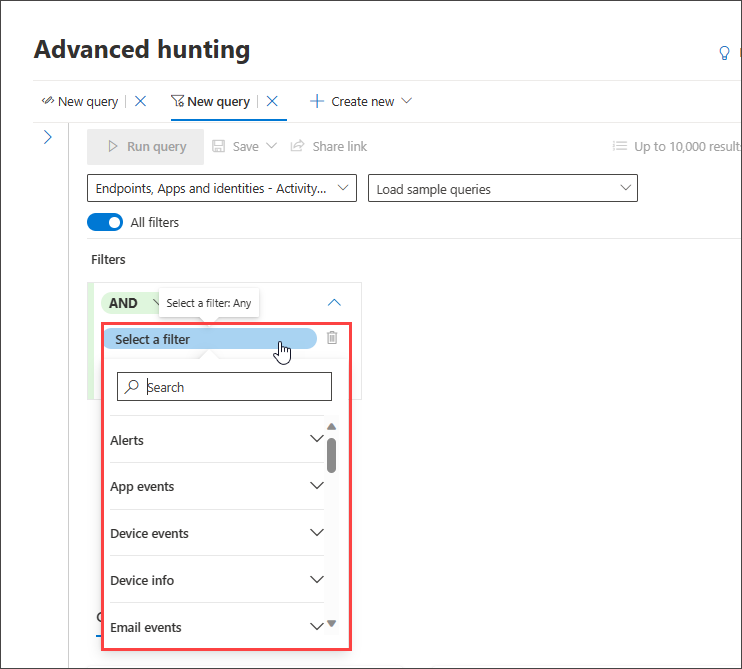
Type the section's titles in the search box at the top of the list to find the filter. Sections ending in info contain filters that provide information about the different components you can look at and filters for the states of entities. Sections ending in events contain filters that allow you to look for any monitored event on the entity. For instance, to hunt for activities involving certain devices, you can use the filters under the Device events section.
Note
Choosing a filter that isn't in the basic filters list deactivates or grays out the toggle to return to the basic filters view. To reset the query or remove existing filters in the current query, select Clear all. This also reactivates the basic filters list.
Next, set the appropriate condition to further filter the data by selecting it from the second dropdown menu and providing entries in the third dropdown menu if necessary:
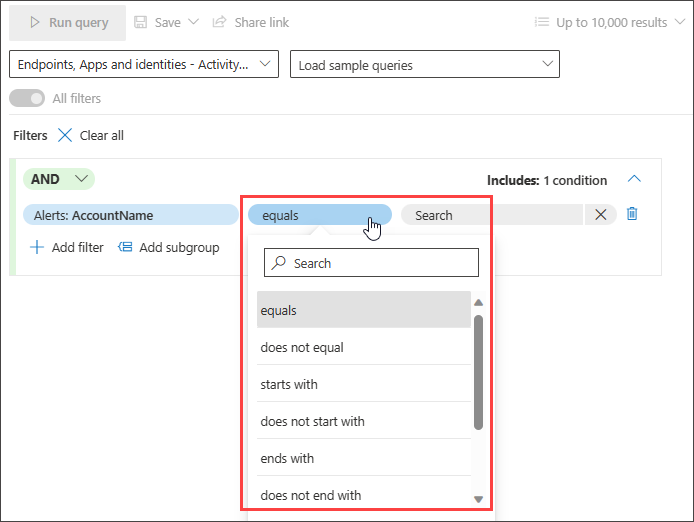
You can add more conditions to your query by using AND, and OR conditions. AND returns results that fulfill all conditions in the query, while OR returns results that fulfill any of the conditions in the query.

Refining your query allows you to automatically sift through voluminous records to generate a list of results that is already targeted to your specific threat hunting need.
To get to know what data types are supported and other guided mode capabilities to help you fine-tune your query, read Refine your query in guided mode.
Try sample query walk-throughs
Another way to get familiar with guided hunting is to load sample queries pre-created in guided mode.
In the Getting started section of the hunting page, we have provided three guided query examples that you can load. The query examples contain some of the most common filters and inputs you would typically need in your hunting. Loading any of the three sample queries opens a guided tour of how you would construct the entry using guided mode.
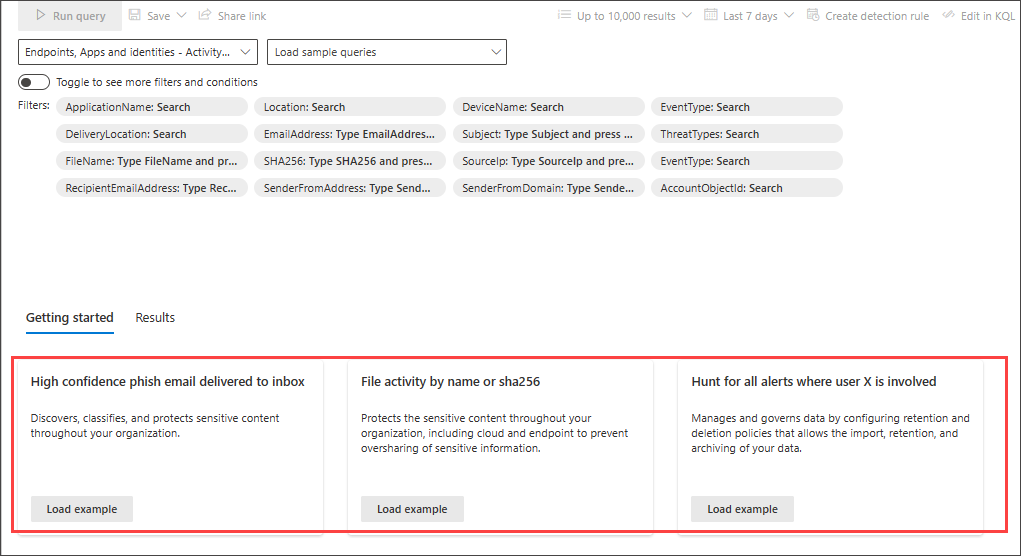
Follow the instructions in the blue teaching bubbles to construct your query. Select Run query.
Try some queries
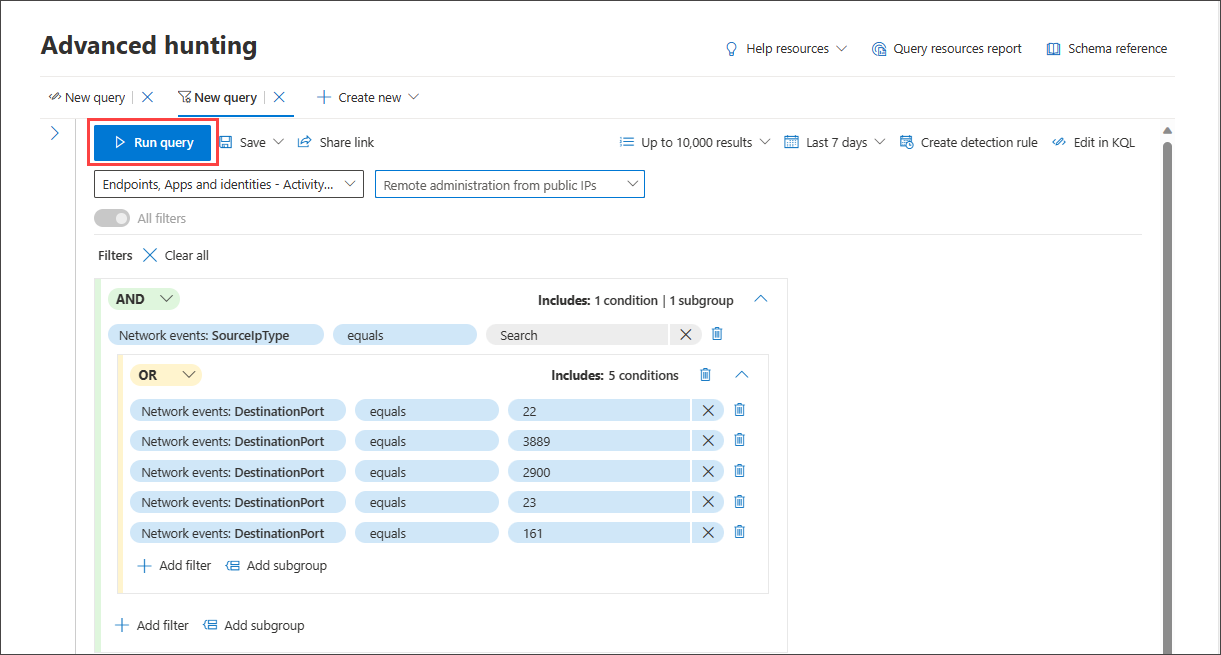
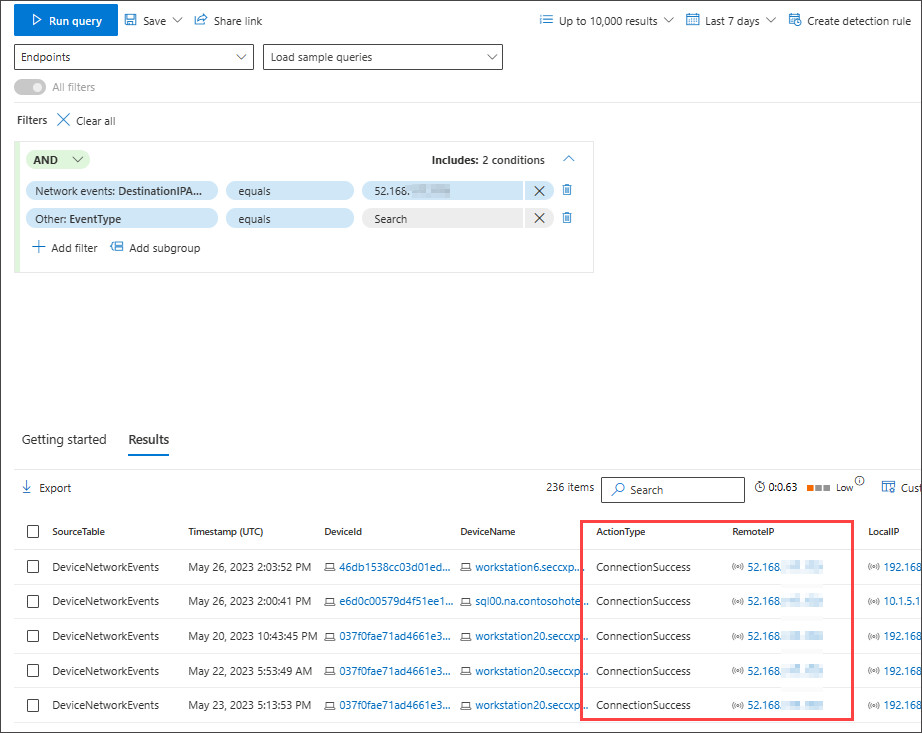
Hunt for successful connections to specific IP
To hunt for successful network communications to a specific IP address, start typing "ip" to get suggested filters:
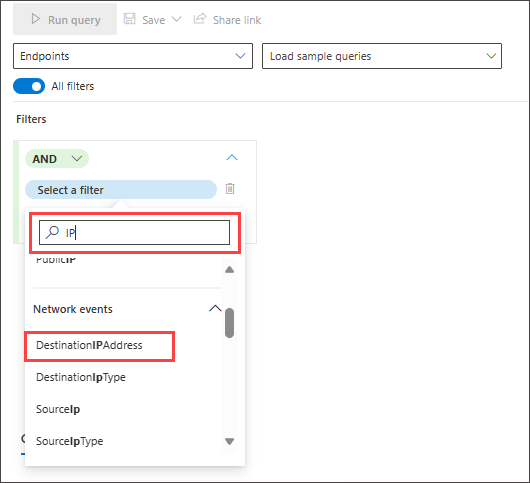
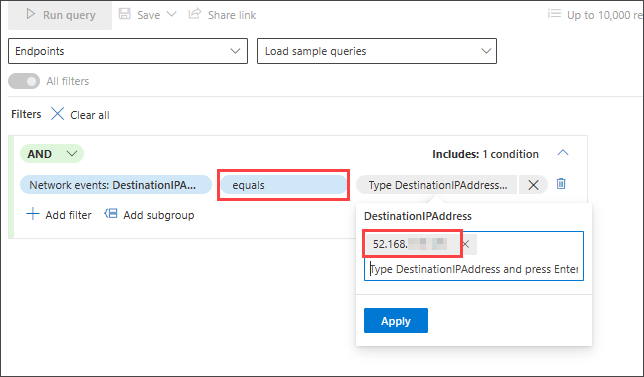
To look for events involving a specific IP address where the IP is the destination of the communication, select DestinationIPAddress under the IP Address Events section. Then select the equals operator. Type the IP in the third dropdown menu and press Enter:
Then, to add a second condition which searches for successful network communication events, search for the filter of a specific event type:
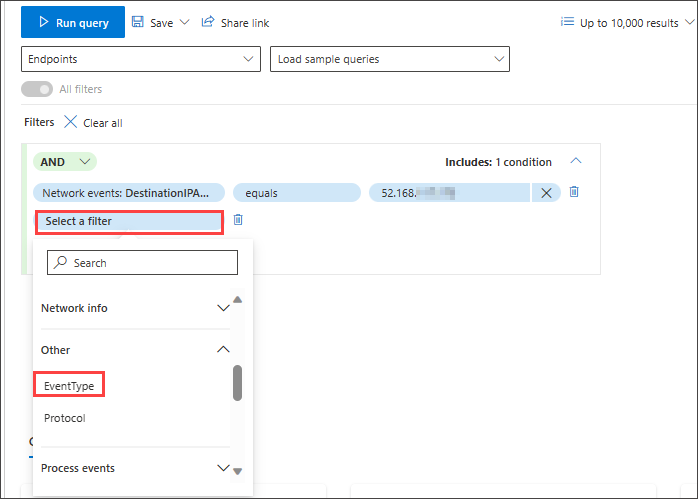
The EventType filter looks for the different event types logged. It is equivalent to the ActionType column which exists in most of the tables in advanced hunting. Select it to choose one or more event types to filter for. To look for successful network communication events, expand the DeviceNetworkEvents section and then choose ConnectionSuccess:
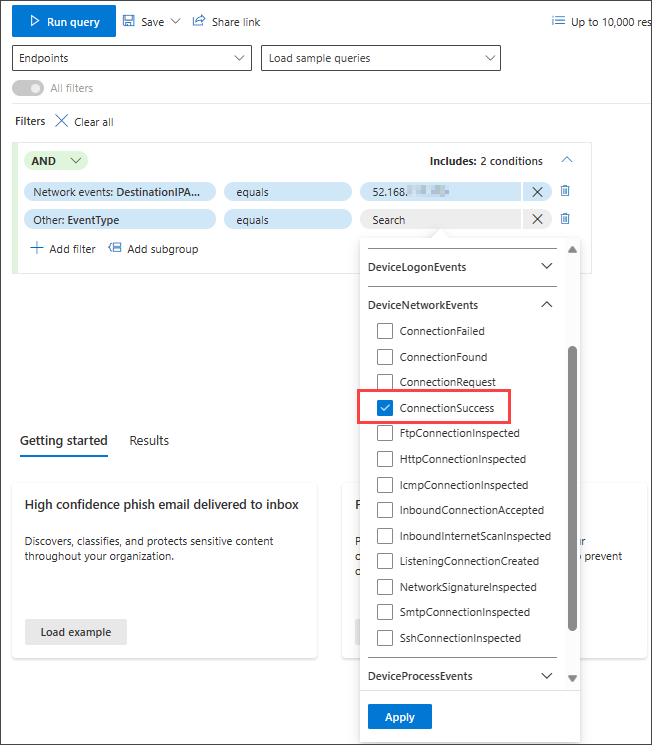
Finally, select Run query to hunt for all successful network communications to the 52.168.117.170 IP address:
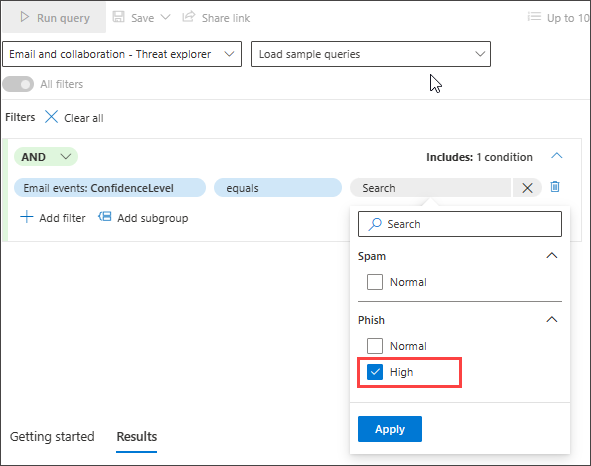
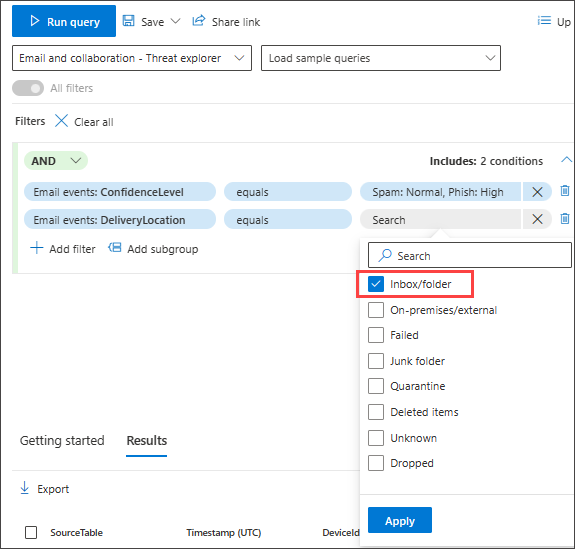
Hunt for high confidence phish or spam emails delivered to inbox
To look for all high confidence phish and spam emails that were delivered to the inbox folder at the time of delivery, first select ConfidenceLevel under Email Events, select equals and choose High under both Phish and Spam from the suggested closed list which supports multi-selection:
Then, add another condition, this time specifying the folder or DeliveryLocation, Inbox/folder.
See also
Tip
Do you want to learn more? Engage with the Microsoft Security community in our Tech Community: Microsoft Defender XDR Tech Community.
Feedback
Bald verfügbar: Im Laufe des Jahres 2024 werden wir GitHub-Tickets als Feedbackmechanismus für Inhalte auslaufen lassen und es durch ein neues Feedbacksystem ersetzen. Weitere Informationen finden Sie unter: https://aka.ms/ContentUserFeedback.
Einreichen und Feedback anzeigen für