Playbook for Accessible Gaming Events Guideline 102: Venues
The lack of accessibility at a venue can completely undo any other accessibility work you've put in. When people with disabilities are unable to enter or navigate your venue, they are unable to experience anything else at your event. That is why it is critical that, when planning your event, you do research up front to ensure that you pick a venue that is accessible.
It is important not to make assumptions about the accessibility of a venue. Just because a venue is newer, for instance, doesn't mean it is necessarily accessible.
Important Note: The following guideline is intended as a quick way to review venues for accessibility. However, this guidance isn't intended to meet any local, state, or national laws or regulations. These laws are quite specific, so it is important to ask a potential venue if they meet these requirements and if they have documentation proving so.
Scoping questions
If you answer "Yes" to any of the following questions, this guideline applies to your event:
- Does your event have a physical presence that guests will visit in-person?
Implementation guidelines
Consider implementing the following guidelines for your event.
Signage
General Guidelines:
Ensure a non-glare finish and high contrast ratio (ideally 7:1) between foreground text and the background.
Use large text without serifs.
Position signage at least 48 inches from the ground but no more than 60 inches.
Whenever possible, add Braille, tactile elements, and (optionally) QR codes.
Identification Signage: These are signs that identify or direct to certain rooms, spaces, or features in public accommodations for people with disabilities. In addition to the general guidelines:
Use all uppercase letters.
Use raised text.
Add Braille.
Directional and Informational Signage: Inaccessible entrances, elevators and restrooms must have directional signage indicating the location of the nearest accessible entrance, elevator, or restroom. In addition to the general guidelines:
- Use simple arrows and pictograms when possible.
Doors
Automatic Doors:
- Entrances and exits should have automatic doors.
Width:
- Doors should be between 32 inches and 48 inches in width (it is better to err on the side of wider doors).
Maneuvering Clearances:
There should be plenty of room for a large power chair to be able to turn in a hallway or other space to navigate through a door.
It is recommended there be at least a 60-inch (perpendicular to the door) by 90-inch (parallel to the door) space to navigate immediately on each side of the door.
Thresholds:
- Door thresholds should not be higher than 1.5 inches.
Elevators, Lifts, and Ramps
Availability:
Anywhere that is accessible to guests should be accessible without needing to navigate a step greater than ½ inch or stairs. This includes stages.
In cases where such steps exist, an elevator, lift, or accessible ramp with railings designed for people with disabilities should allow ingress / egress.
Ramp Slope / Width:
- Ramps should have a slope of no greater than 8.3% and be at least 48" wide.
Functionality:
- All elevators and lifts should be tested prior to an event as well as daily in the mornings before the event opens to ensure they function properly.
Bathrooms
Amenities:
Bathrooms should have stalls with wide entrances and handrails and space for a large turning radius in front of the toilet.
At least one urinal should be lower to the ground.
Bathroom sinks should be able to be rolled up to by a wheelchair.
Bathrooms should be free of obstacles that hinder access to the facilities.
Example (expandable)
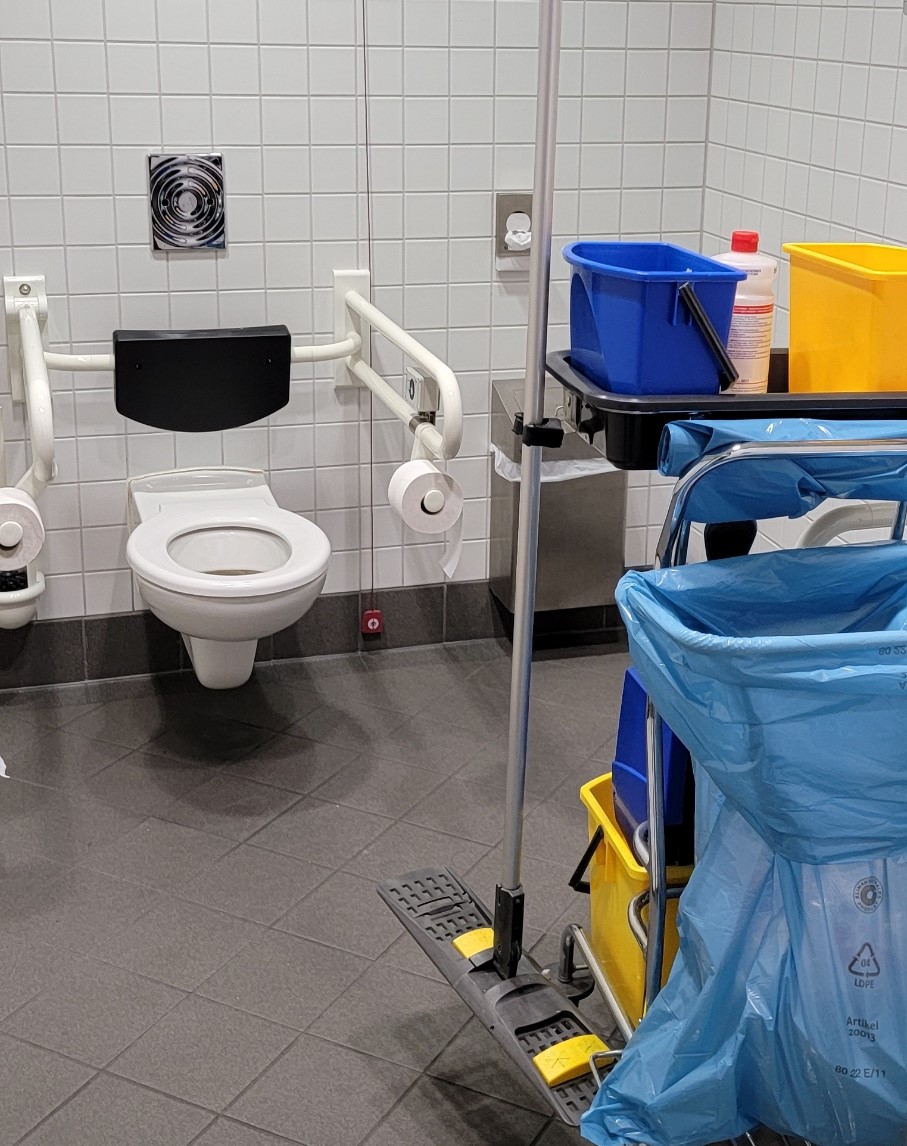
A cleaning cart has been stored in a single-person stall dedicated to individuals with disabilities. It prevents users in large wheelchairs from reaching the toilet.
- Ideally, a bathroom will also be on site that offers an adult-sized changing table.
Gender:
- Accessible bathrooms should be available for anyone, regardless of gender.
Floor Plans
Pathways:
Ensure there is enough space in hallways and between other obstacles for large powerchairs to navigate easily.
Ensure there are no obstacles that someone might trip over or run into.
Surfaces:
- Ensure that flooring is a hard surface (e.g., wood). If carpeting is present, ensure it is low pile.
Platforms:
- Avoid floor plans with platforms or other small rises requiring a step. This is especially important if you are putting in your own flooring on top of the existing flooring at an event. (Example: Many booths at conventions put in their own, raised flooring that requires someone to step up to.) If such steps exist, ensure accessible ramps are available.
Water:
- Ensure water fountains of multiple heights are available as well as (ideally) bottle refilling stations.
Lighting
Brightness:
Lighting in the venue should be bright enough to ensure that walkways, ramps, stairs, and other obstacles can be seen. This includes preventing shadows that could cause someone with a visual disability difficulty when navigating the space or avoiding obstacles.
Lighting shouldn't be so bright that it hurts eyes or causes glare.
Seating
Quantity:
For venues with designated ADA Seating, confirm that you will have enough seating for everyone who has registered.
Many individuals with disabilities may have guests with them that will want to sit with them. In general, a good rule of thumb is to ensure you have two-to-three times the amount of ADA seating available based on requests for accommodations.
Prioritization:
Accessible seating should prioritize guests.
Generally speaking, accessible seating should be close to the main attraction being viewed with an unobstructed view.
Seating should have a clear and easy-to-see view of ASL interpreters as well as screens displaying closed captions.
Audio
Quiet Space:
The venue should offer an area away from any loud noises or visual effects where people with sensory processing disorder can seek refuge.
Quiet spaces should have signage denoting them as such.
Signage should explain that the room should only be used for those with sensory processing needs (not meetings, taking cell phone calls, etc.) and kept quiet (no talking, listening to music through speakers, etc.).
Example (expandable)
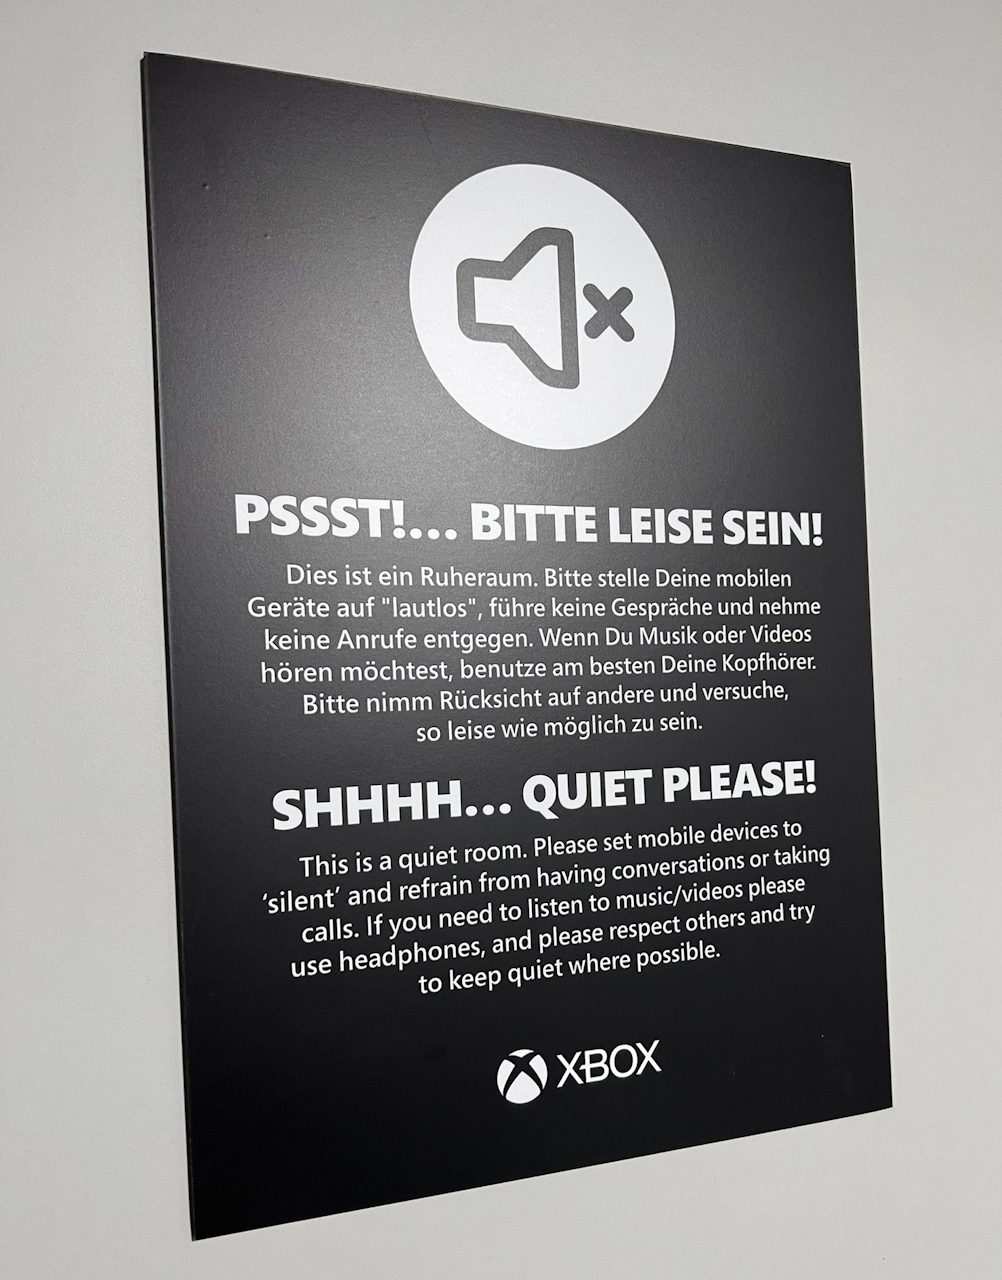
The sign above clearly sets expectations for the quiet room, alerting users that they should not take phone calls, listen to music without headphones, and avoiding conversations.
Resources and tools
Website | The Americans with Disabilities Act | ADA.gov
Article | Making events accessible: Choosing a venue | SCIE
Article | Selecting an Accessible Venue | vera.org