Build multiple branches in Azure Pipelines
TFS 2018
Using Azure Pipelines, you can create triggers to build your project on every new commit and pull request to your repository. In this article, you will learn how to enable continuous integration and set up multiple branch builds for your repository.
Prerequisites
An Azure DevOps organization and a project. Create an organization or a project if you haven't already.
A working pipeline. Follow the instructions in Create your first pipeline to create your pipeline.
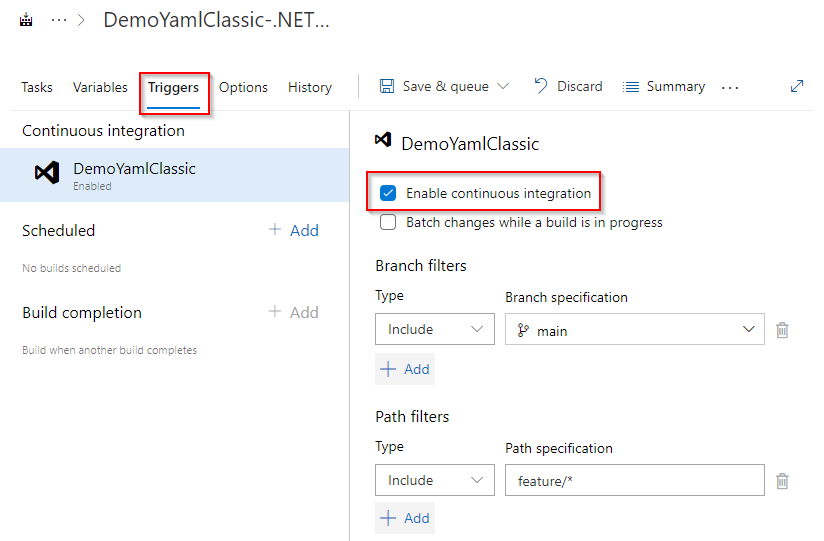
Enable CI trigger for a topic branch
When working with Git, it is a common practice to create temporary branches from the main branch to facilitate a streamlined workflow. These branches, often referred to as topic or feature branches, serve the purpose of isolating your work. Within this workflow, you create a branch dedicated to a specific feature or bug fix, and once completed, you merge the code back into the main branch before deleting the topic branch.
Customize build tasks based on the branch being built
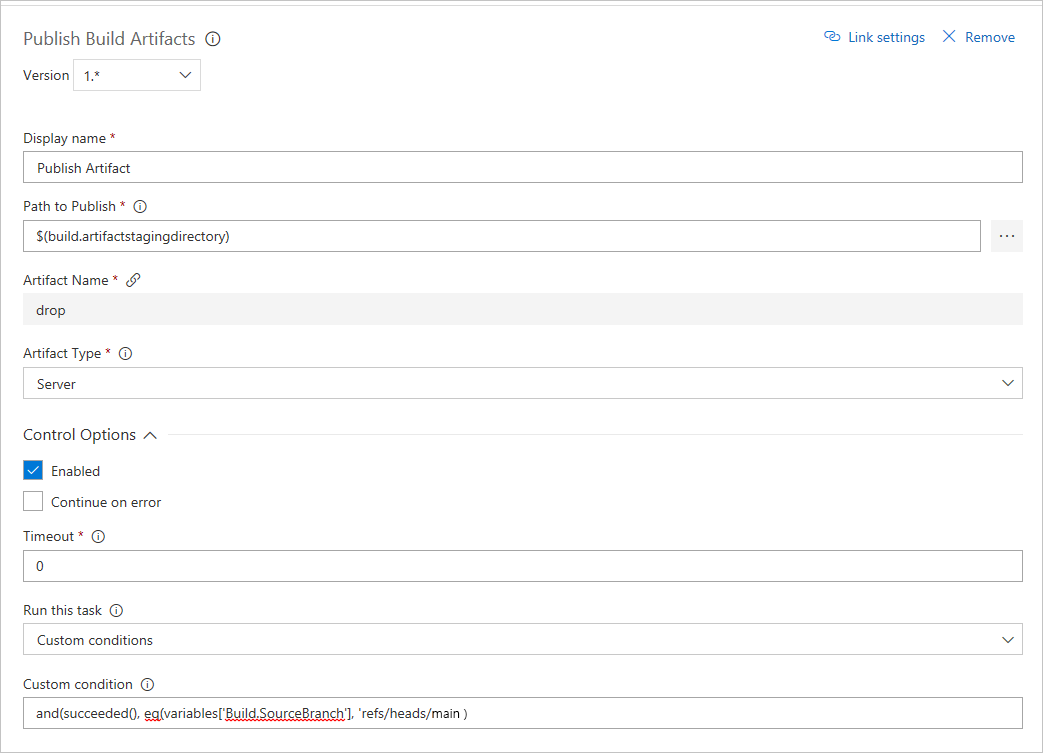
The main branch is usually responsible for generating deployable artifacts, such as binaries. For short-lived feature branches, there is no need to invest time in creating and storing these artifacts. In Azure Pipelines, you can implement custom conditions to ensure that specific tasks are executed only on the main branch.
Edit the azure-pipelines.yml file in your main branch, and add a condition to your desired task. For example, the following snippet adds a condition to the publish pipeline artifacts task.
YAML builds are not yet available on TFS.
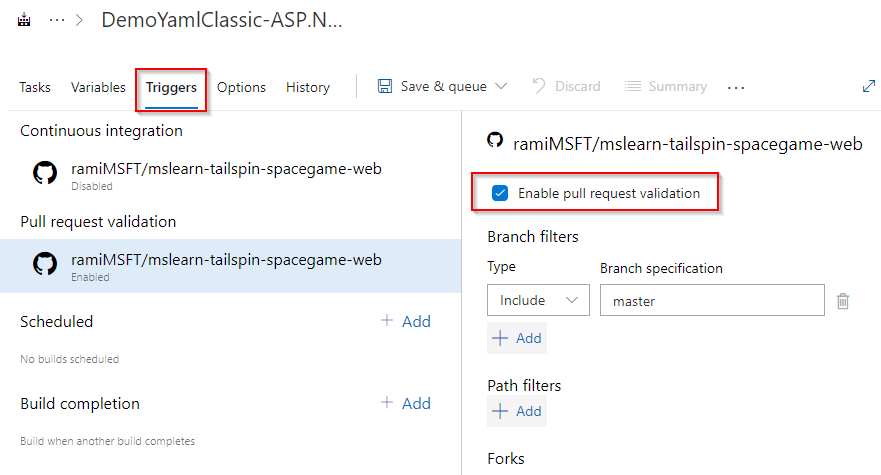
Validate pull requests
To ensure branch protection, you can utilize policies that mandate successful builds prior to merging pull requests. Using Azure Pipelines, you have the flexibility to configure the requirement of a new successful build for merging changes into crucial branches like the main branch.
GitHub repository
Azure Repos repository
Sign in to your Azure DevOps organization, and then navigate to your project.
Select Repos and then select Branches.
Select the ellipsis icon to the right of your branch name, and then select Branch policies.
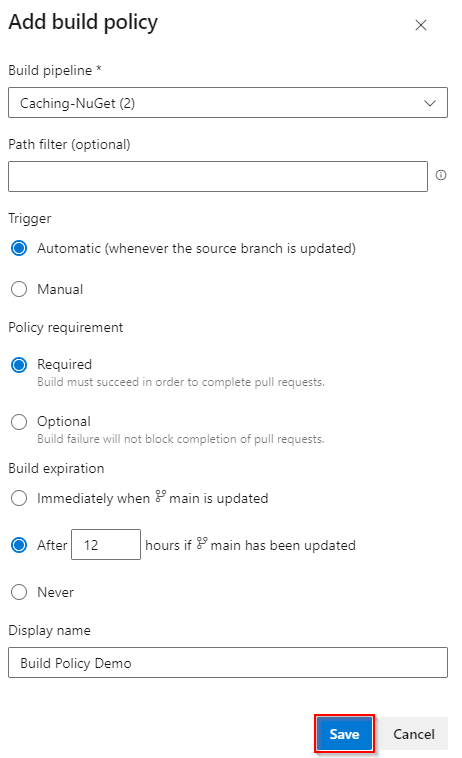
Under the Build validation menu, select the + sign to add a build policy.
Select your Build pipeline from the dropdown menu and make sure that Trigger is set to automatic and the Policy requirement is set to required.
Enter a descriptive Display name to describe the policy.
Select Save to create and enable the policy. Select Save changes at the top left of your screen to save your changes.
To test the policy navigate to Repos > Pull requests in the Azure DevOps portal.
Select New pull request and make sure that your topic branch is set to merge into your main branch, and then Select Create.
On your screen, you can see the currently executing policy.
Select the policy name to examine the build. If the build succeeds your pull request will be merged. If the build fails the merge will be blocked.
Note
Azure Pipelines no longer supports per-pipeline retention policies. We recommend using project-level retention rules.