Note
Access to this page requires authorization. You can try signing in or changing directories.
Access to this page requires authorization. You can try changing directories.
Learn how to use ML.NET CLI to automatically generate an ML.NET model and underlying C# code. You provide your dataset and the machine learning task you want to implement, and the CLI uses the AutoML engine to create model generation and deployment source code, as well as the classification model.
In this tutorial, you will do the following steps:
- Prepare your data for the selected machine learning task
- Run the
mlnet classificationcommand from the CLI - Review the quality metric results
- Understand the generated C# code to use the model in your application
- Explore the generated C# code that was used to train the model
Note
This article refers to the ML.NET CLI tool, which is currently in preview, and material is subject to change. For more information, visit the ML.NET page.
The ML.NET CLI is part of ML.NET and its main goal is to "democratize" ML.NET for .NET developers when learning ML.NET so you don't need to code from scratch to get started.
You can run the ML.NET CLI on any command-prompt (Windows, Mac, or Linux) to generate good quality ML.NET models and source code based on training datasets you provide.
Prerequisites
- .NET 8 SDK or later
- (Optional) Visual Studio
- ML.NET CLI
You can either run the generated C# code projects from Visual Studio or with dotnet run (.NET CLI).
Prepare your data
We are going to use an existing dataset used for a 'Sentiment Analysis' scenario, which is a binary classification machine learning task. You can use your own dataset in a similar way, and the model and code will be generated for you.
Download The UCI Sentiment Labeled Sentences dataset zip file (see citations in the following note), and unzip it on any folder you choose.
Note
The datasets this tutorial uses a dataset from the 'From Group to Individual Labels using Deep Features', Kotzias et al,. KDD 2015, and hosted at the UCI Machine Learning Repository - Dua, D. and Karra Taniskidou, E. (2017). UCI Machine Learning Repository [http://archive.ics.uci.edu/ml]. Irvine, CA: University of California, School of Information and Computer Science.
Copy the
yelp_labelled.txtfile into any folder you previously created (such as/cli-test).Open your preferred command prompt and move to the folder where you copied the dataset file. For example:
cd /cli-testUsing any text editor such as Visual Studio Code, you can open, and explore the
yelp_labelled.txtdataset file. You can see that the structure is:The file has no header. You will use the column's index.
There are just two columns:
Text (Column index 0) Label (Column index 1) Wow... Loved this place. 1 Crust is not good. 0 Not tasty and the texture was just nasty. 0 ...MANY MORE TEXT ROWS... ...(1 or 0)...
Make sure you close the dataset file from the editor.
Now, you are ready to start using the CLI for this 'Sentiment Analysis' scenario.
Note
After finishing this tutorial you can also try with your own datasets as long as they are ready to be used for any of the ML tasks currently supported by the ML.NET CLI Preview which are 'Binary Classification', 'Classification', 'Regression', and 'Recommendation'.
Run the 'mlnet classification' command
Run the following ML.NET CLI command:
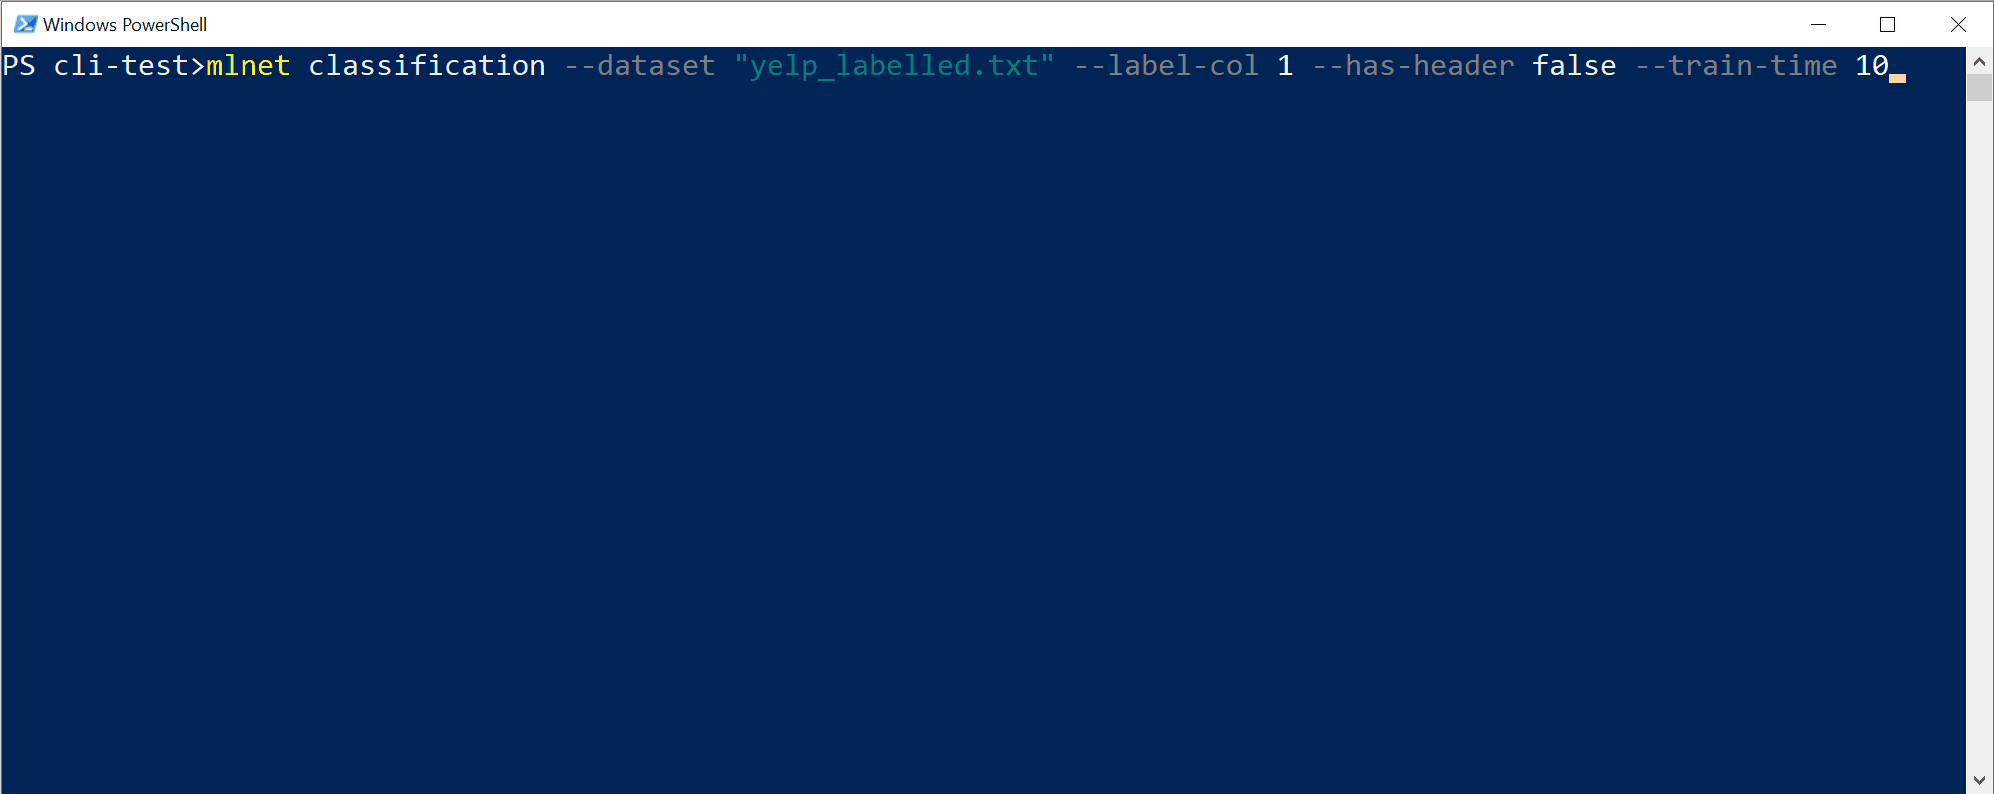
mlnet classification --dataset "yelp_labelled.txt" --label-col 1 --has-header false --train-time 10This command runs the
mlnet classificationcommand:- for the ML task of classification
- uses the dataset file
yelp_labelled.txtas training and testing dataset (internally the CLI will either use cross-validation or split it in two datasets, one for training and one for testing) - where the objective/target column you want to predict (commonly called 'label') is the column with index 1 (that is the second column, since the index is zero-based)
- does not use a file header with column names since this particular dataset file doesn't have a header
- the targeted exploration/train time for the experiment is 10 seconds
You will see output from the CLI, similar to:
In this particular case, in only 10 seconds and with the small dataset provided, the CLI tool was able to run quite a few iterations, meaning training multiple times based on different combinations of algorithms/configuration with different internal data transformations and algorithm's hyper-parameters.
Finally, the "best quality" model found in 10 seconds is a model using a particular trainer/algorithm with any specific configuration. Depending on the exploration time, the command can produce a different result. The selection is based on the multiple metrics shown, such as
Accuracy.Understanding the model's quality metrics
The first and easiest metric to evaluate a binary-classification model is the accuracy, which is simple to understand. "Accuracy is the proportion of correct predictions with a test data set.". The closer to 100% (1.00), the better.
However, there are cases where just measuring with the Accuracy metric is not enough, especially when the label (0 and 1 in this case) is unbalanced in the test dataset.
For additional metrics and more detailed information about the metrics such as Accuracy, AUC, AUCPR, and F1-score used to evaluate the different models, see Understanding ML.NET metrics.
Note
You can try this very same dataset and specify a few minutes for
--max-exploration-time(for instance three minutes so you specify 180 seconds) which will find a better "best model" for you with a different training pipeline configuration for this dataset (which is pretty small, 1000 rows).In order to find a "best/good quality" model that is a "production-ready model" targeting larger datasets, you should make experiments with the CLI usually specifying much more exploration time depending on the size of the dataset. In fact, in many cases you might require multiple hours of exploration time especially if the dataset is large on rows and columns.
The previous command execution has generated the following assets:
- A serialized model .zip ("best model") ready to use.
- C# code to run/score that generated model (To make predictions in your end-user apps with that model).
- C# training code used to generate that model (Learning purposes).
- A log file with all the iterations explored having specific detailed information about each algorithm tried with its combination of hyper-parameters and data transformations.
The first two assets (.ZIP file model and C# code to run that model) can directly be used in your end-user apps (ASP.NET Core web app, services, desktop app, etc.) to make predictions with that generated ML model.
The third asset, the training code, shows you what ML.NET API code was used by the CLI to train the generated model, so you can investigate what specific trainer/algorithm and hyper-parameters were selected by the CLI.
Those enumerated assets are explained in the following steps of the tutorial.
Explore the generated C# code to use for running the model to make predictions
In Visual Studio, open the solution generated in the folder named
SampleClassificationwithin your original destination folder (it was named/cli-testin the tutorial). You should see a solution similar to: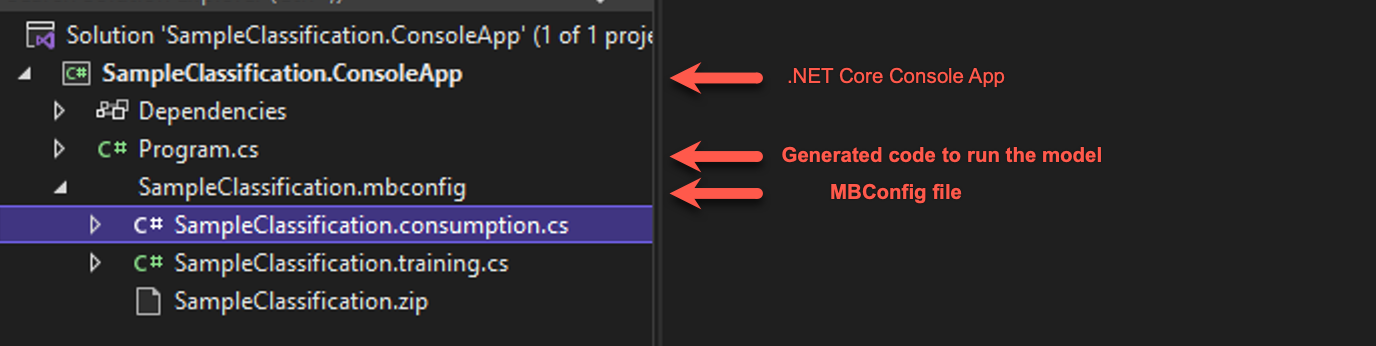
Note
The tutorial suggests using Visual Studio, but you can also explore the generated C# code (two projects) with any text editor and run the generated console app with the
dotnet CLIon a macOS, Linux, or Windows machine.- The generated console app contains execution code that you must review and then you usually reuse the 'scoring code' (code that runs the ML model to make predictions) by moving that simple code (just a few lines) to your end-user application where you want to make the predictions.
- The generated mbconfig file is a config file that can be used to retrain your model, either through the CLI or through Model Builder. This will also have two code files associated with it and a zip file.
- The training file contains the code to build the model pipeline using the ML.NET API.
- The consumption file contains the code to consume the model.
- The zip file that is the generated model from the CLI.
Open the SampleClassification.consumption.cs file within the mbconfig file. You'll see that there are input and output classes. These are data classes, or POCO classes, used to hold data. The classes contain boilerplate code that's useful if your dataset has tens or even hundreds of columns.
- The
ModelInputclass is used when reading data from the dataset. - The
ModelOutputclass is used to get the prediction result (prediction data).
- The
Open the Program.cs file and explore the code. In just a few lines, you are able to run the model and make a sample prediction.
static void Main(string[] args)
{
    // Create single instance of sample data from first line of dataset for model input
    ModelInput sampleData = new ModelInput()
    {
        Col0 = @"Wow... Loved this place.",
    };

    // Make a single prediction on the sample data and print results
    var predictionResult = SampleClassification.Predict(sampleData);

    Console.WriteLine("Using model to make single prediction -- Comparing actual Col1 with predicted Col1 from sample data...\n\n");
    Console.WriteLine($"Col0: {sampleData.Col0}");
    Console.WriteLine($"\n\nPredicted Col1 value {predictionResult.PredictedLabel} \nPredicted Col1 scores: [{String.Join(",", predictionResult.Score)}]\n\n");
    Console.WriteLine("=============== End of process, hit any key to finish ===============");
    Console.ReadKey();
}
The first lines of code create a single sample data. In this case, the single sample data is based on the first row of the dataset to be used for the prediction. You can also create your own 'hard-coded' data by updating the code:
ModelInput sampleData = new ModelInput()
{
    Col0 = "The ML.NET CLI is great for getting started. Very cool!"
};
The next line of code uses the
SampleClassification.Predict()method on the specified input data to make a prediction and return the results (based on the ModelOutput.cs schema).The last lines of code print out the properties of the sample data (in this case the Comment) as well as the Sentiment prediction and corresponding Scores for positive sentiment (1) and negative sentiment (2).
Run the project, either using the original sample data loaded from the first row of the dataset or by providing your own custom hard-coded sample data. You should get a prediction comparable to:

Try changing the hard-coded sample data to other sentences with different sentiments and see how the model predicts positive or negative sentiment.
Infuse your end-user applications with ML model predictions
You can use similar 'ML model scoring code' to run the model in your end-user application and make predictions.
For instance, you could directly move that code to any Windows desktop application such as WPF and WinForms and run the model in the same way than it was done in the console app.
However, the way you implement those lines of code to run an ML model should be optimized (that is, cache the model .zip file and load it once) and have singleton objects instead of creating them on every request, especially if your application needs to be scalable such as a web application or distributed service, as explained in the following section.
Running ML.NET models in scalable ASP.NET Core web apps and services (multi-threaded apps)
The creation of the model object (ITransformer loaded from a model's .zip file) and the PredictionEngine object should be optimized especially when running on scalable web apps and distributed services. For the first case, the model object (ITransformer) the optimization is straightforward. Since the ITransformer object is thread-safe, you can cache the object as a singleton or static object so you load the model once.
For the second object, the PredictionEngine object, it is not so easy because the PredictionEngine object is not thread-safe, therefore you cannot instantiate this object as singleton or static object in an ASP.NET Core app. This thread-safe and scalability problem is deeply discussed in this Blog Post.
However, things got a lot easier for you than what's explained in that blog post. We worked on a simpler approach for you and have created a '.NET Integration Package' that you can easily use in your ASP.NET Core apps and services by registering it in the application DI services (Dependency Injection services) and then directly use it from your code. Check the following tutorial and example for doing that:
- Tutorial: Running ML.NET models on scalable ASP.NET Core web apps and WebAPIs
- Sample: Scalable ML.NET model on ASP.NET Core WebAPI
Explore the generated C# code that was used to train the "best quality" model
For more advanced learning purposes, you can also explore the generated C# code that was used by the CLI tool to train the generated model.
That training model code is generated in the file named SampleClassification.training.cs, so you can investigate that training code.
More importantly, for this particular scenario (Sentiment Analysis model) you can also compare that generated training code with the code explained in the following tutorial:
It is interesting to compare the chosen algorithm and pipeline configuration in the tutorial with the code generated by the CLI tool. Depending on how much time you spend iterating and searching for better models, the chosen algorithm might be different along with its particular hyper-parameters and pipeline configuration.
In this tutorial, you learned how to:
- Prepare your data for the selected ML task (problem to solve)
- Run the 'mlnet classification' command in the CLI tool
- Review the quality metric results
- Understand the generated C# code to run the model (Code to use in your end-user app)
- Explore the generated C# code that was used to train the "best quality" model (earning purposes)
See also
Collaborate with us on GitHub
The source for this content can be found on GitHub, where you can also create and review issues and pull requests. For more information, see our contributor guide.