Note
Access to this page requires authorization. You can try signing in or changing directories.
Access to this page requires authorization. You can try changing directories.
Important
This topic is pre-release documentation and is subject to change.
Enable email validation in Dynamics 365 Sales to remove invalid email addresses from your lead and contact records. You reduce email bounce rates, improve engagement, and get a better return on your sellers' time.
Prerequisite
Before you enable the email validation feature, ensure that the AI Builder preview models option is enabled in your organization. More information: How do I enable a Preview feature?
In which regions is email validation available?
Email validation is available in the following regions:
- Asia Pacific (APAC)
- Canada (CAN)
- Europe (EUR)
- France (FRA)
- Great Britain (GBR)
- India (IND)
- Japan (JPN)
- North America (NAM)
- Oceania (OCE)
- South America (SAM)
- Switzerland (CHE)
- United Arab Emirates (UAE)
What is email validation?
Email validation analyzes the primary email address in lead and contact records to identify the ones that can't receive email. You must enable the feature. It's turned off by default.
Email address validation looks for the following issues:
- Incorrect syntax: An address that doesn't contain a username or an email domain.
- Invalid and unknown domain: An email domain that is invalid, couldn't be determined, or not present.
- Expired email domain: An email domain that has expired and can no longer receive or send email.
Sellers can view invalid email addresses on record forms, work list items, and the Up next widget in sales accelerator. More information: Work with invalid email addresses
Difference between Dynamics 365 Sales and Power Apps
The email validation feature in Dynamics 365 Sales and Power Apps works on the same principles. However, there are some differences as listed below:
| Scenario | Dynamics 365 Sales | Power Apps |
|---|---|---|
| Validation | The validation process runs dynamically and targets only the primary email address in lead and contact records. The feedback is displayed each time the form is loaded. More information: View invalid email addresses |
The validation process dynamically runs on all email address fields, providing immediate feedback. Also, validations aren't performed on addresses that are bulk imported. |
| Actions | Users can mark the invalid email addresses as valid. More information: Send an email to an invalid address |
Users can't mark the invalid email addresses as valid. |
| Both features enabled in an organization | Only the primary email addresses of leads and contacts are validated according to the Dynamics 365 Sales implementation. | All other email addresses are validated based on the Power Apps implementation. |
Note
To know more about the email validation feature in Power Apps, see Email address validation for email columns.
Limitations of email validation
- Email validation works only for lead and contact records.
- It checks only the primary email address in lead and contact records.
- Leads and contacts that are older than 180 days aren't validated.
Enable email address validation
In the Sales Hub site map, select Change area > App settings > Data improvement > Email validation.
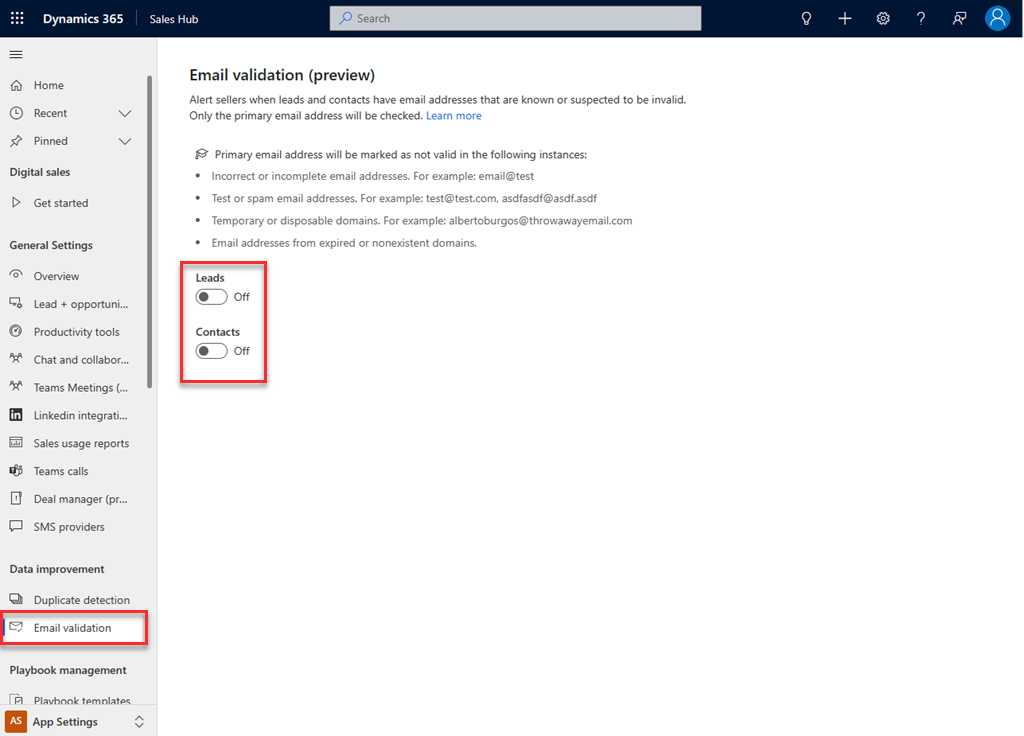
Turn on email validation for leads and contacts, according to your requirements.
Email validation runs immediately on the primary email address in lead and contact records. A red envelope icon indicates an invalid email address.
Can't find the feature in your app?
There are a few possibilities:
- You don't have the necessary license to use this feature. Check out the comparison table and the licensing guide to see which features are available with your license.
- You don't have the necessary security role to use this feature.
- To configure or setup a feature, you need to have the Administration and customization roles
- To use sales-related features, you need to have the Primary sales roles
- Some tasks require specific Functional roles.
- Your administrator hasn't turned on the feature.
- Your organization is using a custom app. Check with your administrator for exact steps. The steps described in this article are specific to the out-of-the-box Sales Hub and Sales Professional apps.
Related information
Work with invalid email addresses
Enable email validation for custom forms