Σημείωση
Η πρόσβαση σε αυτή τη σελίδα απαιτεί εξουσιοδότηση. Μπορείτε να δοκιμάσετε να συνδεθείτε ή να αλλάξετε καταλόγους.
Η πρόσβαση σε αυτή τη σελίδα απαιτεί εξουσιοδότηση. Μπορείτε να δοκιμάσετε να αλλάξετε καταλόγους.
The schema designer in the MSSQL extension for Visual Studio Code simplifies complex schema designs, providing a more intuitive understanding of your database structures. It integrates database diagram functionality to visualize existing schemas. You can design and manage databases directly in a graphical environment without needing to write Transact-SQL (T-SQL) statements.

Features
Schema designer offers these features:
- Visualize database structure with interactive diagrams.
- Create or edit tables, foreign keys, primary keys, and constraints.
- Search, drag and drop, filter, zoom, use a mini-map, and autoarrange diagrams for efficient navigation and customization.
- Export your schema diagrams to share with your team or include in documentation.
- Automatically generate and view read-only T-SQL scripts representing your schema changes.
- Review and apply changes to the database with the Publish Changes feature.
Open schema designer
Right-click on the database in the object explorer and select Design Schema from the menu. This action opens the schema designer view, which then allows you to see the visual database diagram.

Once inside the schema designer, you find a canvas with various navigation capabilities. Here's how to get around:
Pan and zoom: Select and drag anywhere on the canvas to pan across the diagram. Use your mouse scroll wheel or trackpad gestures to zoom in and out for a closer or broader view.
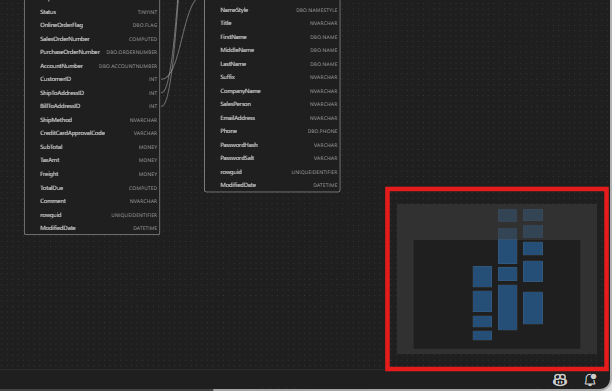
Mini-map: Use the built-in mini-map (located in the bottom right corner of the designer) for quick navigation across large or complex schemas.
Drag and drop: Rearrange tables and relationships by dragging elements on the canvas. This option helps you create a layout that makes sense to you or your team.
Search and filter: Use the search box (Ctrl+F or Cmd+F) to locate specific tables or columns. Apply filters to focus on certain parts of the schema or hide irrelevant elements.
Auto-arrange: The diagram is automatically arranged in a clear and readable layout by default. If you manually reposition tables and want to reset the view, select the Autoarrange button to reorganize the tables into the default optimized layout.
Understand table structure and relationships
When you enter the schema designer view, you see the visualization of your database tables. Each table displays its schema and table name, columns, data types, and primary keys shown as a key icon.

Foreign key relationships are shown with connecting arrows between columns. For example, in the previous diagram, the AddressID column in the CustomerAddress table references the AddressID column in the Address table, visually representing the relationship between them.
Add or edit tables
Select Add Table in the top toolbar to add a new table. Select the pencil icon on a table in the diagram to edit that table.

This action opens the Table tab in the Table Editor in a side panel. You can:
- Select or change the schema
- Define the table name
- Add new columns with name, data type, default value, and constraints
- Mark one or more columns as primary keys
- Delete or update existing columns as needed
Select Save to apply your changes. The diagram updates to reflect your changes. For more advanced table editing capabilities, such as creating indexes or setting up constraint rules, use the Table designer in the MSSQL extension for Visual Studio Code.
Add or edit foreign key relationships
To manage foreign key relationships, select the ellipsis (...) on a table in the diagram and select Manage Relationships.
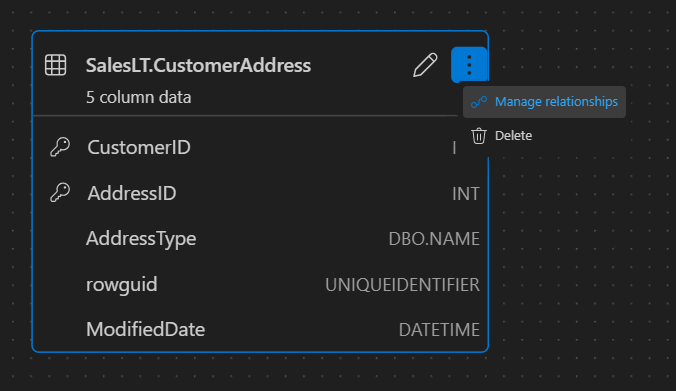
This option opens the Foreign Keys tab in the Table Editor side panel, where you can:
- Add new foreign key relationships by referencing primary keys in other tables
- Define the foreign key name
- Edit existing foreign keys to update or correct relationships

Changes automatically appear in the visual diagram, with arrows showing the direction of each relationship.

Alternatively, you can create a relationship by dragging an arrow from one column to another directly in the diagram. This method defines a one-to-one relationship between the selected columns.
View schema definition in script pane
From the ribbon toolbar, select the View Code button to open the bottom pane. This pane shows the read-only T-SQL script that displays actions performed on the schema designer in real time.

Review and publish your changes
When you finish editing tables or relationships, select Publish Changes in the top toolbar. This action generates a change summary report that lists all pending modifications to your schema.

Review the report carefully. Check the confirmation box to acknowledge and accept any potential risks associated with applying the changes. This process is managed by DacFX (Data-tier Application Framework), which ensures your schema updates are deployed smoothly, reliably, and with minimal disruption to your database.