Quickstart: How to add and remove Multiple Sender Addresses to Email Communication Service
In this quick start, you learn about how to add and remove multiple email sender addresses in Azure Communication Services.
Prerequisites
- An Azure account with an active subscription. Create an account for free.
- An Azure Communication Services Email Resource created and ready to add the domains. See Get started with Creating Email Communication Resource.
- A custom domain with higher than default sending limits provisioned and ready. See Quickstart: How to add custom verified email domains.
Create multiple sender usernames
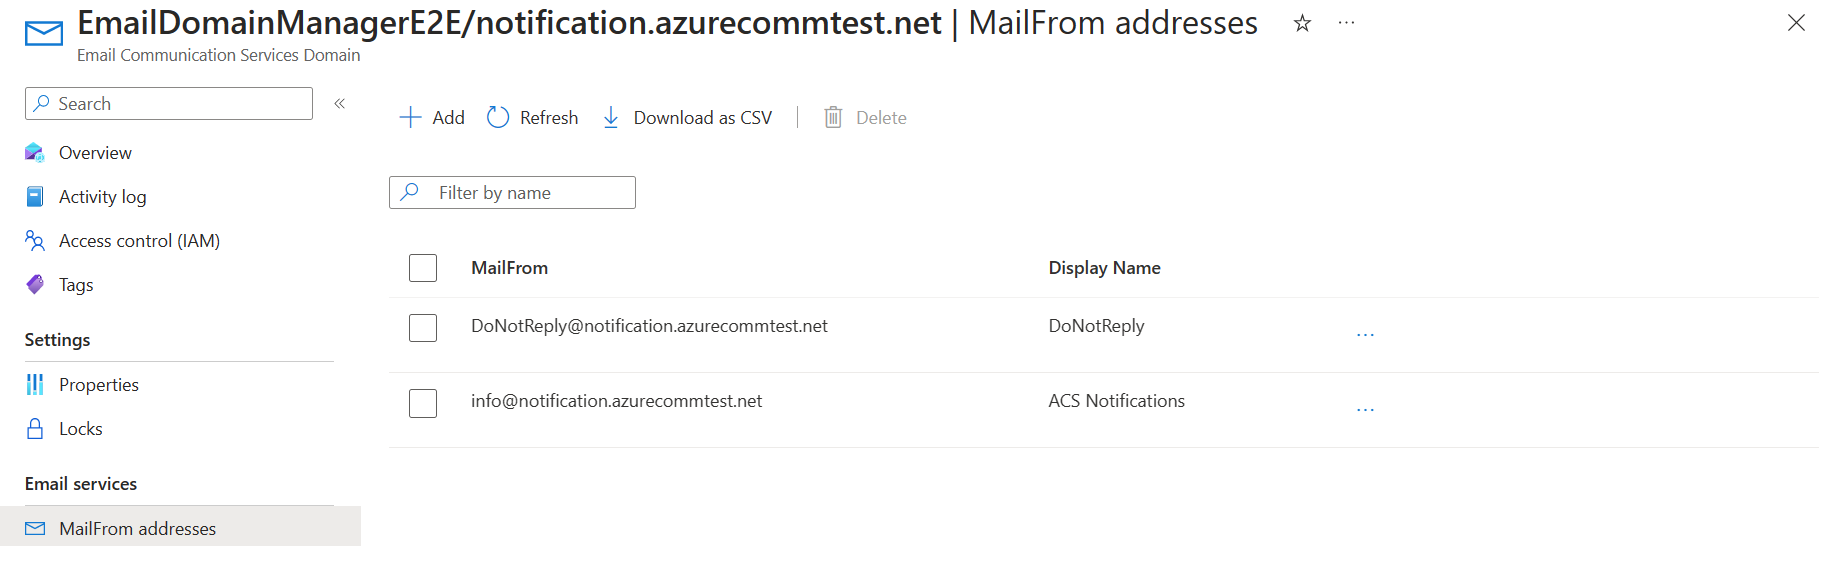
An email domain that is provisioned to send email has a default MailFrom address, formatted as donotreply@xxxxxxxx-xxxx-xxxx-xxxx-xxxxxxxxxxxx.azurecomm.net. If you configure a custom domain such as notification.azuremails.net, then the default MailFrom address has donotreply@notification.azurecommtest.net added. You can configure and add more MailFrom addresses and FROM display names to use values that are easier to read.
Note
Sender usernames cannot be enabled for Azure Managed Domains or custom domains with default sending limits. For more information, see Service limits for Azure Communication Services.
Open the Overview page of the Email Communication Service resource that you created in Get started with Creating Email Communication Resource.
Click Provision Domains on the left navigation panel to see list of provisioned domains.
Click on the one of the provisioned domains to open the Domain Overview page.
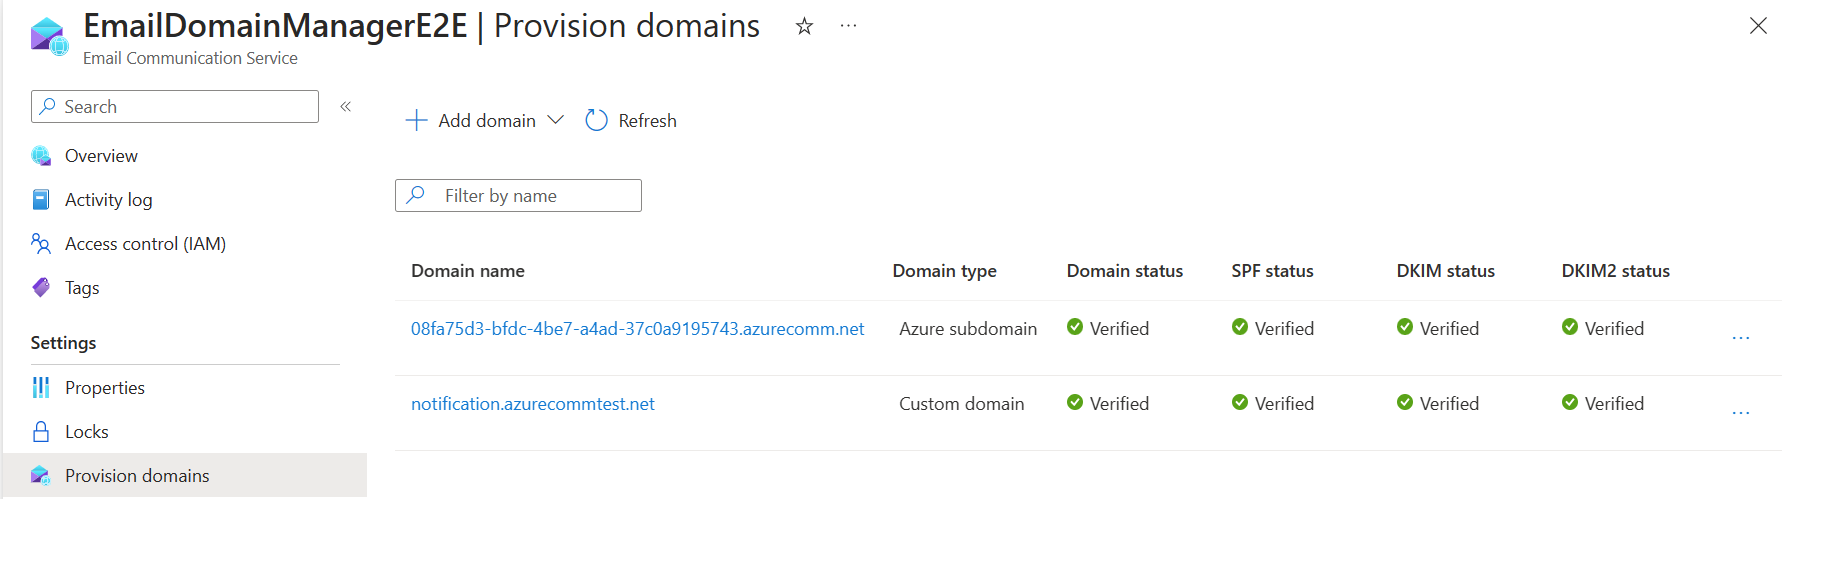
Click the MailFrom Addresses link in left navigation to see the default
donotreplyin MailFrom addresses list.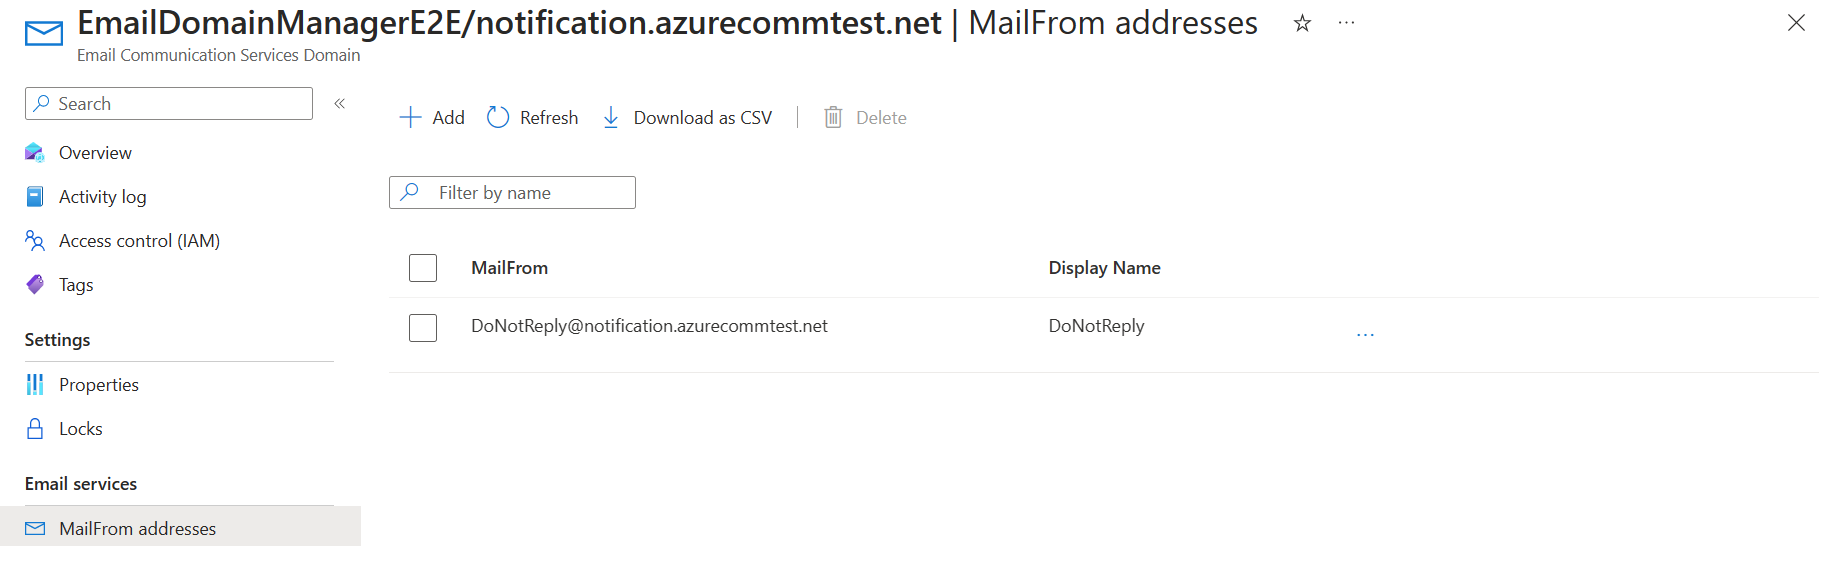
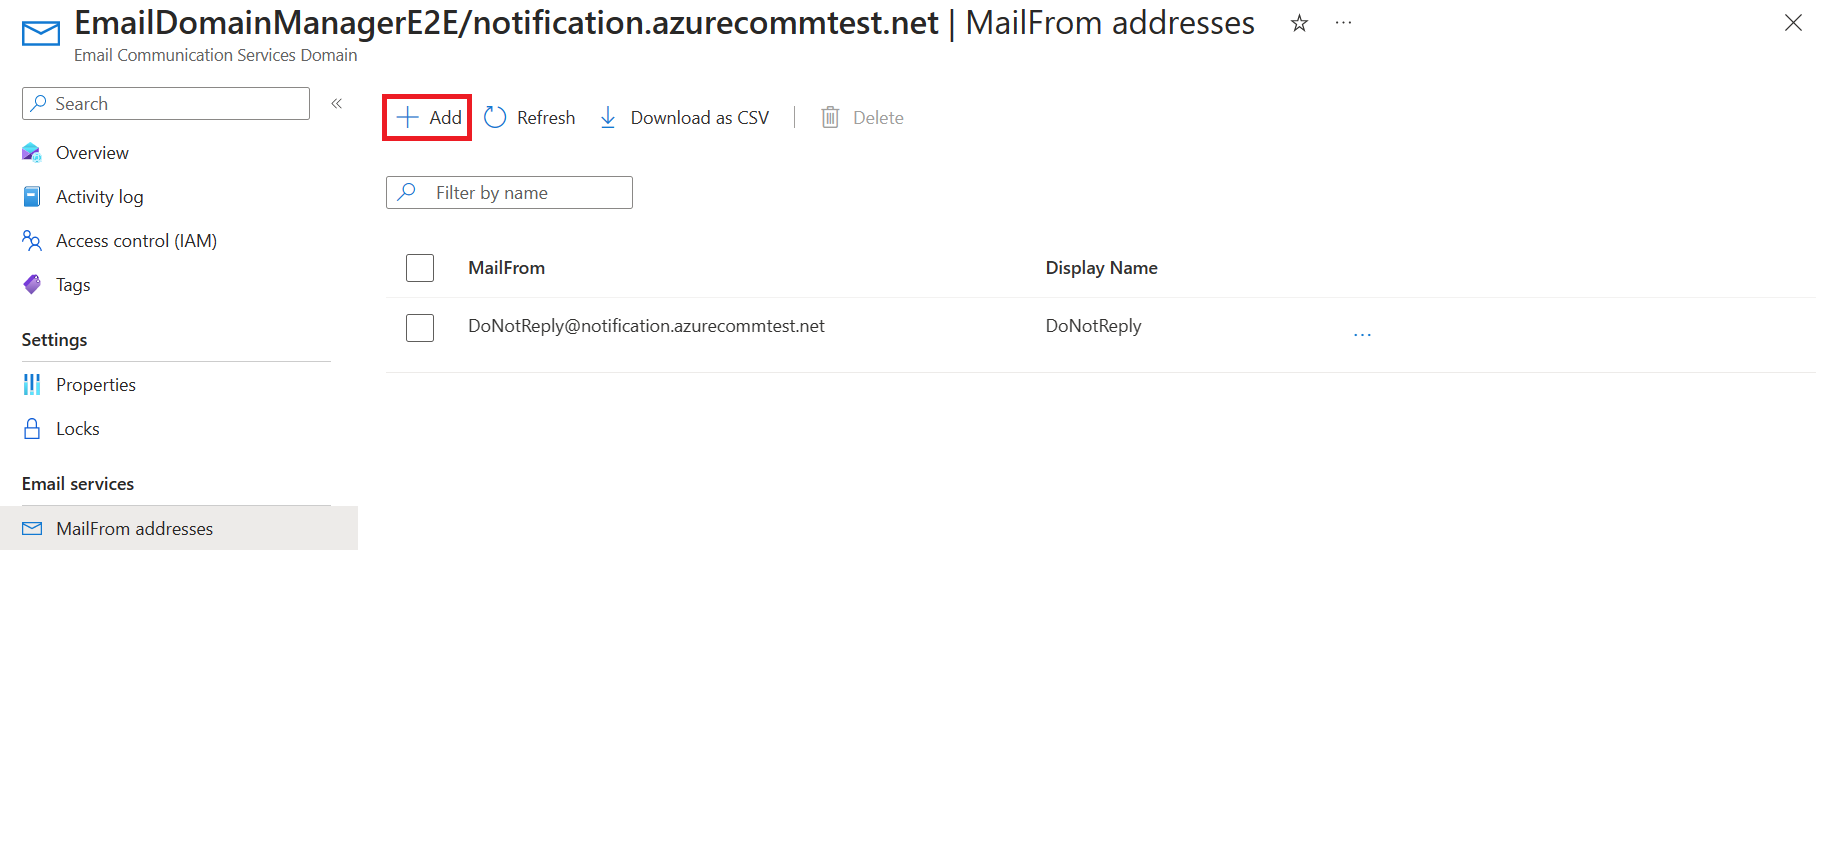
Click Add.
Enter the Display Name and MailFrom address. Click Save.
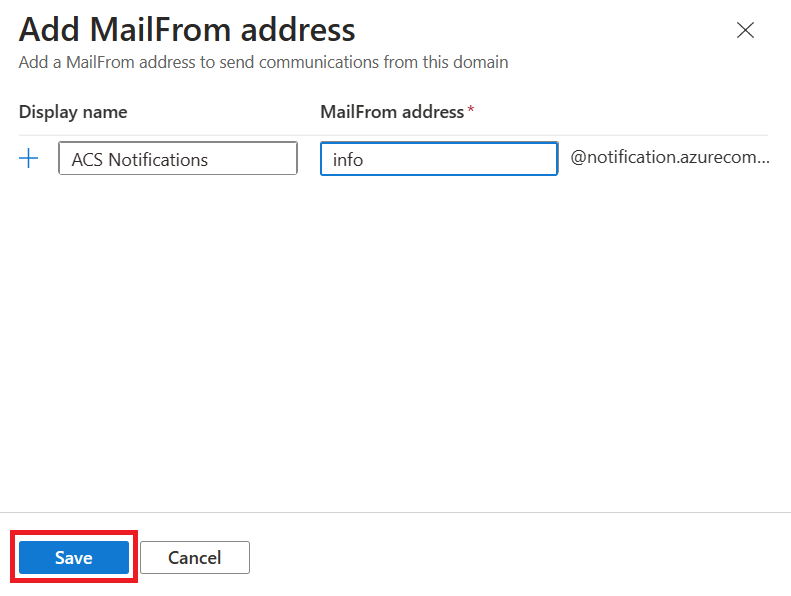
Click Save to see the updated list with newly added MailFrom address in the overview page.


Your email domain is now ready to send emails with the MailFrom address added.
Removing multiple sender usernames
Open the Domains overview page.
Click on MailFrom addresses link in left navigation to see the MailFrom addresses list.
Select the MailFrom address that needs to be removed and click Delete.
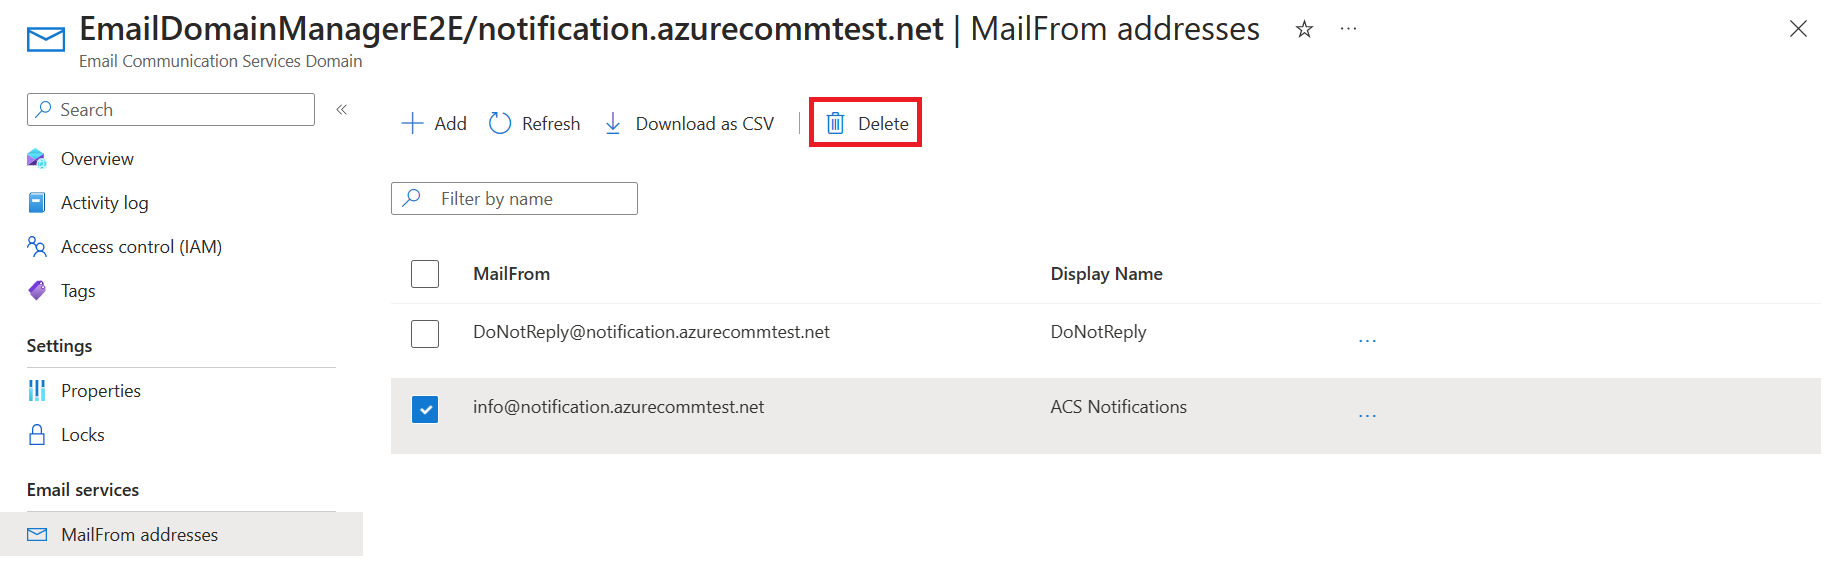
Review the updated list of MailFrom addresses in the overview page.

Prerequisites
- An Azure account with an active subscription. Create an account for free.
- Install Azure CLI
- An Azure Communication Services Email Resource created and ready to add the domains. See Get started with Creating Email Communication Resource.
- A custom domain with higher than default sending limits provisioned and ready. See Quickstart: How to add custom verified email domains.
Create Sender username resource
To create a Sender Username resource, sign in to Azure CLI. You can sign in running the az login command from the terminal and providing your credentials. To create the resource, run the following command:
az communication email domain sender-username create --email-service-name "<EmailServiceName>" --resource-group "<resourceGroup>" --domain-name "contoso.com" --sender-username "contosoNewsAlerts" --username "contosoNewsAlerts"
If you would like to select a specific subscription, you can also specify the --subscription flag and provide the subscription ID.
az communication email domain sender-username create --email-service-name "<EmailServiceName>" --resource-group "<resourceGroup>" --domain-name "contoso.com" --sender-username "contosoNewsAlerts" --username "contosoNewsAlerts" --subscription "<subscriptionId>"
You can configure your Domain resource with the following options:
- The resource group
- The name of the Email Communication Services resource.
- The geography the resource will be associated with.
- The name of the Domain resource.
- The name of the Sender Username.
- The name of the Username.
Note
The Sender Username and Username should be the same.
Manage your Sender Username resource
To add or update display name to your Sender Username resource, run the following commands. You can target a specific subscription as well.
az communication email domain sender-username update --email-service-name "<EmailServiceName>" --resource-group "<resourceGroup>" --domain-name "contoso.com" --sender-username "contosoNewsAlerts" --display-name "Contoso News Alerts"

az communication email domain sender-username update --email-service-name "<EmailServiceName>" --resource-group "<resourceGroup>" --domain-name "contoso.com" --sender-username "contosoNewsAlerts" --display-name "Contoso News Alerts" --subscription "<subscriptionId>"
To list all of your Sender Username resources in a given Domain, use the following command:
az communication email domain sender-username list --email-service-name "<EmailServiceName>" --resource-group "<resourceGroup>" --domain-name "contoso.com"
To show all the information on a given resource use the following command:
az communication email domain sender-username show --email-service-name "<EmailServiceName>" --resource-group "<resourceGroup>" --domain-name "contoso.com" --sender-username "contosoNewsAlerts"
Clean up Sender Username resource
If you want to clean up and remove a Sender Username resource, you can delete your Sender Username resource by running the following command.
az communication email domain sender-username delete --email-service-name "<EmailServiceName>" --resource-group "<resourceGroup>" --domain-name "contoso.com" --sender-username "contosoNewsAlerts"
Note
Resource deletion is permanent and no data, including event grid filters, phone numbers, or other data tied to your resource, can be recovered if you delete the resource.
For information on other commands, see Sender Username CLI.
Prerequisites
- An Azure account with an active subscription. Create an account for free.
- The latest version .NET Core SDK for your operating system.
- Get the latest version of the .NET Identity SDK.
- Get the latest version of the .NET Management SDK.
Installing the SDK
First, include the Communication Services Management SDK in your C# project:
using Azure.ResourceManager.Communication;
Subscription ID
You need to know the ID of your Azure subscription. This can be acquired from the portal:
- Login into your Azure account
- Select Subscriptions in the left sidebar
- Select whichever subscription is needed
- Click on Overview
- Select your Subscription ID
In this quickstart, we'll assume that you've stored the subscription ID in an environment variable called AZURE_SUBSCRIPTION_ID.
Authentication
To communicate with Domain resource, you must first authenticate yourself to Azure.
Authenticate the Client
The default option to create an authenticated client is to use DefaultAzureCredential. Since all management APIs go through the same endpoint, in order to interact with resources, only one top-level ArmClient has to be created.
To authenticate to Azure and create an ArmClient, do the following code:
using System;
using System.Threading.Tasks;
using Azure;
using Azure.Core;
using Azure.Identity;
using Azure.ResourceManager;
using Azure.ResourceManager.Communication;
using Azure.ResourceManager.Resources;
...
// get your azure access token, for more details of how Azure SDK get your access token, please refer to https://learn.microsoft.com/dotnet/azure/sdk/authentication?tabs=command-line
TokenCredential cred = new DefaultAzureCredential();
// authenticate your client
ArmClient client = new ArmClient(cred);
Interacting with Azure resources
Now that you're authenticated.
For each of the following examples, we'll be assigning our Sender Username resources to an existing Domain resource.
If you need to create an Email Communication Service, you can do so by using the Azure portal and to create a Domain resource, you can do so by using the Azure portal.
Create a Sender Username resource
When creating a Sender Username resource, you have to specify the resource group name, Email Communication Service name, Domain name and resource name.
// this example assumes you already have this CommunicationDomainResource created on azure
// for more information of creating CommunicationDomainResource, please refer to the document of CommunicationDomainResource
string subscriptionId = "11112222-3333-4444-5555-666677778888";
string resourceGroupName = "contosoResourceGroup";
string emailServiceName = "contosoEmailService";
string domainName = "contoso.com";
ResourceIdentifier communicationDomainResourceId = CommunicationDomainResource.CreateResourceIdentifier(subscriptionId, resourceGroupName, emailServiceName, domainName);
CommunicationDomainResource communicationDomainResource = client.GetCommunicationDomainResource(communicationDomainResourceId);

// get the collection of this SenderUsernameResource
SenderUsernameResourceCollection collection = communicationDomainResource.GetSenderUsernameResources();

// invoke the operation
string senderUsername = "contosoNewsAlerts";
SenderUsernameResourceData data = new SenderUsernameResourceData()
{
    Username = "contosoNewsAlerts",
    DisplayName = "Contoso News Alerts",
};
ArmOperation<SenderUsernameResource> lro = await collection.CreateOrUpdateAsync(WaitUntil.Completed, senderUsername, data);
SenderUsernameResource result = lro.Value;

// the variable result is a resource, you could call other operations on this instance as well
// but just for demo, we get its data from this resource instance
SenderUsernameResourceData resourceData = result.Data;
// for demo we just print out the id
Console.WriteLine($"Succeeded on id: {resourceData.Id}");
Managing Sender Username Resources
List by Domain resource
// this example assumes you already have this CommunicationDomainResource created on azure
// for more information of creating CommunicationDomainResource, please refer to the document of CommunicationDomainResource
string subscriptionId = "11112222-3333-4444-5555-666677778888";
string resourceGroupName = "contosoResourceGroup";
string emailServiceName = "contosoEmailService";
string domainName = "contoso.com";
ResourceIdentifier communicationDomainResourceId = CommunicationDomainResource.CreateResourceIdentifier(subscriptionId, resourceGroupName, emailServiceName, domainName);
CommunicationDomainResource communicationDomainResource = client.GetCommunicationDomainResource(communicationDomainResourceId);

// get the collection of this SenderUsernameResource
SenderUsernameResourceCollection collection = communicationDomainResource.GetSenderUsernameResources();

// invoke the operation and iterate over the result
await foreach (SenderUsernameResource item in collection.GetAllAsync())
{
    // the variable item is a resource, you could call other operations on this instance as well
    // but just for demo, we get its data from this resource instance
    SenderUsernameResourceData resourceData = item.Data;
    // for demo we just print out the id
    Console.WriteLine($"Succeeded on id: {resourceData.Id}");
}

Console.WriteLine($"Succeeded");
Get Sender Username
// this example assumes you already have this CommunicationDomainResource created on azure
// for more information of creating CommunicationDomainResource, please refer to the document of CommunicationDomainResource
string subscriptionId = "11112222-3333-4444-5555-666677778888";
string resourceGroupName = "contosoResourceGroup";
string emailServiceName = "contosoEmailService";
string domainName = "contoso.com";
ResourceIdentifier communicationDomainResourceId = CommunicationDomainResource.CreateResourceIdentifier(subscriptionId, resourceGroupName, emailServiceName, domainName);
CommunicationDomainResource communicationDomainResource = client.GetCommunicationDomainResource(communicationDomainResourceId);

// get the collection of this SenderUsernameResource
SenderUsernameResourceCollection collection = communicationDomainResource.GetSenderUsernameResources();

// invoke the operation
string senderUsername = "contosoNewsAlerts";
bool result = await collection.ExistsAsync(senderUsername);

Console.WriteLine($"Succeeded: {result}");
Clean up a Sender Username resource
// this example assumes you already have this SenderUsernameResource created on azure
// for more information of creating SenderUsernameResource, please refer to the document of SenderUsernameResource
string subscriptionId = "11112222-3333-4444-5555-666677778888";
string resourceGroupName = "MyResourceGroup";
string emailServiceName = "MyEmailServiceResource";
string domainName = "contoso.com";
string senderUsername = "contosoNewsAlerts";
ResourceIdentifier senderUsernameResourceId = SenderUsernameResource.CreateResourceIdentifier(subscriptionId, resourceGroupName, emailServiceName, domainName, senderUsername);
SenderUsernameResource senderUsernameResource = client.GetSenderUsernameResource(senderUsernameResourceId);

// invoke the operation
await senderUsernameResource.DeleteAsync(WaitUntil.Completed);

Console.WriteLine($"Succeeded");
Note
Resource deletion is permanent and no data, including event grid filters, phone numbers, or other data tied to your resource, can be recovered if you delete the resource.
Prerequisites
- An Azure account with an active subscription. Create an account for free.
- Install the Azure Az PowerShell Module
- An Azure Communication Services Email Resource created and ready to add the domains. See Get started with Creating Email Communication Resource.
- A custom domain with higher than default sending limits provisioned and ready. See Quickstart: How to add custom verified email domains.
Create a Sender Username resource
To create a Sender Username resource, Sign into your Azure account by using the Connect-AzAccount using the following command and provide your credentials.
PS C:\> Connect-AzAccount
First, make sure to install the Azure Communication Services module Az.Communication using the following command.
PS C:\> Install-Module Az.Communication
Run the following command to create Sender user name for Custom domain:
PS C:\> New-AzEmailServiceSenderUsername -ResourceGroupName ContosoResourceProvider1 -EmailServiceName ContosoEmailServiceResource1 -DomainName contoso.com -SenderUsername test -Username test
If you would like to select a specific subscription you can also specify the --subscription flag and provide the subscription ID.
PS C:\> New-AzEmailServiceSenderUsername -ResourceGroupName ContosoResourceProvider1 -EmailServiceName ContosoEmailServiceResource1 -DomainName contoso.com -SenderUsername test -Username test -SubscriptionId SubscriptionID
You can configure your Domain resource with the following options:
- The resource group
- The name of the Email Communication Services resource.
- The name of the Domain resource.
- The name of the Sender Username.
- The name of the Username.
Note
The Sender Username and Username should be the same.
Manage your Sender username resource
To add or update display name to your Sender Username resource, run the following commands. You can target a specific subscription as well.
PS C:\> Update-AzEmailServiceSenderUsername -ResourceGroupName ContosoResourceProvider1 -EmailServiceName ContosoEmailServiceResource1 -DomainName contoso.com -SenderUsername test -Username test -DisplayName testdisplayname

PS C:\> Update-AzEmailServiceSenderUsername -ResourceGroupName ContosoResourceProvider1 -EmailServiceName ContosoEmailServiceResource1 -DomainName contoso.com -SenderUsername test -Username test -DisplayName testdisplayname -SubscriptionId SubscriptionID
To list all of your Sender Username resources in a given Domain, use the following command:
PS C:\> Get-AzEmailServiceSenderUsername -ResourceGroupName ContosoResourceProvider1 -EmailServiceName ContosoEmailServiceResource1 -DomainName contoso.com
To list all the information on a given resource, use the following command:
PS C:\> Get-AzEmailServiceSenderUsername -ResourceGroupName ContosoResourceProvider1 -EmailServiceName ContosoEmailServiceResource1 -DomainName contoso.com -SenderUsername test
Clean up a Sender Username resource
If you want to clean up and remove a Sender Username resource, You can delete your Sender Username resource by running the following command:
PS C:\> Remove-AzEmailServiceSenderUsername -ResourceGroupName ContosoResourceProvider1 -EmailServiceName ContosoEmailServiceResource1 -DomainName contoso.com -SenderUsername test
Note
Resource deletion is permanent and no data, including event grid filters, phone numbers, or other data tied to your resource, can be recovered if you delete the resource.
Next steps
Related articles
- Familiarize yourself with the Email client library
- Learn how to send emails with custom verified domains in Quickstart: How to add custom verified email domains
Σχόλια
Σύντομα διαθέσιμα: Καθ' όλη τη διάρκεια του 2024 θα καταργήσουμε σταδιακά τα ζητήματα GitHub ως μηχανισμό ανάδρασης για το περιεχόμενο και θα το αντικαταστήσουμε με ένα νέο σύστημα ανάδρασης. Για περισσότερες πληροφορίες, ανατρέξτε στο θέμα: https://aka.ms/ContentUserFeedback.
Υποβολή και προβολή σχολίων για