Σημείωση
Η πρόσβαση σε αυτή τη σελίδα απαιτεί εξουσιοδότηση. Μπορείτε να δοκιμάσετε να συνδεθείτε ή να αλλάξετε καταλόγους.
Η πρόσβαση σε αυτή τη σελίδα απαιτεί εξουσιοδότηση. Μπορείτε να δοκιμάσετε να αλλάξετε καταλόγους.
This article describes how to specify mandatory artifacts in Azure DevTest Labs to install on every lab virtual machine (VM). Artifacts are tools and applications that you can add to your VMs. Mandatory artifacts can include any software that every VM in your lab must have. By defining mandatory artifacts, you can ensure all your lab VMs are installed with standardized, up-to-date artifacts. Lab users don't have to spend time and effort to add needed artifacts individually.
Explore mandatory artifacts
Mandatory artifacts can't have any configurable parameters. This restriction makes it easier for lab users to create VMs. Mandatory artifacts always install first on a VM before any extra or custom artifacts selected by the user.
You can create a custom image from a VM that has mandatory artifacts applied to it. When you create new VMs from the custom image, the new VMs also have the mandatory artifacts. DevTest Labs always installs the most recent versions of the mandatory artifacts on a VM, even when the base is an "older" custom image.
When you create a VM, you can't rearrange, change, or delete the mandatory artifacts. However, you can add extra artifacts or define custom artifacts. For more information, see Add artifacts to DevTest Labs VMs.
Define mandatory artifacts
You can select mandatory artifacts for Windows and Linux lab machines separately by following these steps:
In the Azure portal, go to your DevTest Labs lab resource where you want to define the mandatory artifacts.
On your lab Overview page, expand the Settings section in the left menu, and select Configuration and policies.
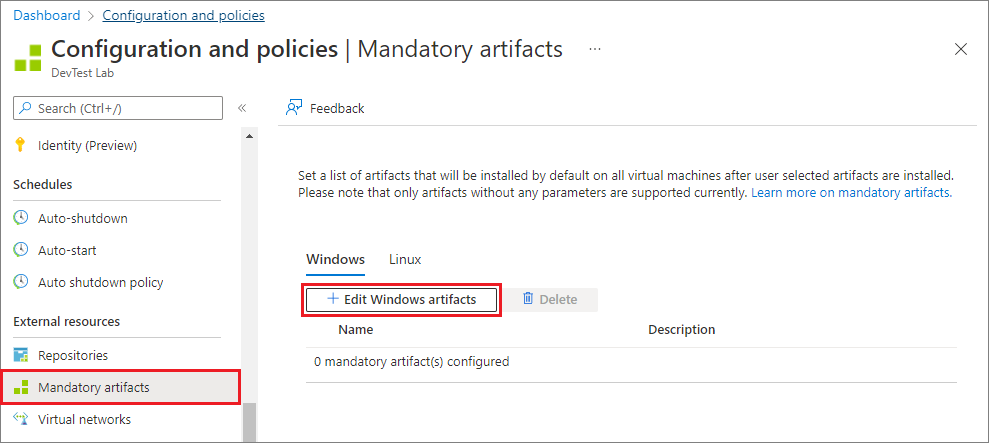
On the Configuration and policies screen, expand the External resources section in the left menu, and select Mandatory artifacts.
Select the VM configuration:
- Windows: Select the Windows tab, and then select Edit Windows artifacts.
- Linux: Select the Linux tab, and then select Edit Linux artifacts.
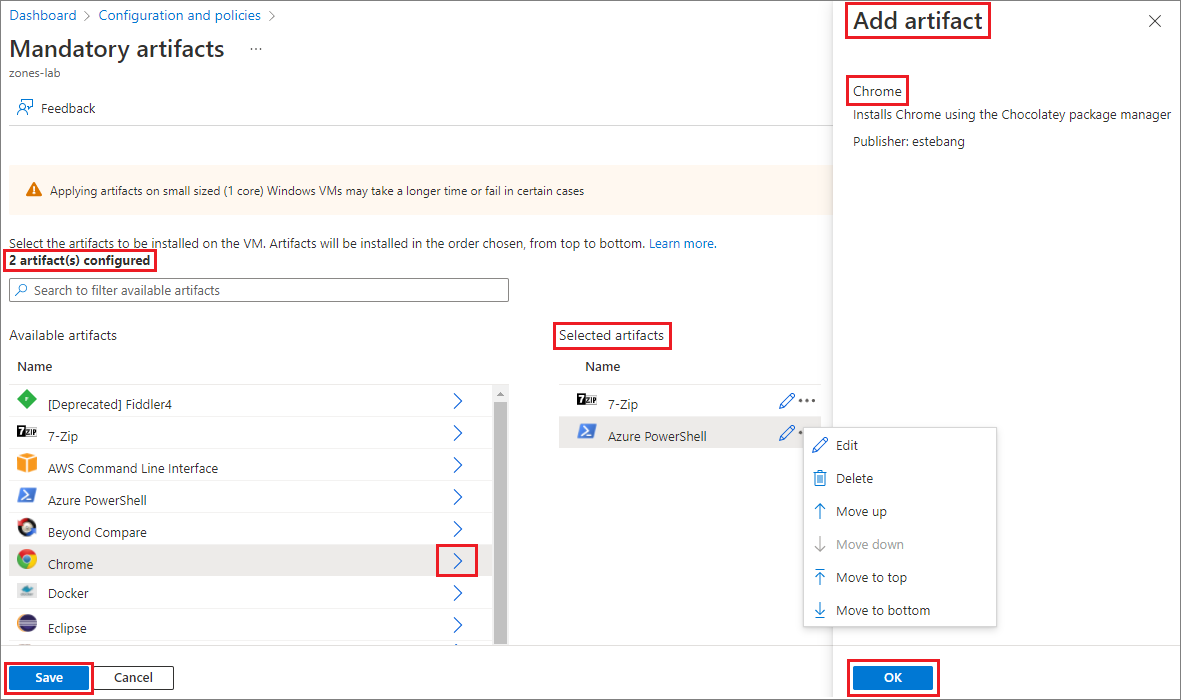
On the Mandatory artifacts page, select the arrow next to each artifact you want to add to the VM.
On each Add artifact pane, select OK. The artifact appears under Selected artifacts, and the number of configured artifacts updates to show the current list:
Select Save.
Change installation order
After you add mandatory artifacts, DevTest Labs updates the Mandatory artifacts lists for your lab in the Azure portal. From these lists, you can access the artifacts to change the installation order. When you create a new VM, DevTest Labs installs the top artifact in the list first and the bottom artifact last.
To change the order of installation for the mandatory artifacts:
On the External resources > Mandatory artifacts screen for your lab, select the Windows or Linux tab.
Select Edit Windows artifacts or Edit Linux artifacts to open the Mandatory artifacts page.
In the Selected artifacts list, select More options (...) for the artifact that you want to change.
On the artifact menu, select Move up, Move down, Move to top, or Move to bottom.
Select Save.
View mandatory artifacts
After you specify mandatory artifacts for a lab, DevTest Labs shows the mandatory artifacts for all lab VMs based on the operating system (Windows or Linux). When a lab user creates a new VM, they can see the mandatory artifacts that DevTest Labs plans to install.
To view the mandatory artifacts for a VM:
On the Overview page for your lab, select Add.
On the Choose a base page, select a Marketplace image, such as Windows 11 Pro.
On the Create lab resource page, under Artifacts, notice the number of mandatory artifacts for the VM:
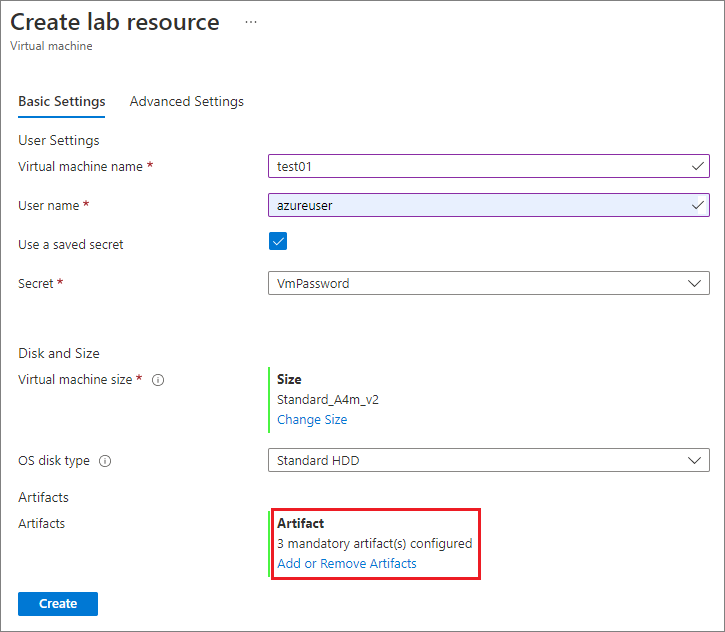
To see details about the mandatory artifacts, select Add or Remove Artifacts.
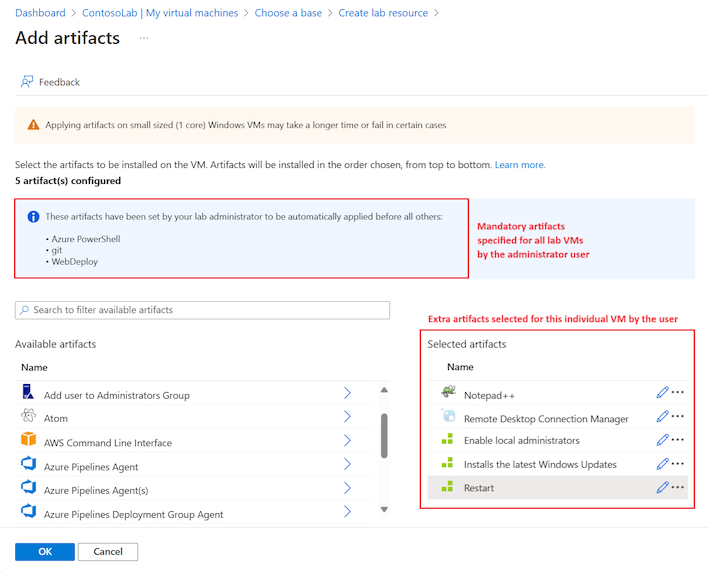
On the Add artifacts screen, the mandatory artifacts are displayed above the Available artifacts list. The mandatory artifacts are listed in order of installation from top to bottom:
Delete mandatory artifacts
You can also delete artifacts in the Mandatory artifacts lists:
On the External resources > Mandatory artifacts screen for your lab, select the Windows or Linux tab.
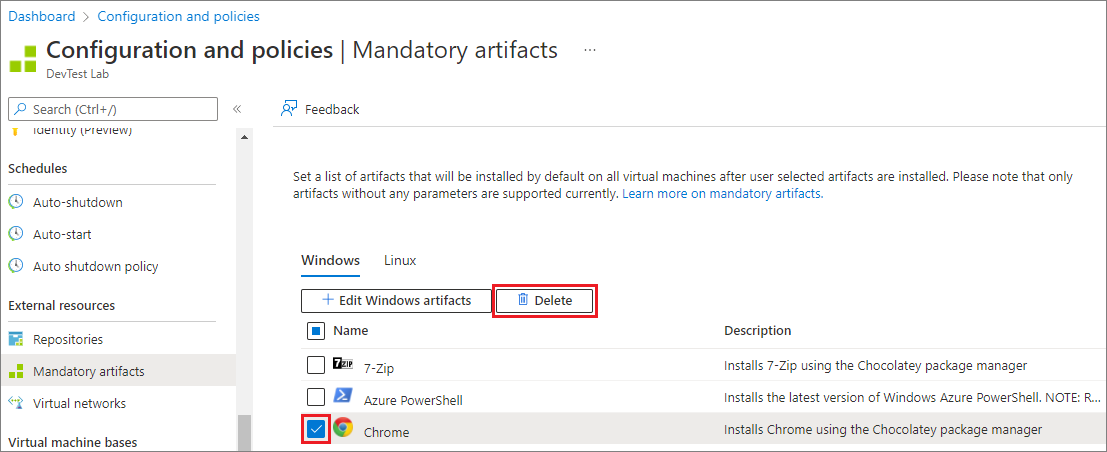
Select the checkbox next to the artifact in the list, and then select Delete:
At the confirmation prompt, select Yes.
