Create and manage projects
This article describes how to create, manage, and delete projects.
Classic Azure Migrate is retiring in Feb 2024. After Feb 2024, the classic version of Azure Migrate will no longer be supported and the inventory metadata in the classic project will be deleted. If you're using classic projects, delete those projects and follow the steps to create a new project. You can't upgrade classic projects or components to Azure Migrate. View FAQ before you start the creation process.
A project is used to store discovery, assessment, and migration metadata collected from the environment you're assessing or migrating. In a project, you can track discovered assets, create assessments, and orchestrate migrations to Azure.
Verify permissions
Ensure you have the correct permissions to create a project using the following steps:
- In the Azure portal, open the relevant subscription, and select Access control (IAM).
- In Check access, find the relevant account, and select it and view permissions. You should have Contributor or Owner permissions.
Create a project for the first time
Set up a new project in an Azure subscription.
In the Azure portal, search for Azure Migrate.
In Services, select Azure Migrate.
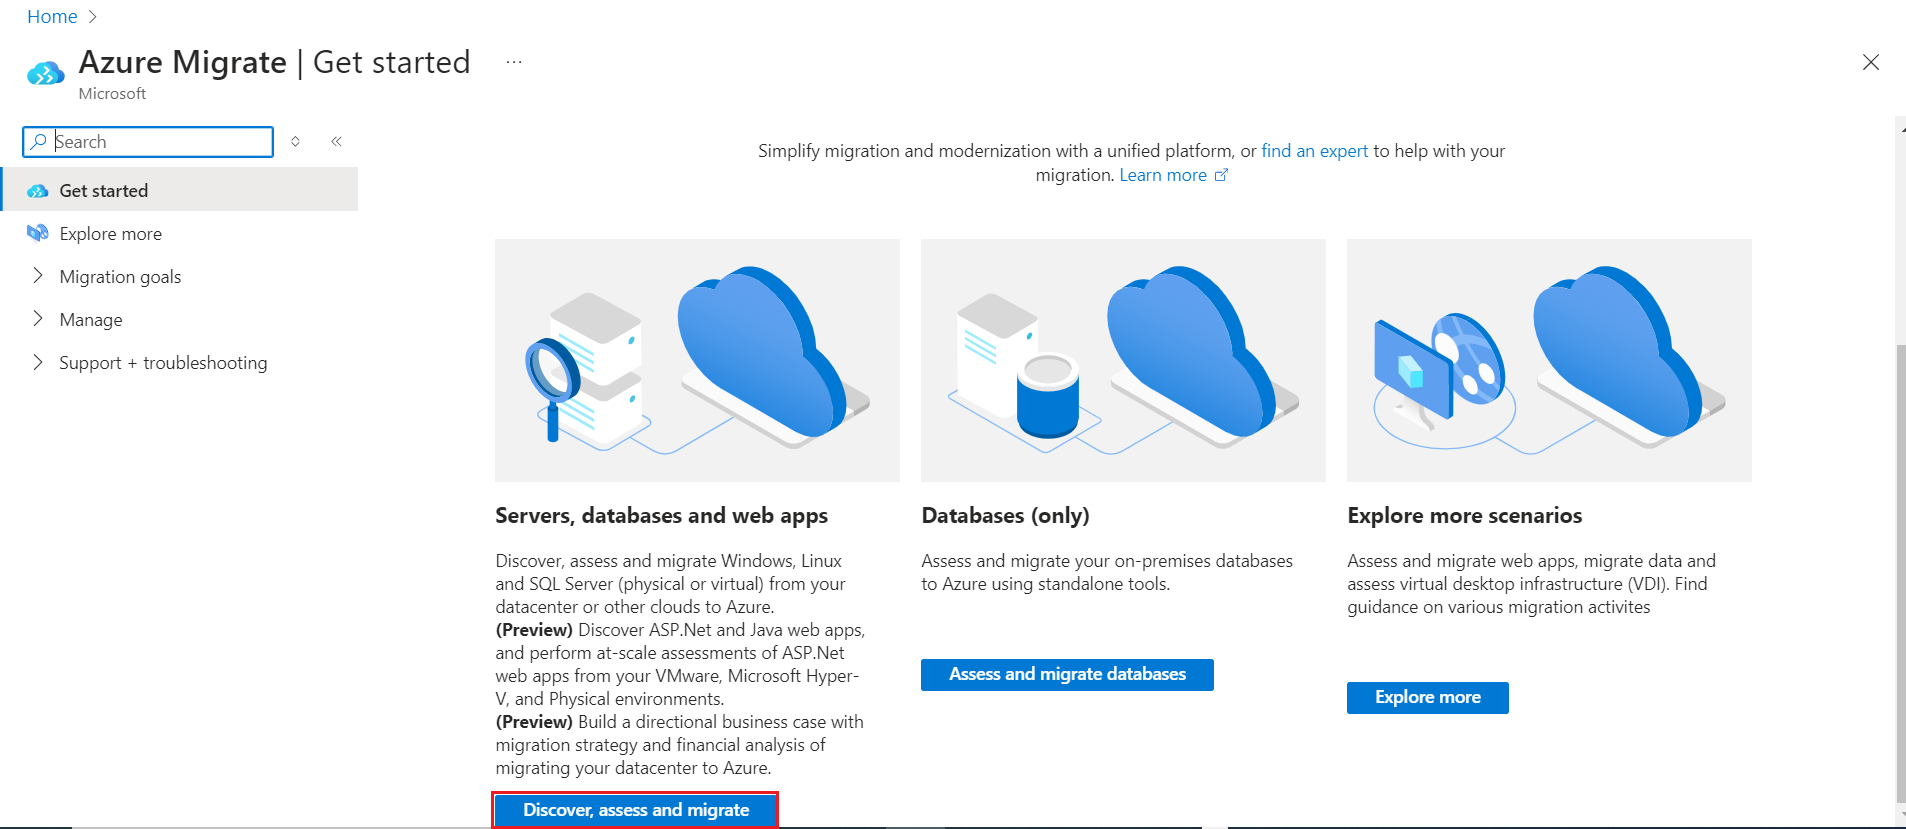
In Get started, select Discover, assess and migrate.
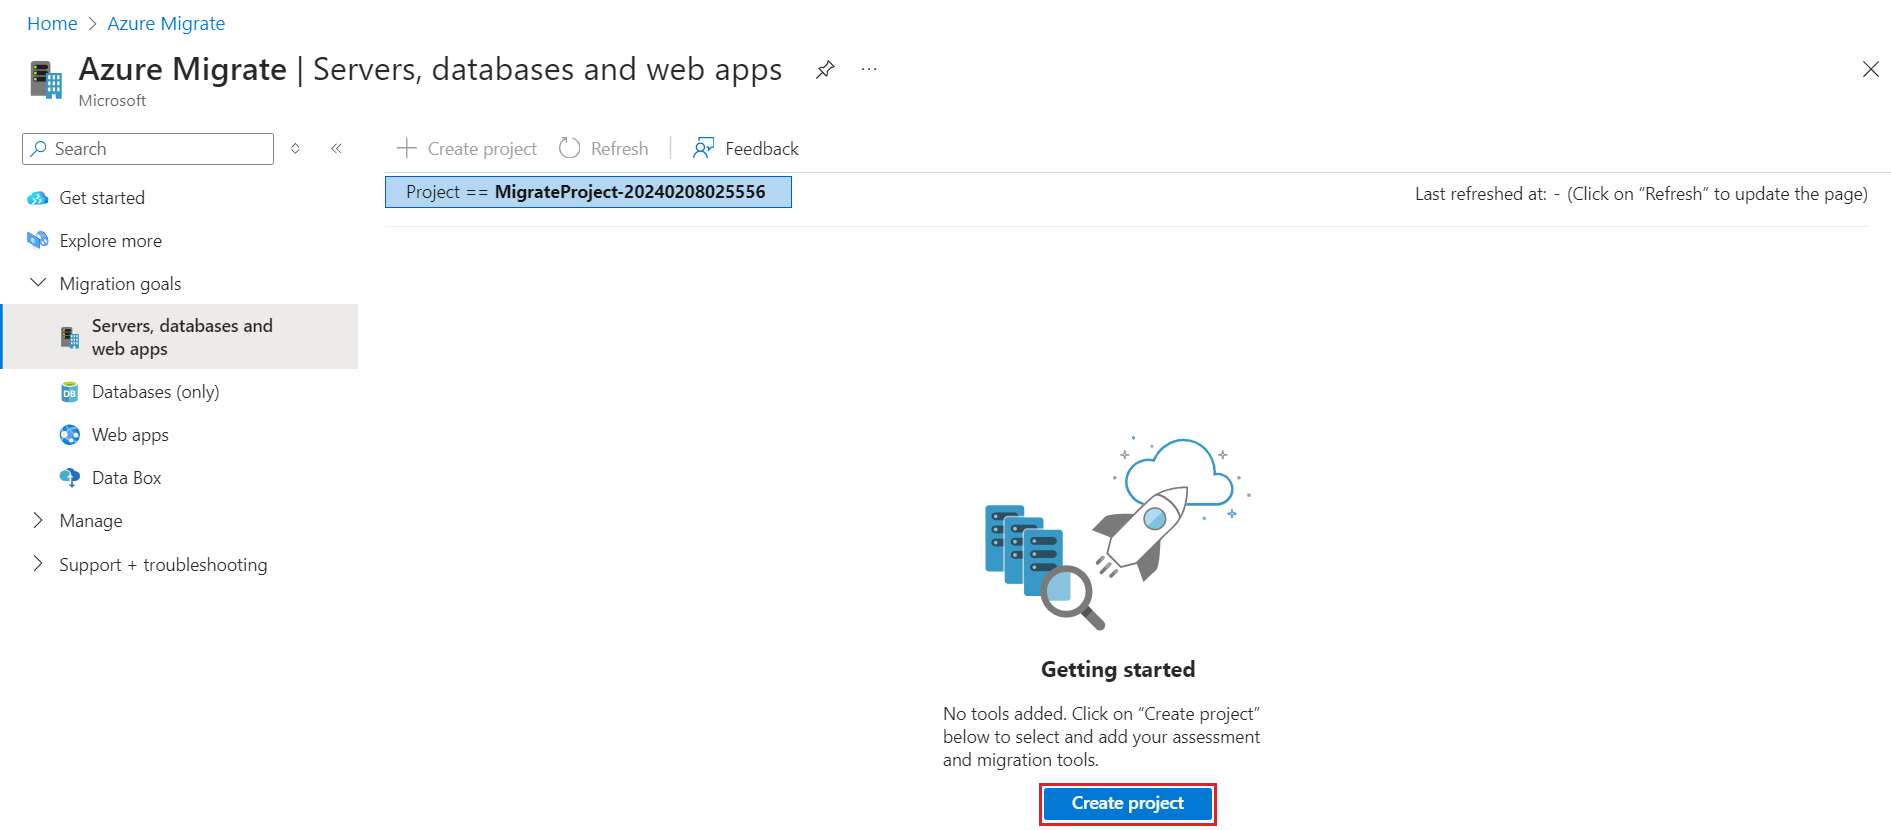
In Servers, databases and web apps, select Create project.
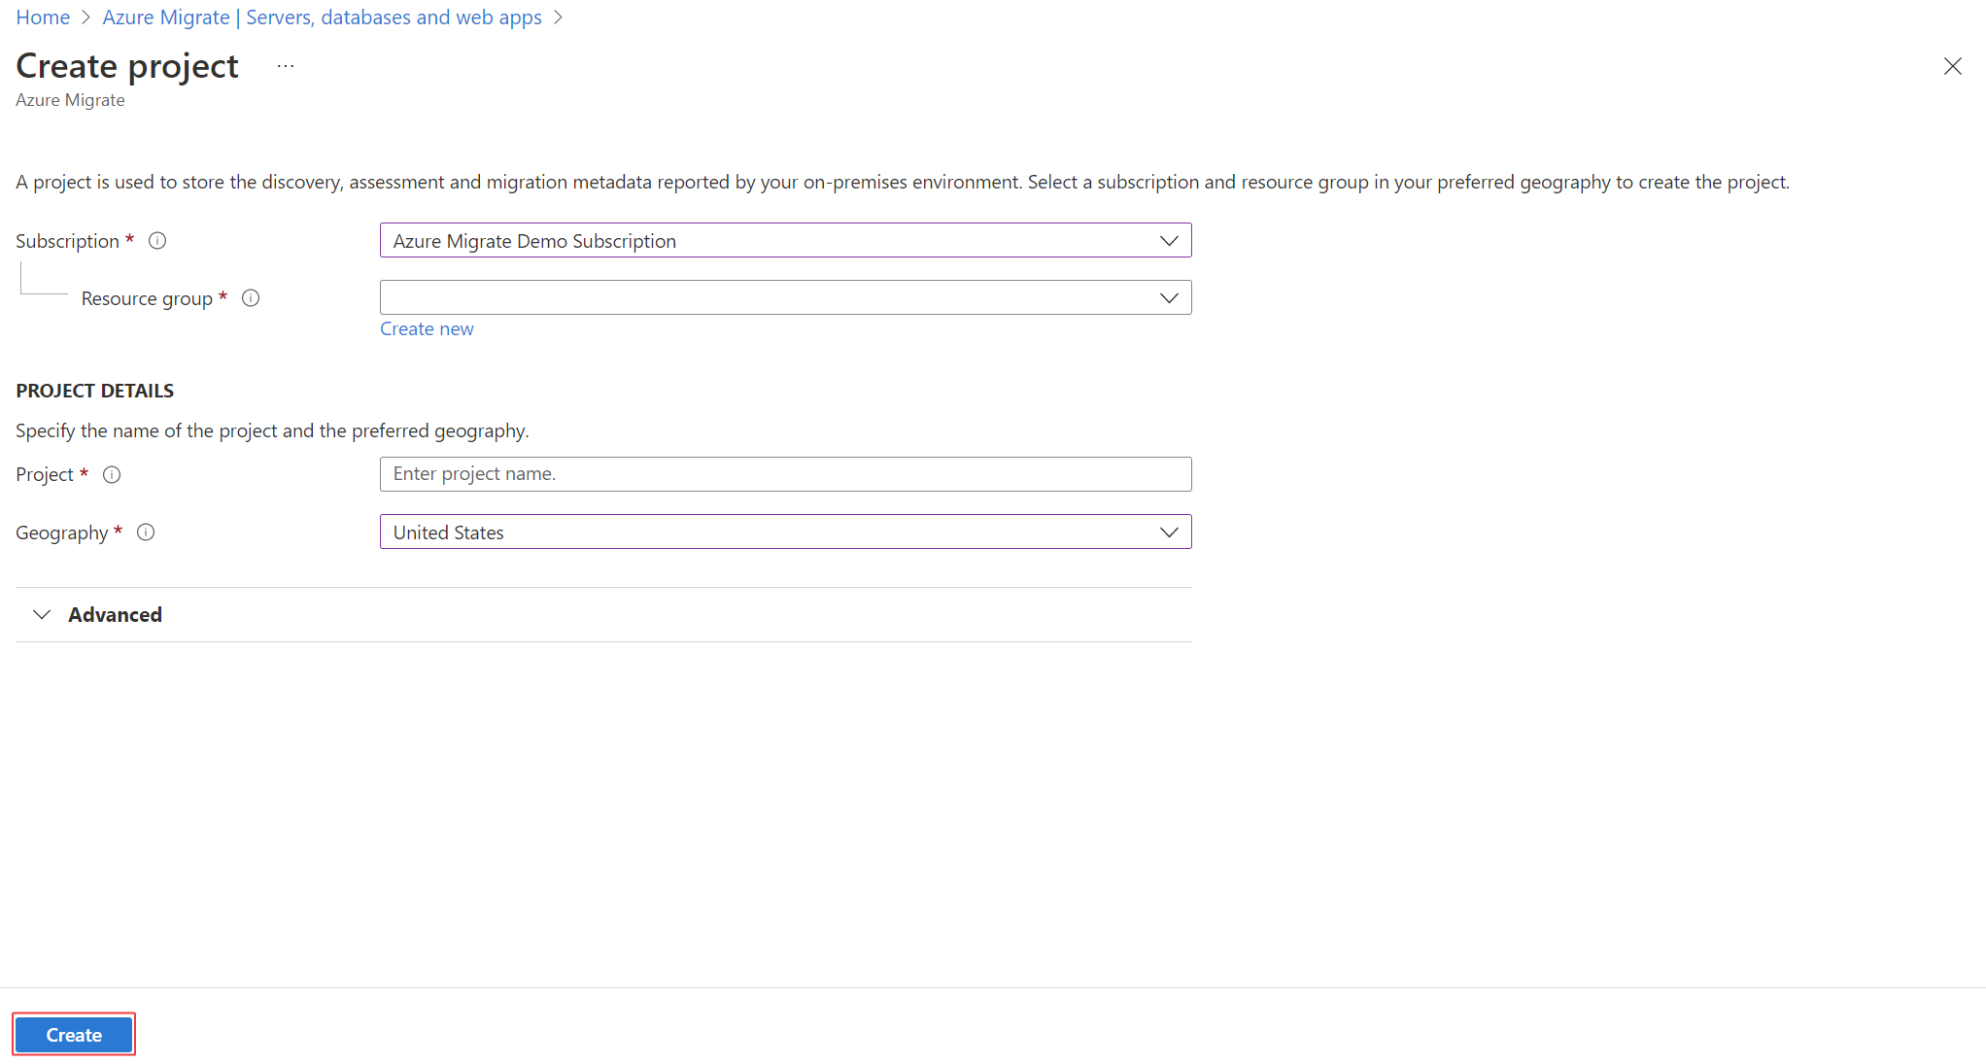
In Create project, select the Azure subscription and resource group. Create a resource group if you don't have one.
In Project Details, specify the project name and the geography in which you want to create the project.
- The geography is only used to store the metadata gathered from on-premises servers. You can assess or migrate servers for any target region regardless of the selected geography.
- Review supported geographies for public and government clouds.
Note
Use the Advanced configuration section to create an Azure Migrate project with private endpoint connectivity. Learn more.
Select Create.
Wait for a few minutes for the project to deploy.
Create a project in a specific region
In the portal, you can select the geography in which you want to create the project. If you want to create the project within a specific Azure region, use the following API command to create the project.
PUT /subscriptions/<subid>/resourceGroups/<rg>/providers/Microsoft.Migrate/MigrateProjects/<mymigrateprojectname>?api-version=2018-09-01-preview "{location: 'centralus', properties: {}}"
Create additional projects
If you already have a project and you want to create an additional project, do the following:
In the Azure public portal or Azure Government, search for Azure Migrate.
On the Azure Migrate dashboard, select Servers, databases and web apps > Create project on the top left.
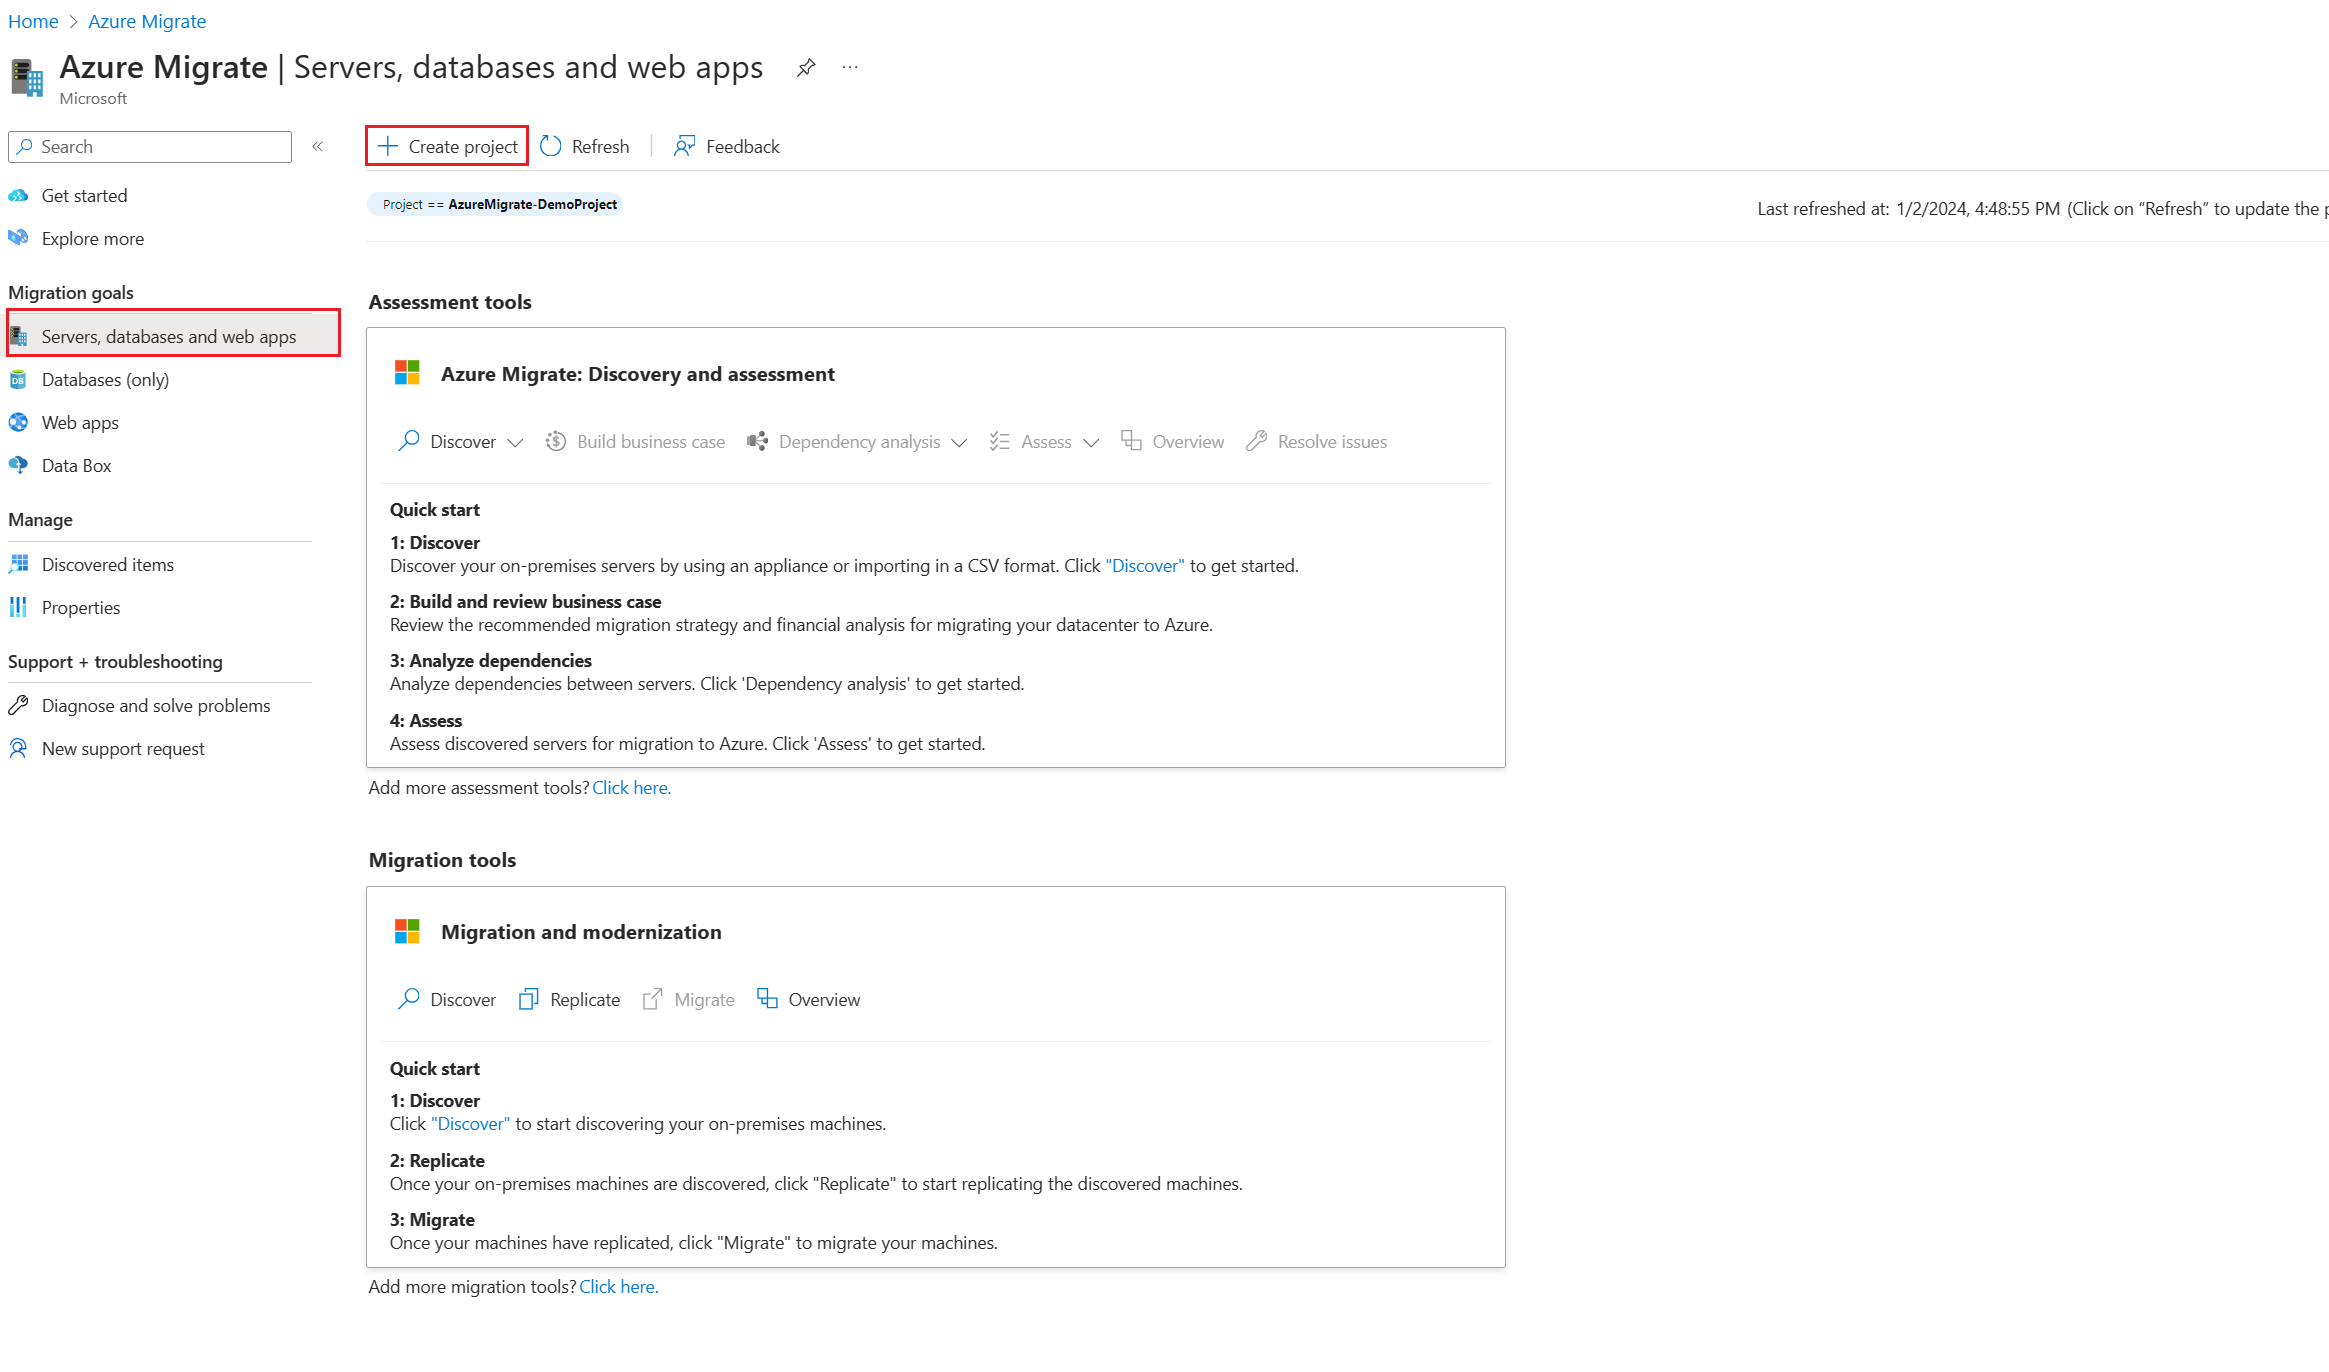
To create a new project, select Click here.
Find a project
Find a project as follows:
In the Azure portal, search for Azure Migrate.
In the Azure Migrate dashboard, select Servers, databases and web apps > Current project in the upper-right corner.
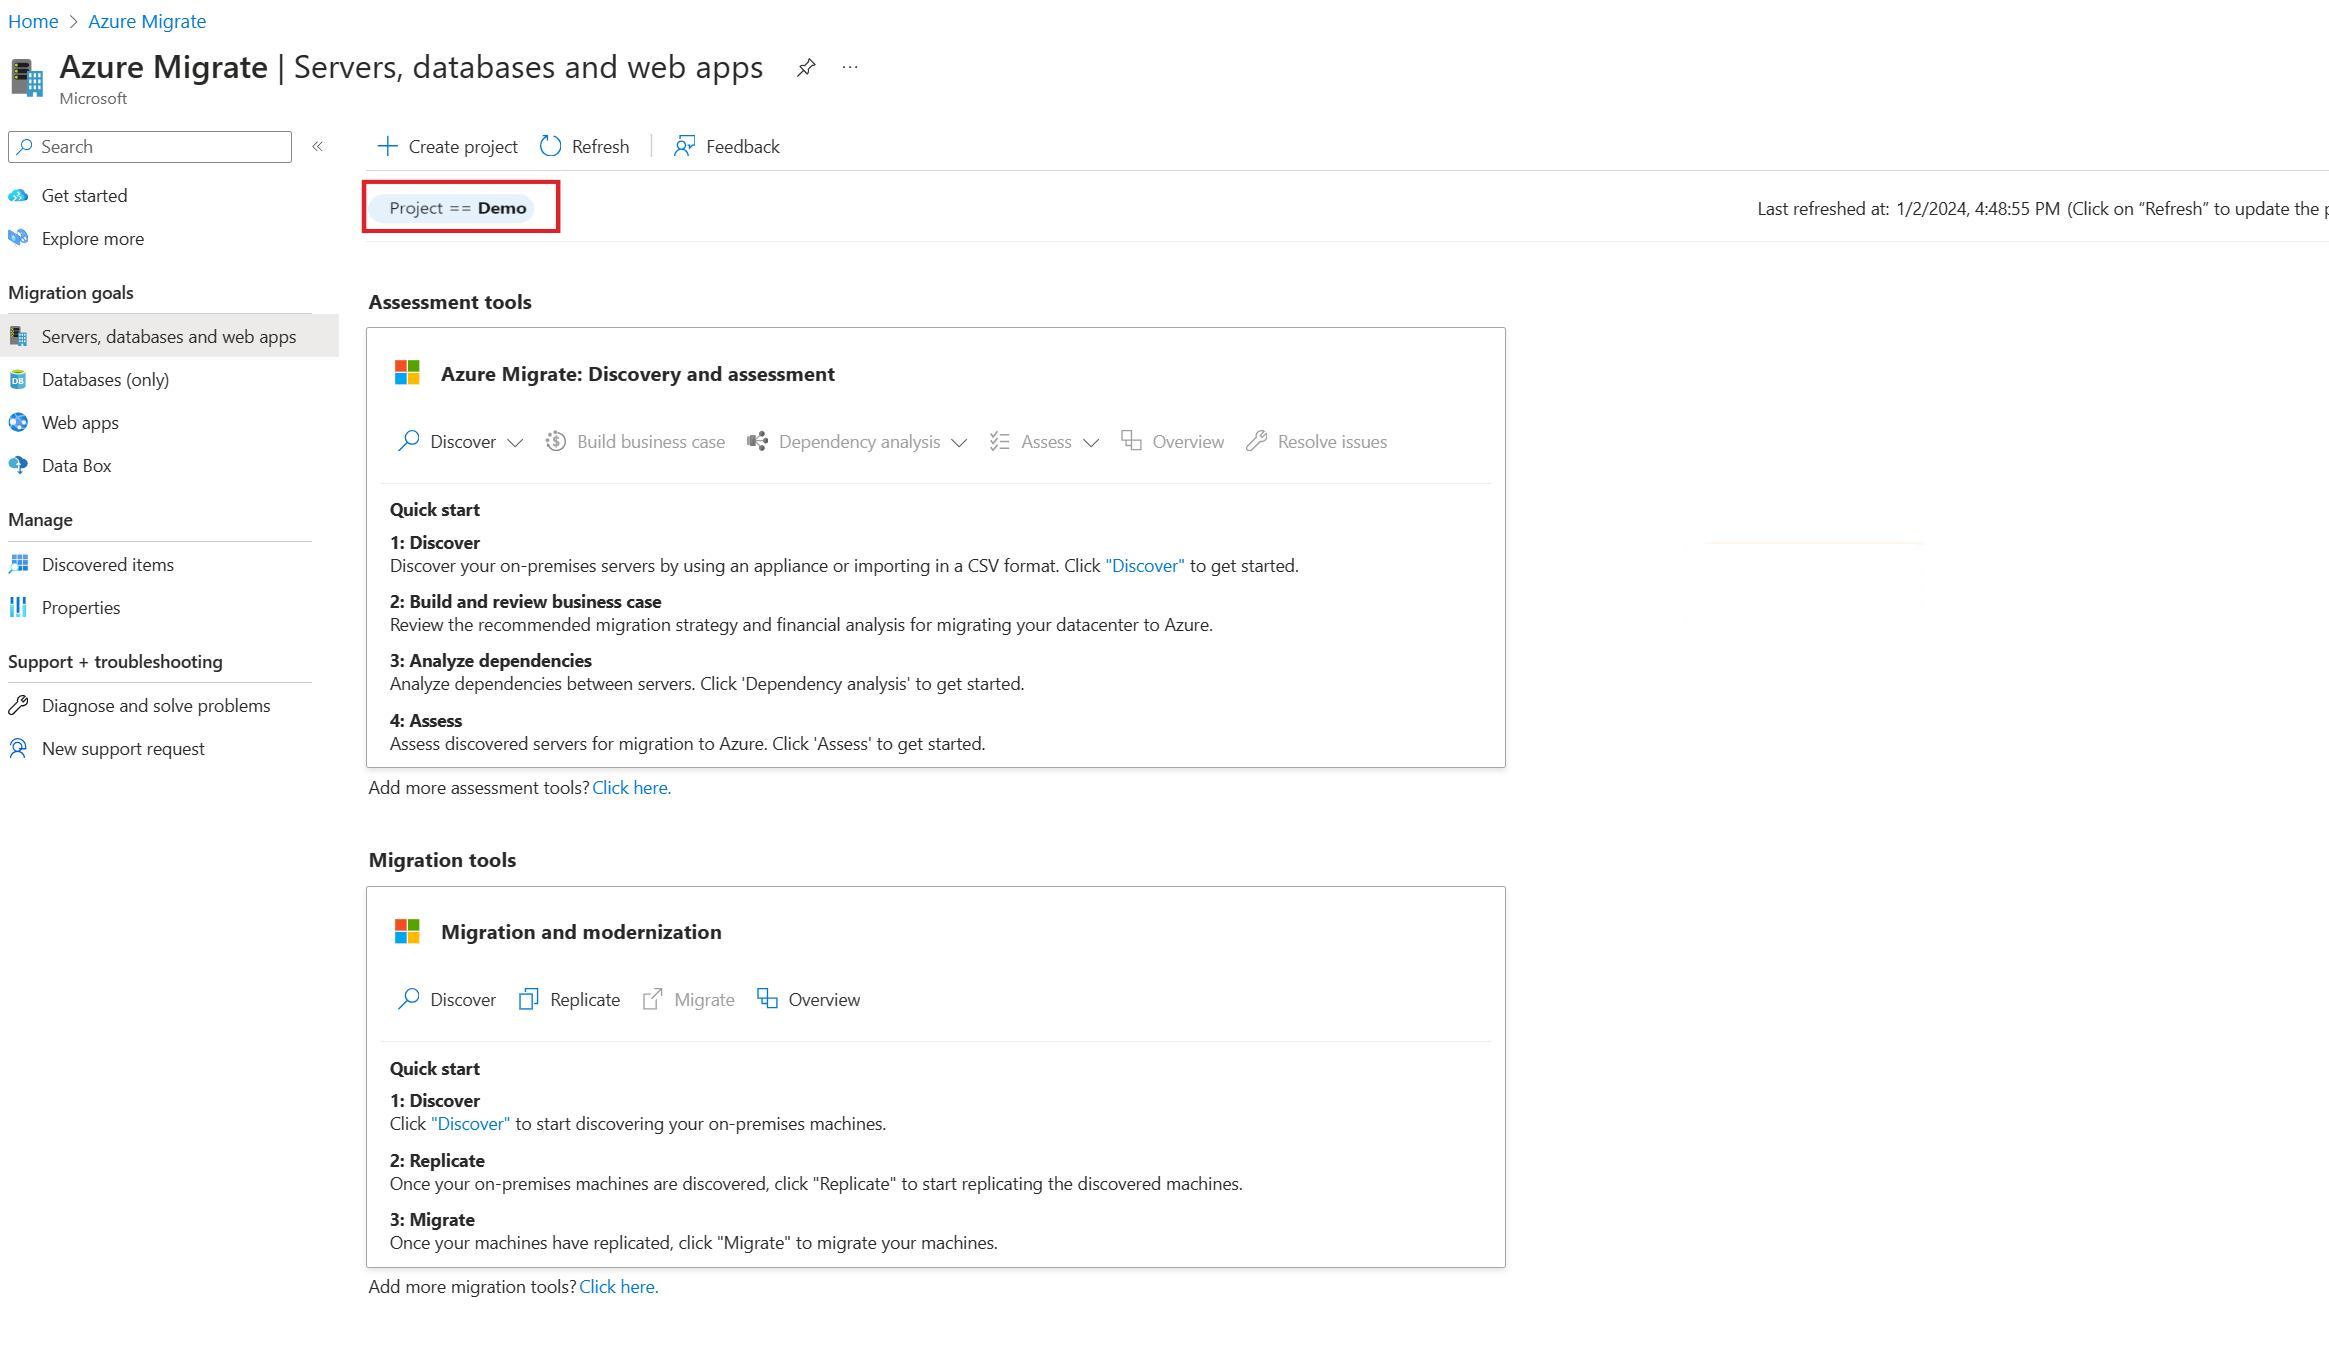
Select the appropriate subscription and project.
Find a classic project
If you created the project in the previous version of Azure Migrate, find it as follows:
In the Azure portal, search for Azure Migrate.
In the Azure Migrate dashboard, if you've created a project in the previous version, a banner referencing older projects appears. Select the banner.
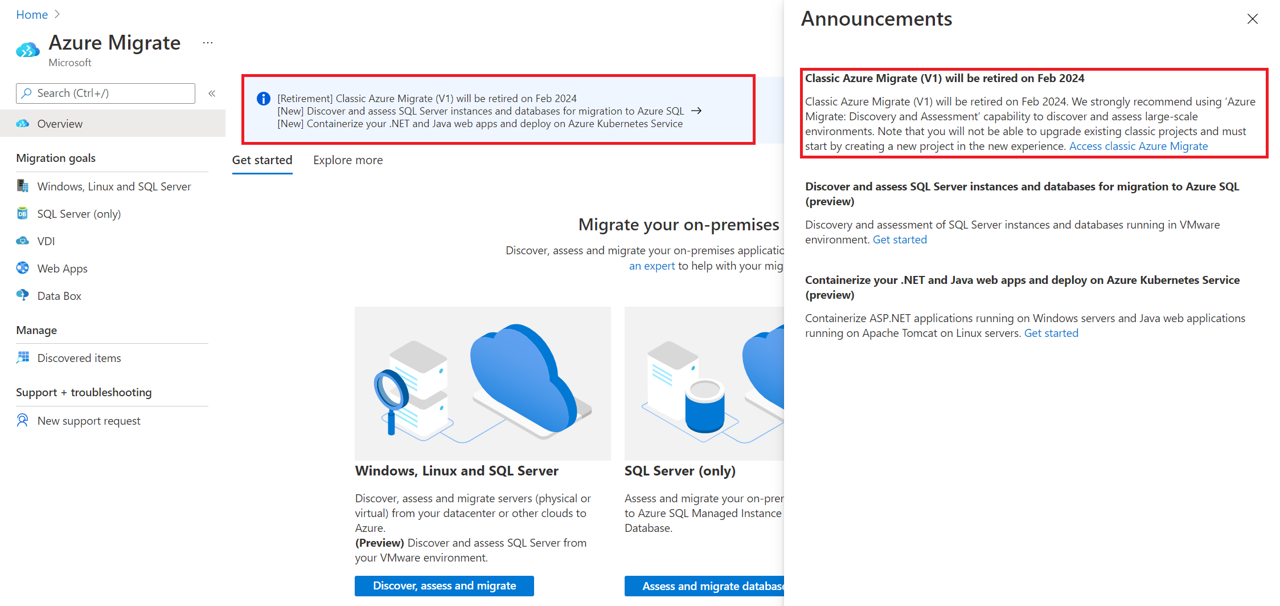
Review the list of old projects.
Delete a project
To delete a project, follow these steps:
- Open the Azure resource group in which the project was created.
- In the Resource Groups page, select Show hidden types.
- Select the project that you want to delete and its associated resources.
- The resource type is Microsoft.Migrate/migrateprojects.
- If the resource group is exclusively used by the project, you can delete the entire resource group.
Note that:
- When you delete, both the project and the metadata about discovered servers are deleted.
- If you're using the older version of Azure Migrate, open the Azure resource group in which the project was created. Select the project you want to delete (the resource type is Migration project).
- If you're using dependency analysis with an Azure Log Analytics workspace:
- If you've attached a Log Analytics workspace to the Server Assessment tool, the workspace isn't automatically deleted. The same Log Analytics workspace can be used for multiple scenarios.
- If you want to delete the Log Analytics workspace, do that manually.
- Project deletion is irreversible. Deleted objects can't be recovered.
Delete a workspace manually
Browse to the Log Analytics workspace attached to the project.
If you haven't deleted the project, you can find the link to the workspace in Essentials > Server Assessment.

If you've already deleted the project, select Resource Groups in the left pane of the Azure portal and find the workspace.
Follow the instructions to delete the workspace.
Next steps
Add assessment or migration tools to projects.
