Quickstart: Create an Azure Spring Apps Standard consumption and dedicated plan instance in an Azure Container Apps environment with a virtual network
Note
The Basic, Standard, and Enterprise plans will be deprecated starting from mid-March, 2025, with a 3 year retirement period. We recommend transitioning to Azure Container Apps. For more information, see the Azure Spring Apps retirement announcement.
The Standard consumption and dedicated plan will be deprecated starting September 30, 2024, with a complete shutdown after six months. We recommend transitioning to Azure Container Apps. For more information, see Migrate Azure Spring Apps Standard consumption and dedicated plan to Azure Container Apps.
This article applies to: ✔️ Standard consumption and dedicated (Preview) ❌ Basic/Standard ❌ Enterprise
This article describes how create an Azure Spring Apps instance in an Azure Container Apps environment with a virtual network. An Azure Container Apps environment creates a secure boundary around a group of applications. Applications deployed to the same environment are deployed in the same virtual network and write logs to the same Log Analytics workspace.
When you create an Azure Spring Apps instance in an Azure Container Apps environment, it shares the same virtual network with other services and resources in the same Azure Container Apps environment.
All apps are in the same Azure Container Apps environment in the following scenarios:
- When you deploy frontend apps as containers in Azure Container Apps.
- When you deploy Spring apps in the Azure Spring Apps Standard consumption and dedicated plan.
You can also deploy your Azure Container Apps environment to an existing virtual network created by your IT team. This scenario simplifies the virtual network experience for running polyglot apps.
Note
You can use an existing virtual network that has a dedicated subnet with a CIDR range of /23 or higher.
Prerequisites
- An Azure subscription. If you don't have a subscription, create a free account before you begin.
- (Optional) Azure CLI version 2.45.0 or higher. Use the following command to install the Azure Spring Apps extension:
az extension add --name spring
Create an Azure Spring Apps instance in an Azure Container Apps environment
Use the following steps to create an Azure Spring Apps instance in an Azure Container Apps environment with a virtual network.
Important
The Consumption workload profile has a pay-as-you-go billing model, with no starting cost. You're billed for the dedicated workload profile based on the provisioned resources. For more information, see Workload profiles in Consumption + Dedicated plan structure environments in Azure Container Apps (preview) and Azure Spring Apps pricing.
Open the Azure portal.
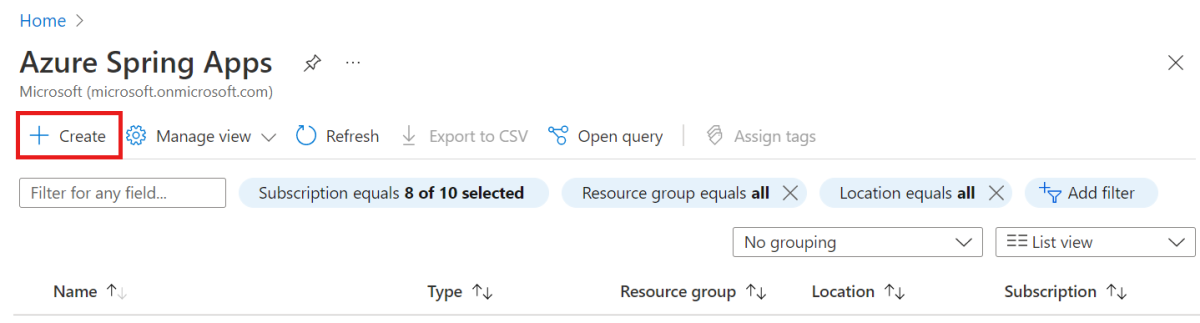
In the search box, search for Azure Spring Apps, and then select Azure Spring Apps in the results.
On the Azure Spring Apps page, select Create.
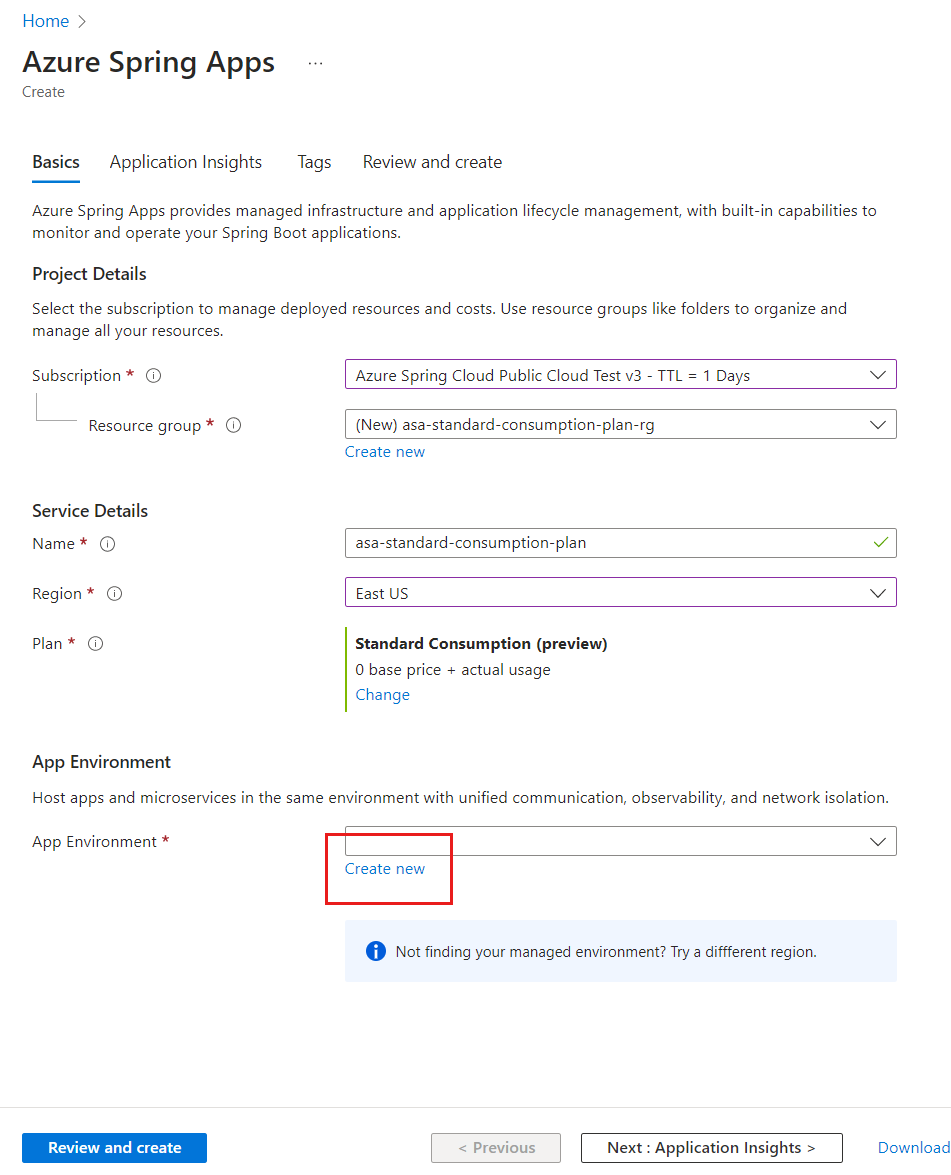
Fill out the Basics form on the Azure Spring Apps Create page using the following guidelines:
Project Details:
- Subscription: Select the subscription you want to be billed for this resource.
- Resource group: Select an existing resource group or create a new one.
Service Details:
- Name: Create the name for the Azure Spring Apps instance. The name must be between 4 and 32 characters long and can contain only lowercase letters, numbers, and hyphens. The first character of the service name must be a letter and the last character must be either a letter or a number.
- Location: Currently, only the following regions are supported: Australia East, Central US, East US, East US 2, West Europe, East Asia, North Europe, South Central US, UK South, West US 3.
Plan: Select Standard Consumption and dedicated for the Pricing tier option.
App Environment:
- Select Create new to create a new Azure Container Apps environment or select an existing environment from the dropdown menu.
Fill out the Basics form on the Create Container Apps environment page. Use the default value
asa-standard-consumption-app-envfor the Environment name and choose Consumption and Dedicated workload profiles for the Plan.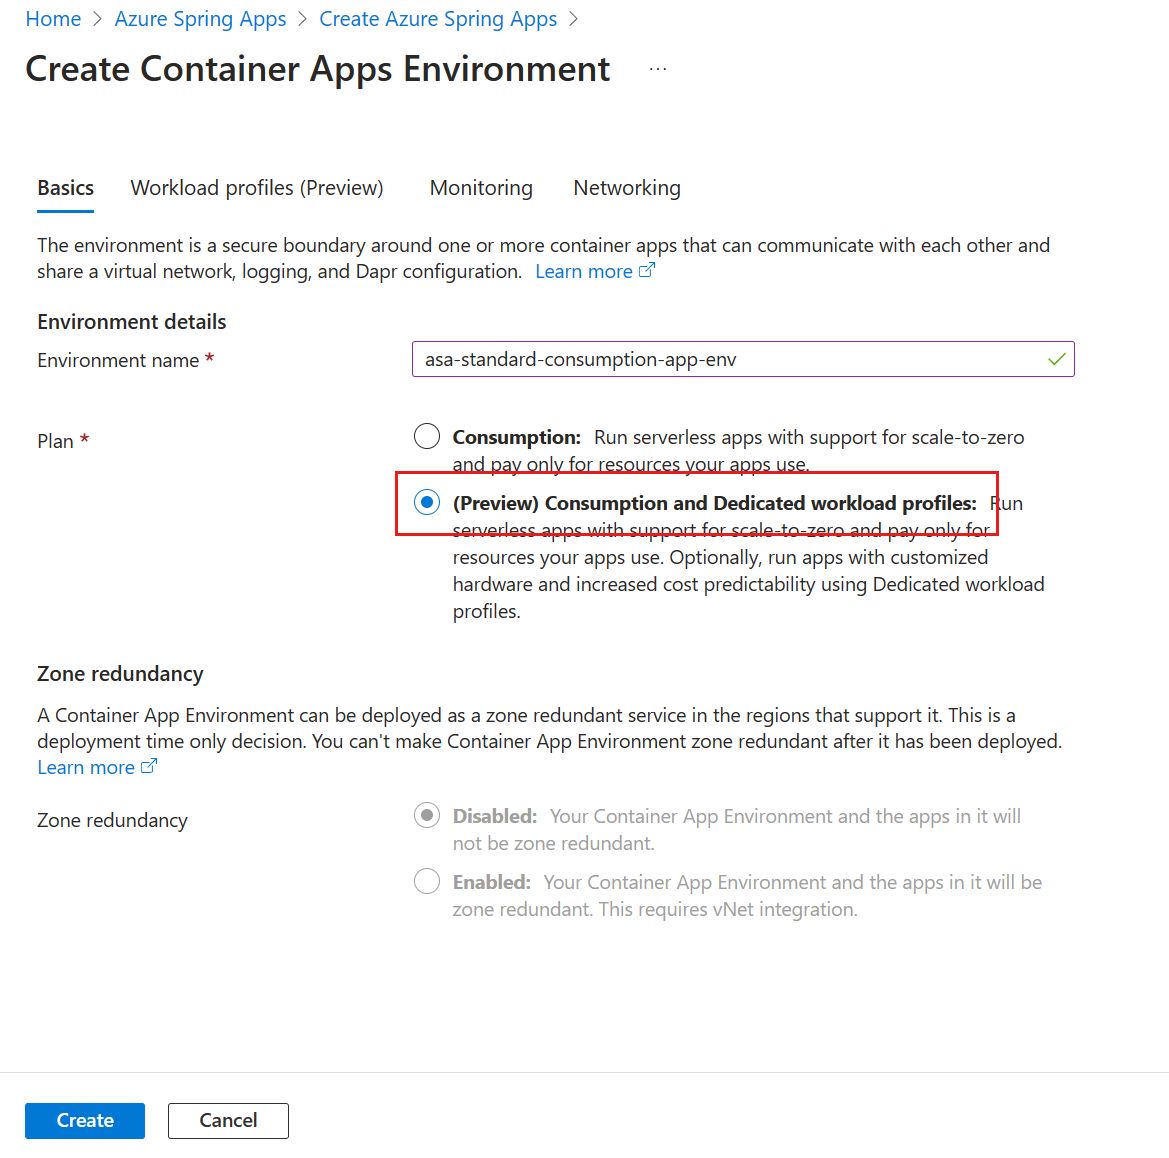
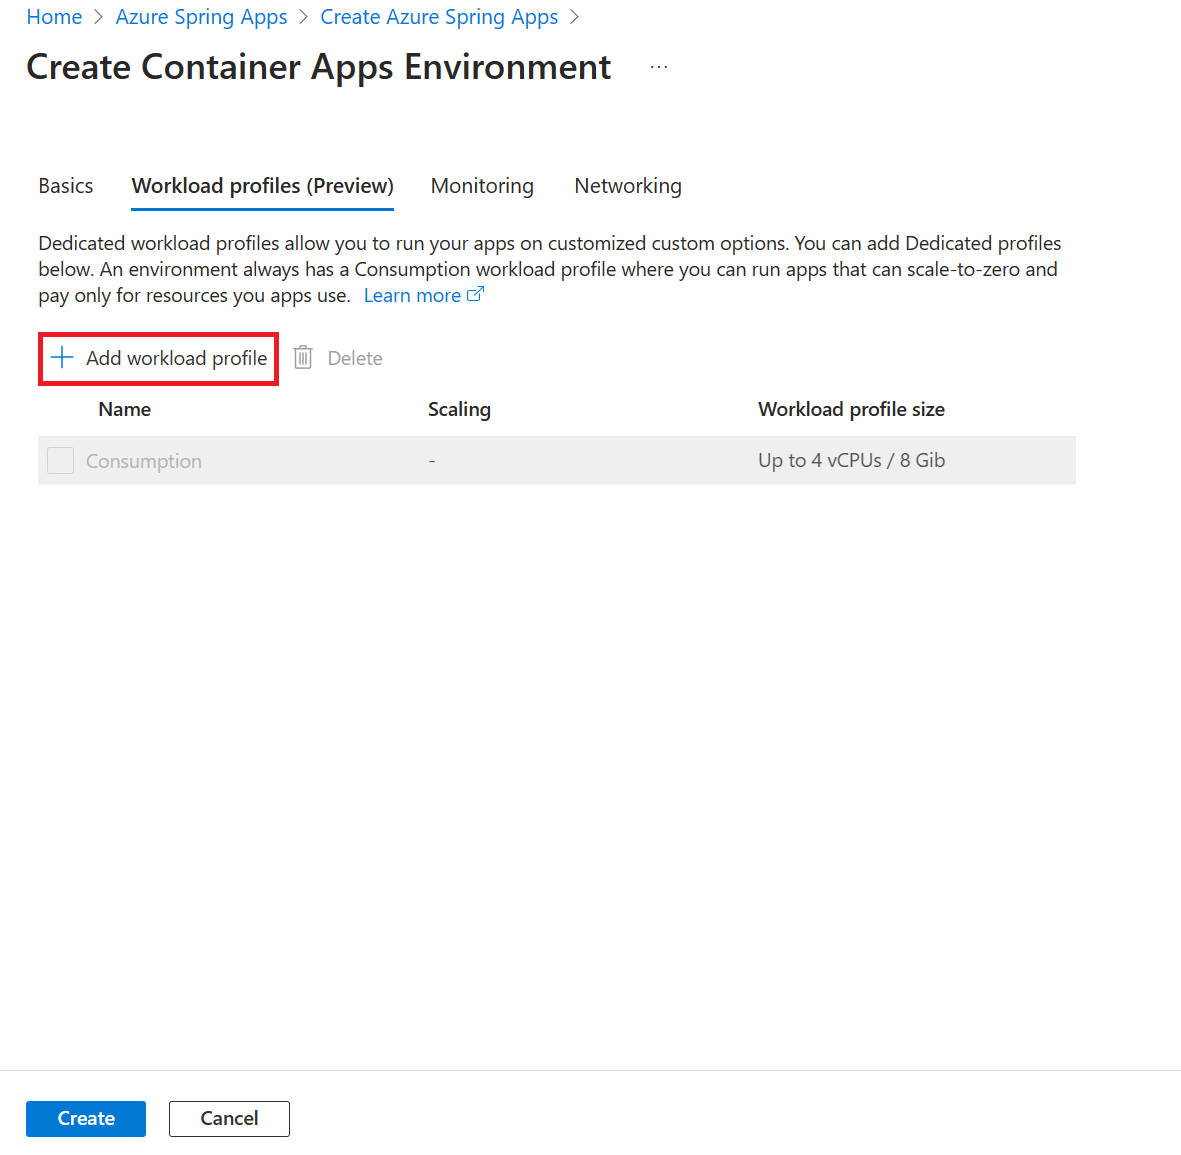
At this point, you've created an Azure Container Apps environment with a default standard consumption workload profile. If you wish to add a dedicated workload profile to the same Azure Container Apps environment, you can select the Workload profiles tab and then select Add workload profile.
Select Networking and then specify the settings using the following guidelines:
- For Use your own virtual network, select Yes.
- Select the names for Virtual network and for Infrastructure subnet from the dropdown menus or use Create new as needed.
- Set Virtual IP to External. You can set the value to Internal if you prefer to use only internal IP addresses available in the virtual network instead of a public static IP.
Note
The subnet associated with an Azure Container Apps environment requires a CIDR prefix of
/23or higher.Select Create.
On the Azure Spring Apps Create page, select Review and Create to finish creating the Azure Spring Apps instance.


Clean up resources
Be sure to delete the resources you created in this article when you no longer need them. To delete the resources, just delete the resource group that contains them. You can delete the resource group using the Azure portal. Alternatively, to delete the resource group by using Azure CLI, use the following commands:
echo "Enter the Resource Group name:" &&
read resourceGroupName &&
az group delete --name $resourceGroupName &&
echo "Press [ENTER] to continue ..."