Tutorial: Manage access to resources in entitlement management
Άρθρο
Managing access to all the resources employees need, such as groups, applications, and sites, is an important function for organizations. You want to grant employees the right level of access they need to be productive and remove their access when it's no longer needed.
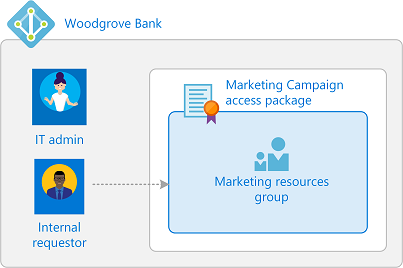
In this tutorial, you work for Woodgrove Bank as an IT administrator. You've been asked to create a package of resources for a marketing campaign that internal users can use to self-service request. Requests don't require approval and user's access expires after 30 days. For this tutorial, the marketing campaign resources are just membership in a single group, but it could be a collection of groups, applications, or SharePoint Online sites.
In this tutorial, you learn how to:
Create an access package with a group as a resource
Allow a user in your directory to request access
Demonstrate how an internal user can request the access package
For a step-by-step demonstration of the process of deploying Microsoft Entra entitlement management, including creating your first access package, view the following video:
This rest of this article uses the Microsoft Entra admin center to configure and demonstrate entitlement management.
Prerequisites
To use entitlement management, you must have one of the following licenses:
Microsoft Entra ID P2 or Microsoft Entra ID Governance
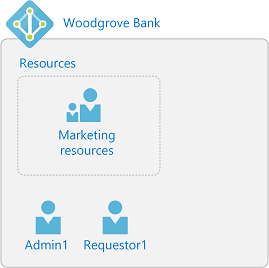
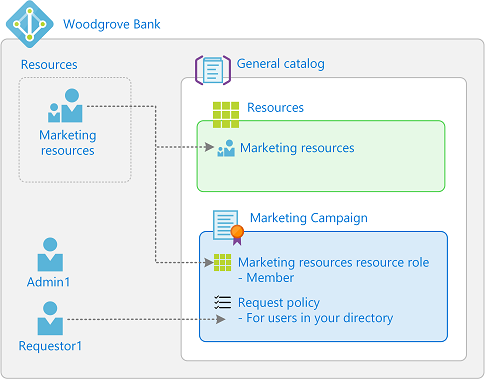
A resource directory has one or more resources to share. In this step, you create a group named Marketing resources in the Woodgrove Bank directory that is the target resource for entitlement management. You also set up an internal requestor.
At least an Identity Governance Administrator. This user can be the user you're currently signed in.
Requestor1
User
Create a Microsoft Entra security group named Marketing resources with a membership type of Assigned. This group is the target resource for entitlement management. The group should be empty of members to start.
Step 2: Create an access package
An access package is a bundle of resources that a team or project needs and is governed with policies. Access packages are defined in containers called catalogs. In this step, you create a Marketing Campaign access package in the General catalog.
Other least privilege roles that can complete this task include the Catalog owner and the Access package manager.
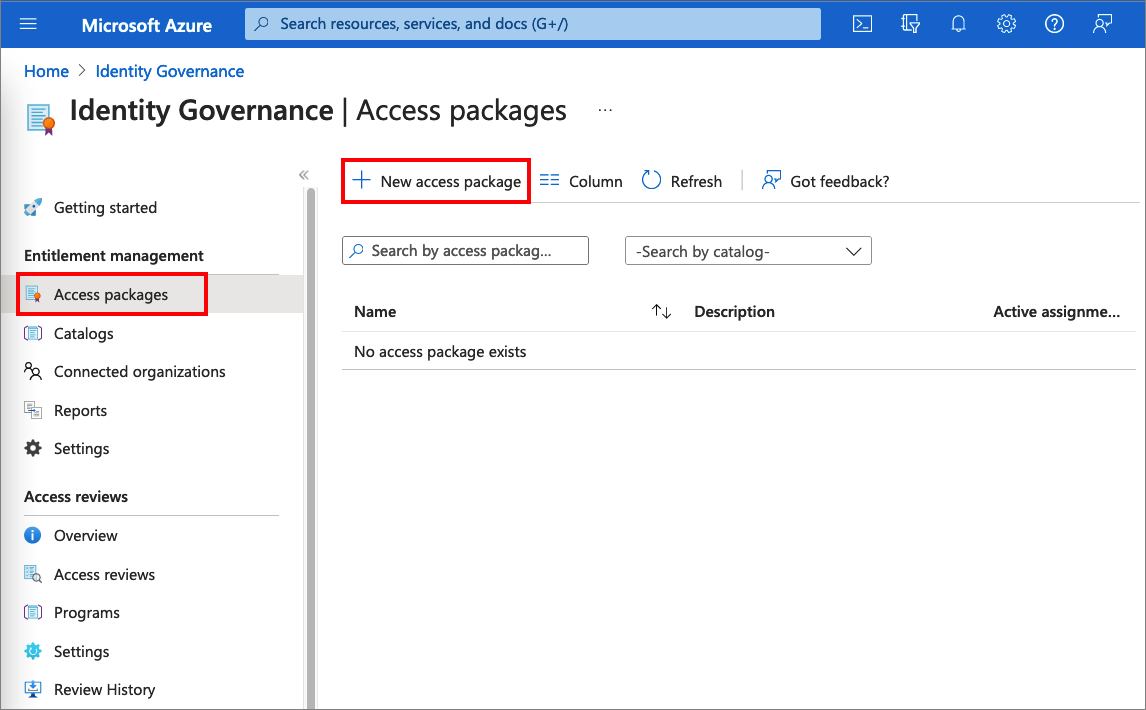
Browse to Identity governance > Entitlement management > Access package.
On the Access packages page, open an access package.
When opening the access package if you see Access denied, ensure that a Microsoft Entra ID P2 or Microsoft Entra ID Governance license is present in your directory.
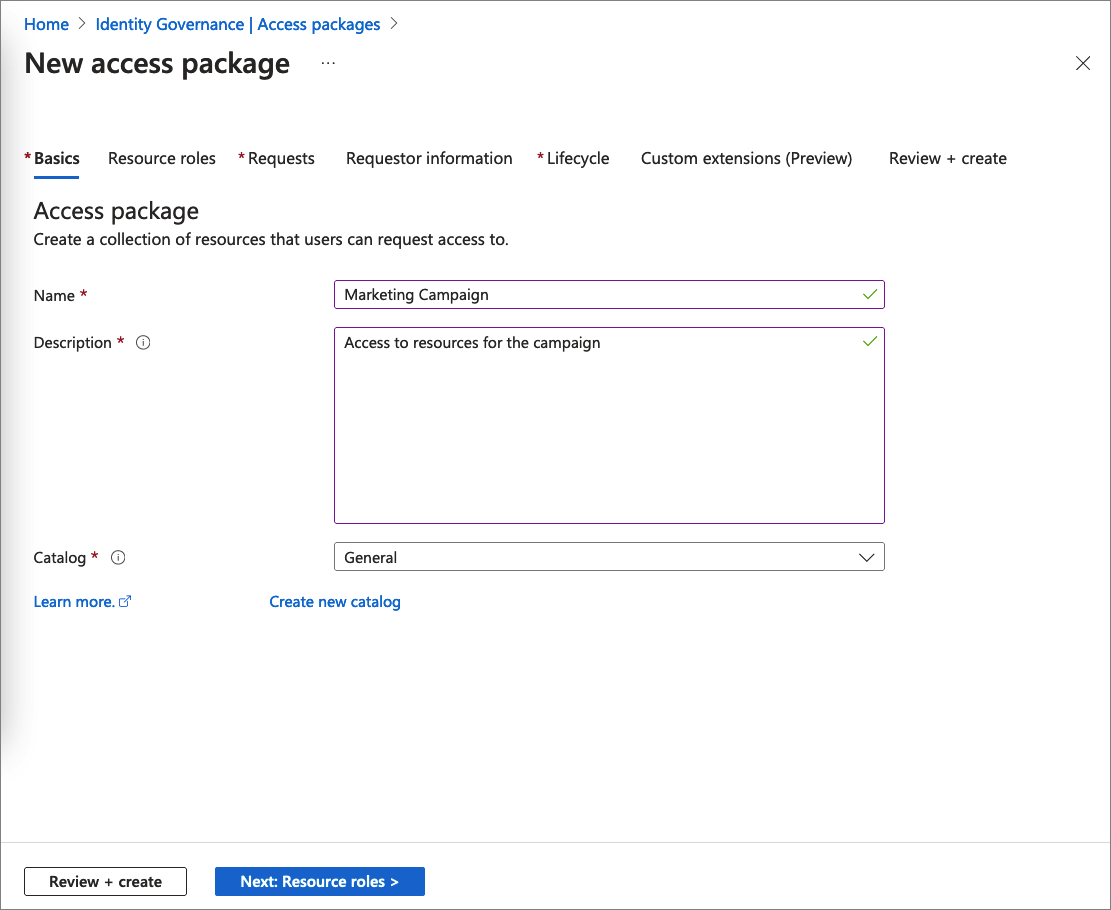
Select New access package.
On the Basics tab, type the name Marketing Campaign access package and description Access to resources for the campaign.
Leave the Catalog drop-down list set to General.
Select Next to open the Resource roles tab. On this tab, select the resources and the resource role to include in the access package. You can choose to manage access to groups and teams, applications, and SharePoint Online sites. In this scenario, select Groups and Teams.
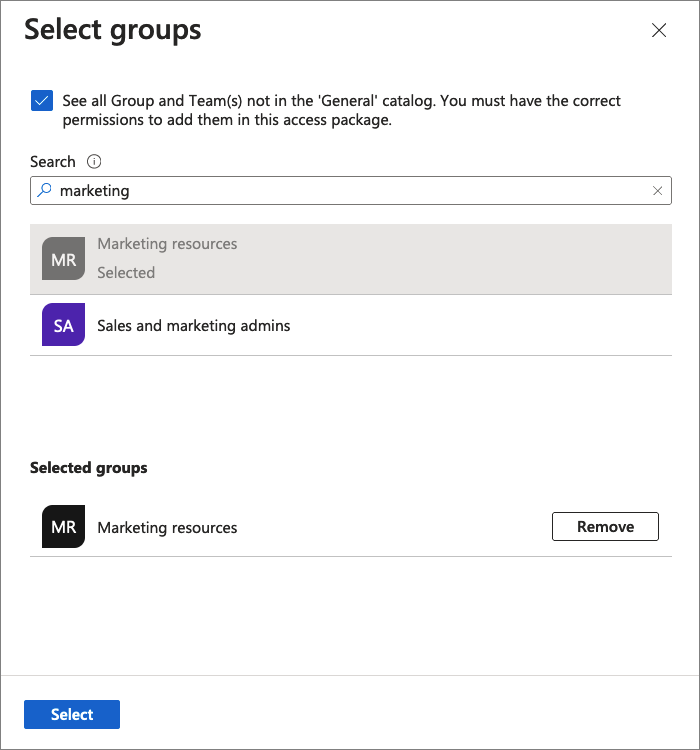
In the Select groups pane, find and select the Marketing resources group you created earlier.
By default, you see groups inside the General catalog. When you select a group outside of the General catalog, which you can see if you check the See all check box, it's added to the General catalog.
Choose Select to add the group to the list.
In the Role drop-down list, select Member. If you select the Owner role, it allows users to add or remove other members or owners. For more information on selecting the appropriate roles for a resource, read add resource roles.
Σημαντικό
The role-assignable groups added to an access package will be indicated using the Sub Type Assignable to roles. For more information, check out the Create a role-assignable group article. Keep in mind that once a role-assignable group is present in an access package catalog, administrative users who are able to manage in entitlement management, including users in the Global Administrator role, users in the Identity Governance Administrator role, and catalog owners of the catalog, will be able to control the access packages in the catalog, allowing them to choose who can be added to those groups. If you don't see a role-assignable group that you want to add or you are unable to add it, make sure you have the required Microsoft Entra role and entitlement management role to perform this operation. You might need to ask someone with the required roles add the resource to your catalog. For more information, see Required roles to add resources to a catalog.
Σημείωση
When using dynamic membership groups you will not see any other roles available besides owner. This is by design.
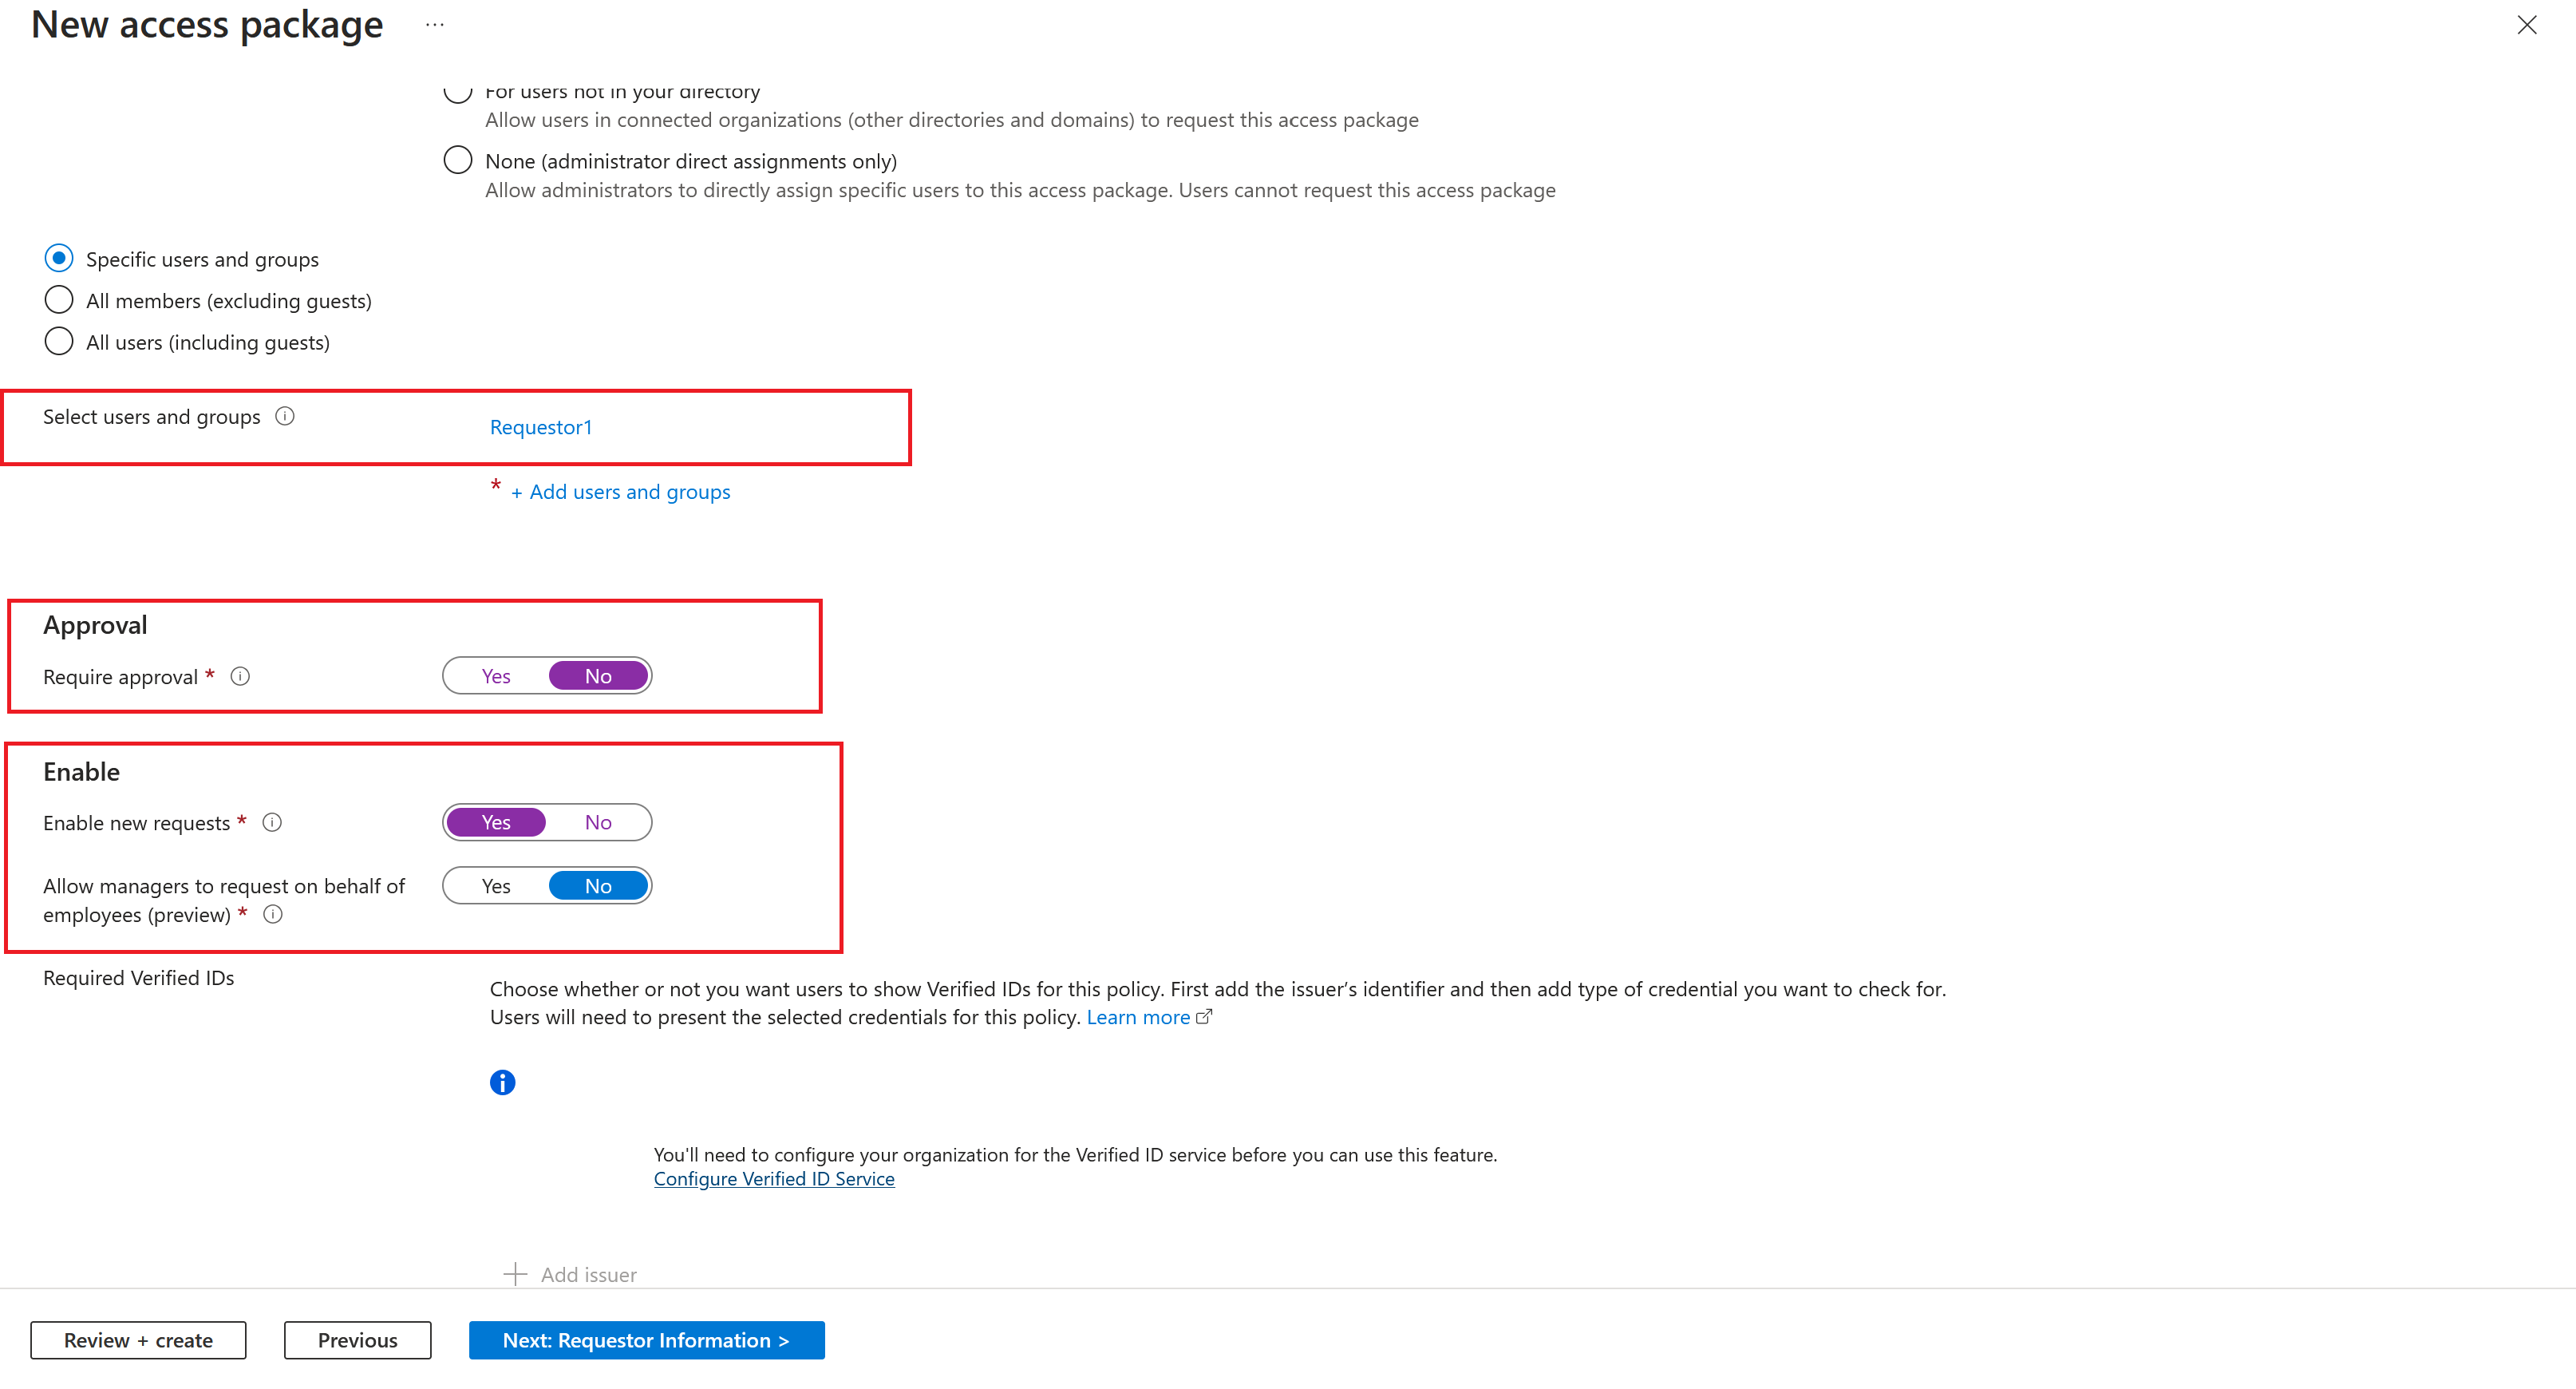
Select Next to open the Requests tab. On the Requests tab, you create a request policy. A policy defines the rules or guardrails to access an access package. You create a policy that allows a specific user in the resource directory to request this access package.
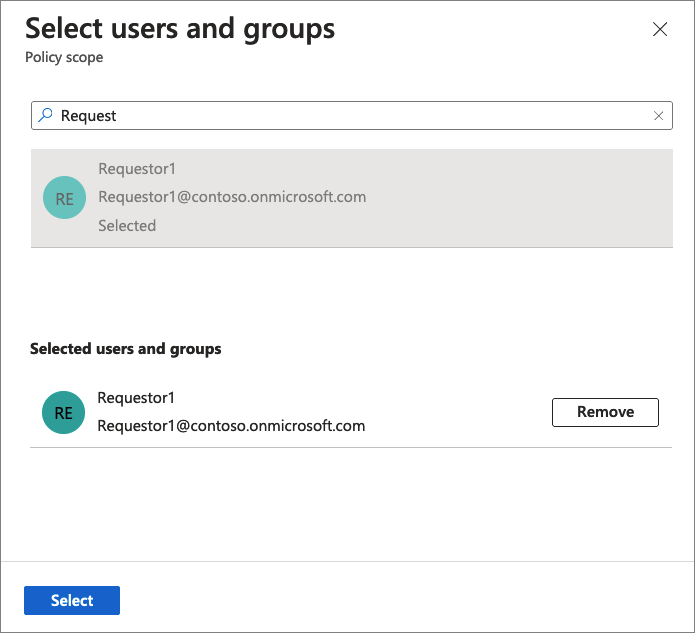
In the Users who can request access section, select For users in your directory, and then select Specific users and groups.
Select Add users and groups.
In the Select users and groups pane, select the Requestor1 user you created earlier.
Choose Select to add the user to the list.
Scroll down to the Approval and Enable requests sections.
Leave Require approval set to No.
For Enable requests, select Yes to enable this access package to be requested as soon as it's created.
Select Next to open the Requestor information tab.
On the Requestor information tab, you can ask questions to collect more information from the requestor. The questions are shown on the request form and can be either required or optional. You're also able to specify whether or not an employee's manager can request on their behalf, and if approval is required if they do so. If the policy allows managers to request on an employee's behalf, the manager would be answering questions on behalf of the employee, and not themselves. For more information on this option, see: Request access package on-behalf-of other users(Preview). In this scenario, you haven't been asked to include requestor information for the access package, so you can leave these boxes empty. Select Next to open the Lifecycle tab.
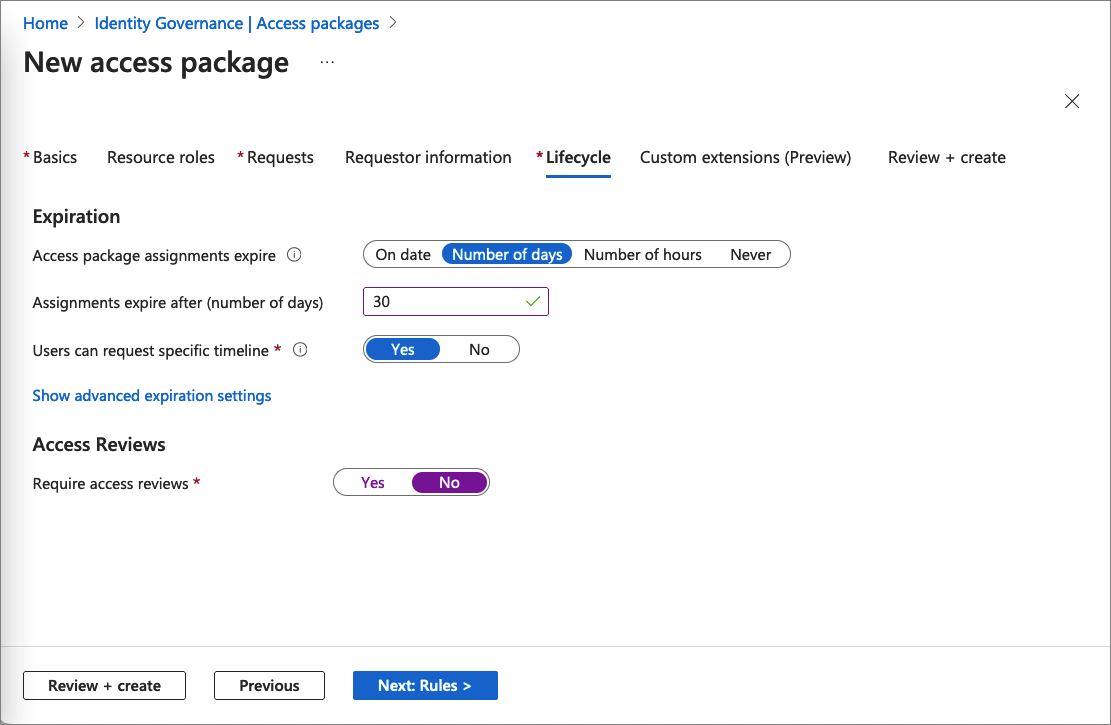
On the Lifecycle tab, you specify when a user's assignment to the access package expires. You can also specify whether users can extend their assignments. In the Expiration section:
Set the Access package assignments expire to Number of days.
Set the Assignments expire after to 30 days.
Leave the Users can request specific timeline default value, Yes.
Set the Require access reviews to No.
Skip the Custom extensions step.
Select Next to open the Review + Create tab.
On the Review + Create tab, select Create. After a few moments, you should see a notification that the access package was successfully created.
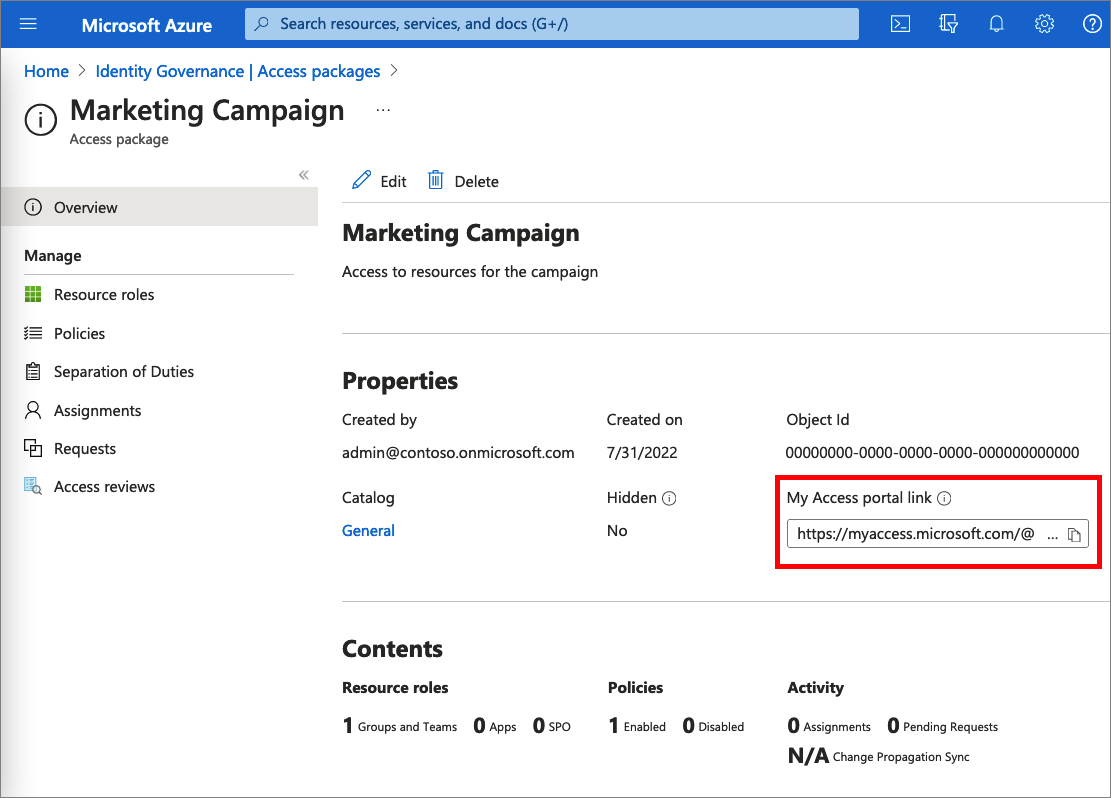
In left menu of the Marketing Campaign access package, select Overview.
Copy the My Access portal link.
You'll use this link for the next step.
Step 3: Request access
In this step, you perform the steps as the internal requestor and request access to the access package. Requestors submit their requests using a site called the My Access portal. The My Access portal enables requestors to submit requests for access packages, see the access packages they already have access to, and view their request history. When a new guest requests an access package in MyAccess, their preferred language is stamped based on the MyAccess browser language at request time. This enables new guests to receive email communication in a language they understand.
Prerequisite role: Internal requestor
Sign out of the Microsoft Entra admin center.
In a new browser window, navigate to the My Access portal link you copied in the previous step.
Sign in to the My Access portal as Requestor1.
You should see the Marketing Campaign access package.
In the Business justification box, type the justification I'm working on the new marketing campaign.
Select Submit.
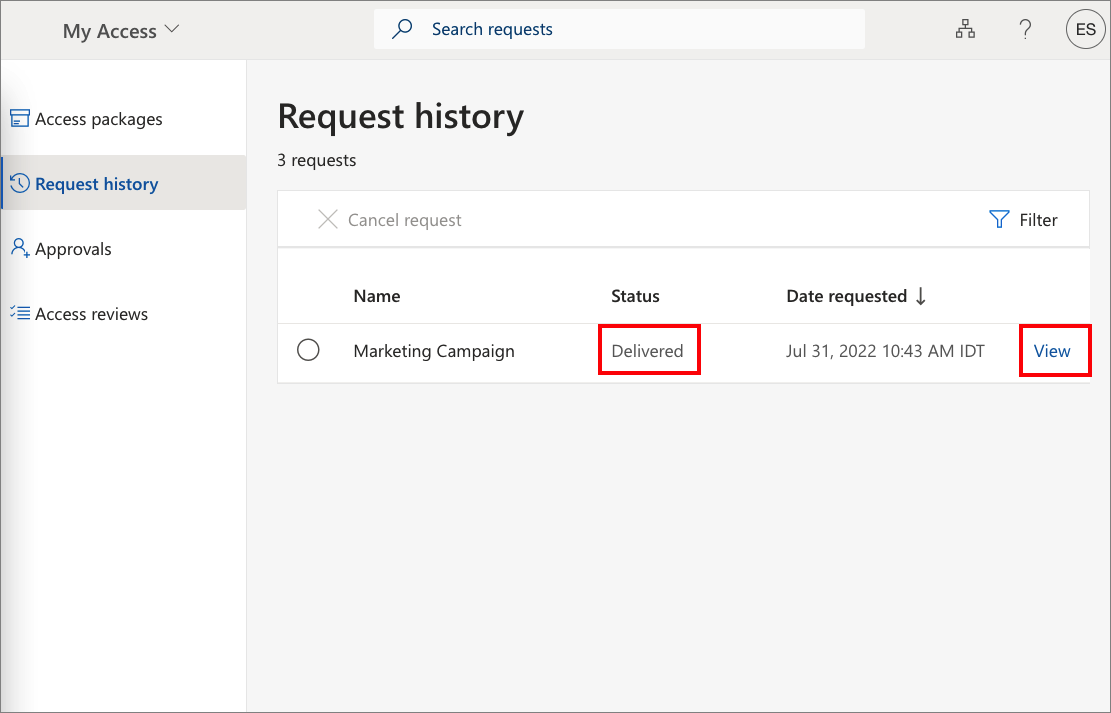
In the left menu, select Request history to verify that your request was delivered. For more details, select View.
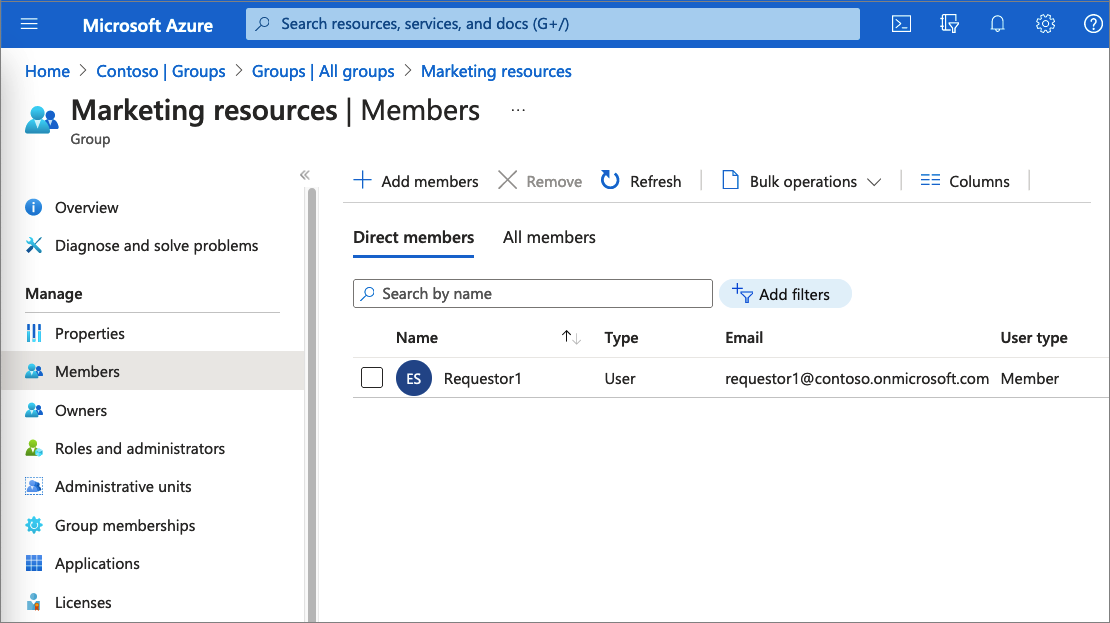
Step 4: Validate that access has been assigned
In this step, you confirm that the internal requestor was assigned the access package and that they're now a member of the Marketing resources group.
When new users or external users join your site, quickly assigning them access to Azure solutions is a must. Explore how to entitle users to access your site and resources.