Quickstart: Create and assign a user account
In this quickstart, you use the Microsoft Entra admin center to create a user account in your Microsoft Entra tenant. After you create the account, you can assign it to the enterprise application that you added to your tenant.
We recommend that you use a nonproduction environment to test the steps in this quickstart.
Prerequisites
To create a user account and assign it to an enterprise application, you need:
- A Microsoft Entra user account. If you don't already have one, you can Create an account for free.
- One of the following roles: Cloud Application Administrator, or owner of the service principal. You need the User Administrator role to manage users.
- Completion of the steps in Quickstart: Add an enterprise application.
Create a user account
Tip
Steps in this article might vary slightly based on the portal you start from.
To create a user account in your Microsoft Entra tenant:
- Sign in to the Microsoft Entra admin center as at least a User Administrator.
- Browse to Identity > Users > All users
- Select New user at the top of the pane and then, select Create new user.
- In the User principal name field, enter the username of the user account. For example,
contosouser1@contoso.com. Be sure to changecontoso.comto the name of your tenant domain. - In the Display name field, enter the name of the user of the account. For example,
contosouser1. - Enter the details required for the user under the Groups and roles, Settings, and Job info sections.
- Select Create.
Assign a user account to an enterprise application
To assign a user account to an enterprise application:
Sign in to the Microsoft Entra admin center as at least a Cloud Application Administrator.
Browse to Identity > Applications > Enterprise applications > All applications. For example, the application that you created in the previous quickstart named Microsoft Entra SAML Toolkit 1.
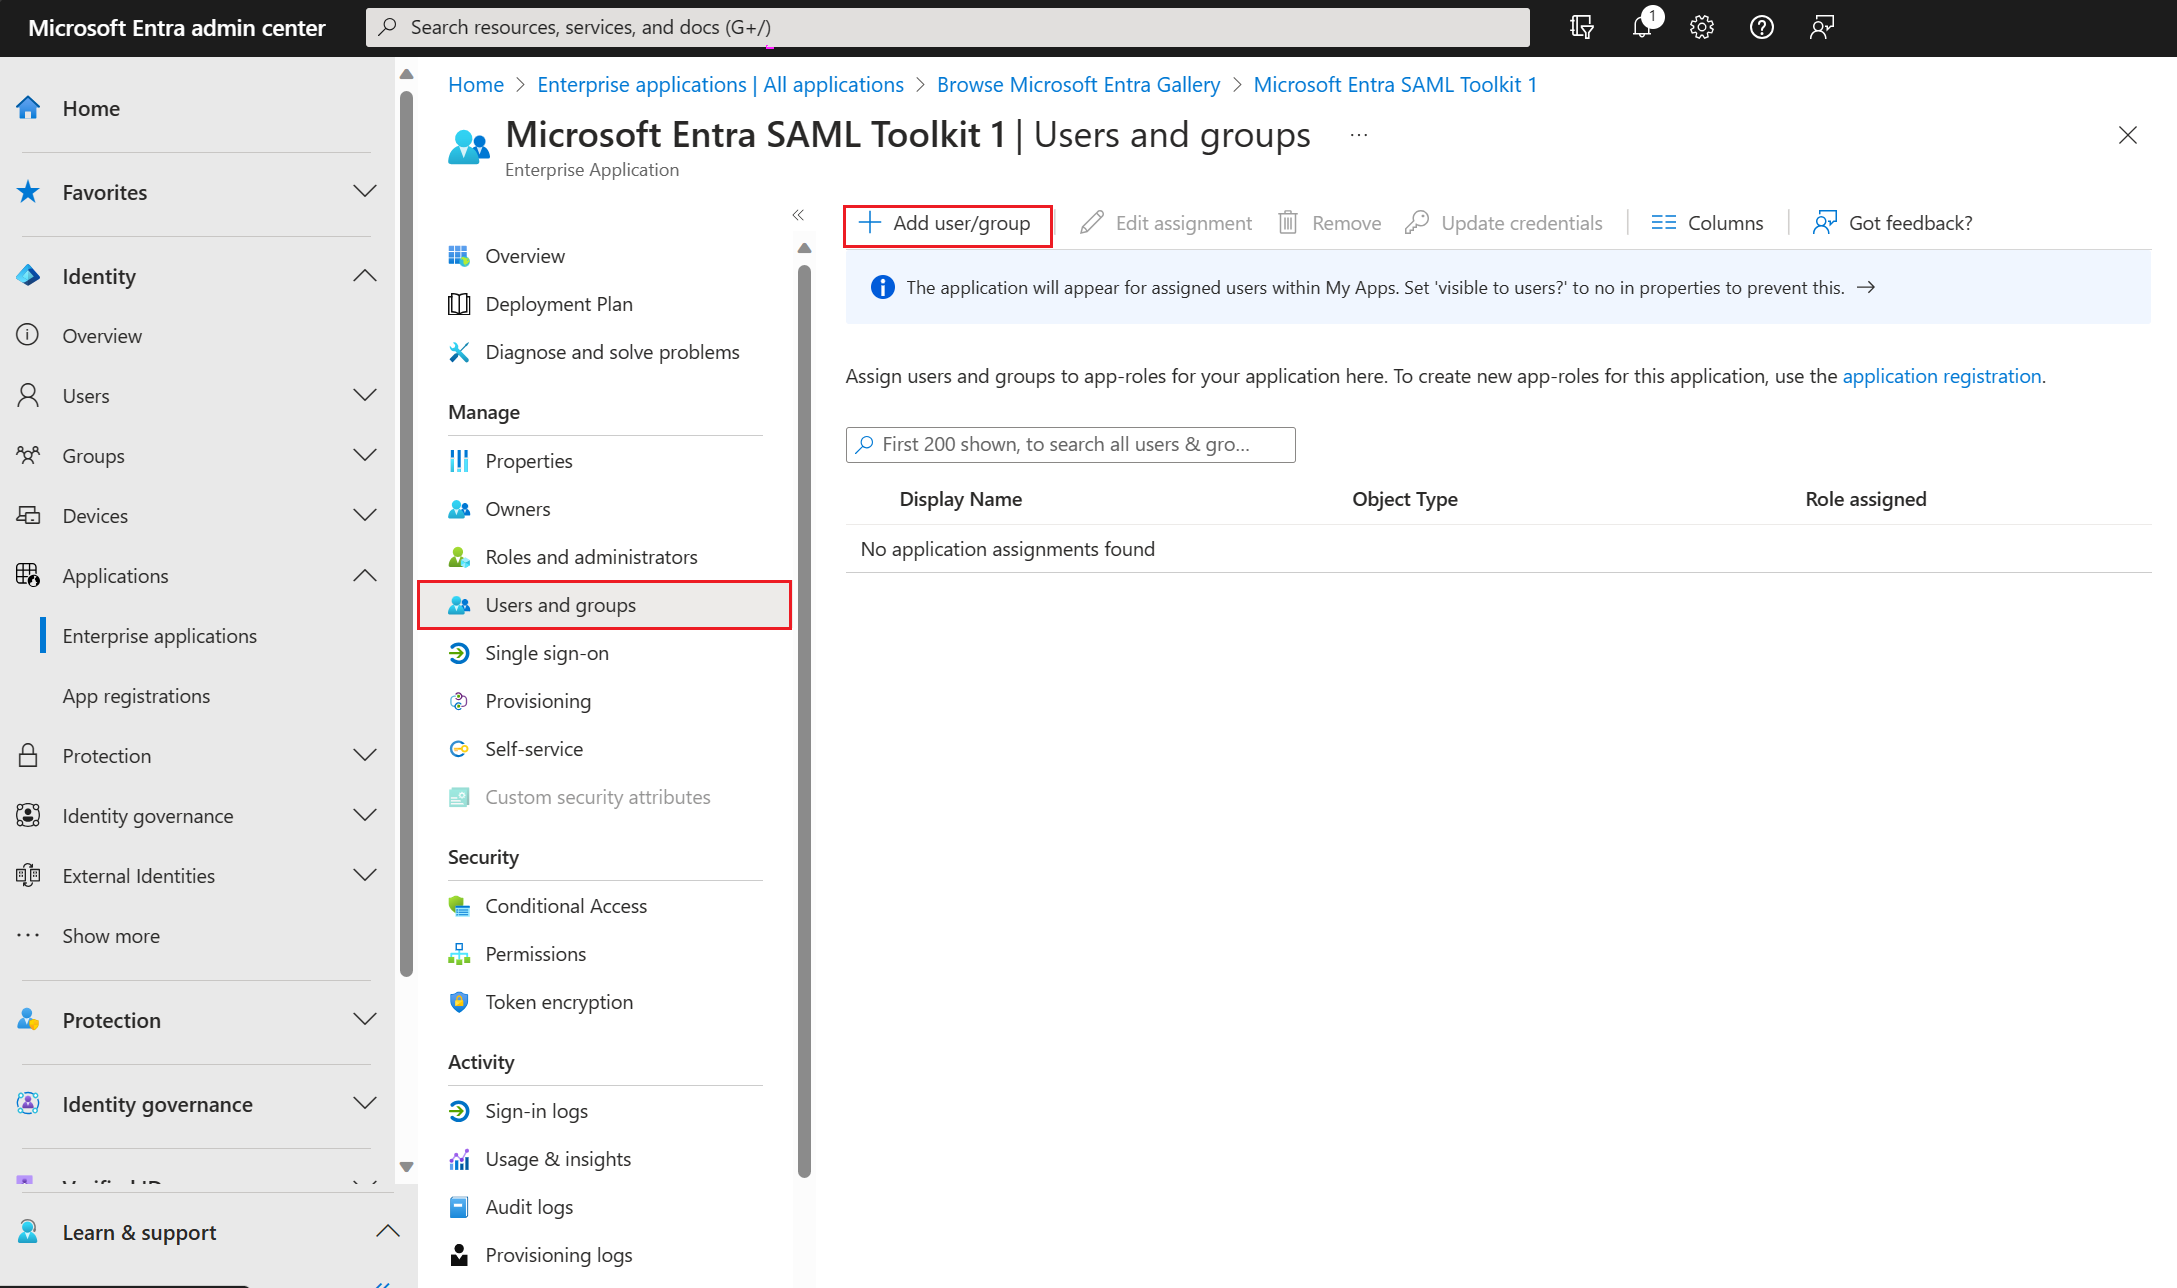
In the left pane, select Users and groups, and then select Add user/group.
On the Add Assignment pane, select None Selected under Users and groups.
Search for and select the user that you want to assign to the application. For example,
contosouser1@contoso.com.Select Select.
Select None Selected under Select a role and then select the role that you want to assign to the user. For example, Standard User.
Select Select.
Select Assign at the bottom of the pane to assign the user to the application.
After you assign the user to the application, ensure you set the application to be visible to the user. To make it visible to assigned users, select Properties in the left pane, and then set Visible to users? to Yes.
Clean up resources
If you're planning to complete the next quickstart, keep the application that you created. Otherwise, you can consider deleting it to clean up your tenant.
Next steps
Learn how to set up single sign-on for an enterprise application.
