Microsoft Entra tenants come with an initial domain name like, domainname.onmicrosoft.com. You can't change or delete the initial domain name, but you can add your organization's name to the initial domain. By adding your custom domain name, you can then add user names that are familiar to your users, such as alain@contoso.com.
Add your custom domain name to your tenant
Prerequisites
Before you can add a custom domain name, create your domain name with a domain registrar. For an accredited domain registrar, see ICANN-Accredited Registrars.
Create your directory
Tip
Steps in this article might vary slightly based on the portal you start from.
After you get your domain name, you can create your first directory. Sign in to the Azure portal for your directory, using an account with the Owner role for the subscription.
Create your new directory by following the steps in Create a new tenant for your organization.
Important
The person who creates the tenant is automatically granted Global Administrator privileges. This role is highly privileged and can add additional administrators to the tenant.
For more information about subscription roles, see Azure roles.
Tip
If you plan to federate on-premises Windows Server Active Directory with Microsoft Entra ID, then you need to select I plan to configure this domain for single sign-on with my local Active Directory when you run the Microsoft Entra Connect tool to synchronize your directories.
You also need to register the same domain name you select for federating with your on-premises directory in the Microsoft Entra Domain step in the wizard. To see what that setup looks like, see Verify the domain selected for federation. If you don't have the Microsoft Entra Connect tool, you can download it here.
Add your custom domain name
After you create your directory, you can add your custom domain name.
Important
When updating domain information, you may be unable to complete the process and encounter an HTTP 500 Internal Server Error message. Under some conditions, this error may be expected. This message may appear if you try to use a protected DNS suffix. Protected DNS suffixes may only be used by Microsoft. If you believe that this operation should have been completed successfully, please contact your Microsoft representative for assistance.
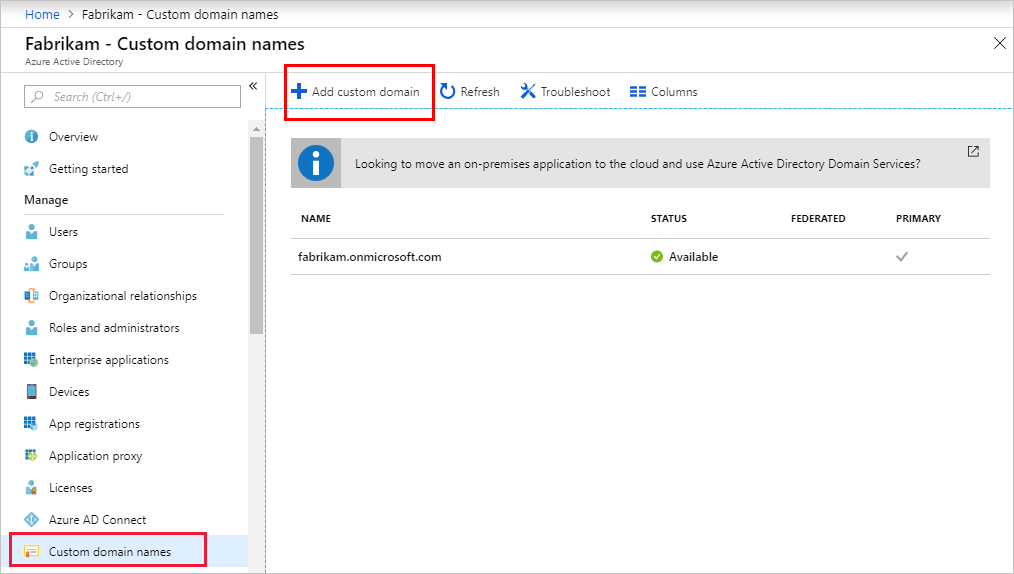
Sign in to the Microsoft Entra admin center as at least a Domain Name Administrator.
Browse to Identity > Settings > Domain names > Add custom domain.
In Custom domain name, enter your organization's domain, in this example, contoso.com. Select Add domain.
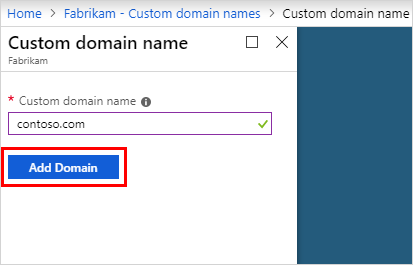
Important
You must include .com, .net, or any other top-level extension for this to work. When adding a custom domain, the Password Policy values will be inherited from the initial domain.
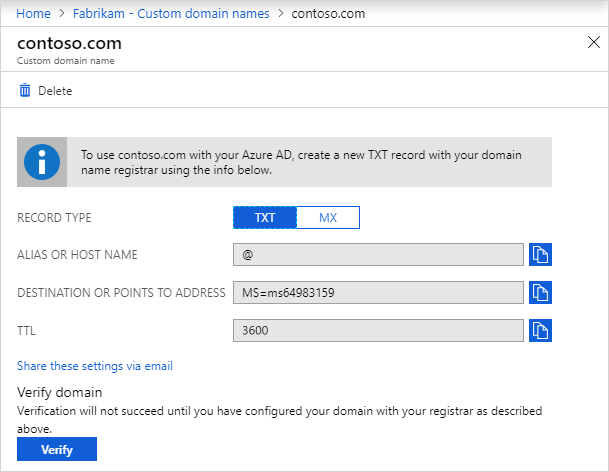
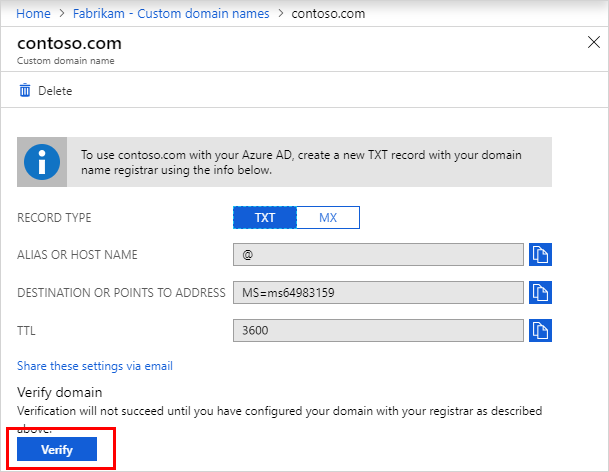
The unverified domain is added. The contoso.com page appears showing the DNS information needed to validate your domain ownership. Save this information.
Add your DNS information to the domain registrar
Follow these steps:
After you add your custom domain name, you must return to your domain registrar and add the DNS information from your copied from the previous step. Creating this TXT or MX record for your domain verifies ownership of your domain name.
Go back to your domain registrar and create a new TXT or MX record for your domain based on your copied DNS information. Set the time to live (TTL) to 3600 seconds (60 minutes), and then save the record.
Important
You can register as many domain names as you want. However, each domain gets its own TXT or MX record. Be careful when you enter the information at the domain registrar. If you enter the wrong or duplicate information by mistake, you'll have to wait until the TTL times out (60 minutes) before you can try again.
Verify your custom domain name
After you register your custom domain name, make sure it's valid in Microsoft Entra. The propagation time can be instantaneous or it can take a few days, depending on your domain registrar.
To verify your custom domain name, follow these steps:
Sign in to the Microsoft Entra admin center as at least a Domain Name Administrator.
Browse to Identity > Settings > Domain names.
In Custom domain names, select the custom domain name. In this example, select contoso.com.
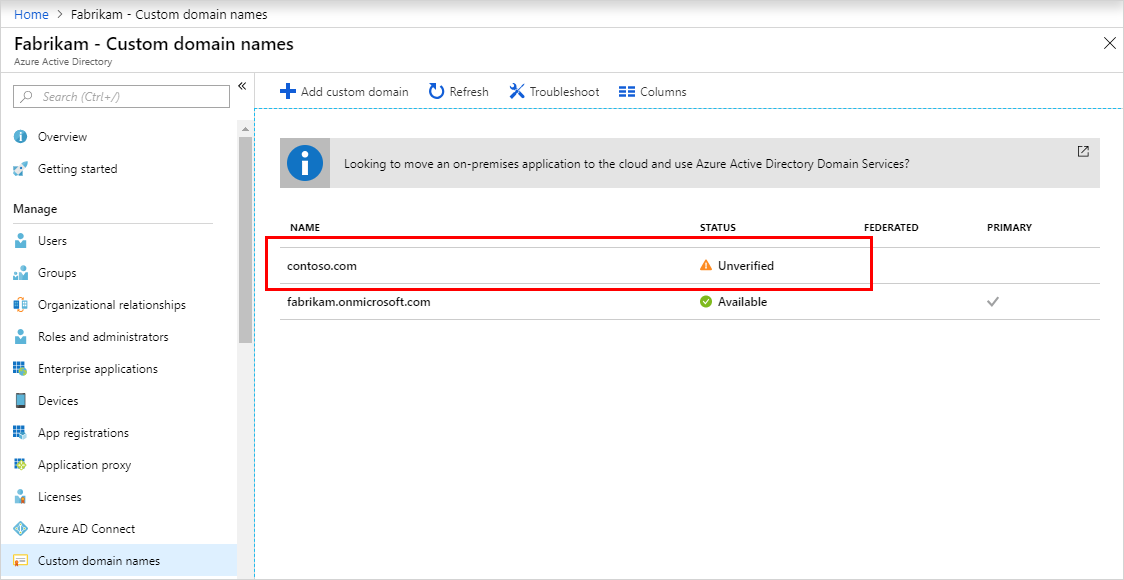
On the contoso.com page, select Verify to make sure your custom domain is properly registered and is valid.
Common verification issues
If you can't verify a custom domain name, try the following suggestions:
Wait at least an hour and try again. DNS records must propagate before you can verify the domain. This process can take an hour or more.
Make sure the DNS record is correct. Go back to the domain name registrar site. Make sure the entry is there, and that it matches the DNS entry information provided in the Microsoft Entra admin center.
- If you can't update the record on the registrar site, share the entry with someone who has permissions to add the entry and verify it's correct.
Make sure the domain name isn't already in use in another directory. A domain name can only be verified in one directory. If your domain name is currently verified in another directory, it can't also be verified in the new directory. To fix this duplication problem, you must delete the domain name from the old directory. For more information about deleting domain names, see Manage custom domain names.
Make sure you don't have any unmanaged Power BI tenants. If your users have activated Power BI through self-service sign-up and created an unmanaged tenant for your organization, you must take over management as an internal or external admin, using PowerShell. For more information, see Take over an unmanaged directory.
Feedback
Coming soon: Throughout 2024 we will be phasing out GitHub Issues as the feedback mechanism for content and replacing it with a new feedback system. For more information see: https://aka.ms/ContentUserFeedback.
Submit and view feedback for