Create Incoming Webhooks
Important
The existing Microsoft 365 (previously called Office 365) connectors across all cloud platforms are nearing deprecation, and the creation of new Microsoft 365 connectors will soon be blocked. For more information on the schedule and how the Workflows app provides a more flexible and secure experience, see retirement of Microsoft 365 connectors within Microsoft Teams.
An Incoming Webhook lets external applications share content in Microsoft Teams channels. The webhooks are used as tools to track and notify. The webhooks provide a unique URL to send a JSON payload with a message in card format. Cards are user interface containers that include content and actions related to a single article. You can use cards in the following capabilities:
- Bots
- Message extensions
- Connectors
Note
- The message size limit is 28 KB. When the size exceeds 28 KB, you receive an error. For more information, see Limits and specifications for Microsoft Teams.
- If more than four requests are made in a second, the client connection is throttled until the window refreshes for the duration of the fixed rate. A retry logic with exponential backoff can mitigate rate limiting for cases where requests exceed the limits within a second. To avoid hitting the rate limits, see HTTP 429 responses.
Key features of Incoming Webhooks
The following table provides the features and description of an Incoming Webhook:
| Features | Description |
|---|---|
| Adaptive Cards using an Incoming Webhook | Adaptive Cards can be sent through Incoming Webhooks. For more information, see Send Adaptive Cards using Incoming Webhooks. |
| Actionable messaging support | Actionable message cards are supported in all Microsoft 365 groups including Teams. If you send messages through cards, you must use the actionable message card format. For more information, see Legacy actionable message card reference and message card playground. |
| Independent HTTPS messaging support | Cards provide information clearly and consistently. Any tool or framework that can send HTTPS POST requests can send messages to Teams through an Incoming Webhook. |
| Markdown support | All text fields in actionable messaging cards support basic Markdown. Don't use HTML markup in your cards. HTML is ignored and treated as plain text. |
| Scoped configuration | An Incoming Webhook is scoped and configured at the channel level. |
| Secure resource definitions | Messages are formatted as JSON payloads. This declarative messaging structure prevents the insertion of malicious code. |
Note
- Teams bots, message extensions, Incoming Webhook, and the Bot Framework support Adaptive Cards. Adaptive Card is an open cross-card platform framework that is used in all platforms such as Windows, Android, and iOS. Teams connectors don't support Adaptive Cards. However, it is possible to create a flow that posts Adaptive Cards to a Teams channel.
- For more information on cards and webhooks, see Adaptive cards and Incoming Webhooks.
Create an Incoming Webhook
To add an Incoming Webhook to a Teams channel, follow these steps:
In the New Teams client, select Teams
 and navigate to the channel where you want to add an Incoming Webhook.
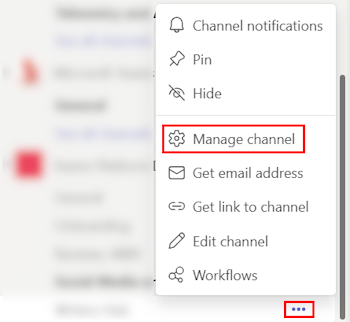
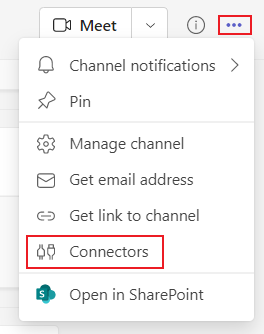
Select More options ••• on the right side of the channel name.
Select Manage channel.
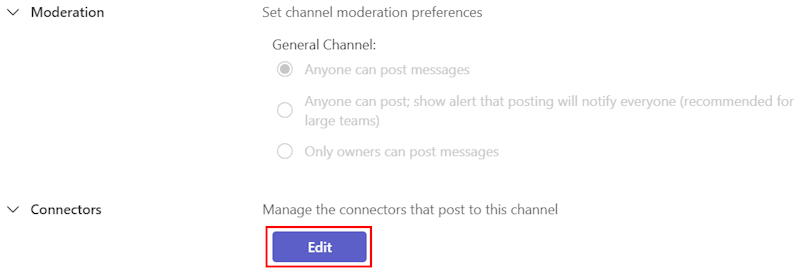
Select Edit.
Search for Incoming Webhook and select Add.
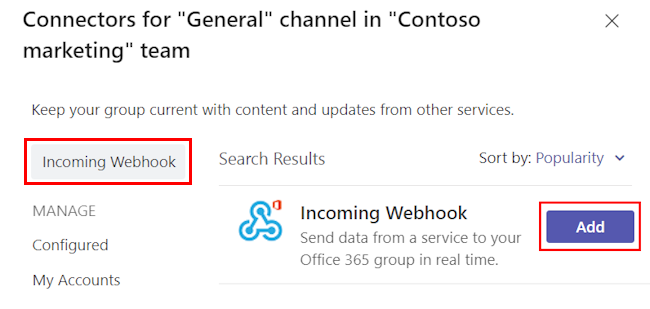
The Incoming Webhook dialog appears.
Select Add.

Note
If you’ve already added an Incoming Webhook, the Configure option appears. Select Configure to create an Incoming Webhook.
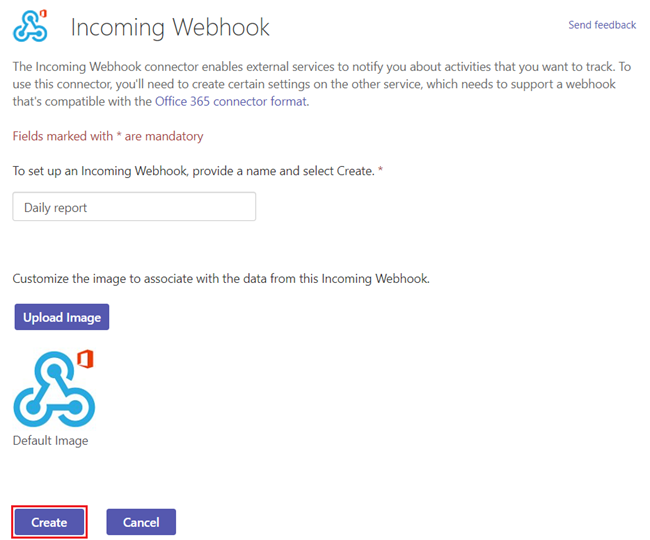
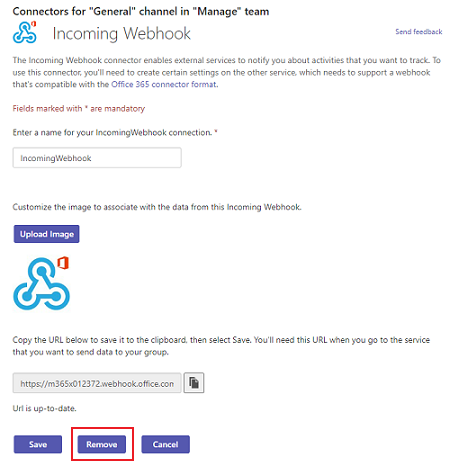
Provide a name for the webhook and upload an image if necessary.
Select Create.
Copy and save the unique webhook URL present in the dialog. The URL maps to the channel and you can use it to send information to Teams.
Select Done. The webhook is now available in the Teams channel.
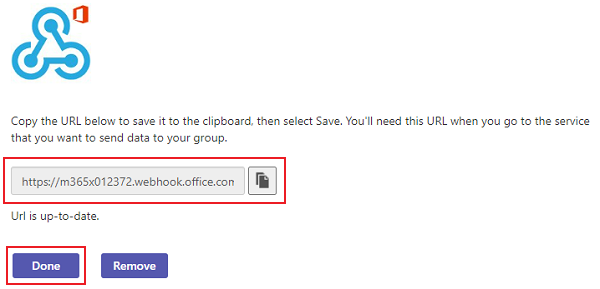

The following graphical representation provides the steps to create an Incoming Webhook:


Important
You can build a notification bot Teams app using Teams Toolkit other than an Incoming Webhook. They perform similarly but notification bot has more functionalities. For more information, see Build notification bot with JavaScript or Incoming Webhook notification sample.
You can create and send actionable messages through an Incoming Webhook or connector for Microsoft 365 Groups. For more information, see create and send messages.
Note
In Teams, select Settings > Member permissions > Allow members to create, update, and remove connectors, so that any team member can add, modify, or delete a connector.
Example
var adaptiveCardJson = @"{
  ""type"": ""message"",
  ""attachments"": [
    {
      ""contentType"": ""application/vnd.microsoft.card.adaptive"",
      ""content"": {
        ""type"": ""AdaptiveCard"",
        ""body"": [
          {
            ""type"": ""TextBlock"",
            ""text"": ""Message Text""
          }
        ],
        ""$schema"": ""http://adaptivecards.io/schemas/adaptive-card.json"",
        ""version"": ""1.0""
      }
    }
  ]
}";

var webhookUrl = "https://xxxxx.webhook.office.com/xxxxxxxxx";

var client = new HttpClient();
client.DefaultRequestHeaders.Accept.Add(new MediaTypeWithQualityHeaderValue("application/json"));

var content = new StringContent(adaptiveCardJson, System.Text.Encoding.UTF8, "application/json");
var response = await client.PostAsync(webhookUrl, content);
Remove Incoming Webhooks
To remove an Incoming Webhook from a Teams channel, follow these steps:
In the New Teams client, select the Teams icon
and navigate to the channel where you want to remove an Incoming Webhook.Select More options ••• on the right side of the channel name.
Select Manage channel.
Select Edit.
In the left pane, select Configured.
Under Incoming Webhook, select 1 Configured.
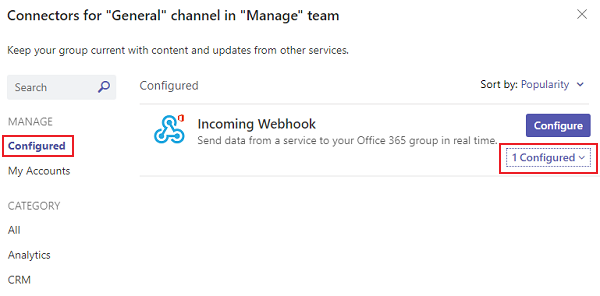
Select Manage.
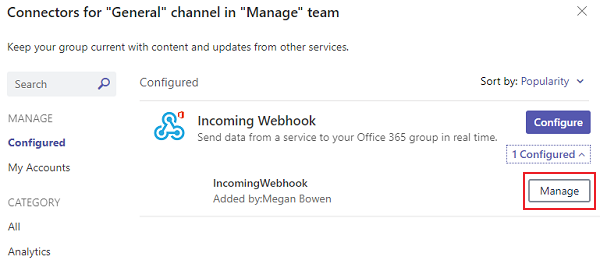
Select Remove.
The Remove Configuration dialog appears.
Select the required checkboxes.
Select Remove.
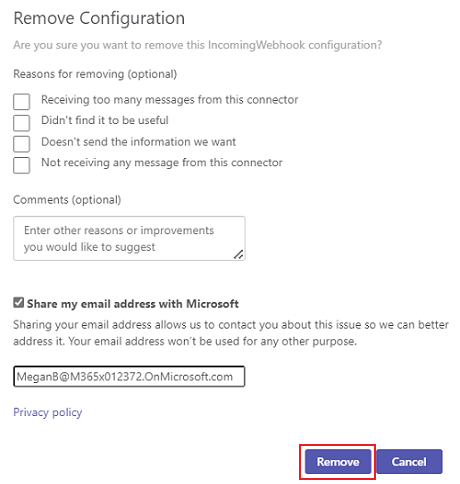

The webhook is now removed from the Teams channel.
Code sample
| Sample name | Description | .NET | Node.js |
|---|---|---|---|
| Incoming Webhook | This sample shows how to implement and use an Incoming Webhook. | View | View |
See also
Platform Docs
Feedback
Coming soon: Throughout 2024 we will be phasing out GitHub Issues as the feedback mechanism for content and replacing it with a new feedback system. For more information see: https://aka.ms/ContentUserFeedback.
Submit and view feedback for