Note
Access to this page requires authorization. You can try signing in or changing directories.
Access to this page requires authorization. You can try changing directories.
Community endpoints enable enclaves in a community to establish connections to resources outside of the community boundary to include public websites, public IP addresses, and external private networks through Site-to-Site (S2S) VPN or ExpressRoute connections. Enclave endpoints enable others to connect to your service by defining the means by which inbound traffic is allowed to flow into a given enclave once a connection is made.
In this tutorial, part five of eight, you create community and enclave endpoint resources and connect them. You learn how to:
- Create community endpoint resources in communities.
- Create enclave endpoint resources in enclaves.
- Create an enclave connection.
- View your endpoints and connection in the Azure portal.
Before you begin
In the previous tutorials, you created a community and an enclave using the Azure portal.
Create an enclave endpoint
Navigate to an enclave hosting a service you want to make available to other enclaves in the community
While in your enclave's page, select
Enclave Endpointson the left side, and selectCreate.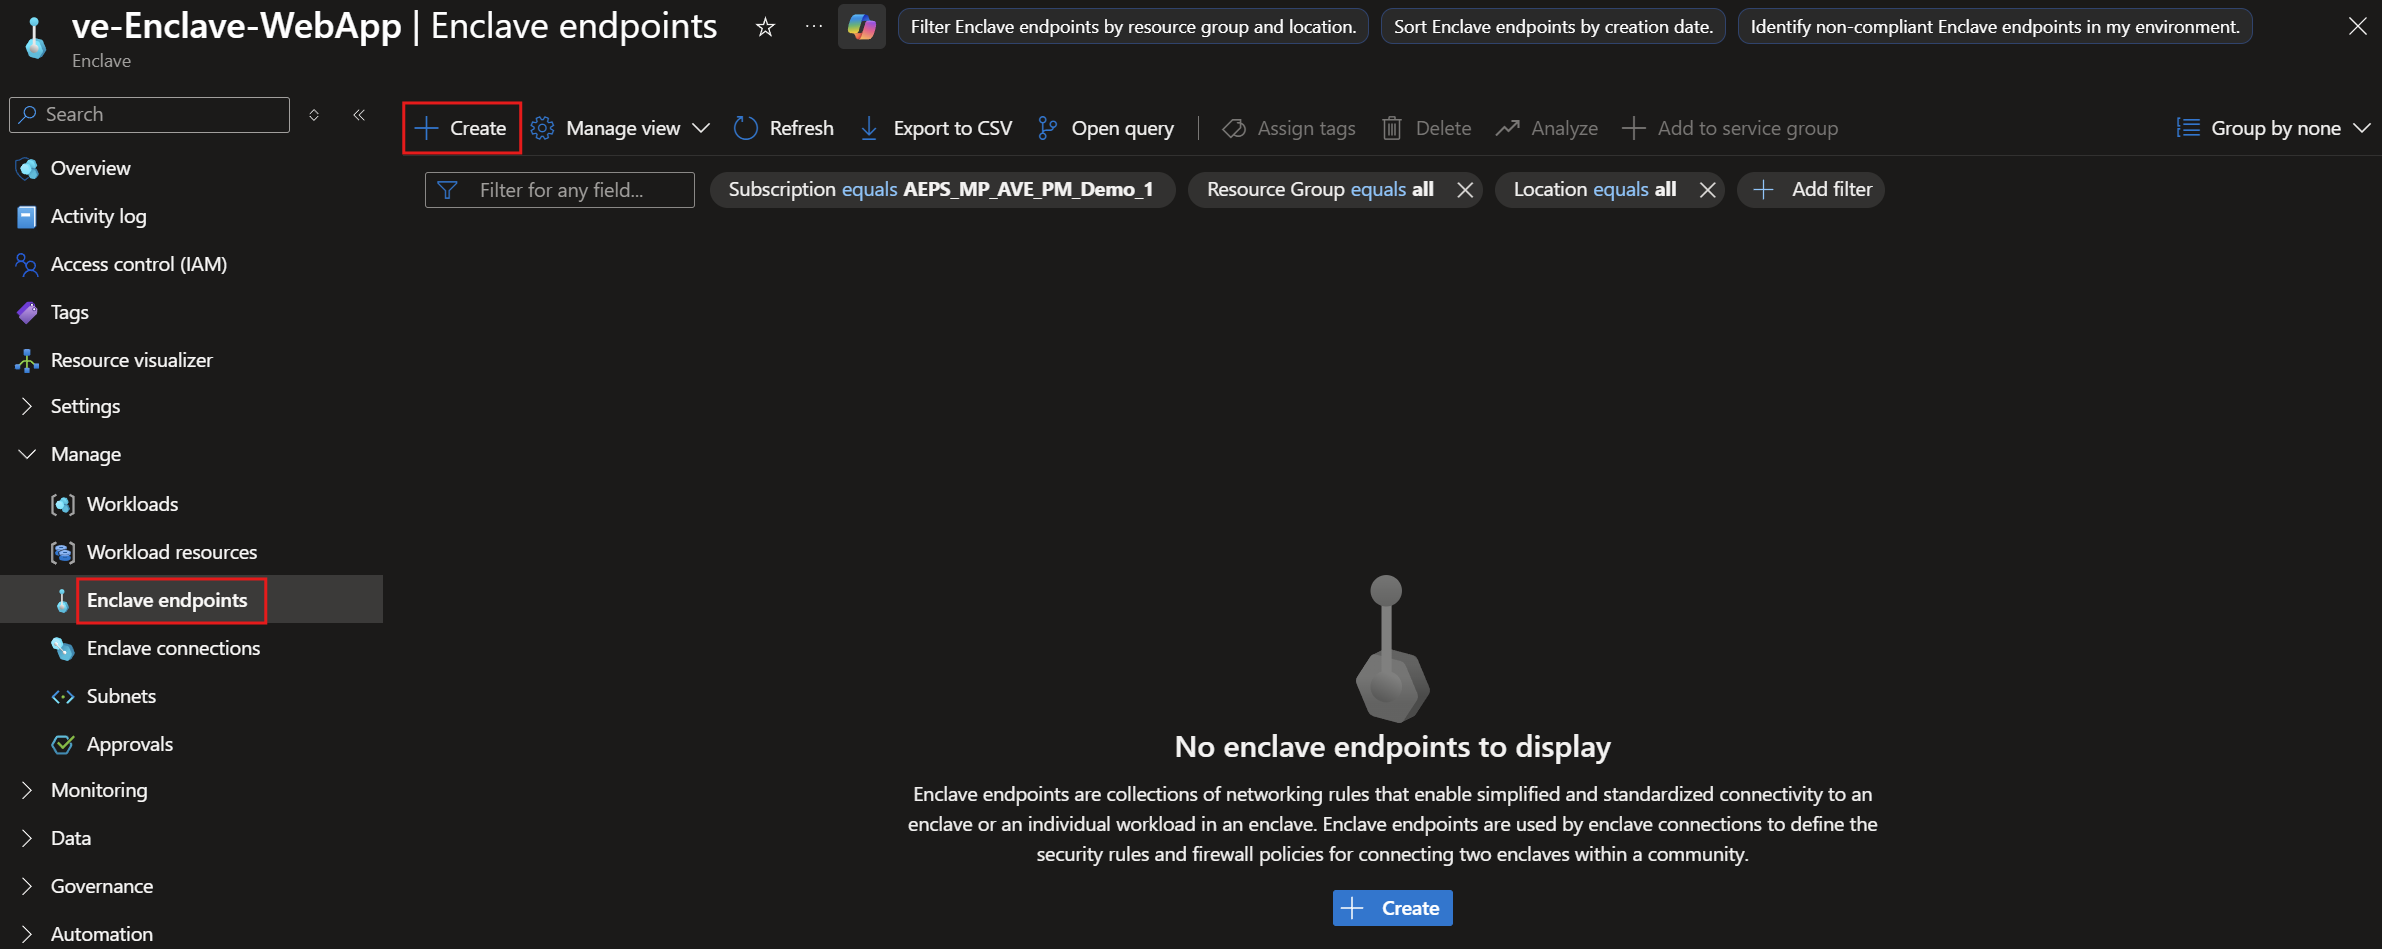
Enter
ee-MyServiceas the enclave endpoint name, and then select Next.Enter the endpoint rules for your app:
- Select + Add to add an endpoint rule that represents how to access your app.
Rule Name: EnterWebAppEndpointRules.Destination IP/CIDR range: Enter the CIDR range for the subnet that hosts your application, such as10.0.2.0/26. Find the subnet range in the information box for your enclave workload.Protocol: SelectANY.Port: Enter443.
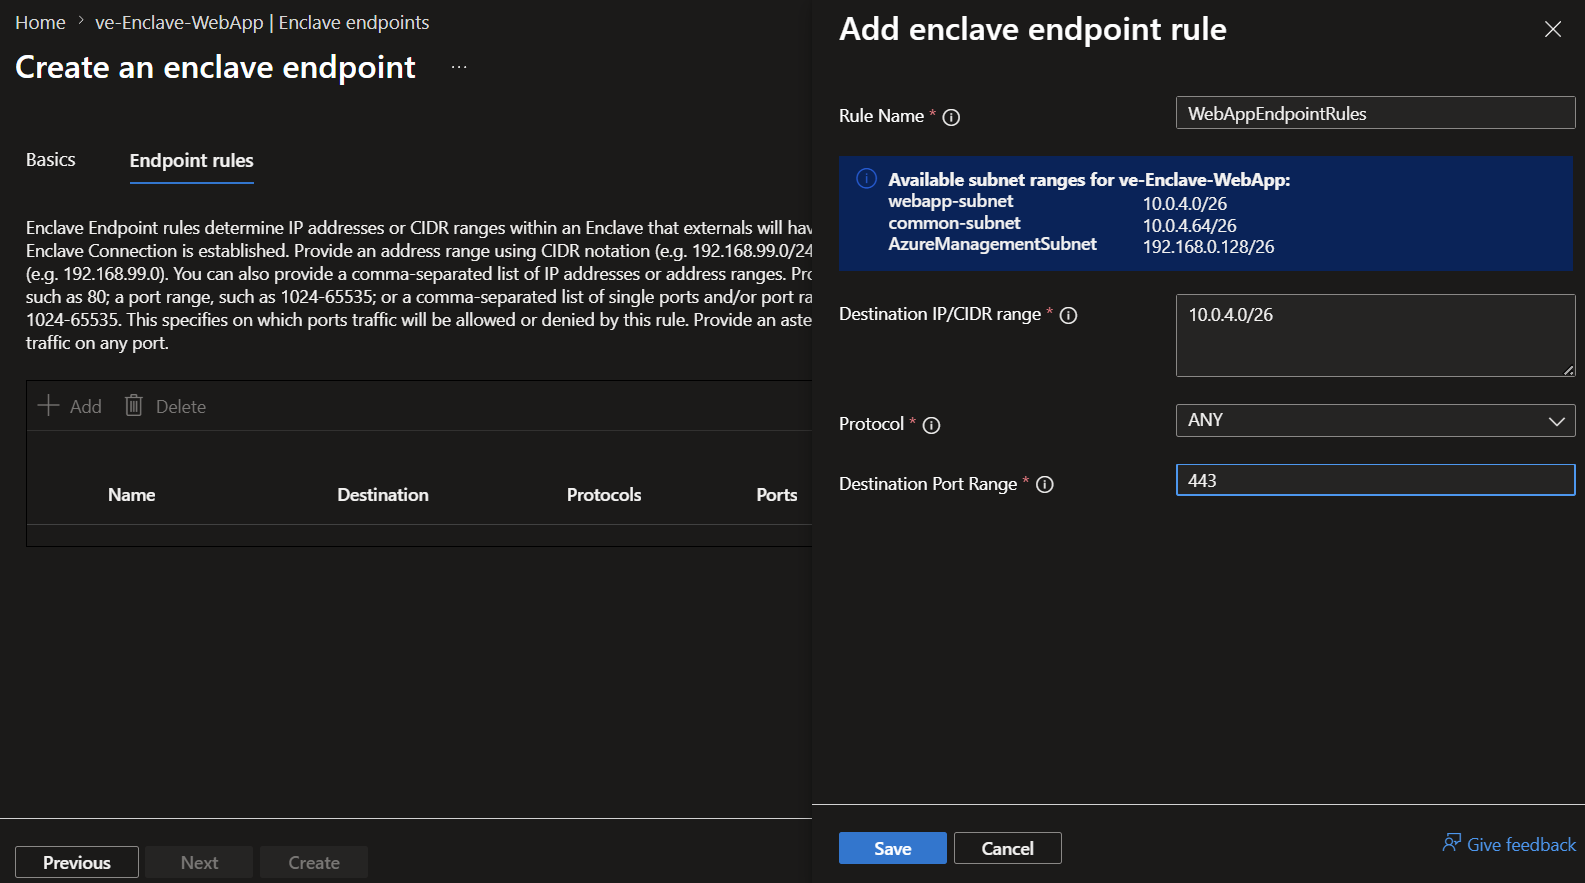
- Select + Add to add an endpoint rule that represents how to access your app.
Select
Save, selectReview + Create, and selectCreateAfter the portal creates the endpoint resource, you can view it in the Azure portal from the
ve-Enclave-WebAppenclave's Enclave Endpoints.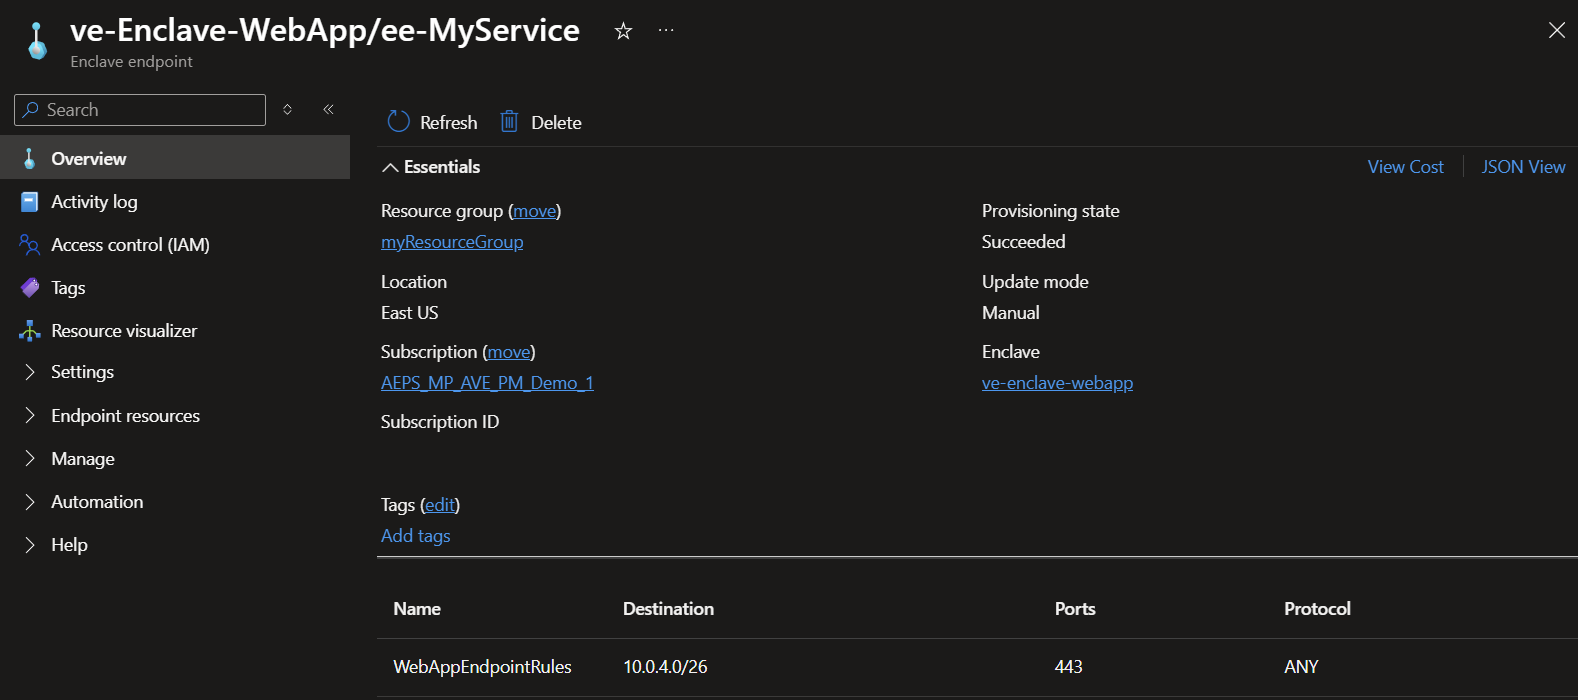
Create a community endpoint
Go to the
cmt-fabrikamcommunity, selectCommunity Endpoints, and then selectCreate.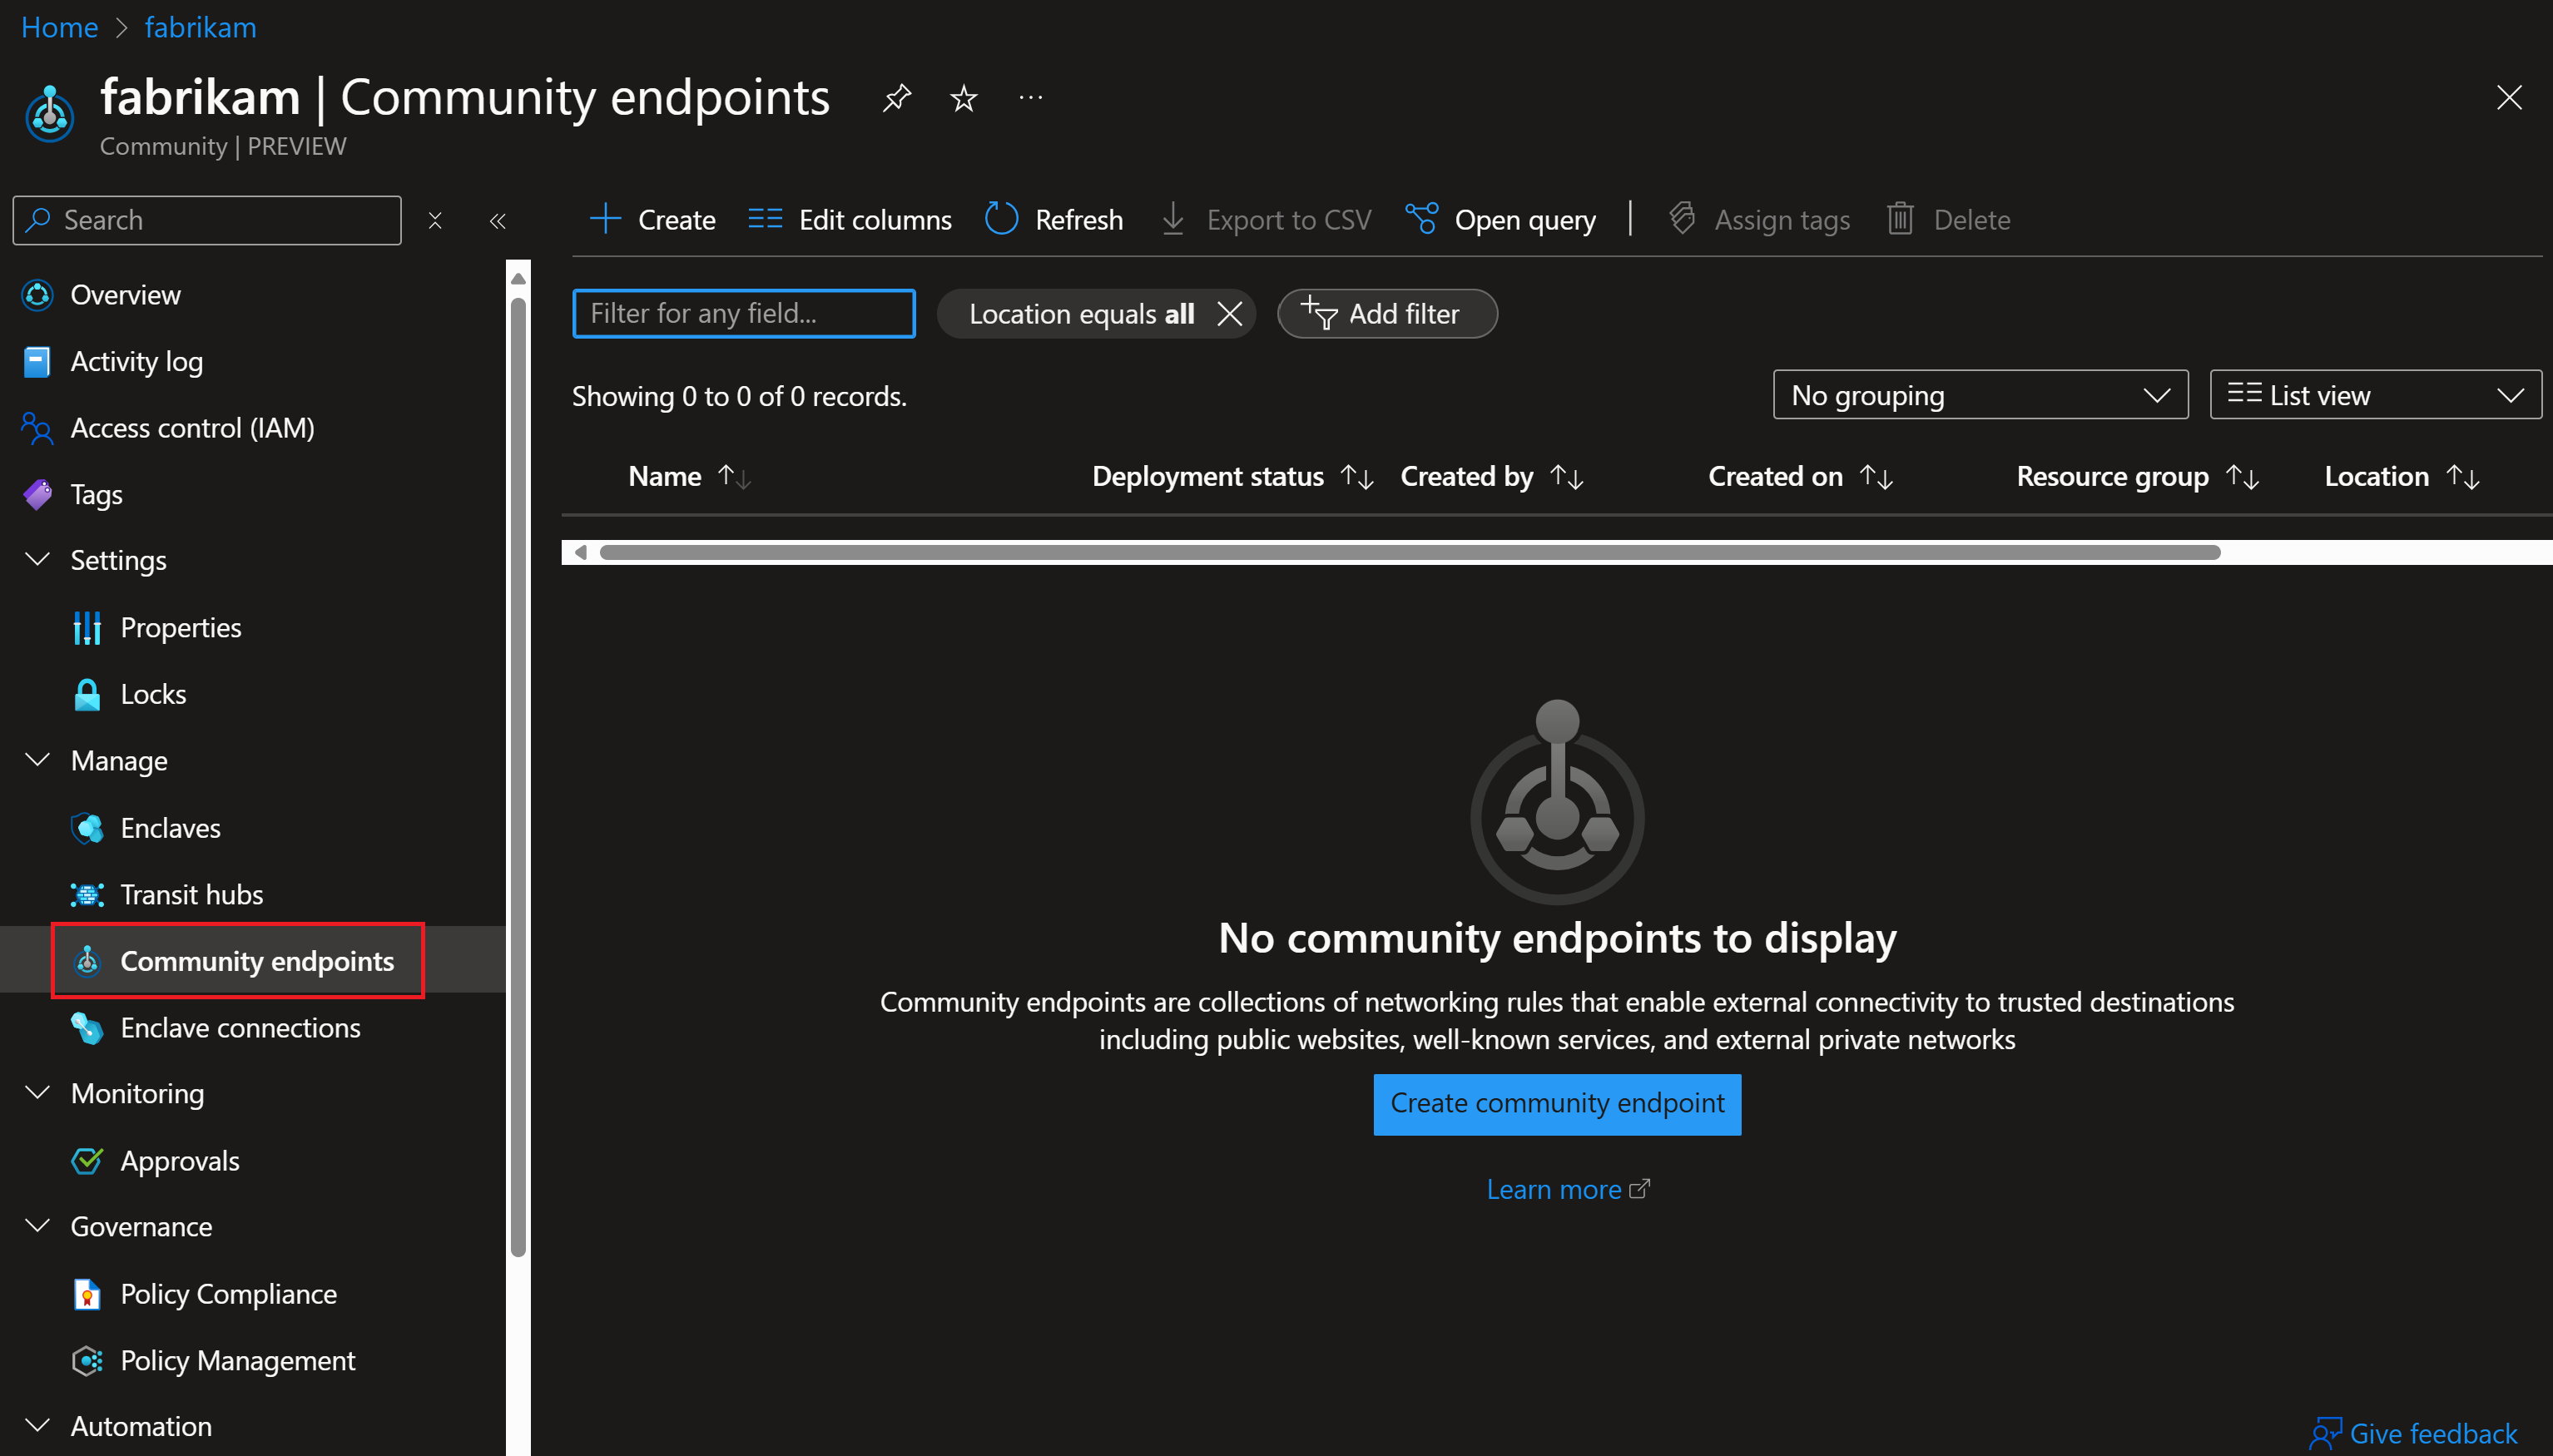
Enter the community endpoint name and then select
Next:- Community endpoint name:
ce-fabrikam-website
- Community endpoint name:
Enter the endpoint rules for your app:
- Select + Add to add an endpoint rule that represents how to access your app.
Rule Name: EnterWebsite-Rule.Destination Type: SelectFQDN.Destination: Enter*.microsoft.com.Protocol: SelectHTTPS.Port: Enter443.
Note
FQDN endpoint rules aren't supported for Basic communities. Use a community with a supported SKU for this example.
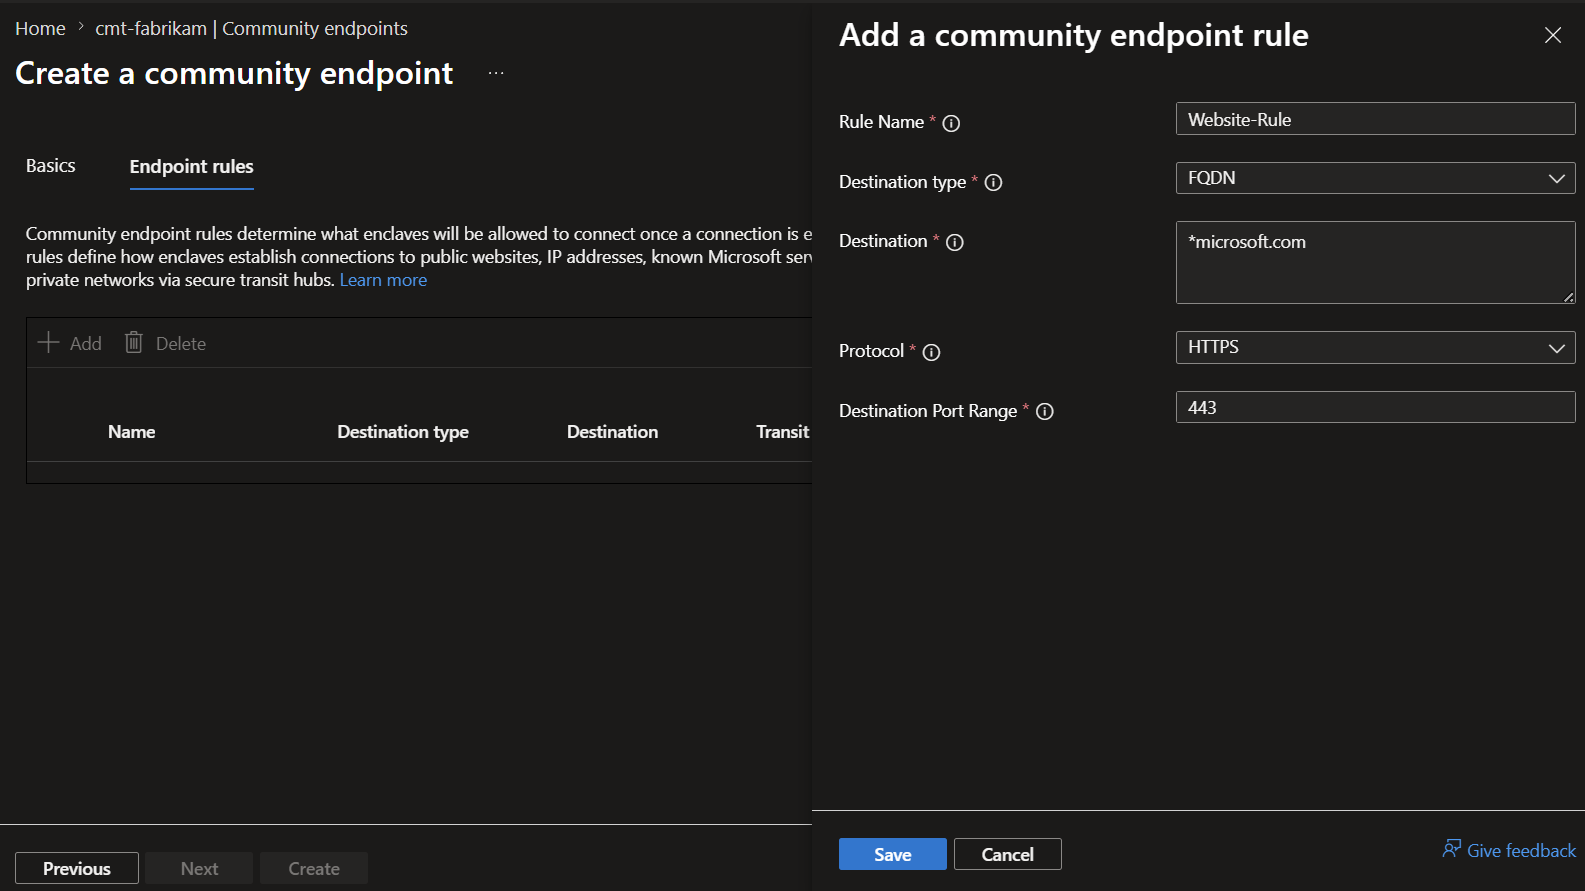
- Select + Add to add an endpoint rule that represents how to access your app.
Select
Save, selectReview + Create, and selectCreate.After the portal creates the endpoint resource, you can view it in the Azure portal from the
cmt-fabrikamcommunity'sCommunity Endpoints.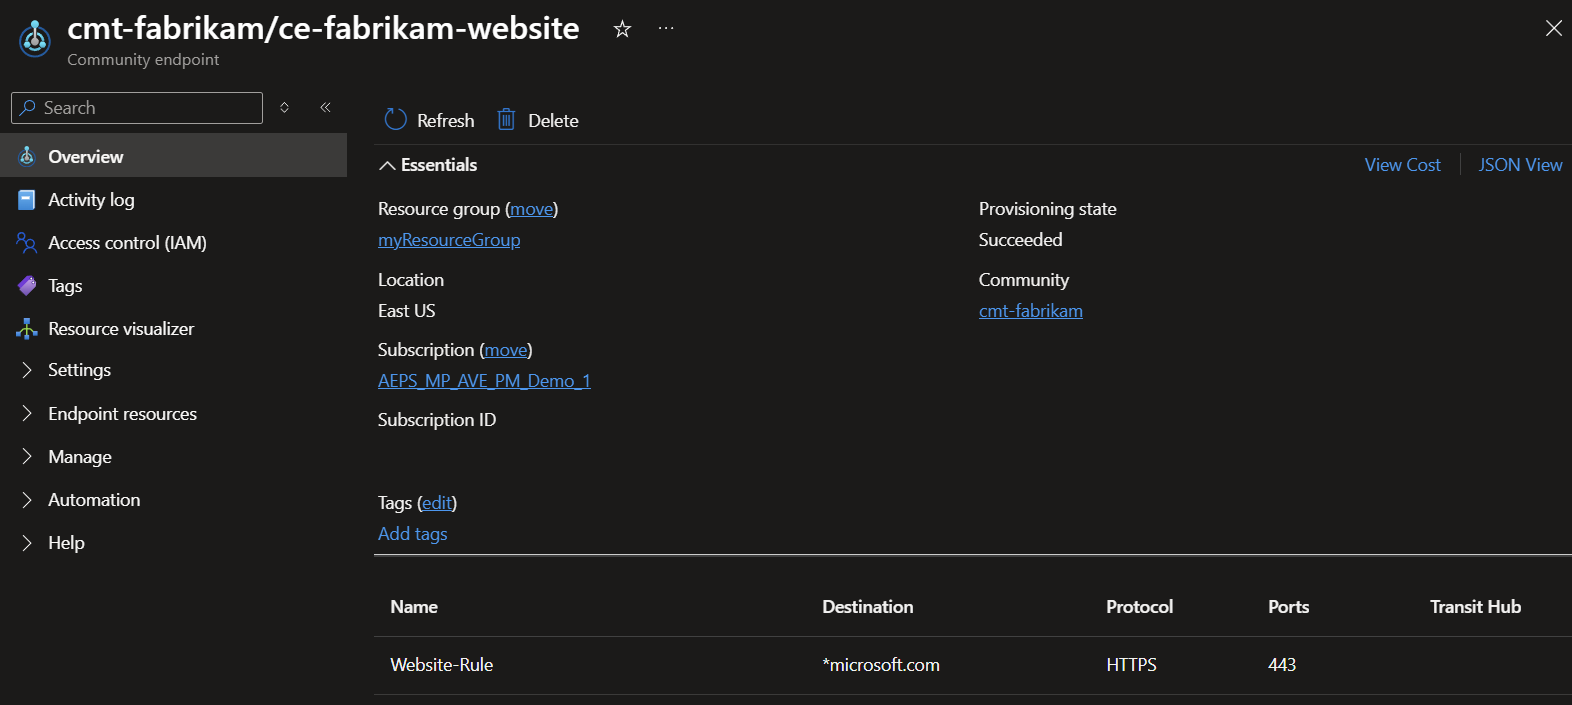
Create an enclave connection
Create an enclave connection from the web app enclave to the community endpoint so the app can reach required site outside the community.
From the
cmt-fabrikamcommunity, selectEnclave Connections, then selectCreate.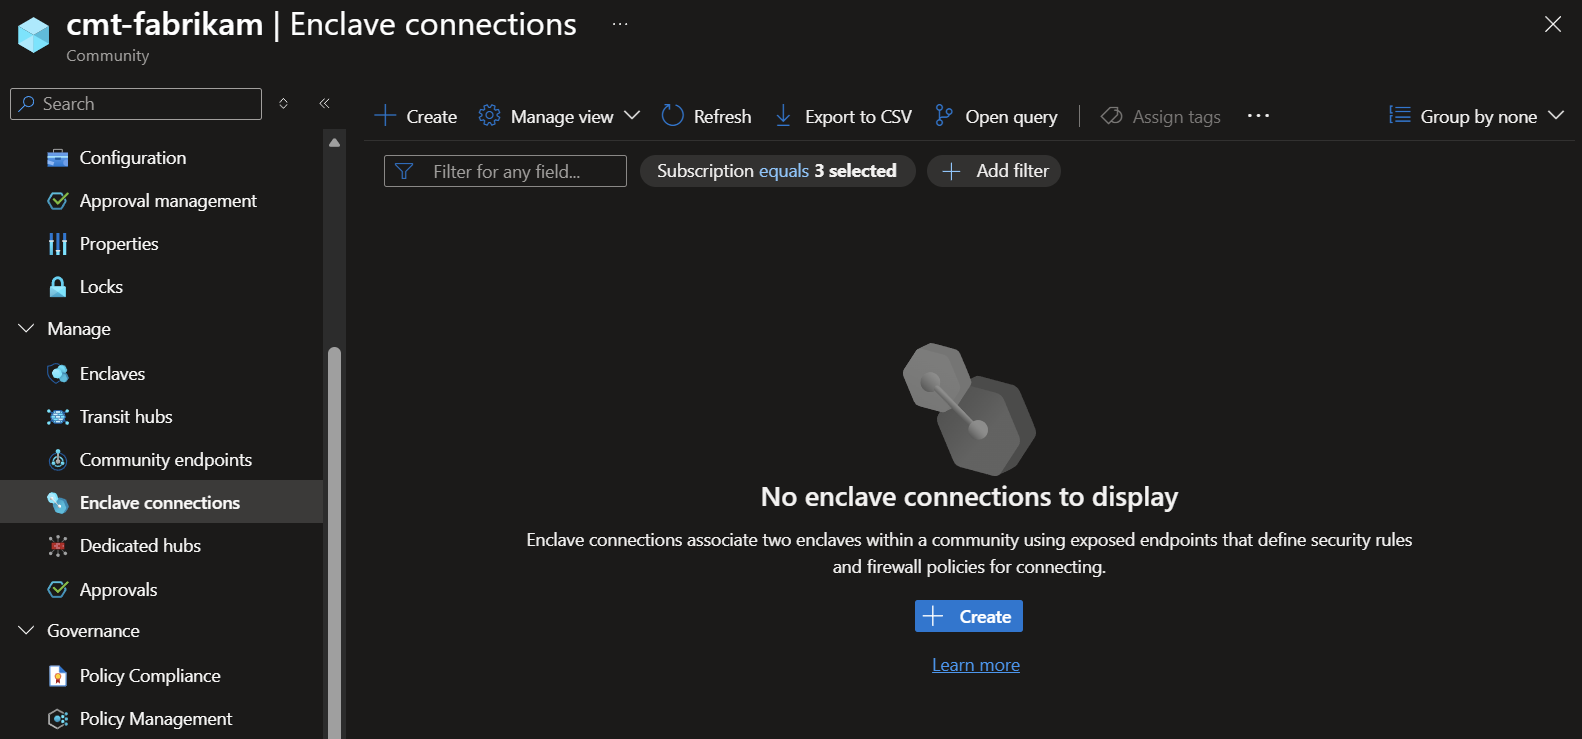
Enter the details for your app or service:
Resource Group: SelectmyResourceGroup.Enclave connection name: Enterec-fabrikam-external-connection.Community: Selectcmt-fabrikamfrom the dropdown.Source Type: SelectEnclave.Source enclave: Selectve-Enclave-WebAppfrom the dropdown.Source IP addresses/CIDR range(s): Enter the CIDR range for the source enclave subnet, such as10.0.2.0/26.Destination Endpoint Type: SelectCommunity Endpoint.Destination endpoint: Selectce-fabrikam-websitefrom the dropdown.
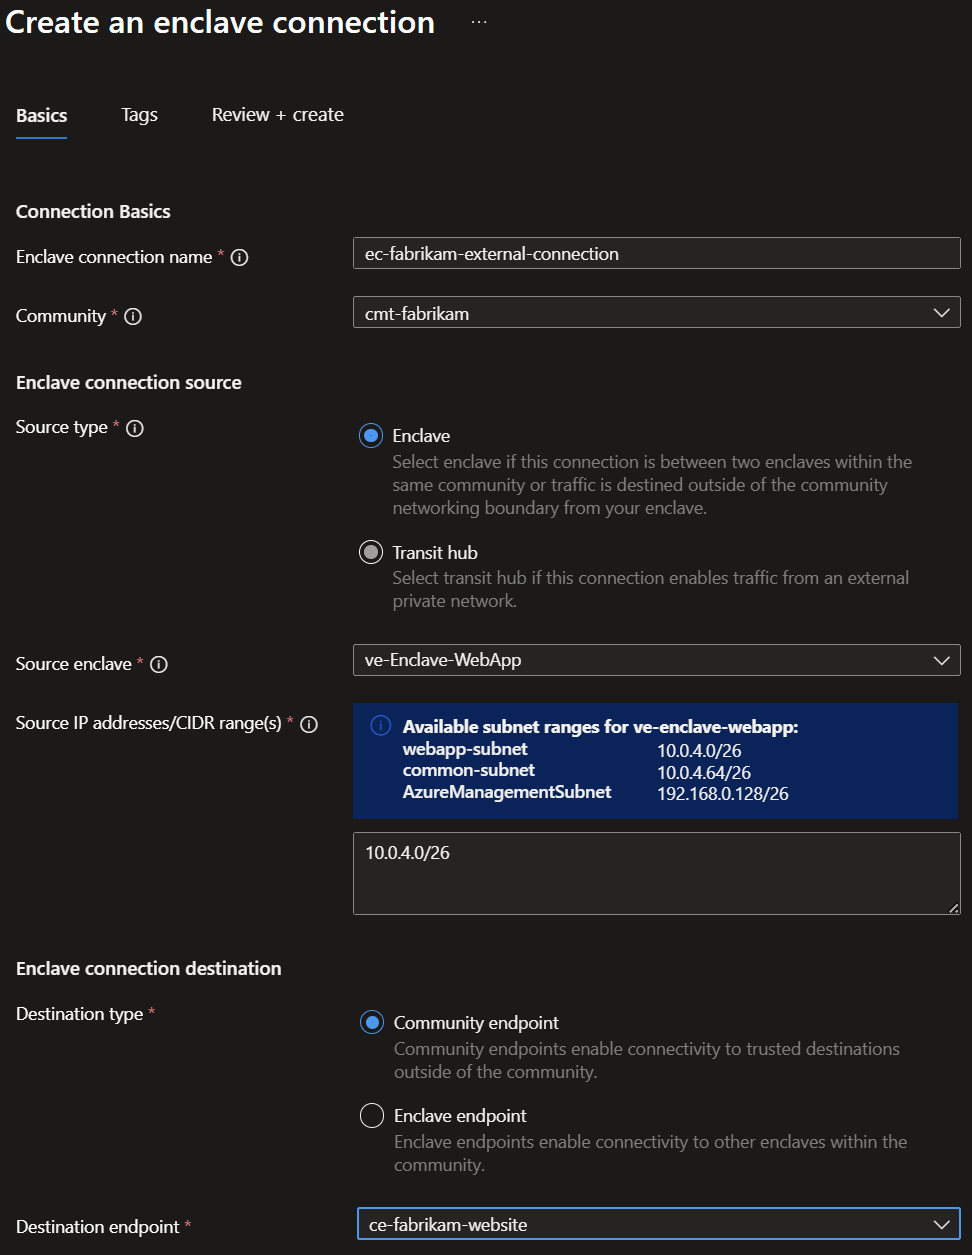
Select
Review + Createand thenCreate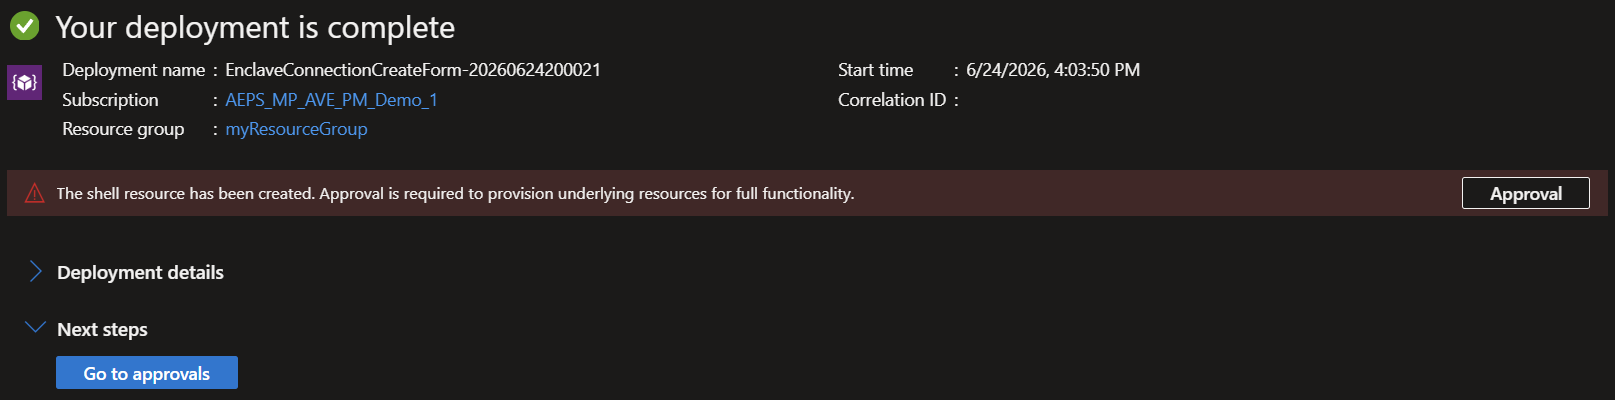
After the portal creates the connection resource, you can view it in
cmt-fabrikamunderEnclave Connections. The connection can remain in a disconnected state when approval is required by the community or destination endpoint.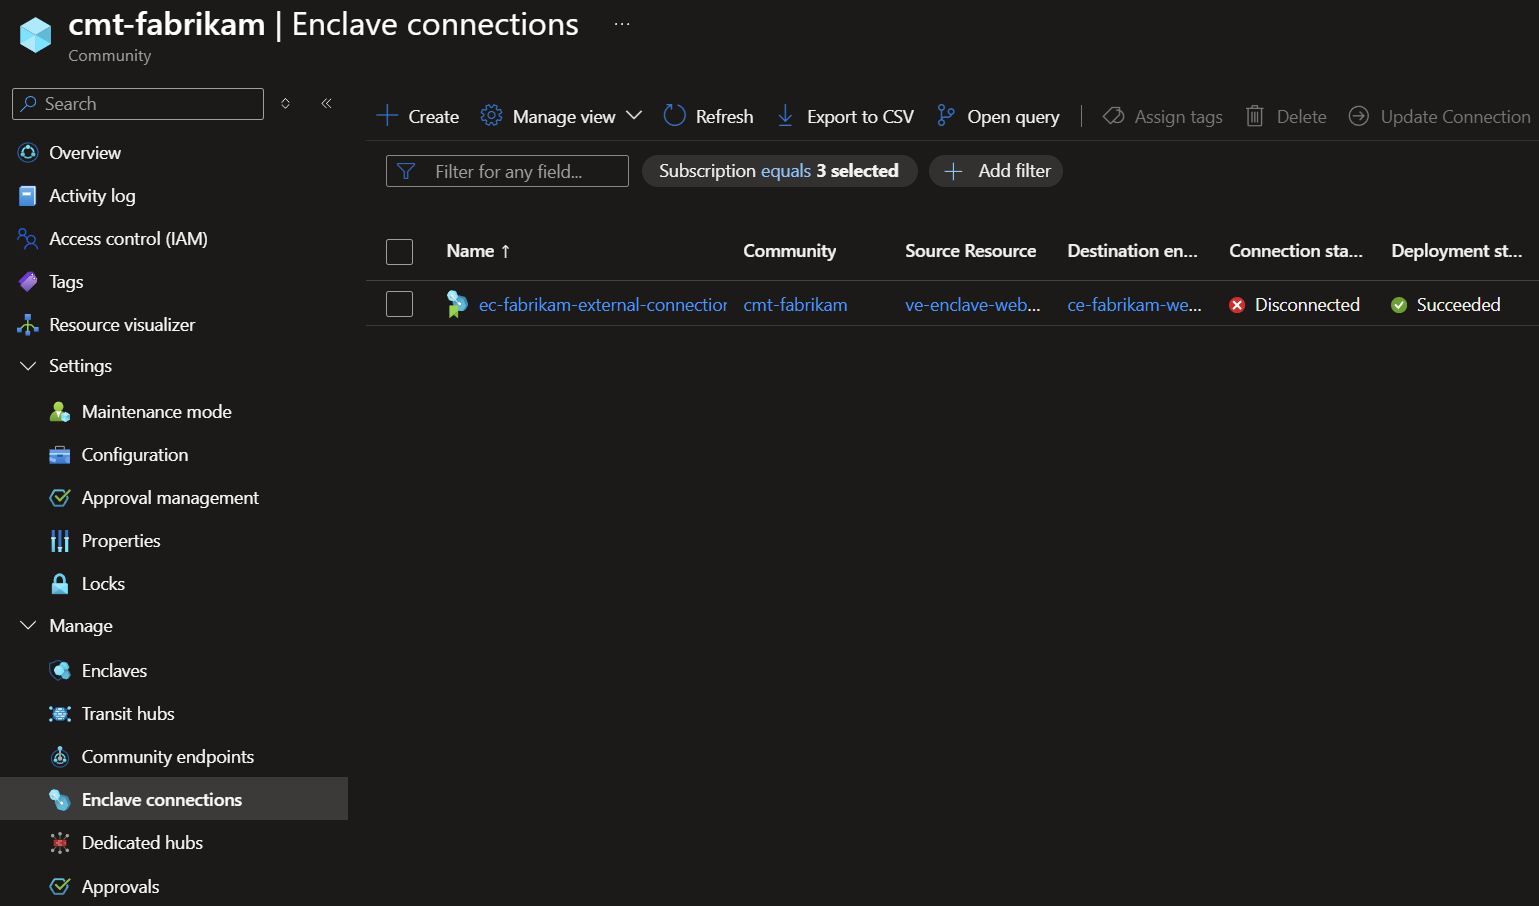
Review the pending approvals in
Approvalson the left for the enclave.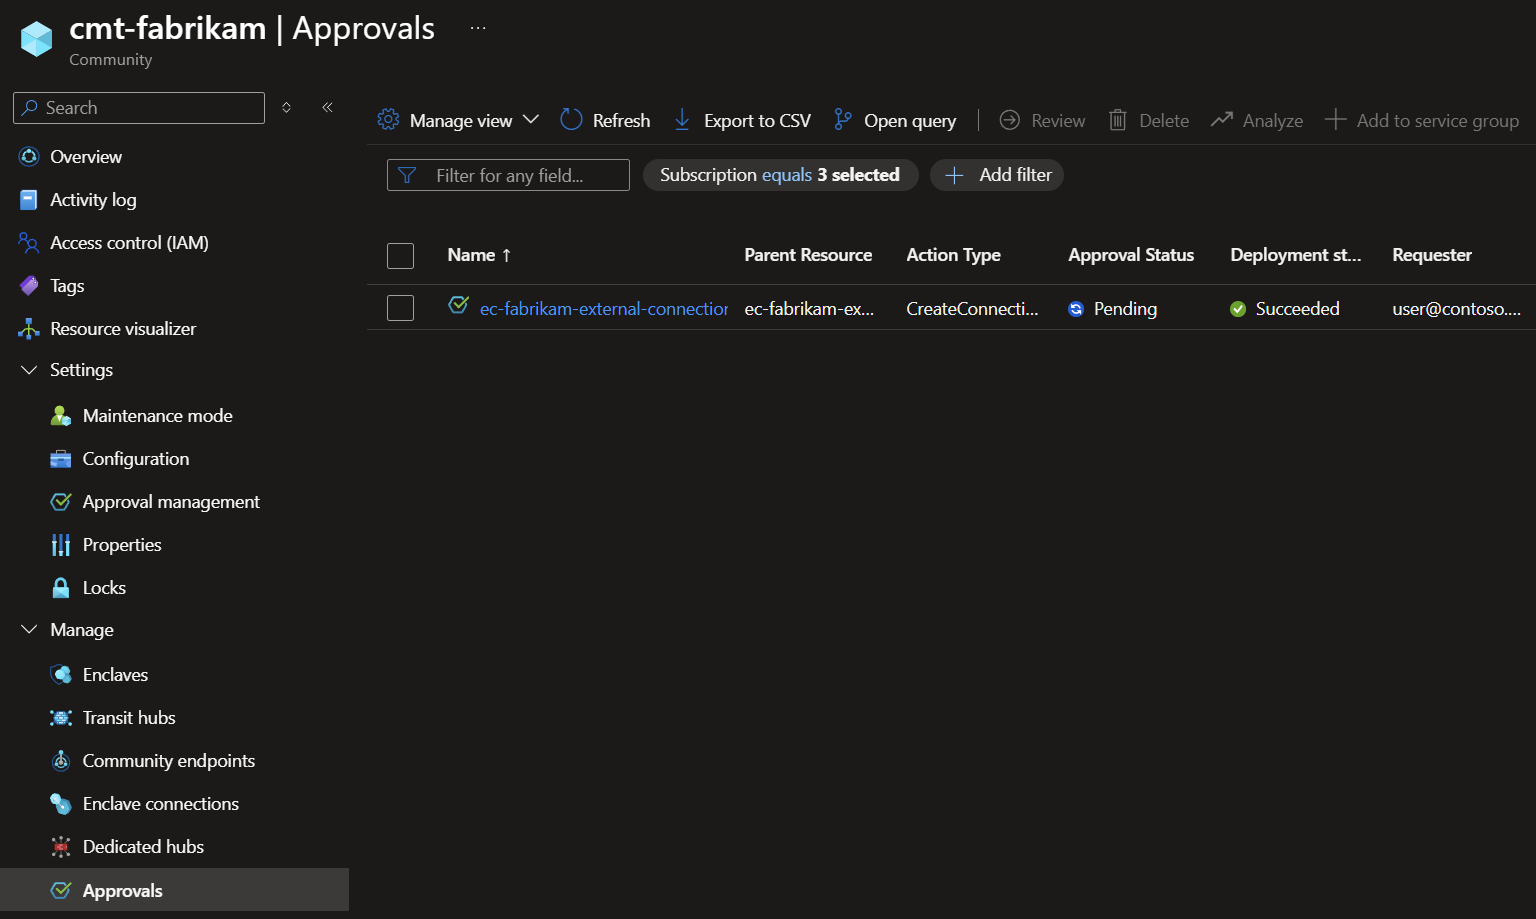
Approve any pending requests. After approval, the connection is reconciled and can change to the
Connectedstate when the required network configuration is complete. For more information about reviewing approval requests, see Manage approval requests. For resource-type approval settings, see Configure approval settings.
Clean up resources
If you no longer need the endpoint and connection resources that you created in this tutorial, delete them to avoid incurring unnecessary charges.
Warning
Deleting endpoint and connection resources is permanent and can't be undone. Review dependent workloads and active traffic paths before deletion.
Before deleting:
- Verify that no workloads depend on these endpoints or connections.
Recommended deletion order:
- Delete enclave connections.
- Delete enclave endpoints.
- Delete community endpoints.
To delete enclave connections:
- In the Azure portal, go to your community (for example,
cmt-fabrikam). - Select
Enclave Connections. - Select the enclave connection to delete (for example,
ec-fabrikam-external-connection). - Select
Delete. - Confirm deletion.
To delete enclave endpoints:
- In the Azure portal, go to the source enclave (for example,
ve-Enclave-WebApp). - Select
Enclave Endpoints. - Select the enclave endpoint to delete (for example,
ee-MyService). - Select
Delete. - Confirm deletion.
To delete community endpoints:
- In the Azure portal, go to your community (for example,
cmt-fabrikam). - Select
Community Endpoints. - Select the community endpoint to delete (for example,
ce-fabrikam-website). - Select
Delete. - Confirm deletion.
What gets deleted:
- Enclave connection resources that you created in this tutorial.
- Enclave endpoint resources that you created in this tutorial.
- Community endpoint resources that you created in this tutorial.
What is retained:
- Community and enclave resources.
- Workloads and subnet resources.
- Approval settings and other unrelated Azure Enclave resources.
Next steps
In this tutorial, you deployed community and enclave endpoints using Azure portal. You also learned how to:
In the next tutorial, you'll learn how to create connections using these endpoints.