Note
Access to this page requires authorization. You can try signing in or changing directories.
Access to this page requires authorization. You can try changing directories.
Azure Enclave is a cloud networking service that provides organizations with highly sensitive data the ability to quickly deploy and manage workloads across Commercial and air-gapped Azure clouds at scale. In this article, you:
- Deploy a service catalog App Service Web App template into an existing workload from the Azure portal.
- Review an architecture example for a basic web application
Note
This sample deployment is just for demonstration purposes and doesn't represent all the best practices for network, systems, or applications administration.
Before you begin
This article assumes a basic understanding of networking and Azure Enclave concepts. For more information, see Best practices of Azure Enclave.
You need an Azure account with an active subscription. If you don't have one, create an account for free.
You need a community, enclave, workload, and at least one workload resource group, with permissions to create resources in the workload resource group.
Enable the required maintenance mode for your enclave so the deployment can add Private Link resources to the enclave managed resource group. The required mode depends on the Mission API version and the deployment configuration.
Prerequisites
If your organization's policies require Customer-Managed Keys (CMK) encryption, create the required key and managed identity before deployment. Use the Common Dependencies service catalog template to create these resources.
- Subnets for private endpoints and App Service integration: Use subnets you create during enclave creation or create new subnets after enclave creation. The private endpoint subnet shouldn't have subnet delegation.
- Create a private endpoint subnet. A
/26subnet, such as10.0.2.0/26, is an example size and isn't a universal requirement.- Add NSG rule set
- Don't delegate this subnet
- Use this subnet for private endpoint resources
- Create an App Service integration subnet. A
/26subnet, such as10.0.2.64/26, is an example size and isn't a universal requirement.- Add NSG rule set
- Add subnet delegation
Microsoft.Web/serverFarms - Use this subnet for App Service resources
Note
You can't resize a subnet once resources are deployed inside the subnet.
- Create the private DNS zone required for the App Service private endpoint. The zone name is cloud-specific. For example, use
privatelink.azurewebsites.netin Azure global orprivatelink.azurewebsites.usin Azure Government. Create the zone underAdditional Private DNS Zone namesin the Private DNS Zones service catalog template.
Deploy the template
- Navigate to the workload for the intended deployment.
- Select the
+Add Azure Servicebutton. - Select the
App Serviceservice template from the service catalog list dropdown, confirm the version you need (default:latest), and selectNext.
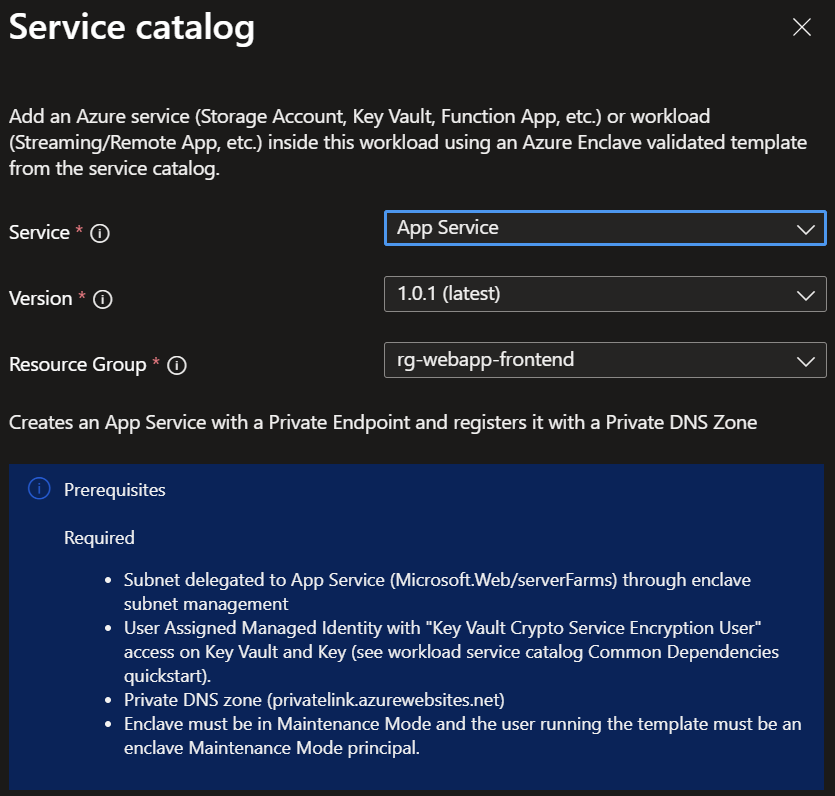
- Enter all required parameters on each tab.
- Adjust any of the prepopulated parameters as needed.
- Select
Review + CreatethenCreate.
Wait for the deployment to complete successfully before you take any actions within the deployed resources.
Validate the deployment
Go to the specified resource group and confirm that the deployment created the expected resources, including an App Service, App Service plan, private endpoint, and network interface.
Delete the deployment
If you don't plan on keeping these resources, clean up unnecessary resources to avoid Azure charges. Before deleting a resource group, confirm that it doesn't contain resources used by other deployments, including shared subnets, private DNS zones, CMK resources, Key Vaults, or managed identities.
Recommendations
- Add tags to service catalog deployments to track important information for that resource such as:
- Owner:
<main POC> - Deployer:
<yourName> - Purpose:
<prod user web app> - Service Catalog Name:
<App Service Web App> - Service Catalog Version:
<version you deployed>
- Owner:
- Consider adding an Azure Policy to enforce and inherit tags