Developing iOS Apps with Azure and Office 365 APIs
Microsoft will kick-off a world tour event this week with the Office 365 Summit (formerly Ignite). With planned stops across 6 continents and fresh new content/tracks, the Summit promised to be the premier Office 365 training event offered by Microsoft. I’ll have the pleasure of delivering developer sessions across two separate developer tracks with a focus on new Office 365 APIs. The Office 365 APIs are extremely exciting for the following reasons:
- The Office 365 APIs promote Office 365 as a platform for developers. Ultimately, Office 365 can be seen a Software as a Service (SaaS) offering AND a Platform as a Service (PaaS) offering because of these API investments.
- The Office 365 APIs remove the silos that exist in traditional Office/SharePoint solution development. Instead of developing solutions IN Office/SharePoint the Office 365 APIs enable solutions to be developed WITH Office/SharePoint.
- The Office 365 APIs are delivered using standards such as REST/OData/OAuth, which enable developers from all backgrounds and technologies to leverage Office 365 features in their solutions. Instead of just targeting Microsoft/.NET developers, the APIs are technology agnostic for ANY developer.
As an evangelist, I speak frequently about this value proposition. As I prepared for the Office 365 Summit, I realized I have never leveraged the Office 365 APIs outside of Visual Studio (my comfort zone). As a weekend challenge, I decided to try developing an iOS app with the Office 365 APIs using XCode and Swift (both completely new to me). Are the Office 365 APIs and Azure really that easy to develop with outside of Visual Studio? You be the judge!
[View:https://www.youtube.com/watch?v=lUhRHE9M78I]
| NOTE: Visual Studio will always provide the premier developer experience with Azure and the Office 365 APIs. In fact, there are a number of fantastic solutions for developing iOS apps in Visual Studio (Xamarin, Cordova, etc). If not for the personal challenge, I’d probably use one of these technologies that keeps me in Visual Studio. Cordova is particularly interesting as it leverages HTML/JavaScript to deliver apps across mobile platforms (think responsive web wrapped in a simple native app). The Office 365 Summit has a session on developing cross-platform mobile apps with the Office 365 APIs and Cordova. |
Getting Started
I decided to use Apple’s new Swift programming language, because (unlike Objective-C) I was unable to find ANY documentation, blogs, or starter projects for developing Swift apps with Windows Azure or Office 365. I figured Swift would add to the challenge and hopefully result in something useful for the iOS developer community. I borrowed a Macbook Air from work (yes, we have some Apple hardware in the MTC for demonstrations), downloaded XCode, and started developing. I divided my effort into four milestones…configuring the iOS app in Azure Active Directory (which is the identity provider to Office 365), authenticating to Azure AD within my iOS app, using the Office 365 Discovery Service to locate API end-points, and calling those end-points to consume Office 365 services. My applications calls several of these Office 365 services, but Azure AD's "Common Consent Framework" makes it easy authenticate once and consume multiple services. Below is a more comprehensive video that illustrates exactly how to get started and accomplish the four milestones that are detailed in this post.
[View:https://www.youtube.com/watch?v=suv1Ig78yrM]
Configuring the Application in Azure AD
Registering the iOS app in Azure Active Directory is an extremely simple task. Visual Studio tooling automates most of this configuration for developers, so non-Microsoft developers will use the Windows Azure Portal (don't worry, it is still easy). MSDN details exactly how to add, updates, and delete applications in Azure Active Directory, but I'll provide the summary:
- Log into the Azure Management Portal with the Azure AD directory for your tenant
- Navigate to the "Active Directory" tab in the left navigation
- Click on the directory for your Office 365 tenant in the directory list
- Click on the "APPLICATIONS" tab in the top navigation
- Click on the "ADD" button at the bottom on the screen to launch the new application wizard
- Select "Add an application my organization is developing" in the new application wizard
- Give the application a NAME and select "NATIVE CLIENT APPLICATION" as the Type, then click the next button
- Provide a unique REDIRECT URI...this can be any valid URL (but it does not to have to actually resolve to anything), then click the complete button
- Once the Application has been provisioned, click on the "CONFIGURE" link in the top navigation
- Locate the "CLIENT ID" and copy this unique identifier for later use (our native app will need this)
- Locate the "permissions to other applications" section of the screen and grant the following permissions:
- Windows Azure Active Directory: "Read directory data" and "Enable sign-on and read users' profiles"
- Office 365 Exchange Online: "Read users' mail"
- Office 365 SharePoint Online: "Read users' files"
- Click the SAVE button at the bottom of the screen (don't forget this)
Application Permissions in Azure AD:
Client Authentication to Azure AD
It is possibly to accomplish a manual OAuth flow with Azure Active Directory. However, Microsoft offers the Active Directory Authentication Libraries (ADAL) to simplify this flow on most major platforms (iOS, Android, Windows, etc). ADAL for iOS is available on GitHub and makes easy work of authentication in our app. There are a few inputs ADAL will require to perform the authentication:
- Authority: this will be https://login.windows.net/\<tenantdomain> where <tenantdomain> is the full tenant domain for your Office 365 instance (ex: contoso.onmicrosoft.com)
- ClientID: this is the unique identifier for the application within Azure Active Directory (value from Step 10 above)
- RedirectURI: this is the redirect URL configured for the application within Azure Active Directory (value from Step 8 above)
- Resource: this will be unique for each service we will call into. We will use Office 365's Discovery Service (discussed later) to get the resource URIs for each Office 365 service (ex: SharePoint, Exchange, etc)
Although iOS has some great features to store global configuration data, I took the lazy approach of hard-coding these as global variables.
Global Variables for ADAL
//define global variables for use across view controllers var tenant:NSString = "rzna.onmicrosoft.com" var authority:NSString = "https://login.windows.net/\(tenant)" var clientID:NSString = "2908e4e2-c6a4-4829-b065-b15f7ab3ecef" var redirectURI:NSURL = NSURL(string: "https://orgdna.azurewebsites.net") var resources:Dictionary<String, Resource> = Dictionary<String, Resource>() |
As mentioned before, ADAL makes it really easy to authenticate against Azure Active Directory with these variable. How easy? Is three lines of code easy enough for you? The key is to get all the ADALiOS assets in the XCode project correctly, including the ADALiOS.a library, the header files, and the Storyboards for handling the OAuth flow. I detail the steps in the longer video above. Once ADAL is in place, authenticating involves getting a ADAuthenticationContext with the authority (which will prompt a login) and the using the context to get a resource-specific access token using the resource, client id, and redirect URI. Here is the code for the discovery service (https://api.office.com/discovery/).
Authenticating to Azure AD with ADAL
//Use ADAL to authenticate the user against Azure Active Directory var er:ADAuthenticationError? = nil var authContext:ADAuthenticationContext = ADAuthenticationContext(authority: authority, error: &er) authContext.acquireTokenWithResource("https://api.office.com/discovery/", clientId: clientID, redirectUri: redirectURI, completionBlock: { (result: ADAuthenticationResult!) in //validate token exists in response if (result.accessToken == nil) { println("token nil") } |
The Office 365 Discovery Service
When Microsoft released the Office 365 API Preview, they debuted a Discovery Service to locate API service end-points within Office 365. Many of the service end-points are universal such as Exchange which uses https://outlook.office365.com/ews/odata. However, every Office 365 user has a unique OneDrive path (typically at https://<tenant>-my.sharepoint.com/personal/<username>/_api). Because of this, the Discovery Service will be the first API call my iOS app makes after authenticating. I’ll store the results in a global Dictionary so resource details can be looked up from any controller view.
JSON from Office 365 Discovery Service
| { d = { results = ( { Capability = MyFiles; EntityKey = "MyFiles@O365_SHAREPOINT"; ProviderId = "72f988bf-86f1-41af-91ab-2d7cd011db47"; ProviderName = Microsoft; ServiceAccountType = 2; ServiceEndpointUri = "https://rzna-my.sharepoint.com/personal/alexd_rzna_onmicrosoft_com/_api"; ServiceId = "O365_SHAREPOINT"; ServiceName = "Office 365 SharePoint"; ServiceResourceId = "https://rzna-my.sharepoint.com/"; "__metadata" = { id = "https://api.office.com/discovery/me/services('MyFiles@O365_SHAREPOINT')"; type = "MS.Online.Discovery.ServiceInfo"; uri = "https://api.office.com/discovery/me/services('MyFiles@O365_SHAREPOINT')"; }; }, { Capability = Contacts; EntityKey = "Contacts@O365_EXCHANGE"; ProviderId = "72f988bf-86f1-41af-91ab-2d7cd011db47"; ProviderName = Microsoft; ServiceAccountType = 2; ServiceEndpointUri = "https://outlook.office365.com/ews/odata"; ServiceId = "O365_EXCHANGE"; ServiceName = "Office 365 Exchange"; ServiceResourceId = "https://outlook.office365.com/"; "__metadata" = { id = "https://api.office.com/discovery/me/services('Contacts@O365_EXCHANGE')"; type = "MS.Online.Discovery.ServiceInfo"; uri = "https://api.office.com/discovery/me/services('Contacts@O365_EXCHANGE')"; }; }, { Capability = Calendar; EntityKey = "Calendar@O365_EXCHANGE"; ProviderId = "72f988bf-86f1-41af-91ab-2d7cd011db47"; ProviderName = Microsoft; ServiceAccountType = 2; ServiceEndpointUri = "https://outlook.office365.com/ews/odata"; ServiceId = "O365_EXCHANGE"; ServiceName = "Office 365 Exchange"; ServiceResourceId = "https://outlook.office365.com/"; "__metadata" = { id = "https://api.office.com/discovery/me/services('Calendar@O365_EXCHANGE')"; type = "MS.Online.Discovery.ServiceInfo"; uri = "https://api.office.com/discovery/me/services('Calendar@O365_EXCHANGE')"; }; }, { Capability = Mail; EntityKey = "Mail@O365_EXCHANGE"; ProviderId = "72f988bf-86f1-41af-91ab-2d7cd011db47"; ProviderName = Microsoft; ServiceAccountType = 2; ServiceEndpointUri = "https://outlook.office365.com/ews/odata"; ServiceId = "O365_EXCHANGE"; ServiceName = "Office 365 Exchange"; ServiceResourceId = "https://outlook.office365.com/"; "__metadata" = { id = "https://api.office.com/discovery/me/services('Mail@O365_EXCHANGE')"; type = "MS.Online.Discovery.ServiceInfo"; uri = "https://api.office.com/discovery/me/services('Mail@O365_EXCHANGE')"; }; } ); };} |
Calling the Office 365 Discovery Service
//use the discovery service to see all resource end-points let request = NSMutableURLRequest(URL: NSURL(string: "https://api.office.com/discovery/me/services")) request.HTTPMethod = "GET" request.setValue("application/json; odata=verbose", forHTTPHeaderField: "accept") request.setValue("Bearer \(result.accessToken)", forHTTPHeaderField: "Authorization")
//make the call to the discovery service NSURLConnection.sendAsynchronousRequest(request, queue: NSOperationQueue(), completionHandler:{ (response:NSURLResponse!, data: NSData!, error: NSError!) -> Void in var error:NSError? = nil
let jsonResult: NSDictionary! = NSJSONSerialization.JSONObjectWithData(data, options:NSJSONReadingOptions.MutableContainers, error: &error) as? NSDictionary
if (jsonResult != nil) { println(jsonResult) //parse the json into a Resource dictionary let results:NSArray = (jsonResult["d"] as NSDictionary)["results"] as NSArray for result in results { var r = Resource() r.Capability = result["Capability"] as? NSString r.EntityKey = result["EntityKey"] as? NSString r.ProviderId = result["ProviderId"] as? NSString r.ProviderName = result["ProviderName"] as? NSString r.ServiceAccountType = result["ServiceAccountType"] as? Int r.ServiceEndpointUri = result["ServiceEndpointUri"] as? NSString r.ServiceId = result["ServiceId"] as? NSString r.ServiceName = result["ServiceName"] as? NSString r.ServiceResourceId = result["ServiceResourceId"] as? NSString resources[r.Capability!] = r }
//make sure we found the MyFiles items if (resources["MyFiles"] != nil) { //get an access token for this resource and query for self.loadFiles(resources["MyFiles"]!) } } else { // couldn't load JSON, look at error println("Unable to load Discovery json") } }) |
Calling Office 365 APIs
I built my iOS app as a tabbed application with three controller views. The first tab will display files from OneDrive. The second tab will display mail from Exchange. The third tab will display colleagues from Azure Active Directory. API calls to a specific resource requires a resource-specific access token. Luckily, ADAL makes this easy to accomplish. I simply call acquireTokenWithResource on the ADAuthenticationContext to get a resource-specific access token. Then I can make normal REST call with the access token written to the request header.
Calling OneDrive for Business API
//calls the Office 365 APIs to get a list of files in the users OneDrive for Business func loadFiles(resource: Resource) { //use the resource to get a resource-specfic token var er:ADAuthenticationError? = nil var authContext:ADAuthenticationContext = ADAuthenticationContext(authority: authority, error: &er) authContext.acquireTokenWithResource(resource.ServiceResourceId, clientId: clientID, redirectUri: redirectURI, completionBlock: { (result: ADAuthenticationResult!) in if (result.accessToken == nil) { println("token nil") } else { //build API string to get users OneDrive for Business Files let request = NSMutableURLRequest(URL: NSURL(string: "\(resource.ServiceEndpointUri!)/Files")) request.HTTPMethod = "GET" request.setValue("Bearer \(result.accessToken)", forHTTPHeaderField: "Authorization") request.setValue("application/json; odata=verbose", forHTTPHeaderField: "accept")
//make the call to the OneDrive API NSURLConnection.sendAsynchronousRequest(request, queue: NSOperationQueue(), completionHandler:{ (response:NSURLResponse!, data: NSData!, error: NSError!) -> Void in var error:NSError? = nil let jsonResult: NSDictionary! = NSJSONSerialization.JSONObjectWithData(data, options:NSJSONReadingOptions.MutableContainers, error: &error) as? NSDictionary
if (jsonResult != nil) { //parse the json into File objects in the table view let results:NSArray = (jsonResult["d"] as NSDictionary)["results"] as NSArray for result in results { if ((result["Size"] as Int) > 0) { //add to array var f = File(name: result["Name"] as NSString, modified: result["TimeLastModified"] as NSString) self.files.append(f) } }
//update the UI dispatch_async(dispatch_get_main_queue(), { self.tblFiles.reloadData() self.tblFiles.hidden = false self.spinner.hidden = true self.spinner.stopAnimating() println("Files loaded") })
} else { // couldn't load JSON, look at error println("Unable to load Files json") } }) } }) } |
Calling Mail API
//calls the Office 365 APIs to get a list of mail for the user func loadMail(resource: Resource) { //use the resource to get a resource-specfic token var er:ADAuthenticationError? = nil var authContext:ADAuthenticationContext = ADAuthenticationContext(authority: authority, error: &er) authContext.acquireTokenWithResource(resource.ServiceResourceId, clientId: clientID, redirectUri: redirectURI, completionBlock: { (result: ADAuthenticationResult!) in if (result.accessToken == nil) { println("token nil") } else { //build API string to get users mail from Exchange let request = NSMutableURLRequest(URL: NSURL(string: "\(resource.ServiceEndpointUri!)/Me/Inbox/Messages")) request.HTTPMethod = "GET" request.setValue("Bearer \(result.accessToken)", forHTTPHeaderField: "Authorization") request.setValue("application/json", forHTTPHeaderField: "accept")
//make the call to the OneDrive API NSURLConnection.sendAsynchronousRequest(request, queue: NSOperationQueue(), completionHandler:{ (response:NSURLResponse!, data: NSData!, error: NSError!) -> Void in var error:NSError? = nil let jsonResult: NSDictionary! = NSJSONSerialization.JSONObjectWithData(data, options:NSJSONReadingOptions.MutableContainers, error: &error) as? NSDictionary
if (jsonResult != nil) { //parse the json into File objects in the table view let results:NSArray = jsonResult["value"] as NSArray for result in results { var m = Mail(sender: (result["From"] as Dictionary)["Name"] as NSString!, subject: result["Subject"] as NSString) self.mail.append(m) }
//update the UI dispatch_async(dispatch_get_main_queue(), { //bind the table self.tblMail.reloadData() self.tblMail.hidden = false self.spinner.hidden = true self.spinner.stopAnimating() println("Mail loaded") })
} else { // couldn't load JSON, look at error println("Unable to load Mail json") } }) } }) } |
Calling Azure AD Graph API
//editing change action fires as the user types in the txtSearch textbox @IBAction func editingChanged(sender: AnyObject) { //make sure the textbox has text if (countElements(txtSearch.text) > 0 && aadToken != nil) { //build REST call to Azure AD for user lookup let request = NSMutableURLRequest(URL: NSURL(string: "https://graph.windows.net/\(tenant)/users?$filter=startswith(displayName,'\(txtSearch.text)')&api-version=2013-11-08")) request.HTTPMethod = "GET" request.setValue("Bearer \(aadToken)", forHTTPHeaderField: "Authorization") request.setValue("application/json", forHTTPHeaderField: "accept")
//send the request to the Azure AD Graph NSURLConnection.sendAsynchronousRequest(request, queue: NSOperationQueue(), completionHandler:{ (response:NSURLResponse!, data: NSData!, error: NSError!) -> Void in var error:NSError? = nil let jsonResult: NSDictionary! = NSJSONSerialization.JSONObjectWithData(data, options:NSJSONReadingOptions.MutableContainers, error: &error) as? NSDictionary
if (jsonResult != nil) { //parse json results into Array let results:NSArray = jsonResult["value"] as NSArray
//clear out the users array so we can re-populate self.users.removeAll(keepCapacity: false) for result in results { var u = User(name: result["displayName"] as NSString, email: result["mail"] as NSString) self.users.append(u) }
//update the UI dispatch_async(dispatch_get_main_queue(), { //bind the table self.tblUsers.reloadData() })
} else { // couldn't load JSON, look at error println("Unable to load Mail json") } }) } } |
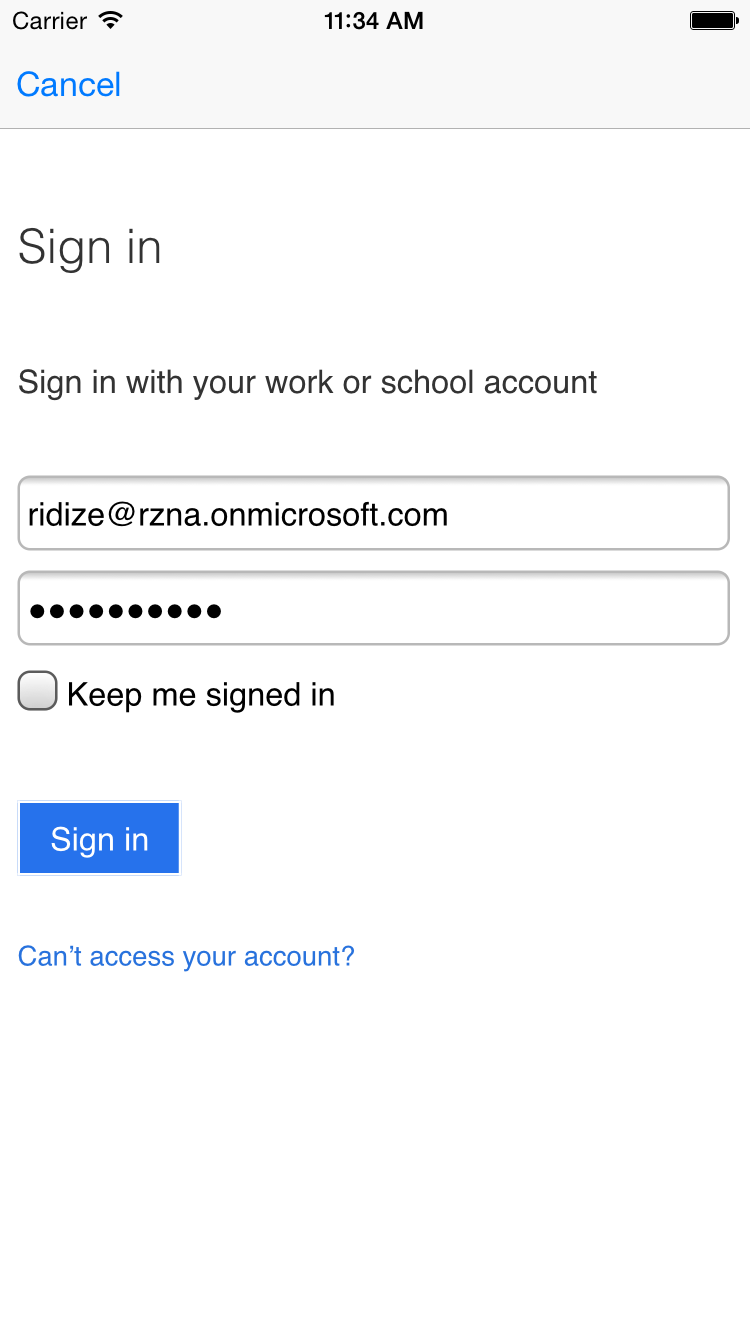
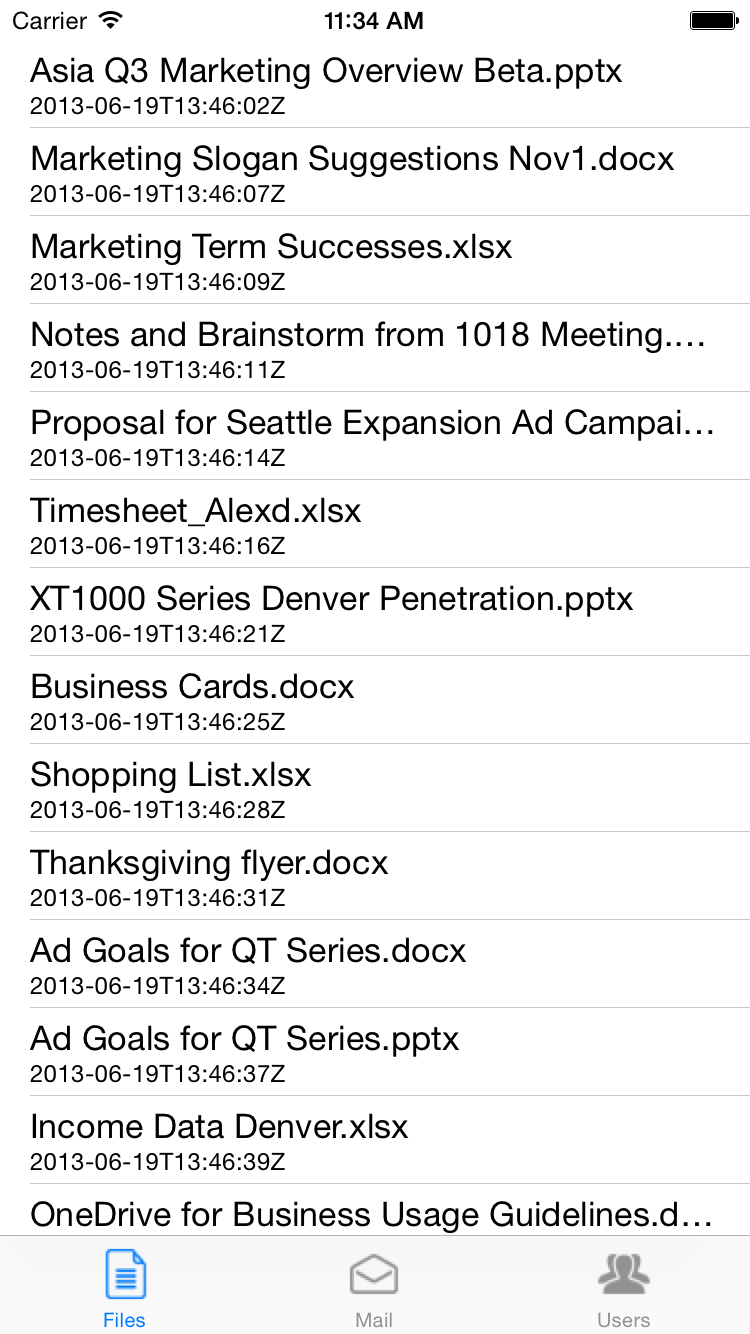
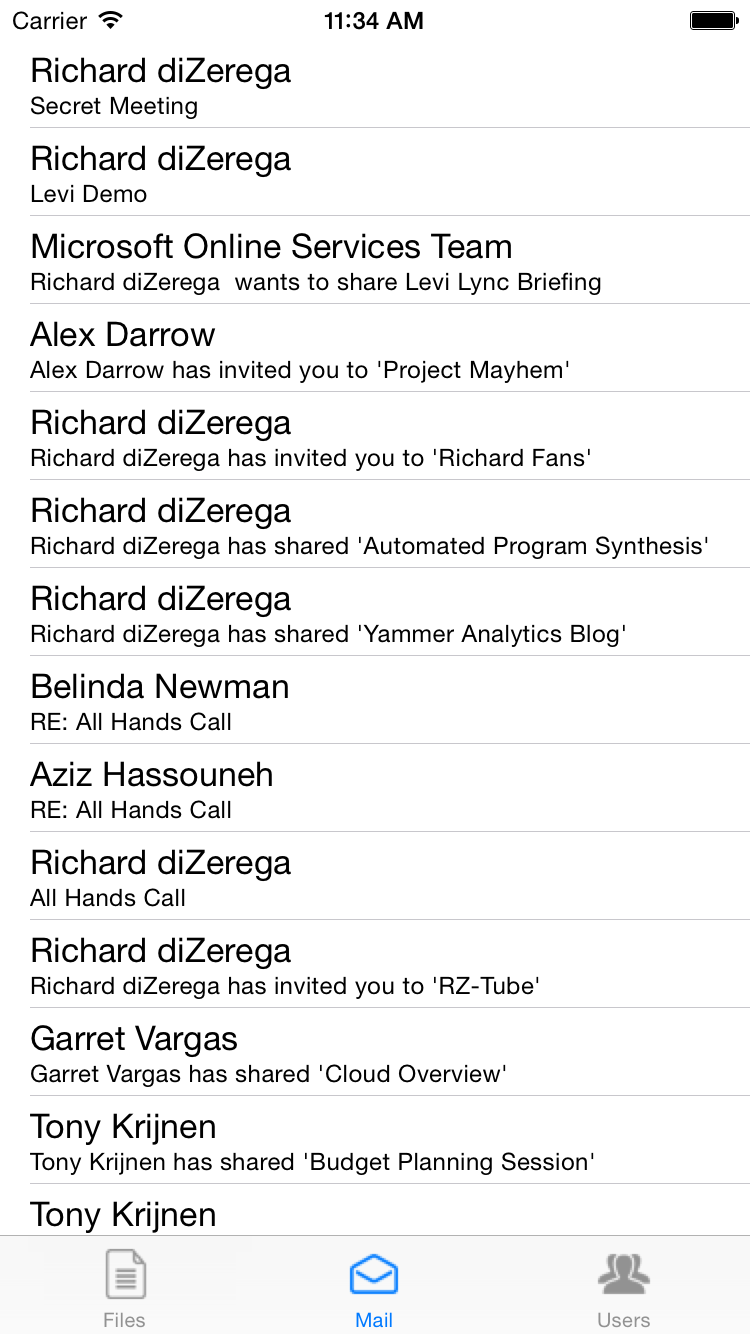
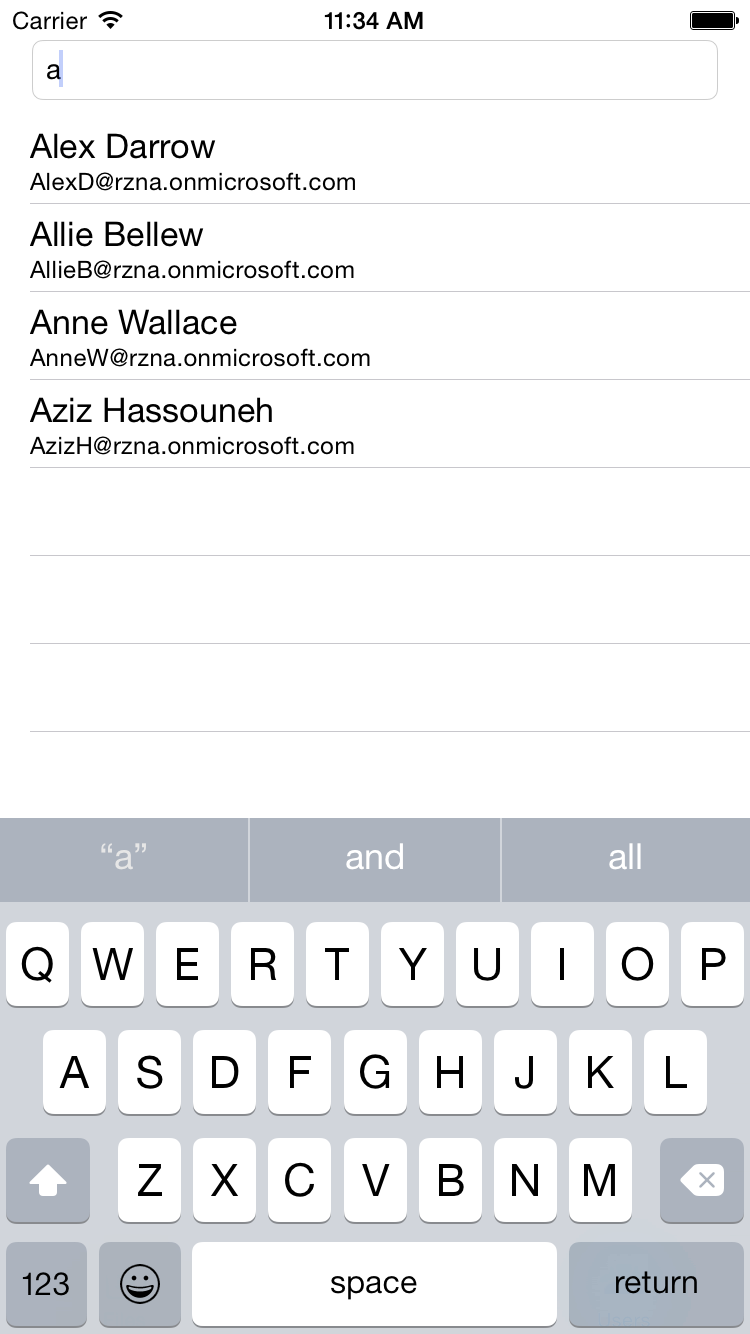
Here are some screenshots of the app running in the iOS Simulator.
| Azure AD Authentication | OneDrive for Business Files |
 |
 |
Mail from Exchange Online |
Azure AD Directory Search |
 |
 |
Conclusion
As expected, I spent far more time figuring out the Mac, XCode, and Swift than in consuming the Office 365 APIs. I can safely say (from experience now) that the Office 365 APIs and Azure are simple to integrate into almost any development platform. As long as the platform supports basic http requests (including header info), you can light it up with powerful Office 365 services!
You can download my XCode project HERE. Please note you need to register your own Application in your own Azure Active Directory and then change the Tenant, ClientID, and RedirectUri global variables accordingly.
Comments
Anonymous
October 07, 2014
Great post! I downloaded the app, but can't find where you configured the client secret. Am I missing something?Anonymous
October 07, 2014
The comment has been removedAnonymous
October 28, 2014
The comment has been removedAnonymous
October 28, 2014
Hey Karl - yes...planning on creating a new post that leverages the new SDK. I haven't had time to investigate too much, but the according to the MS Open Tech blog post, the SDK isn't yet supported with Swift :( msopentech.com/.../android-ios-sdks-tooling Look for a new post in the next week.Anonymous
October 28, 2014
The comment has been removedAnonymous
October 28, 2014
The comment has been removedAnonymous
November 21, 2014
The comment has been removedAnonymous
December 03, 2014
Nice and informative post .I am creating an app based on office 365 in iOS, so your post here has been extremely helpful for me and also helping in developing iOS apps.Anonymous
January 08, 2015
Karl, this is a bit late but I wrote a couple of articles on how to use the O365 iOS SDK using Swift, they may be useful to you: www.kloh.me/.../using-the-office-365-ios-sdk-in-swift www.kloh.me/.../get-files-from-office-365-in-swiftAnonymous
January 09, 2015
Very Useful for me ! Thanks a lot ! I was wondering ... in your second video at 11:50 you talk about manually authenticate. Do you have any example or documentation that will help me to build a manual auth that will allow me once sign in to talk with the Active directory ...I will like to do that because the business will like to have a custom Log In page in the app.Basically, I want an app that will do something very similar to your last tab in your demo. Connect to AAD and then use the Graph to retrieve User Info. Thanks !Anonymous
January 27, 2015
Good day, Thank you very much for fantastic tutorial. I have one question, current tutorial shows how to configure application and use it with only single tenant. But what if i want to make it multi-tenant solution ? Which authority Link should i specify? Thank you in advance.Anonymous
January 27, 2015
The comment has been removedAnonymous
January 27, 2015
The comment has been removedAnonymous
March 20, 2015
Well it is quite great piece of effort. Whole explanation is made in very efficient way. It is very impressive. I consider it much value able. Thanks for sharing with us and letting us know about some excellent things regarding http://www.itinterns.orgAnonymous
July 12, 2015
The comment has been removed
