Note
Access to this page requires authorization. You can try signing in or changing directories.
Access to this page requires authorization. You can try changing directories.
Azure App Service provides a highly scalable, self-patching web hosting service using the Linux operating system. This tutorial shows how to create a secure Node.js app in Azure App Service that's connected to a Azure Cosmos DB for MongoDB database. When you're finished, you'll have an Express.js app running on Azure App Service on Linux.
In this tutorial, you learn how to:
- Create a secure-by-default architecture for Azure App Service and Azure Cosmos DB with MongoDB API.
- Secure connection secrets using a managed identity and Key Vault references.
- Deploy a Node.js sample app to App Service from a GitHub repository.
- Access App Service app settings in the application code.
- Make updates and redeploy the application code.
- Stream diagnostic logs from App Service.
- Manage the app in the Azure portal.
- Provision the same architecture and deploy by using Azure Developer CLI.
- Optimize your development workflow with GitHub Codespaces and GitHub Copilot.
Prerequisites
- An Azure account with an active subscription. If you don't have an Azure account, you can create one for free.
- A GitHub account. you can also get one for free.
- Knowledge of Express.js development.
- (Optional) To try GitHub Copilot, a GitHub Copilot account. A 30-day free trial is available.
- An Azure account with an active subscription. If you don't have an Azure account, you can create one for free.
- Azure Developer CLI installed. You can follow the steps with the Azure Cloud Shell because it already has Azure Developer CLI installed.
- Knowledge of Express.js development.
- (Optional) To try GitHub Copilot, a GitHub Copilot account. A 30-day free trial is available.
Skip to the end
You can quickly deploy the sample app in this tutorial and see it running in Azure. Just run the following commands in the Azure Cloud Shell, and follow the prompt:
mkdir msdocs-nodejs-mongodb-azure-sample-app
cd msdocs-nodejs-mongodb-azure-sample-app
azd init --template msdocs-nodejs-mongodb-azure-sample-app
azd up
1. Run the sample
First, you set up a sample data-driven app as a starting point. For your convenience, the sample repository, includes a dev container configuration. The dev container has everything you need to develop an application, including the database, cache, and all environment variables needed by the sample application. The dev container can run in a GitHub codespace, which means you can run the sample on any computer with a web browser.
Step 1: In a new browser window:
- Sign in to your GitHub account.
- Navigate to https://github.com/Azure-Samples/msdocs-nodejs-mongodb-azure-sample-app/fork.
- Unselect Copy the main branch only. You want all the branches.
- Select Create fork.

Step 2: In the GitHub fork:
- Select main > starter-no-infra for the starter branch. This branch contains just the sample project and no Azure-related files or configuration.
- Select Code > Create codespace on starter-no-infra. The codespace takes a few minutes to set up.

Step 3: In the codespace terminal:
- Run
npm install && npm start. - When you see the notification
Your application running on port 3000 is available., select Open in Browser. You should see the sample application in a new browser tab. To stop the Express.js application, typeCtrl+C.

Tip
You can ask GitHub Copilot about this repository. For example:
- @workspace What does this project do?
- @workspace What does the .devcontainer folder do?
Having issues? Check the Troubleshooting section.
2. Create App Service and Azure Cosmos DB
In this step, you create the Azure resources. The steps used in this tutorial create a set of secure-by-default resources that include App Service and Azure Cosmos DB for MongoDB. For the creation process, you'll specify:
- The Name for the web app. It's used as part of the DNS name for your app.
- The Region to run the app physically in the world. It's also used as part of the DNS name for your app.
- The Runtime stack for the app. It's where you select the version of Node to use for your app.
- The Hosting plan for the app. It's the pricing tier that includes the set of features and scaling capacity for your app.
- The Resource Group for the app. A resource group lets you group (in a logical container) all the Azure resources needed for the application.
Sign in to the Azure portal and follow these steps to create your Azure App Service resources.
Step 1: In the Azure portal:
- Enter "web app database" in the search bar at the top of the Azure portal.
- Select the item labeled Web App + Database under the Marketplace heading. You can also navigate to the creation wizard directly.

Step 2: In the Create Web App + Database page, fill out the form as follows.
- Resource Group: Select Create new and use a name of msdocs-expressjs-mongodb-tutorial.
- Region: Any Azure region near you.
- Name: msdocs-expressjs-mongodb-XYZ, where XYZ is any three random characters.
- Runtime stack: Node 24 LTS.
- Engine: Cosmos DB API for MongoDB. Azure Cosmos DB is a cloud native database offering a 100% MongoDB compatible API. Note the database name that's generated for you (<app-name>-database). You'll need it later.
- Hosting plan: Basic. When you're ready, you can scale up to a production pricing tier.
- Select Review + create.
- After validation completes, select Create.

Step 3: The deployment takes a few minutes to complete. Once deployment completes, select the Go to resource button. You're taken directly to the App Service app, but the following resources are created:
- Resource group → The container for all the created resources.
- App Service plan → Defines the compute resources for App Service. A Linux plan in the Basic tier is created.
- App Service → Represents your app and runs in the App Service plan.
- Virtual network → Integrated with the App Service app and isolates back-end network traffic.
- Private endpoint → Access endpoint for the database resource in the virtual network.
- Network interface → Represents a private IP address for the private endpoint.
- Azure Cosmos DB for MongoDB → Accessible only from behind the private endpoint. A database and a user are created for you on the server.
- Private DNS zone → Enables DNS resolution of the Azure Cosmos DB server in the virtual network.

Having issues? Check the Troubleshooting section.
3. Secure connection secrets
The creation wizard generated the connectivity string for you already as an app setting. However, the security best practice is to keep secrets out of App Service completely. You'll move your secrets to a key vault and change your app setting to a Key Vault reference with the help of Service Connectors.
Step 1: In the App Service page:
- In the left menu, select Settings > Environment variables.
- Next to AZURE_COSMOS_CONNECTIONSTRING, select Show value. This connection string lets you connect to the Cosmos DB database secured behind a private endpoint. However, the secret is saved directly in the App Service app, which isn't the best. You'll change this.

Step 2: Create a key vault for secure management of secrets.
- In the top search bar, type "key vault", then select Marketplace > Key Vault.
- In Resource Group, select msdocs-expressjs-mongodb-tutorial.
- In Key vault name, type a name that consists of only letters and numbers.
- In Region, set it to the sample location as the resource group.

Step 3:
- Select the Networking tab.
- Unselect Enable public access.
- Select Create a private endpoint.
- In Resource Group, select msdocs-expressjs-mongodb-tutorial.
- In Key vault name, type a name that consists of only letters and numbers.
- In Region, set it to the sample location as the resource group.
- In the dialog, in Location, select the same location as your App Service app.
- In Resource Group, select msdocs-expressjs-mongodb-tutorial.
- In Name, type msdocs-expressjs-mongodb-XYZVaultEndpoint.
- In Virtual network, select msdocs-expressjs-mongodb-XYZVnet.
- In Subnet, msdocs-expressjs-mongodb-XYZSubnet.
- Select OK.
- Select Review + create, then select Create. Wait for the key vault deployment to finish. You should see "Your deployment is complete."

Step 4:
- In the top search bar, type msdocs-expressjs-mongodb, then the App Service resource called msdocs-expressjs-mongodb-XYZ.
- In the App Service page, in the left menu, select Settings > Service Connector. There's already a connector, which the app creation wizard created for you.
- Select checkbox next to the connector, then select Edit.
- In the Basics tab, set Client type to Node.js.
- Select the Authentication tab.
- Select Store Secret in Key Vault.
- Under Key Vault Connection, select Create new. A Create connection dialog is opened on top of the edit dialog.

Step 5: In the Create connection dialog for the Key Vault connection:
- In Key Vault, select the key vault you created earlier.
- Select Review + Create. You should see that System assigned managed identity is set to Selected.
- When validation completes, select Create.

Step 6: You're back in the edit dialog for defaultConnector.
- In the Authentication tab, wait for the key vault connector to be created. When it's finished, the Key Vault Connection dropdown automatically selects it.
- Select Next: Networking.
- Select Configure firewall rules to enable access to target service. If you see the message, "No Private Endpoint on the target service," ignore it. The app creation wizard already secured the Cosmos DB database with a private endpoint.
- Select Save. Wait until the Update succeeded notification appears.

Step 7: To verify your changes:
- From the left menu, select Environment variables again.
- Next to the app setting AZURE_COSMOS_CONNECTIONSTRING, select Show value. The value should be
@Microsoft.KeyVault(...), which means that it's a key vault reference because the secret is now managed in the key vault.

Having issues? Check the Troubleshooting section.
4. Deploy sample code
In this step, you configure GitHub deployment using GitHub Actions. It's just one of many ways to deploy to App Service, but also a great way to have continuous integration in your deployment process. By default, every git push to your GitHub repository kicks off the build and deploy action.
Step 1: In the left menu, select Deployment > Deployment Center.

Step 2: In the Deployment Center page:
- In Source, select GitHub. By default, GitHub Actions is selected as the build provider.
- Sign in to your GitHub account and follow the prompt to authorize Azure.
- In Organization, select your account.
- In Repository, select msdocs-nodejs-mongodb-azure-sample-app.
- In Branch, select starter-no-infra. This is the same branch that you worked in with your sample app, without any Azure-related files or configuration.
- For Authentication type, select User-assigned identity.
- In the top menu, select Save. App Service commits a workflow file into the chosen GitHub repository, in the
.github/workflowsdirectory. By default, the deployment center creates a user-assigned identity for the workflow to authenticate using Microsoft Entra (OIDC authentication). For alternative authentication options, see Deploy to App Service using GitHub Actions.

Step 3: Back in the GitHub codespace of your sample fork, run git pull origin starter-no-infra.
This pulls the newly committed workflow file into your codespace.

Step 4 (Option 1: with GitHub Copilot):
- Start a new chat session by selecting the Chat view, then selecting +.
- Ask, "@workspace How does the app connect to the database?" Copilot might point you to the app.js file and the
mongoose.connectcall. - Say, "*I have a connection string variable in Azure called AZURE_COSMOS_CONNECTIONSTRING.". Copilot might give you a code suggestion similar to the one in the Option 2: without GitHub Copilot steps below and even tell you to make the change in app.js.
- Open app.js in the explorer and add the code suggestion in the
getAppmethod. GitHub Copilot doesn't give you the same response every time, you might need to ask more questions to fine-tune its response. For tips, see What can I do with GitHub Copilot in my codespace?.

Step 4 (Option 2: without GitHub Copilot):
- From the explorer, open app.js.
- Find the line where
mongoose.connectis called (Line 16) and changeprocess.env.MONGODB_URItoprocess.env.AZURE_COSMOS_CONNECTIONSTRING || process.env.MONGODB_URI.

Step 5:
- Select the Source Control extension.
- In the textbox, type a commit message like
Update environment variable. Or, select and let GitHub Copilot generate a commit message for you.
 - Select Commit, then confirm with Yes.
- Select Sync changes 1, then confirm with OK.

Step 6: Back in the Deployment Center page in the Azure portal:
- Under the Logs tab, select Refresh. A new deployment run is already started from your committed changes.
- In the log item for the deployment run, select the Build/Deploy Logs entry with the latest timestamp.

Step 7: You're taken to your GitHub repository and see that the GitHub action is running. The workflow file defines two separate stages, build and deploy. Wait for the GitHub run to show a status of Complete.

Having issues? Check the Troubleshooting section.
5. Browse to the app
Step 1: In the App Service page:
- From the left menu, select Overview.
- Select the URL of your app.

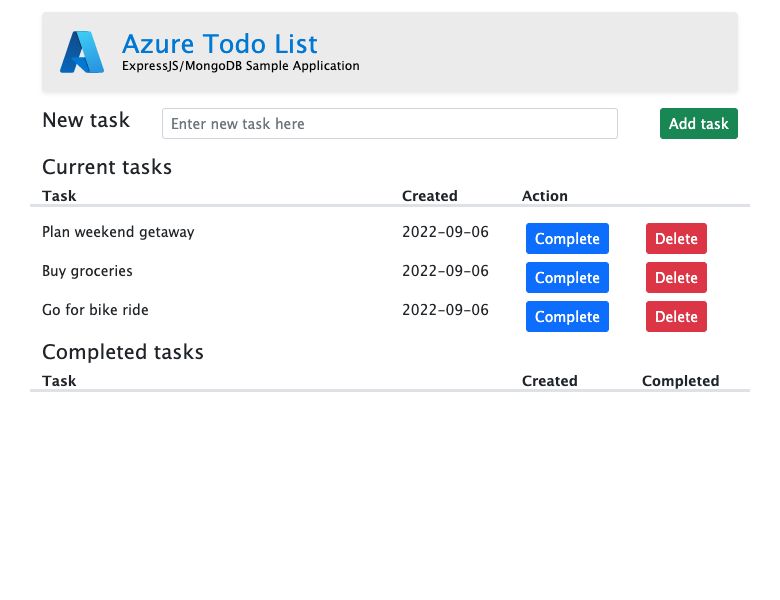
Step 2: Add a few tasks to the list. Congratulations, you're running a secure data-driven Node.js app in Azure App Service.

6. Stream diagnostic logs
Azure App Service captures all messages logged to the console to assist you in diagnosing issues with your application. The sample app outputs console log messages in each of its endpoints to demonstrate this capability. For example, the get endpoint outputs a message about the number of tasks retrieved from the database and an error message appears if something goes wrong.
router.get('/', function(req, res, next) {
  Task.find()
    .then((tasks) => {
      const currentTasks = tasks.filter(task => !task.completed);
      const completedTasks = tasks.filter(task => task.completed === true);

      console.log(`Total tasks: ${tasks.length}   Current tasks: ${currentTasks.length}    Completed tasks:  ${completedTasks.length}`)
      res.render('index', { currentTasks: currentTasks, completedTasks: completedTasks });
    })
    .catch((err) => {
      console.log(err);
      res.send('Sorry! Something went wrong.');
    });
});
Step 1: In the App Service page:
- From the left menu, select App Service logs.
- Under Application logging, select File System.
- In the top menu, select Save.

Step 2: From the left menu, select Log stream. You see the logs for your app, including platform logs and logs from inside the container.

7. Inspect deployed files using Kudu
Azure App Service provides a web-based diagnostics console named Kudu that lets you examine the server hosting environment for your web app. Using Kudu, you can view the files deployed to Azure, review the deployment history of the application, and even open an SSH session into the hosting environment.
Step 1: In the App Service page:
- From the left menu, select Advanced Tools.
- Select Go.

Step 2: In the Kudu page, select Deployments.

If you deploy code to App Service using Git or zip deploy, you see a history of deployments of your web app.

Step 3: Go back to the Kudu homepage and select Site wwwroot.

You can see the deployed folder structure and select to browse and view the files.

8. Clean up resources
When you're finished, you can delete all of the resources from your Azure subscription by deleting the resource group.
Step 1: In the search bar at the top of the Azure portal:
- Enter the resource group name.
- Select the resource group.

Step 2: In the resource group page, select Delete resource group.

Step 3:
- Enter the resource group name to confirm your deletion.
- Select Delete.

2. Create Azure resources and deploy a sample app
In this step, you create the Azure resources and deploy a sample app to App Service on Linux. The steps used in this tutorial create a set of secure-by-default resources that include App Service and Azure Cosmos DB.
The dev container already has the Azure Developer CLI (AZD).
From the repository root, run
azd init.azd init --template nodejs-app-service-cosmos-redis-infraWhen prompted, give the following answers:
Question Answer The current directory is not empty. Would you like to initialize a project here in '<your-directory>'? Y What would you like to do with these files? Keep my existing files unchanged Enter a new environment name Type a unique name. The AZD template uses this name as part of the DNS name of your web app in Azure ( <app-name>-<hash>.azurewebsites.net). Alphanumeric characters and hyphens are allowed.Sign into Azure by running the
azd auth logincommand and following the prompt:azd auth loginCreate the necessary Azure resources and deploy the app code with the
azd upcommand. Follow the prompt to select the desired subscription and location for the Azure resources.azd upThe
azd upcommand takes about 15 minutes to complete (the Redis cache takes the most time). It also compiles and deploys your application code, but you'll modify your code later to work with App Service. While it's running, the command provides messages about the provisioning and deployment process, including a link to the deployment in Azure. When it finishes, the command also displays a link to the deploy application.This AZD template contains files (azure.yaml and the infra directory) that generate a secure-by-default architecture with the following Azure resources:
- Resource group: The container for all the created resources.
- App Service plan: Defines the compute resources for App Service. A Linux plan in the B1 tier is created.
- App Service: Represents your app and runs in the App Service plan.
- Virtual network: Integrated with the App Service app and isolates back-end network traffic.
- Azure Cosmos DB account with MongoDB API: Accessible only from behind its private endpoint. A database is created for you on the server.
- Azure Cache for Redis: Accessible only from within the virtual network.
- Key vault: Accessible only from behind its private endpoint. Used to manage secrets for the App Service app.
- Private endpoints: Access endpoints for the key vault, the database server, and the Redis cache in the virtual network.
- Private DNS zones: Enable DNS resolution of the Cosmos DB database, the Redis cache, and the key vault in the virtual network.
- Log Analytics workspace: Acts as the target container for your app to ship its logs, where you can also query the logs.
Once the command finishes creating resources and deploying the application code the first time, the deployed sample app doesn't work yet because you must make small changes to make it connect to the database in Azure.
3. Verify connection strings
The AZD template you use generated the connectivity variables for you already as app settings and outputs the them to the terminal for your convenience. App settings are one way to keep connection secrets out of your code repository.
In the AZD output, find the app setting
AZURE_COSMOS_CONNECTIONSTRING. Only the setting names are displayed. They look like this in the AZD output:App Service app has the following app settings: - AZURE_COSMOS_CONNECTIONSTRING - AZURE_REDIS_CONNECTIONSTRING - AZURE_KEYVAULT_RESOURCEENDPOINT - AZURE_KEYVAULT_SCOPEAZURE_COSMOS_CONNECTIONSTRINGcontains the connection string to the Cosmos DB database in Azure. You need to use it in your code later.For your convenience, the AZD template shows you the direct link to the app's app settings page. Find the link and open it in a new browser tab.
Having issues? Check the Troubleshooting section.
4. Modify sample code and redeploy
In the GitHub codespace, start a new chat session by clicking the Chat view, then clicking +.
Ask, "@workspace How does the app connect to the database?" Copilot might point you to the app.js file and the
mongoose.connectcall.Say, "I have a connection string variable in Azure called AZURE_COSMOS_CONNECTIONSTRING.". Copilot might give you a code suggestion similar to the one in the Option 2: without GitHub Copilot steps below and even tell you to make the change in app.js.
Open app.js in the explorer and add the code suggestion in the
getAppmethod.GitHub Copilot doesn't give you the same response every time, you might need to ask more questions to fine-tune its response. For tips, see What can I do with GitHub Copilot in my codespace?.
Back in the codespace terminal, run
azd deploy.azd deploy
Tip
You can also just use azd up always, which does all of azd package, azd provision, and azd deploy.
Having issues? Check the Troubleshooting section.
5. Browse to the app
In the AZD output, find the URL of your app and navigate to it in the browser. The URL looks like this in the AZD output:
 Deploying services (azd deploy)

   (✓) Done: Deploying service web
   - Endpoint: <URL>
Add a few tasks to the list.
Congratulations, you're running a web app in Azure App Service, with secure connectivity to Azure Cosmos DB.
Having issues? Check the Troubleshooting section.
6. Stream diagnostic logs
Azure App Service captures all messages logged to the console to assist you in diagnosing issues with your application. The sample app outputs console log messages in each of its endpoints to demonstrate this capability. For example, the get endpoint outputs a message about the number of tasks retrieved from the database and an error message appears if something goes wrong.
router.get('/', function(req, res, next) {
  Task.find()
    .then((tasks) => {
      const currentTasks = tasks.filter(task => !task.completed);
      const completedTasks = tasks.filter(task => task.completed === true);

      console.log(`Total tasks: ${tasks.length}   Current tasks: ${currentTasks.length}    Completed tasks:  ${completedTasks.length}`)
      res.render('index', { currentTasks: currentTasks, completedTasks: completedTasks });
    })
    .catch((err) => {
      console.log(err);
      res.send('Sorry! Something went wrong.');
    });
});
In the AZD output, find the link to stream App Service logs and navigate to it in the browser. The link looks like this in the AZD output:
Stream App Service logs at: <URL>
Learn more about logging in Java apps in the series on Enable Azure Monitor OpenTelemetry for .NET, Node.js, Python and Java applications.
Having issues? Check the Troubleshooting section.
7. Clean up resources
To delete all Azure resources in the current deployment environment, run azd down and follow the prompts.
azd down
Troubleshooting
- The portal deployment view for Azure Cosmos DB shows a Conflict status
- The browser page of the deployed app says "Something went wrong."
The portal deployment view for Azure Cosmos DB shows a Conflict status
Depending on your subscription and the region you select, you might see the deployment status for Azure Cosmos DB to be Conflict, with the following message in Operation details:
Sorry, we are currently experiencing high demand in <region> region, and cannot fulfill your request at this time.
The error is most likely caused by a limit on your subscription for the region you select. Try choosing a different region for your deployment.
The browser page of the deployed app says "Something went wrong."
You probably still need to make the connection string changes in your application code. See 4. Deploy sample code.
Frequently asked questions
- How much does this setup cost?
- How do I connect to the Azure Cosmos DB server that's secured behind the virtual network with other tools?
- How does local app development work with GitHub Actions?
- Why is the GitHub Actions deployment so slow?
- I don't have permissions to create a user-assigned identity
- What can I do with GitHub Copilot in my codespace?
How much does this setup cost?
Pricing for the created resources is as follows:
- The App Service plan is created in Basic tier and can be scaled up or down. See App Service pricing.
- The Azure Cosmos DB server is created in a single region and can be distributed to other regions. See Azure Cosmos DB pricing.
- The virtual network doesn't incur a charge unless you configure extra functionality, such as peering. See Azure Virtual Network pricing.
- The private DNS zone incurs a small charge. See Azure DNS pricing.
How do I connect to the Azure Cosmos DB server that's secured behind the virtual network with other tools?
- For basic access from a command-line tool, you can run
mongoshfrom the app's SSH terminal. The app's container doesn't come withmongosh, so you must install it manually. Remember that the installed client doesn't persist across app restarts. - To connect from a MongoDB GUI client, your machine must be within the virtual network. For example, it could be an Azure VM that's connected to one of the subnets, or a machine in an on-premises network that has a site-to-site VPN connection with the Azure virtual network.
- To connect from the MongoDB shell from the Azure Cosmos DB management page in the portal, your machine must also be within the virtual network. You could instead open the Azure Cosmos DB server's firewall for your local machine's IP address, but it increases the attack surface for your configuration.
How does local app development work with GitHub Actions?
Take the autogenerated workflow file from App Service as an example, each git push kicks off a new build and deployment run. From a local clone of the GitHub repository, you make the desired updates push it to GitHub. For example:
git add .
git commit -m "<some-message>"
git push origin main
Why is the GitHub Actions deployment so slow?
The autogenerated workflow file from App Service defines build-then-deploy, two-job run. Because each job runs in its own clean environment, the workflow file ensures that the deploy job has access to the files from the build job:
- At the end of the
buildjob, upload files as artifacts. - At the beginning of the
deployjob, download the artifacts.
Most of the time taken by the two-job process is spent uploading and download artifacts. If you want, you can simplify the workflow file by combining the two jobs into one, which eliminates the need for the upload and download steps.
I don't have permissions to create a user-assigned identity
See Set up GitHub Actions deployment from the Deployment Center.
What can I do with GitHub Copilot in my codespace?
You might notice that the GitHub Copilot chat view was already there for you when you created the codespace. For your convenience, we include the GitHub Copilot chat extension in the container definition (see .devcontainer/devcontainer.json). However, you need a GitHub Copilot account (30-day free trial available).
A few tips for you when you talk to GitHub Copilot:
- In a single chat session, the questions and answers build on each other and you can adjust your questions to fine-tune the answer you get.
- By default, GitHub Copilot doesn't have access to any file in your repository. To ask questions about a file, open the file in the editor first.
- To let GitHub Copilot have access to all of the files in the repository when preparing its answers, begin your question with
@workspace. For more information, see Use the @workspace agent. - In the chat session, GitHub Copilot can suggest changes and (with
@workspace) even where to make the changes, but it's not allowed to make the changes for you. It's up to you to add the suggested changes and test it.
Here are some other things you can say to fine-tune the answer you get:
- @workspace Where is MONGODB_URI defined?
- Which file do I make the change in?
- Will this change break my app when running locally?