Enable support uploads
Avere vFXT for Azure can automatically upload support data about your cluster. These uploads let support staff provide the best possible customer service.
Steps to enable uploads
Follow these steps from the Avere Control Panel to activate support. (Read Access the vFXT cluster to learn how to open the control panel.)
Navigate to the Settings tab at the top.
Click the Support link on the left and accept the privacy policy.
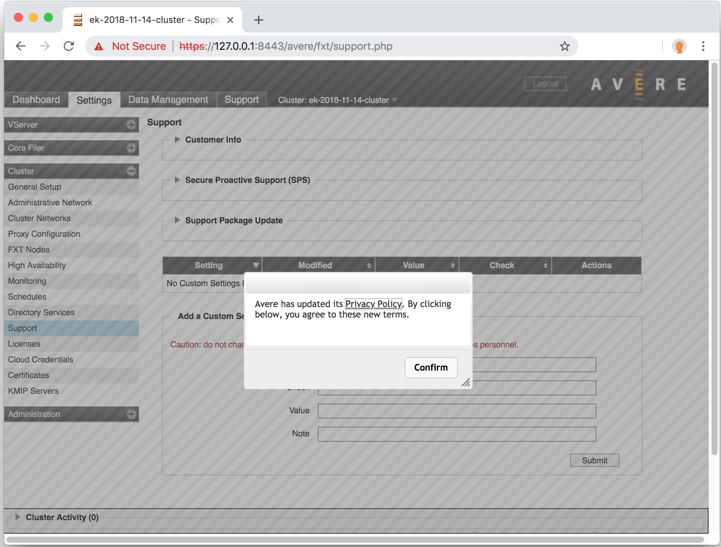
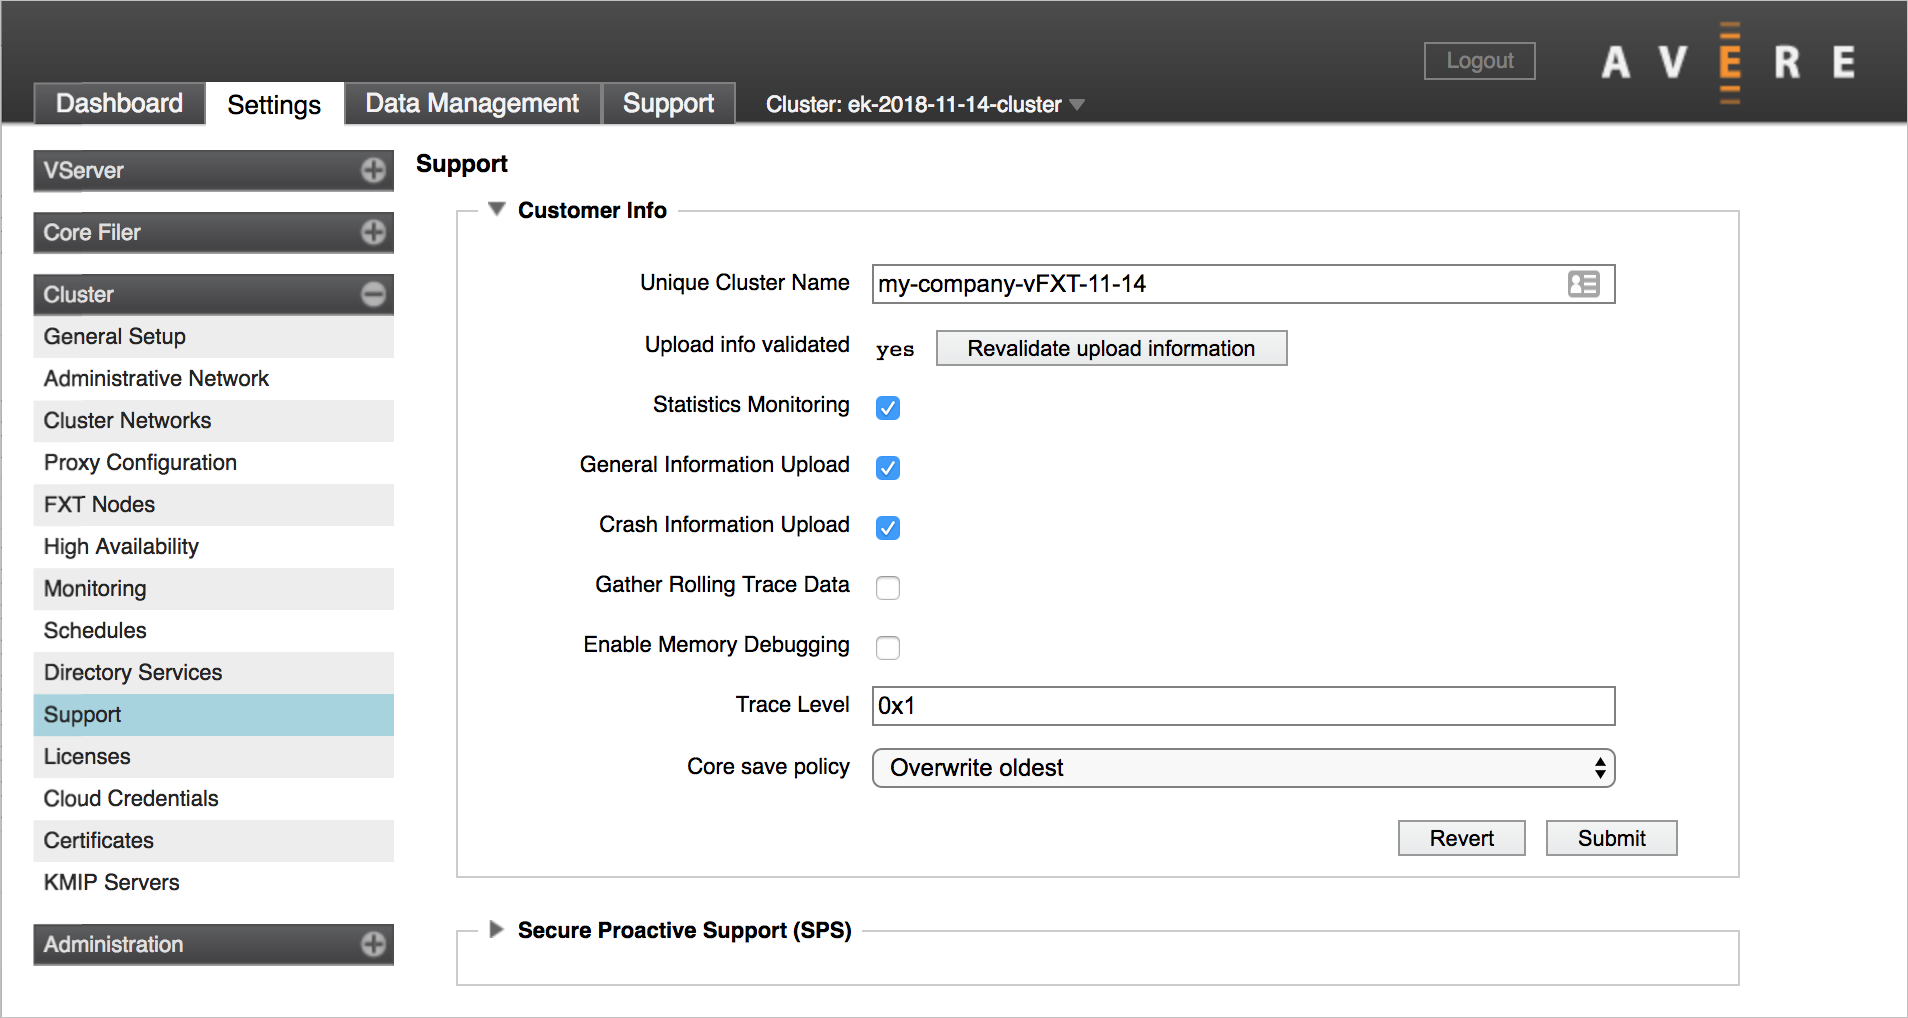
On the support configuration page, open the Customer Info section by clicking the triangle at the left.
Click the Revalidate upload information button.
Set the cluster's support name in Unique Cluster Name. Make sure this name uniquely identifies your cluster to support staff.
Check the boxes for Statistics Monitoring, General Information Upload, and Crash Information Upload.
Click Submit.
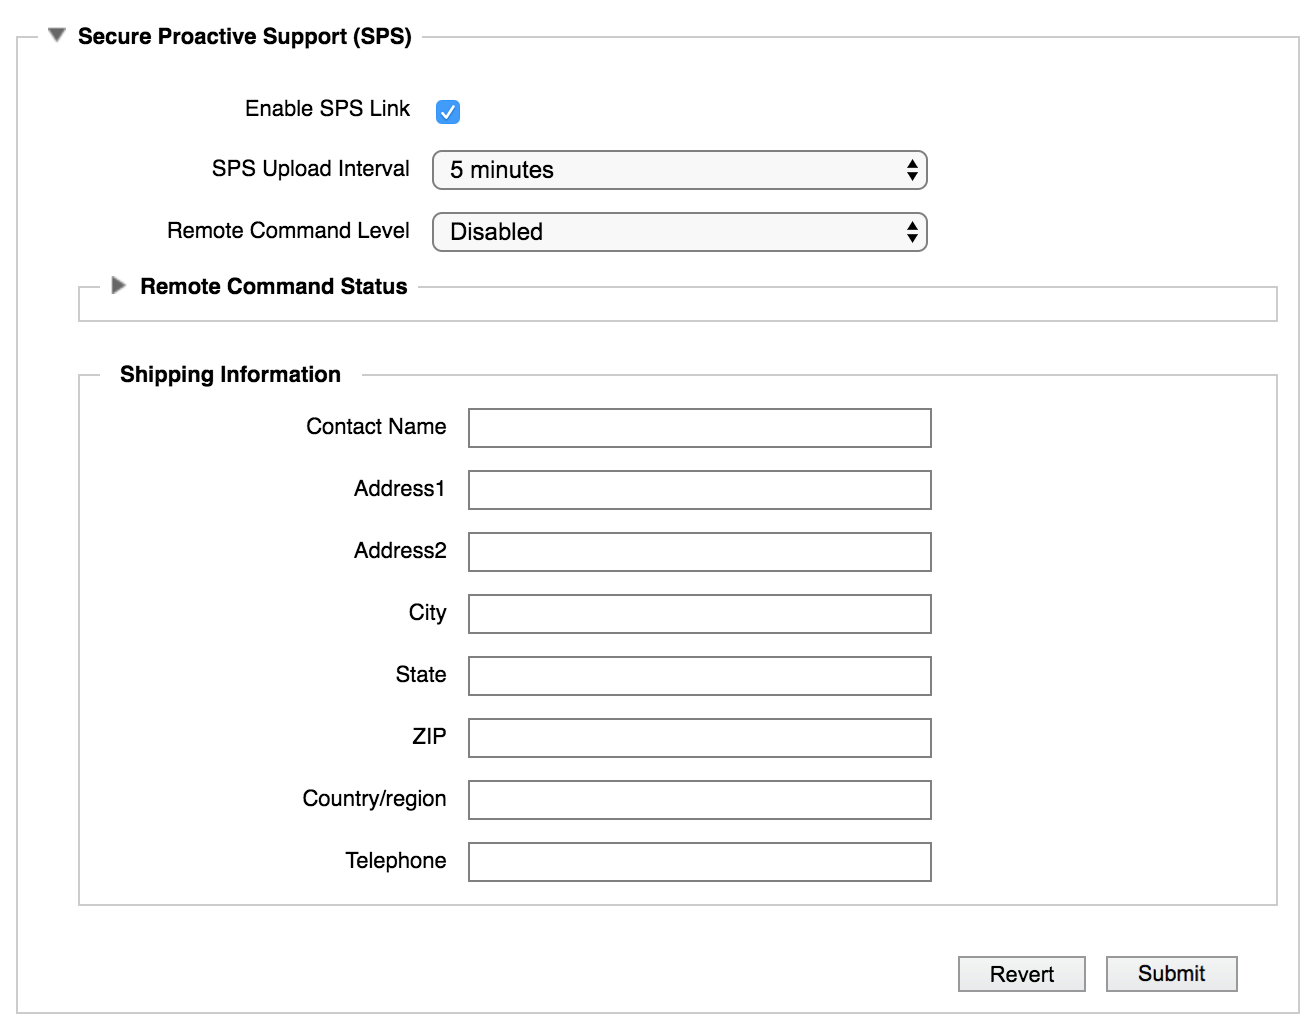
Click the triangle to the left of Secure Proactive Support (SPS) to expand the section.
Check the box for Enable SPS Link.
Click Submit.
Next steps
If you need to add an on-premises or existing cloud storage system to the cluster, follow the instructions in Configure storage.
If you are ready to start attaching clients to the cluster, read Mount the Avere vFXT cluster.
Feedback
Coming soon: Throughout 2024 we will be phasing out GitHub Issues as the feedback mechanism for content and replacing it with a new feedback system. For more information see: https://aka.ms/ContentUserFeedback.
Submit and view feedback for