Create a NetApp account
Creating a NetApp account enables you to set up a capacity pool so that you can create a volume. You use the Azure NetApp Files pane to create a new NetApp account.
Before you begin
You must register your subscription for using the NetApp Resource Provider. For more information, see Register the NetApp Resource Provider.
Steps
Sign in to the Azure portal.
Access the Azure NetApp Files pane by using one of the following methods:
- Search for Azure NetApp Files in the Azure portal search box.
- Select All services in the navigation, and then filter to Azure NetApp Files.
To make the Azure NetApp Files pane a favorite, select the star icon next to it.
Select + Add to create a new NetApp account. The New NetApp account window appears.
Provide the following information for your NetApp account:
Account name: Specify a unique name for the subscription.
Subscription: Select a subscription from your existing subscriptions.
Resource group: Use an existing resource group or create a new one.
Location: Select the region where you want the account and its child resources to be located.
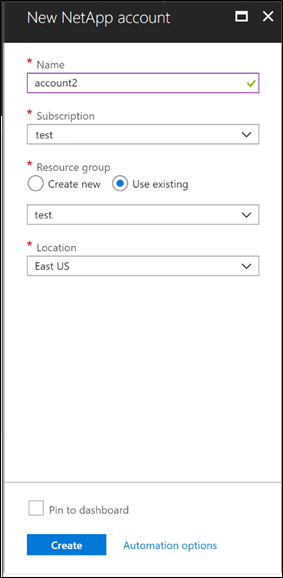
Select Create. The NetApp account you created now appears in the Azure NetApp Files pane.
Note
If you didn't register your subscription for using the NetApp Resource Provider, you receive the following error when you try to create the first NetApp account:
{"code":"DeploymentFailed","message":"At least one resource deployment operation failed. Please list deployment operations for details. Please see https://aka.ms/arm-debug for usage details.","details":[{"code":"NotFound","message":"{\r\n \"error\": {\r\n \"code\": \"InvalidResourceType\",\r\n \"message\": \"The resource type could not be found in the namespace 'Microsoft.NetApp' for api version '20xx-xx-xx'.\"\r\n }\r\n}"}]}