Restore Azure File shares
This article describes how to use the Azure portal to restore an entire file share or specific files from a restore point created by Azure Backup.
Azure Backup provides simple, reliable, and secure solution to configure protection for your enterprise file shares by using snapshot backup and vaulted backup (preview) so that you can recover your data in case of any accidental or malicious deletion.
Note
Vaulted backup for Azure File share is currently in preview.
Restore the Azure File shares
This section describes how to restore:
- A full Azure file share
- Individual files or folders
Note
Vaulted backup (preview) currently supports only full share recovery to an alternate location. The target file share selected for restore needs to be empty.
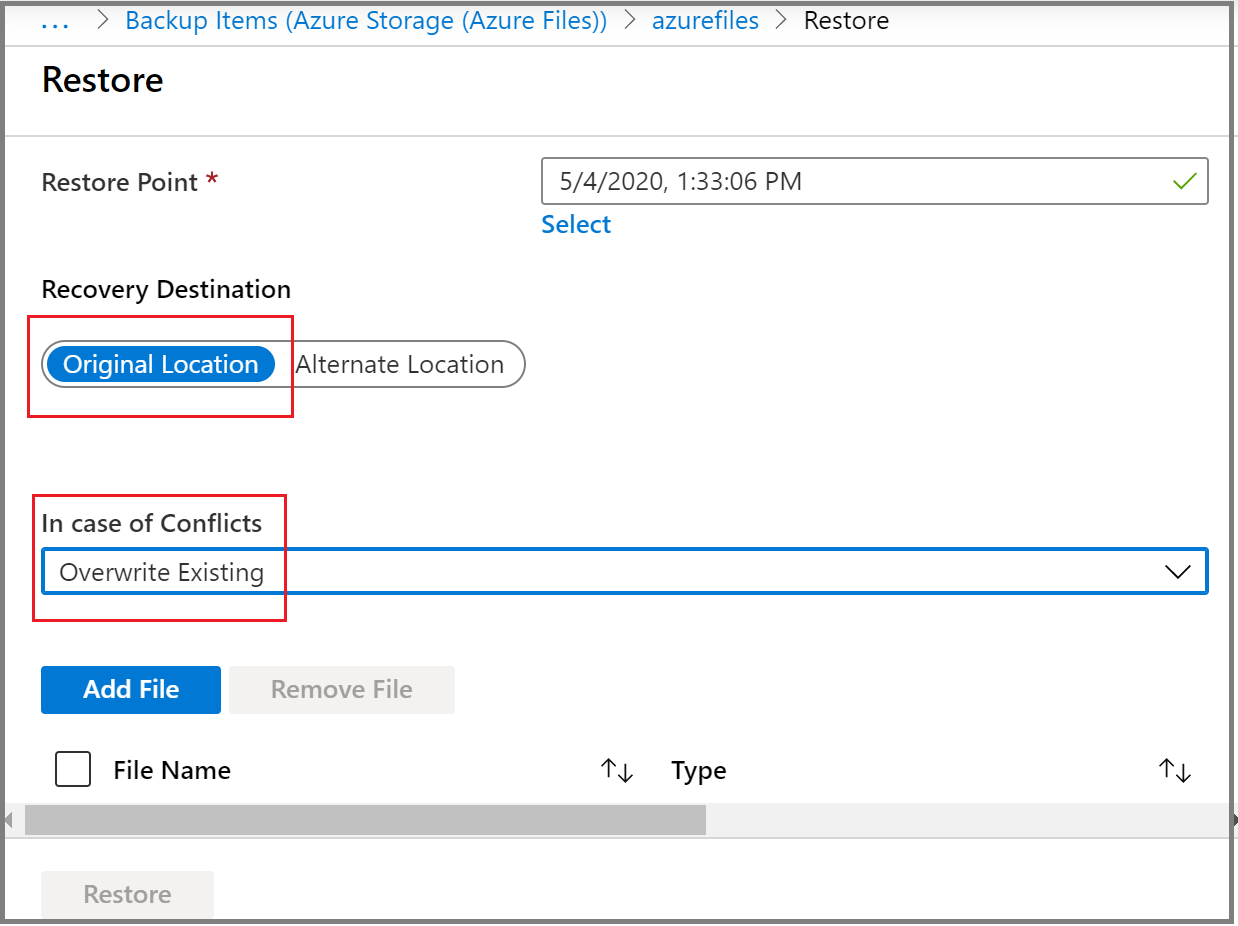
Choose a restore option:
You can use this restore option to restore the complete file share in the original location or an alternate location.
To restore the complete file share, follow these steps:
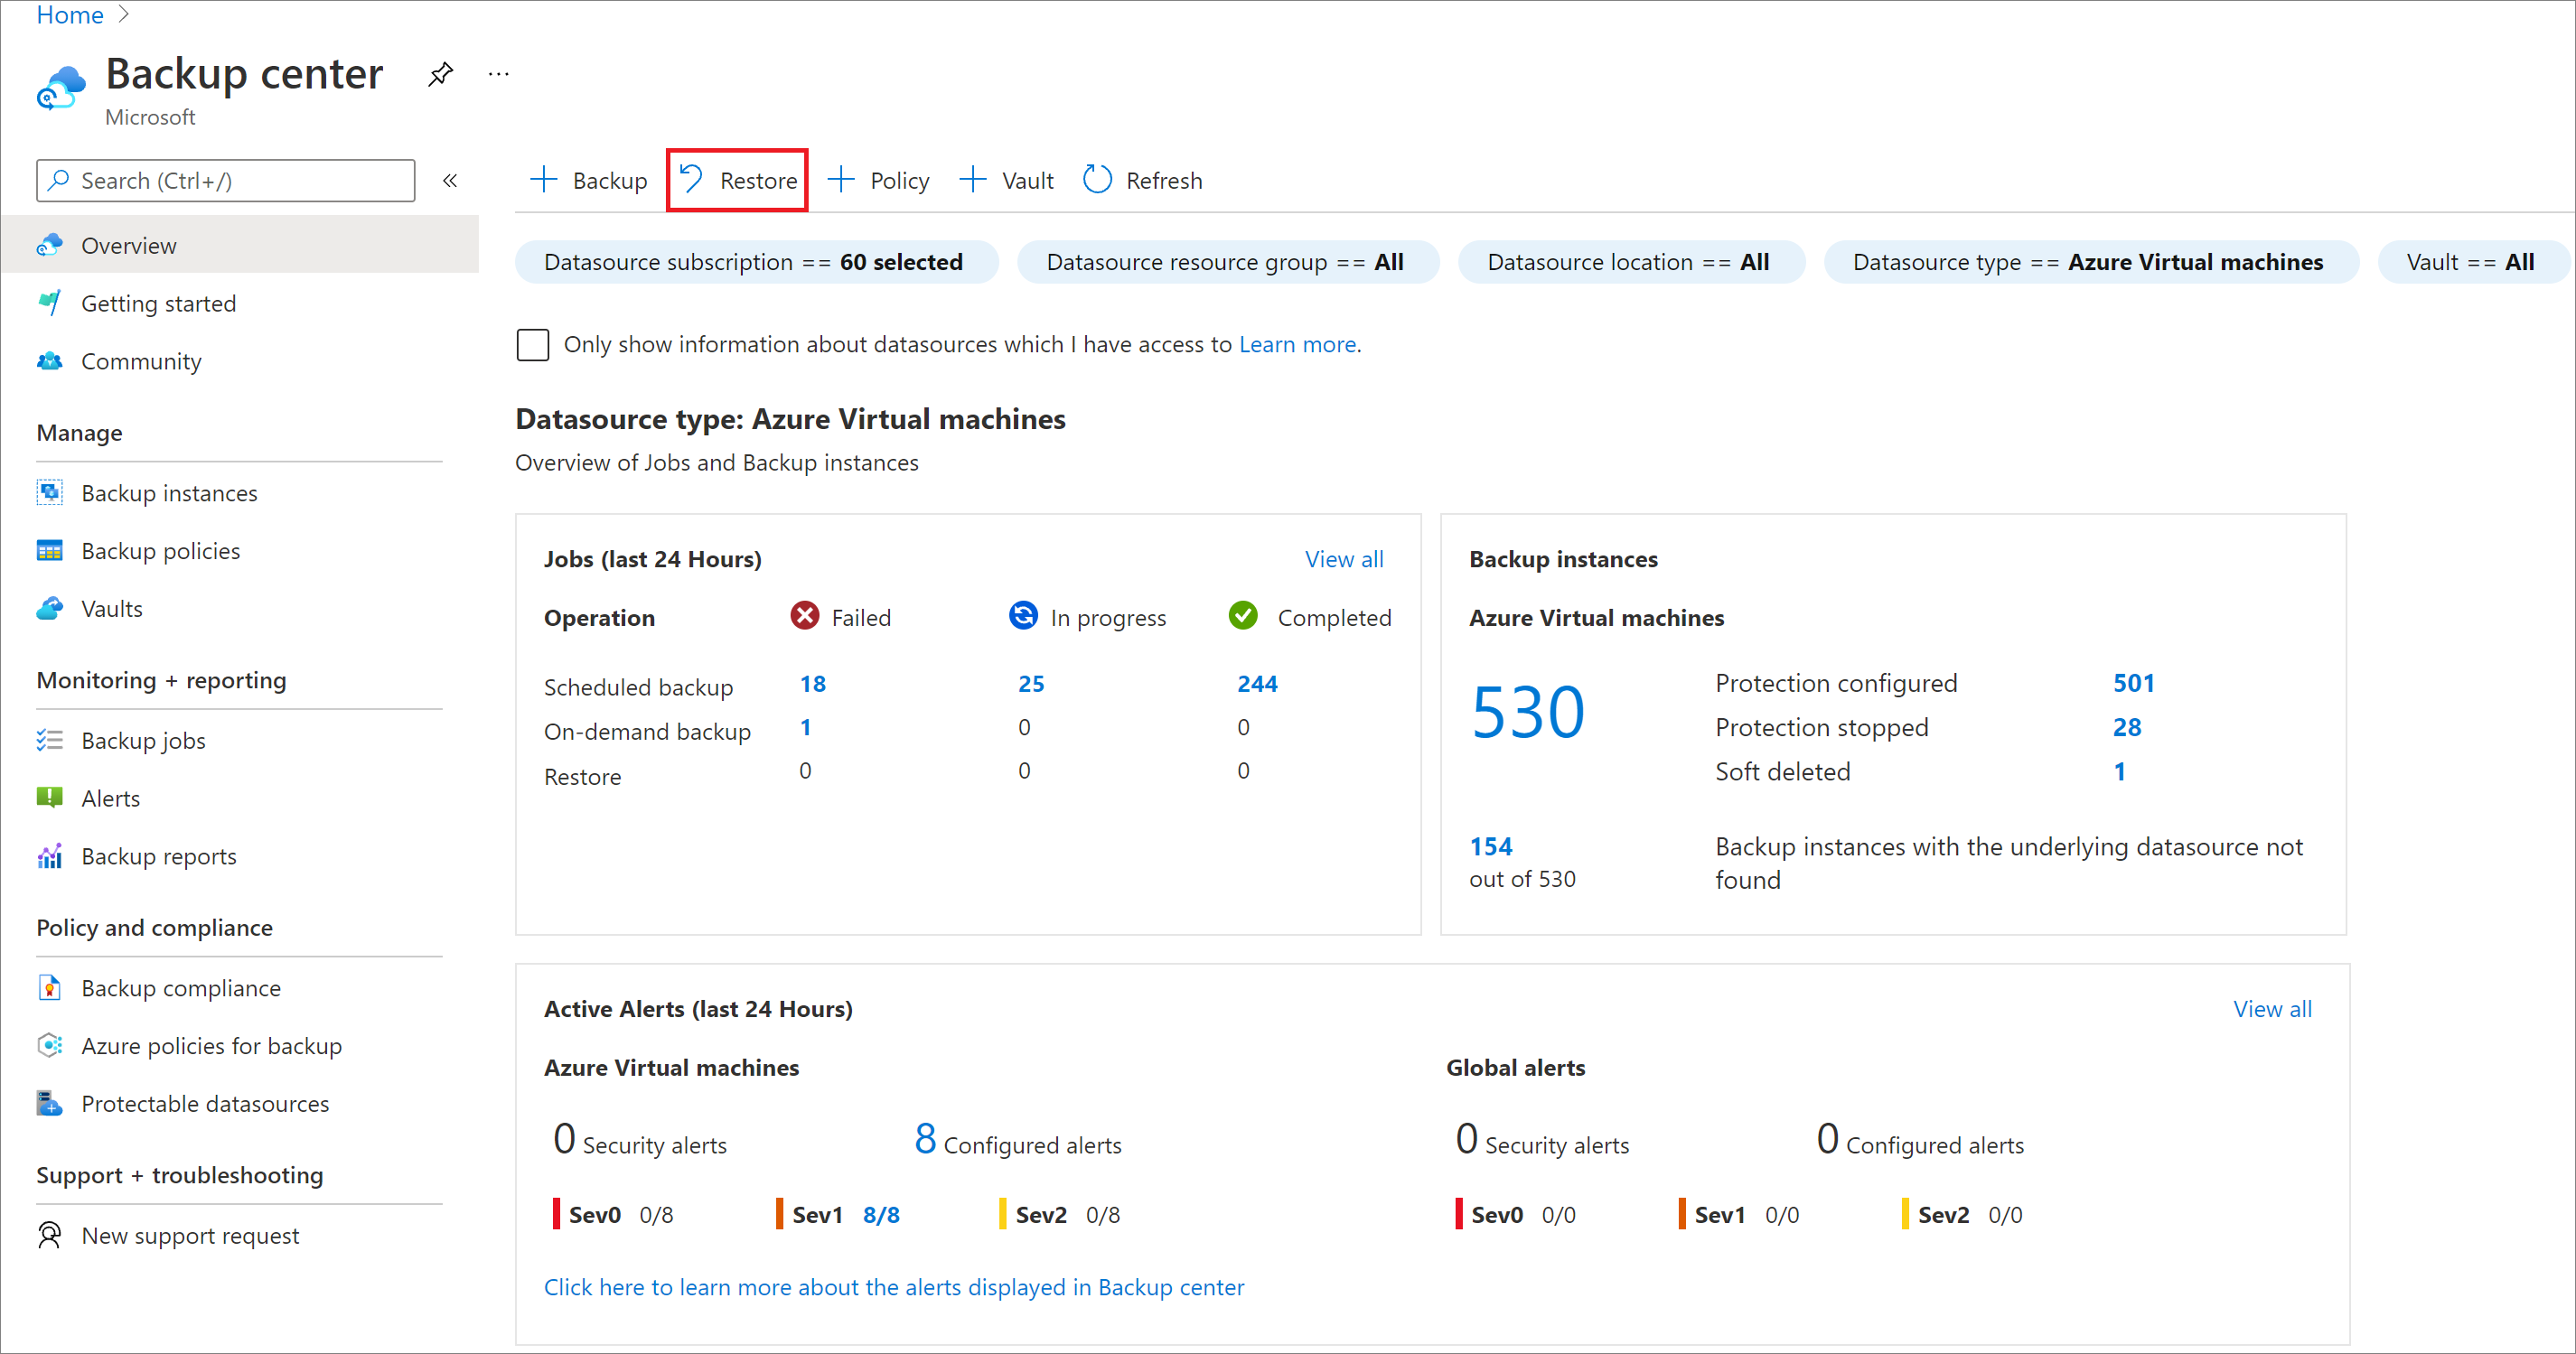
In the Azure portal, go to Backup center and select Restore.
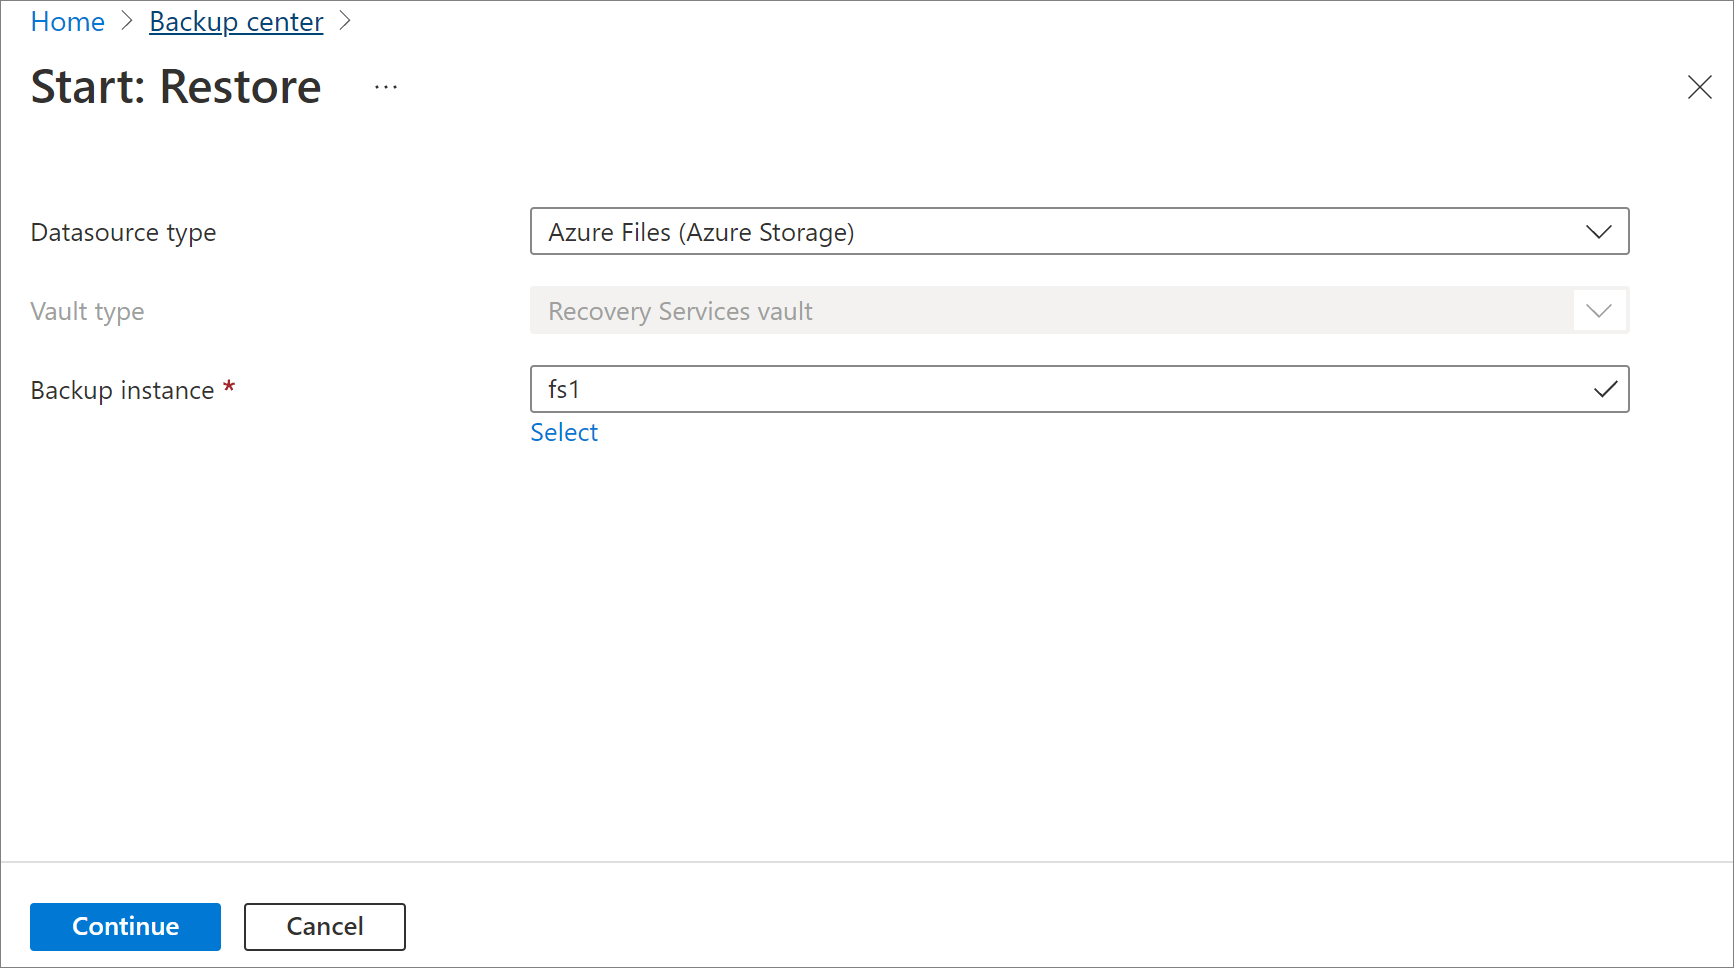
On the Start: Restore blade, select Azure Files (Azure Storage) as the datasource type, select the file share that you want to restore, and then select Continue.
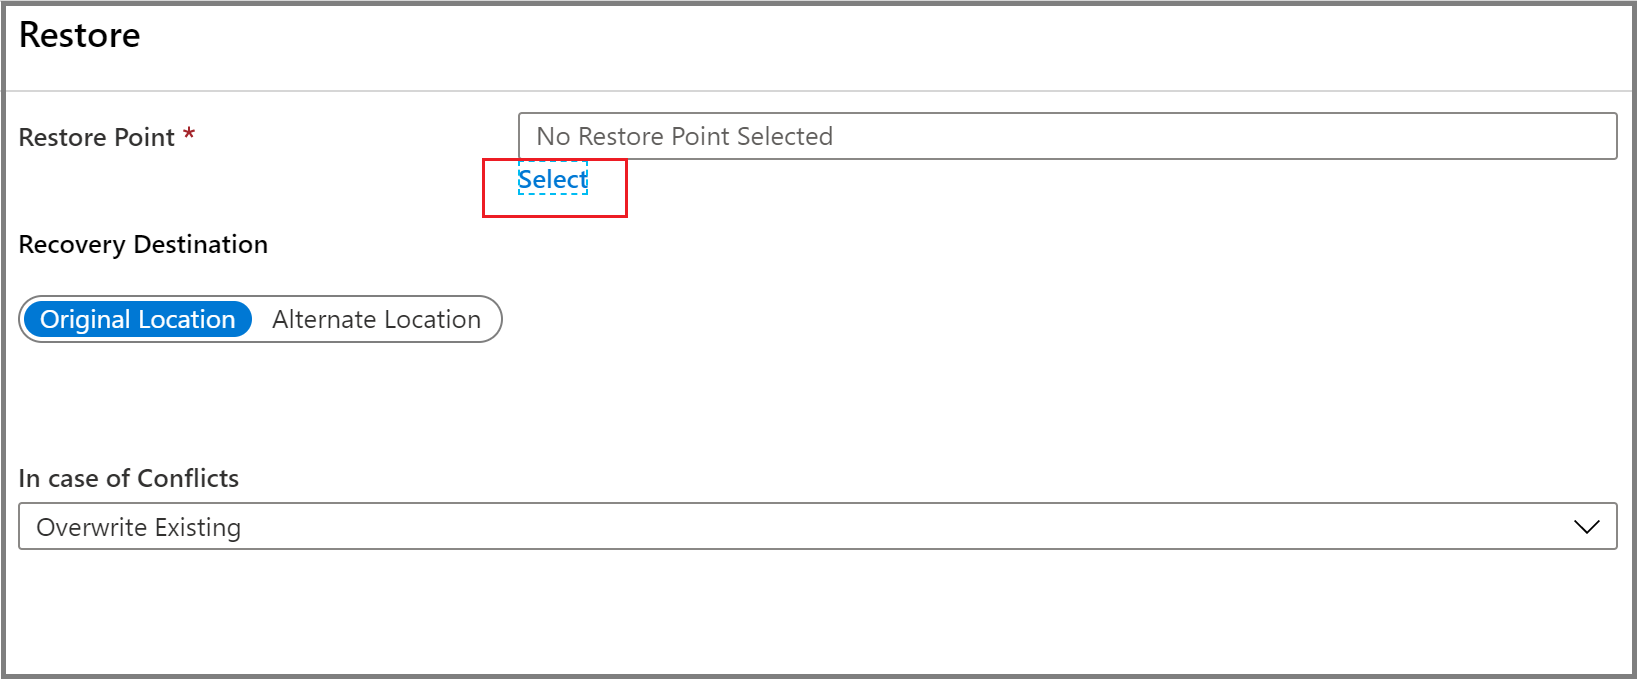
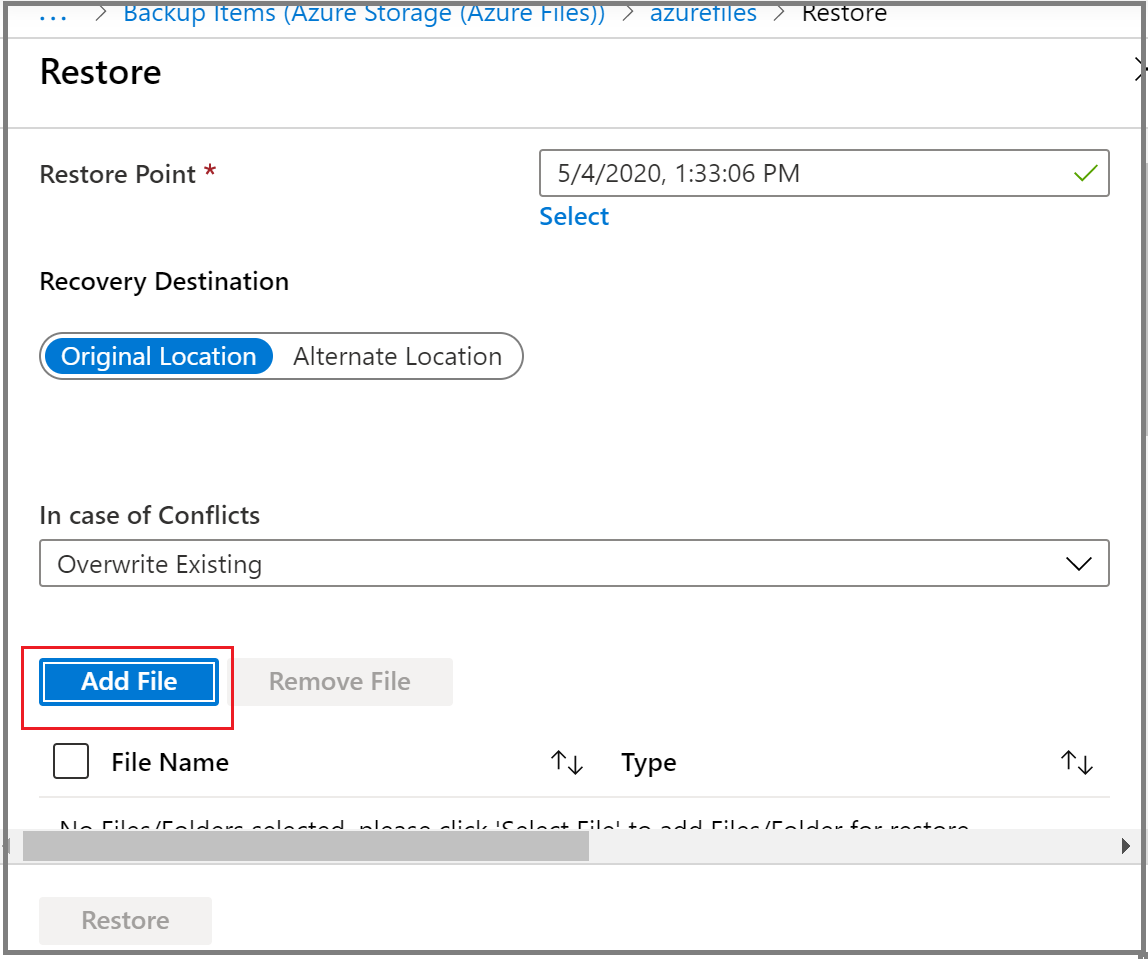
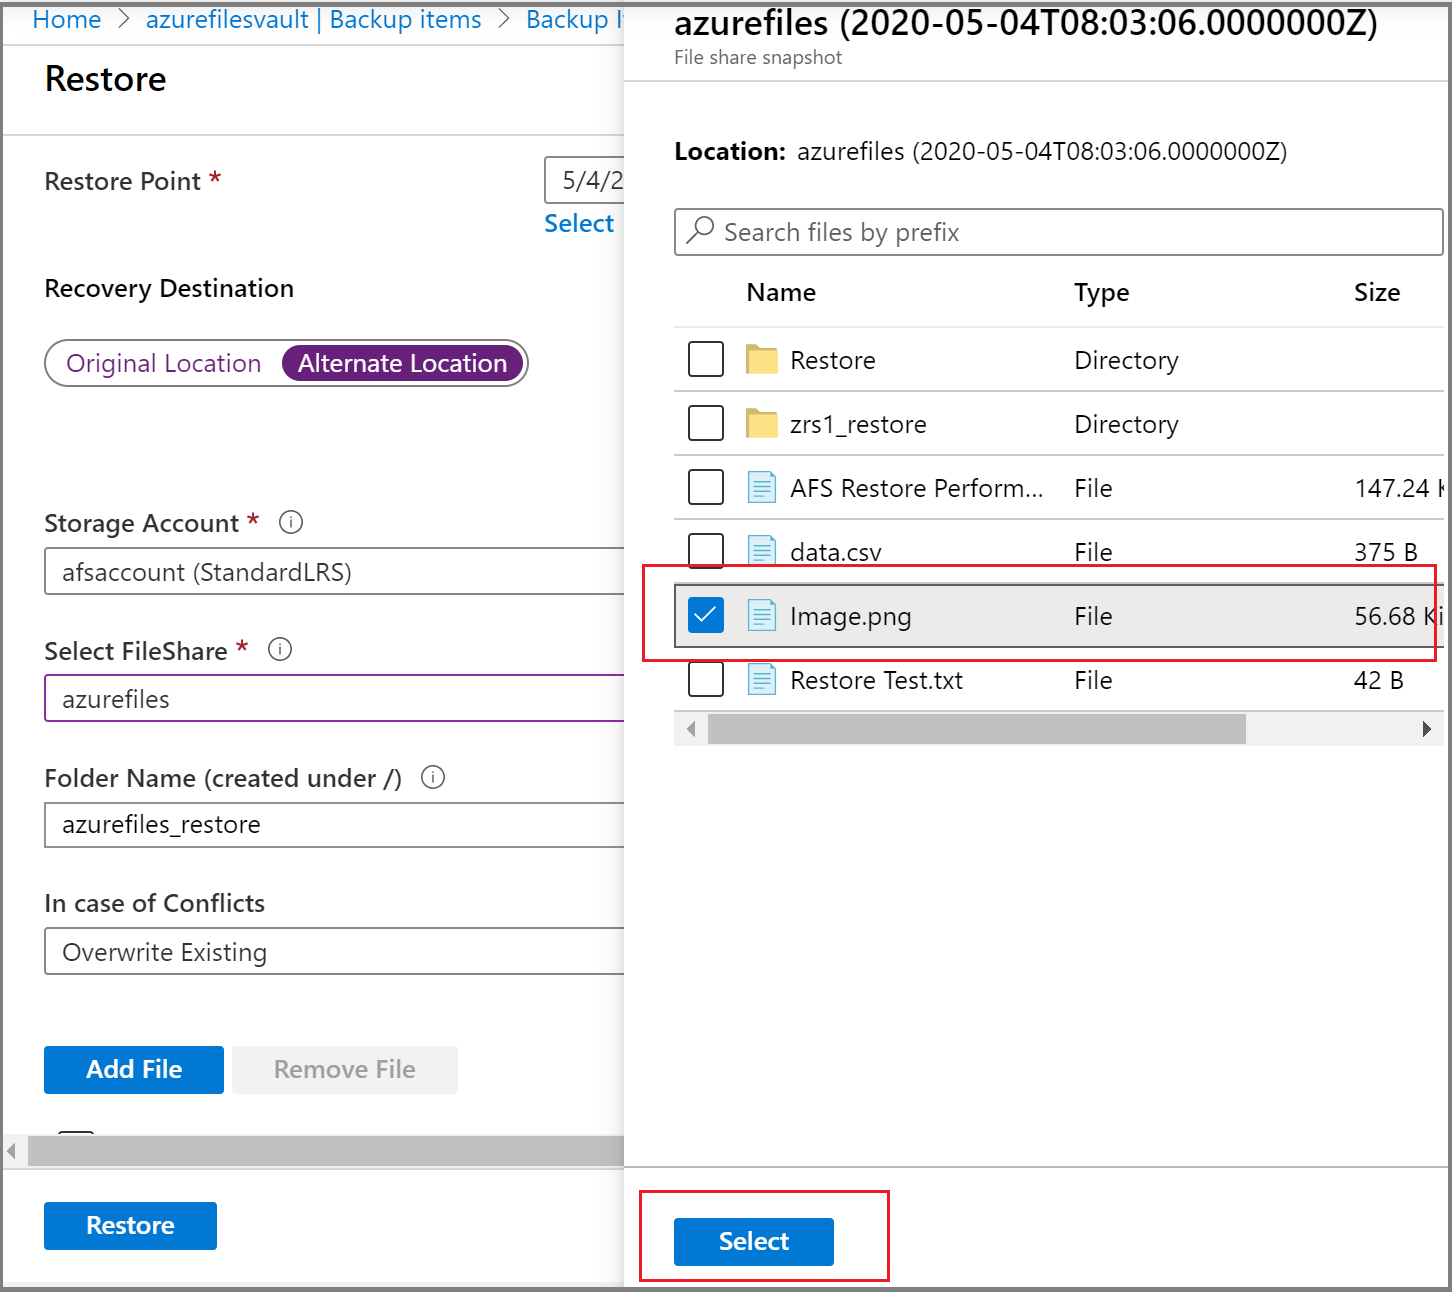
After you select the file share for restore, the Restore blade opens.
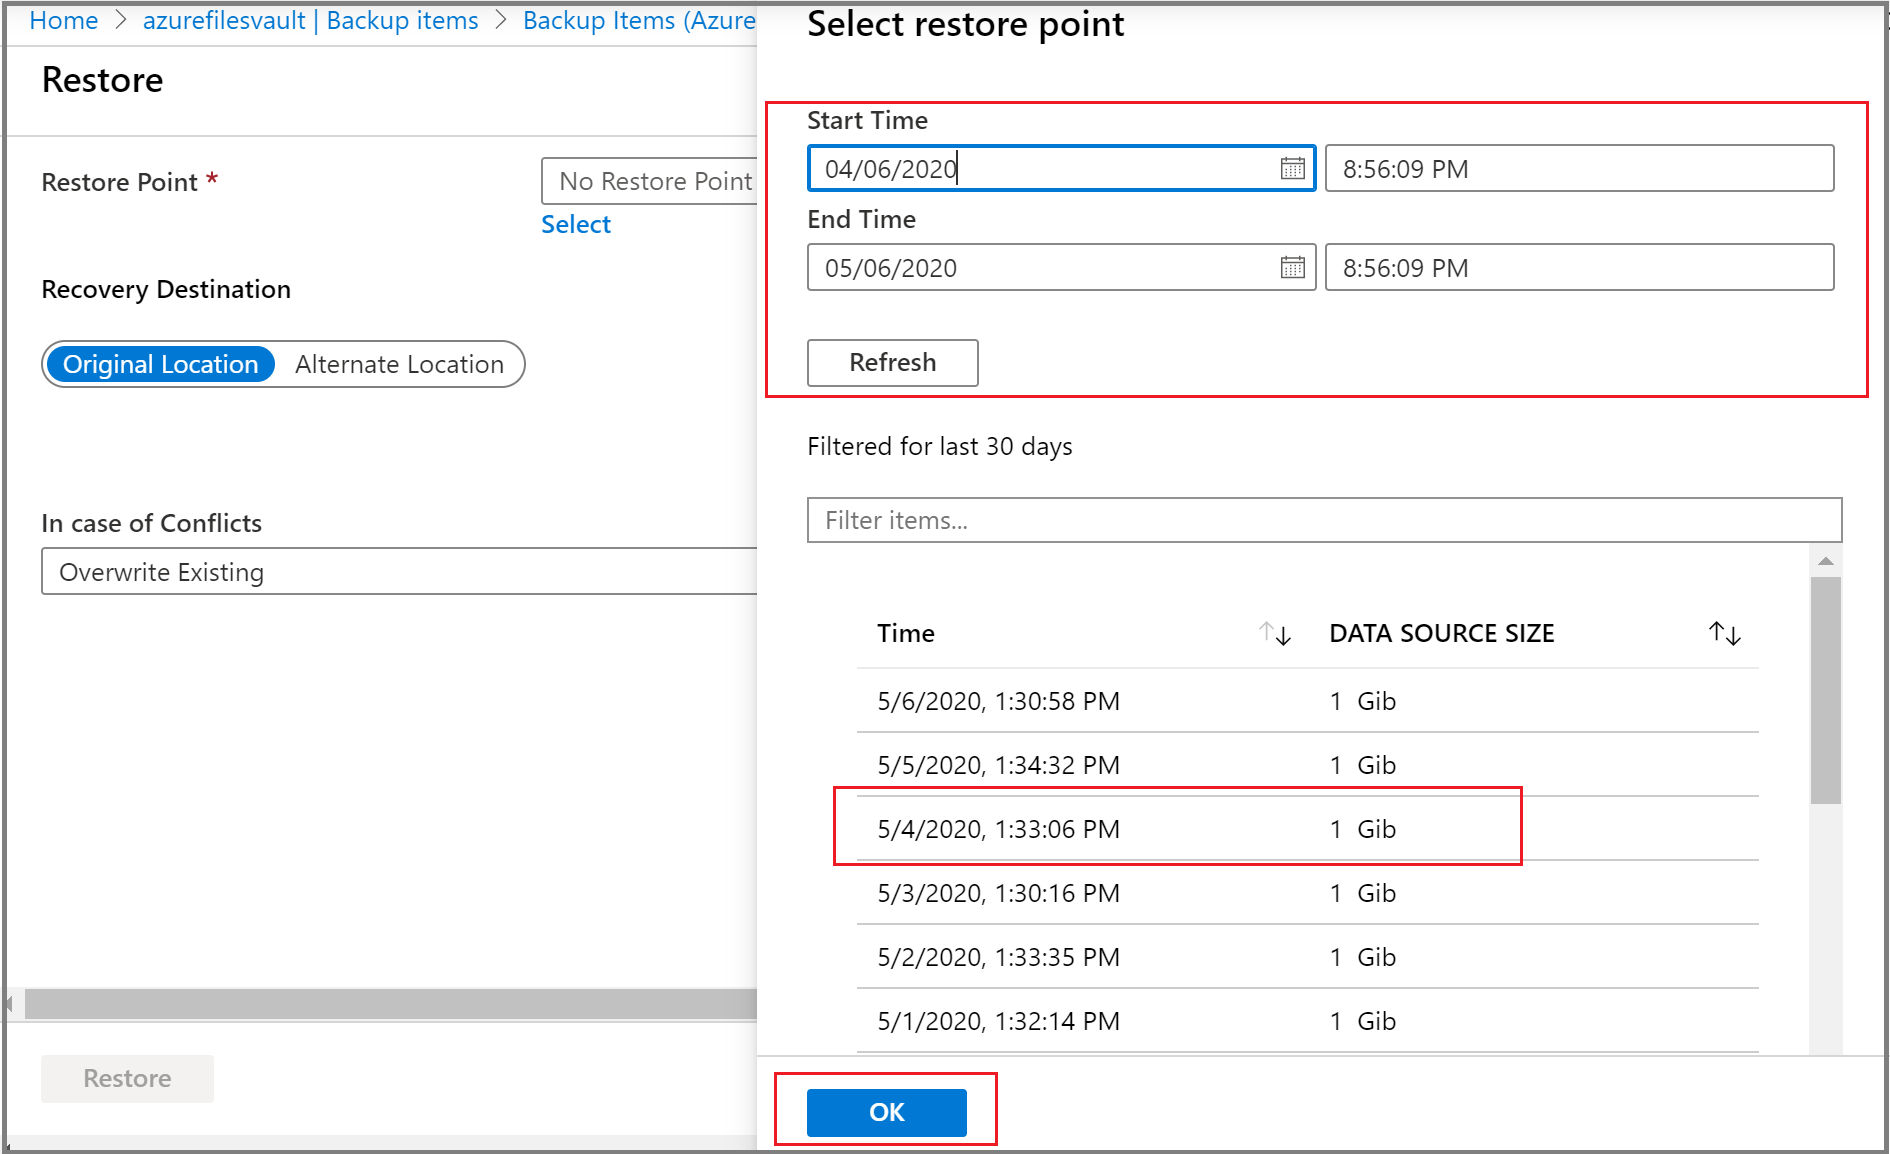
To select the restore point you want to use for performing the restore operation, choose Select under Restore Point.
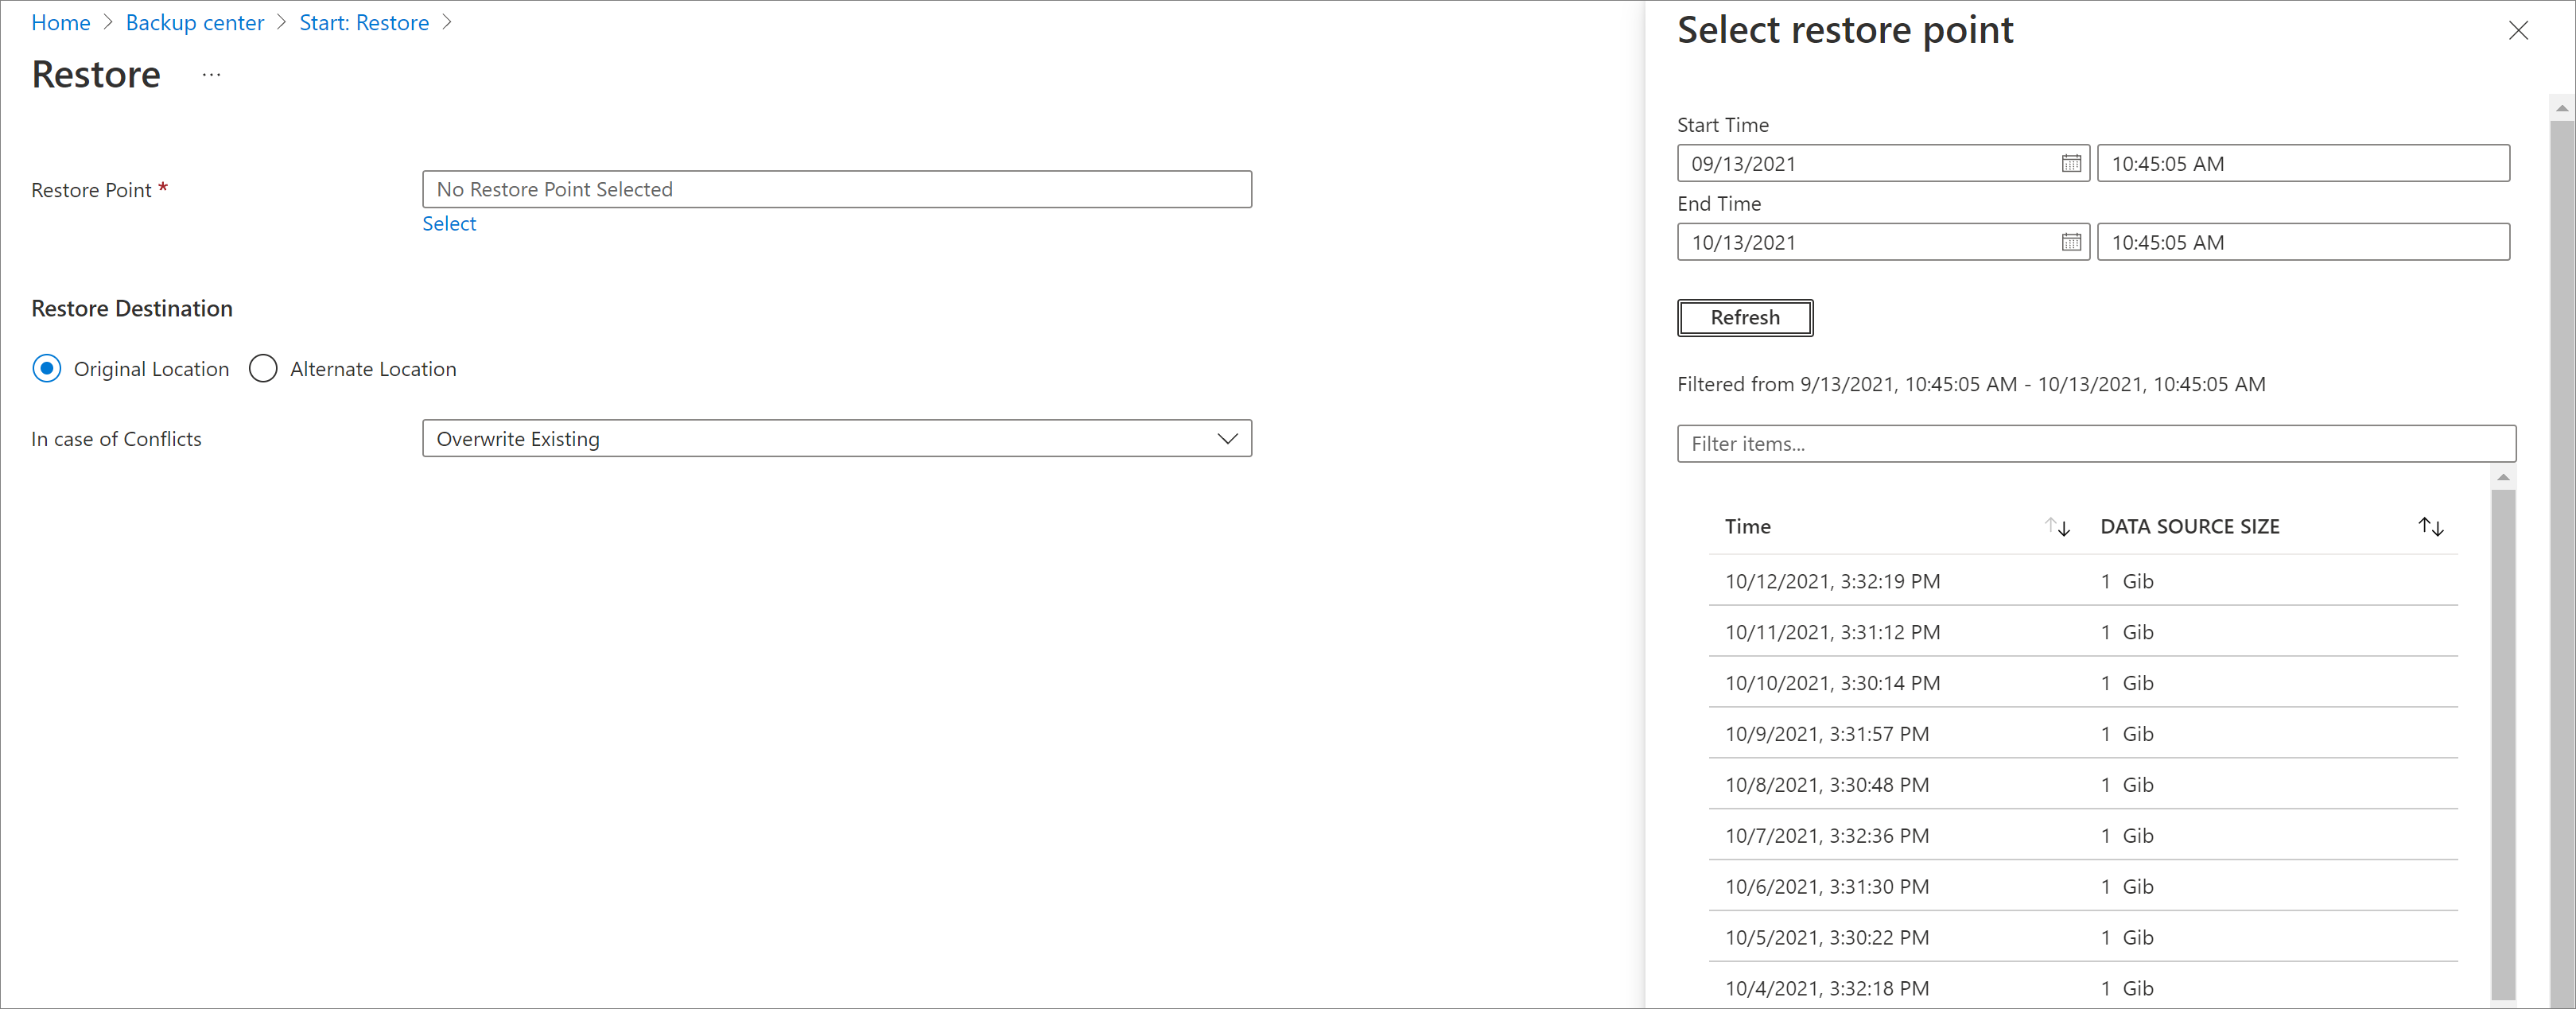
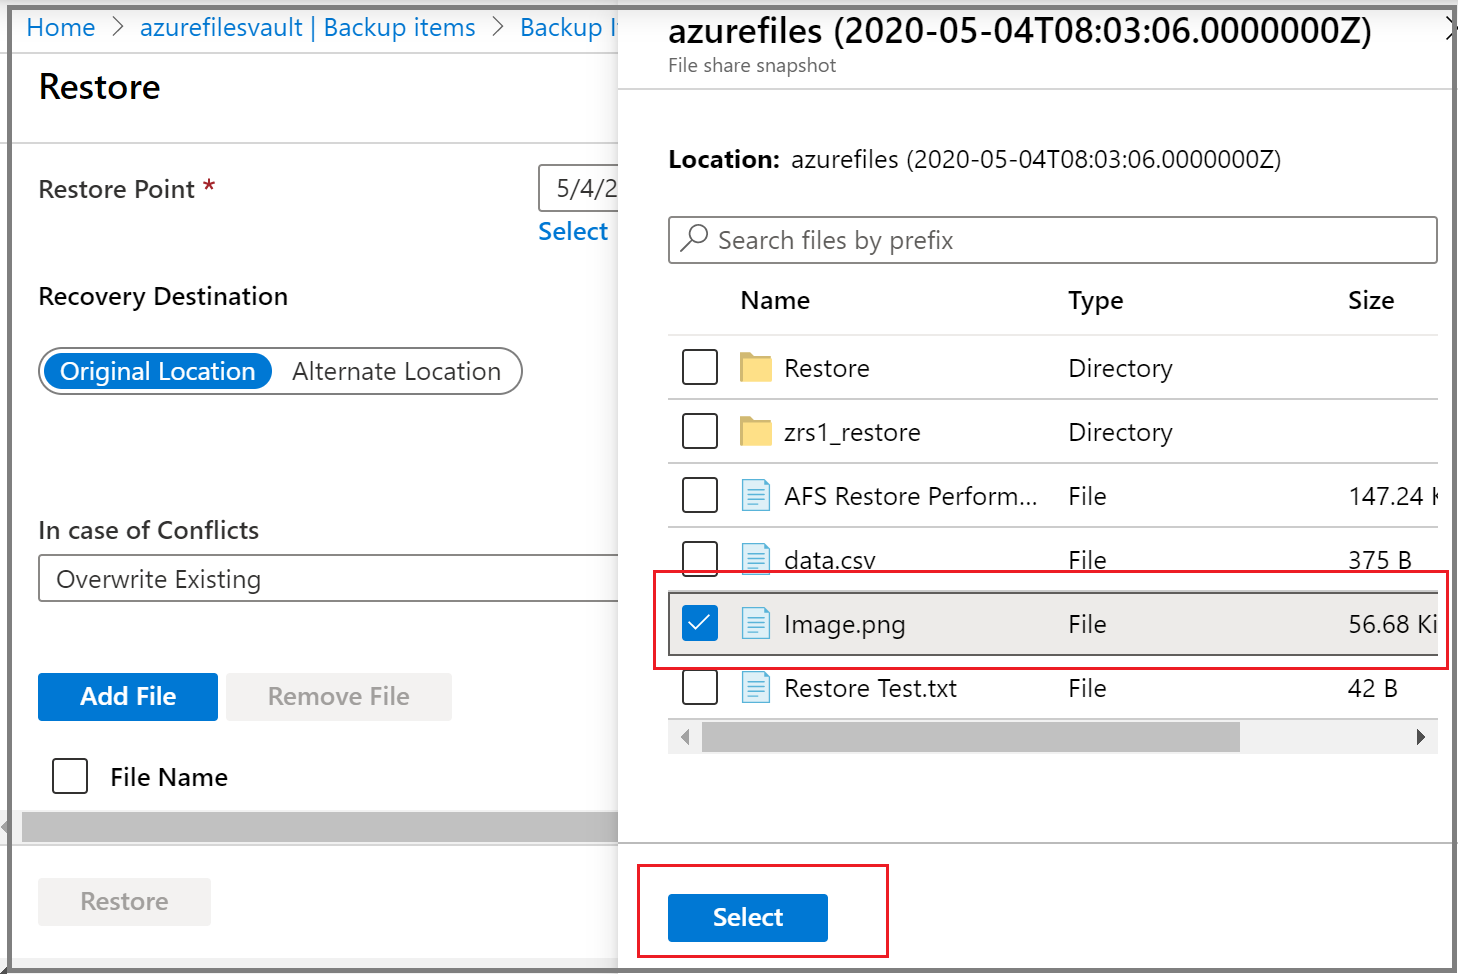
The Select restore point context blade opens on the right that lists the restore points available for the selected file share.
On the Select restore point bladeSe, select the restore point you want to use to perform the restore operation, and then select OK.
Note
By default, the Select restore point blade lists restore points from the last 30 days. If you want to check the restore points created during a specific duration, specify the range by selecting the appropriate Start Time and End Time and select Refresh.
The next step is to choose the Restore Location. In the Recovery Destination section, specify where or how to restore the data. Select one of the following two options by using the toggle button:
- Original Location: Restore the complete file share to the same location as the original source.
- Alternate Location: Restore the complete file share to an alternate location and keep the original file share as is.


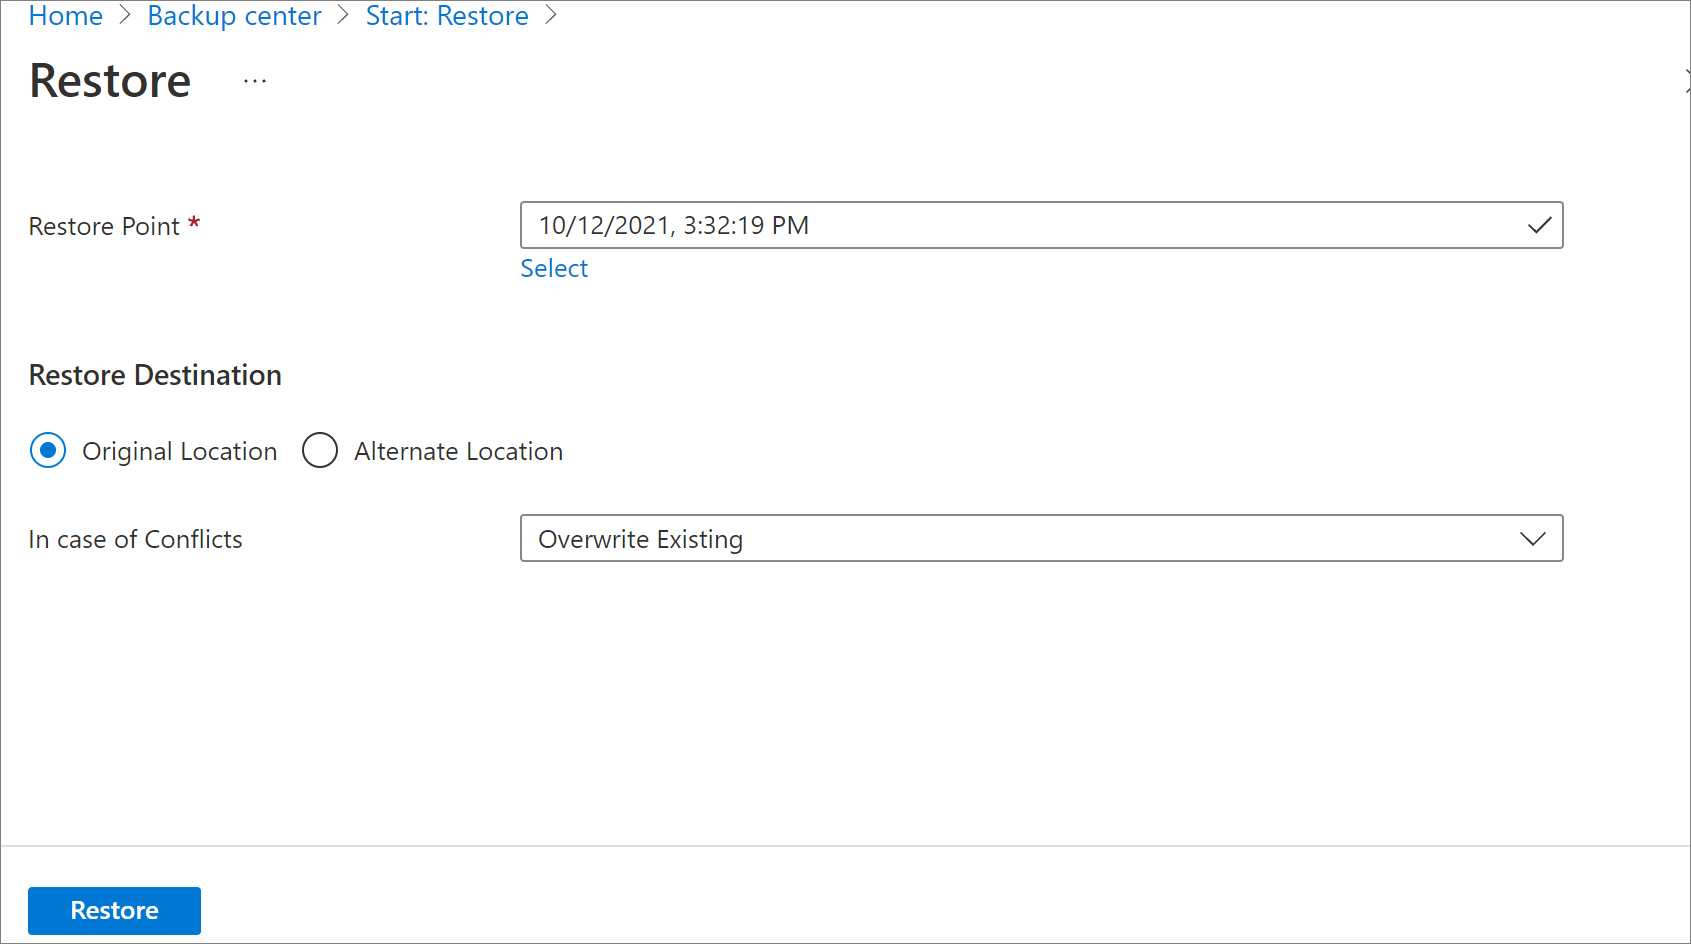
Restore Azure file share to the original location (full share recovery)
To restore Azure file share in the original location, follow these steps:
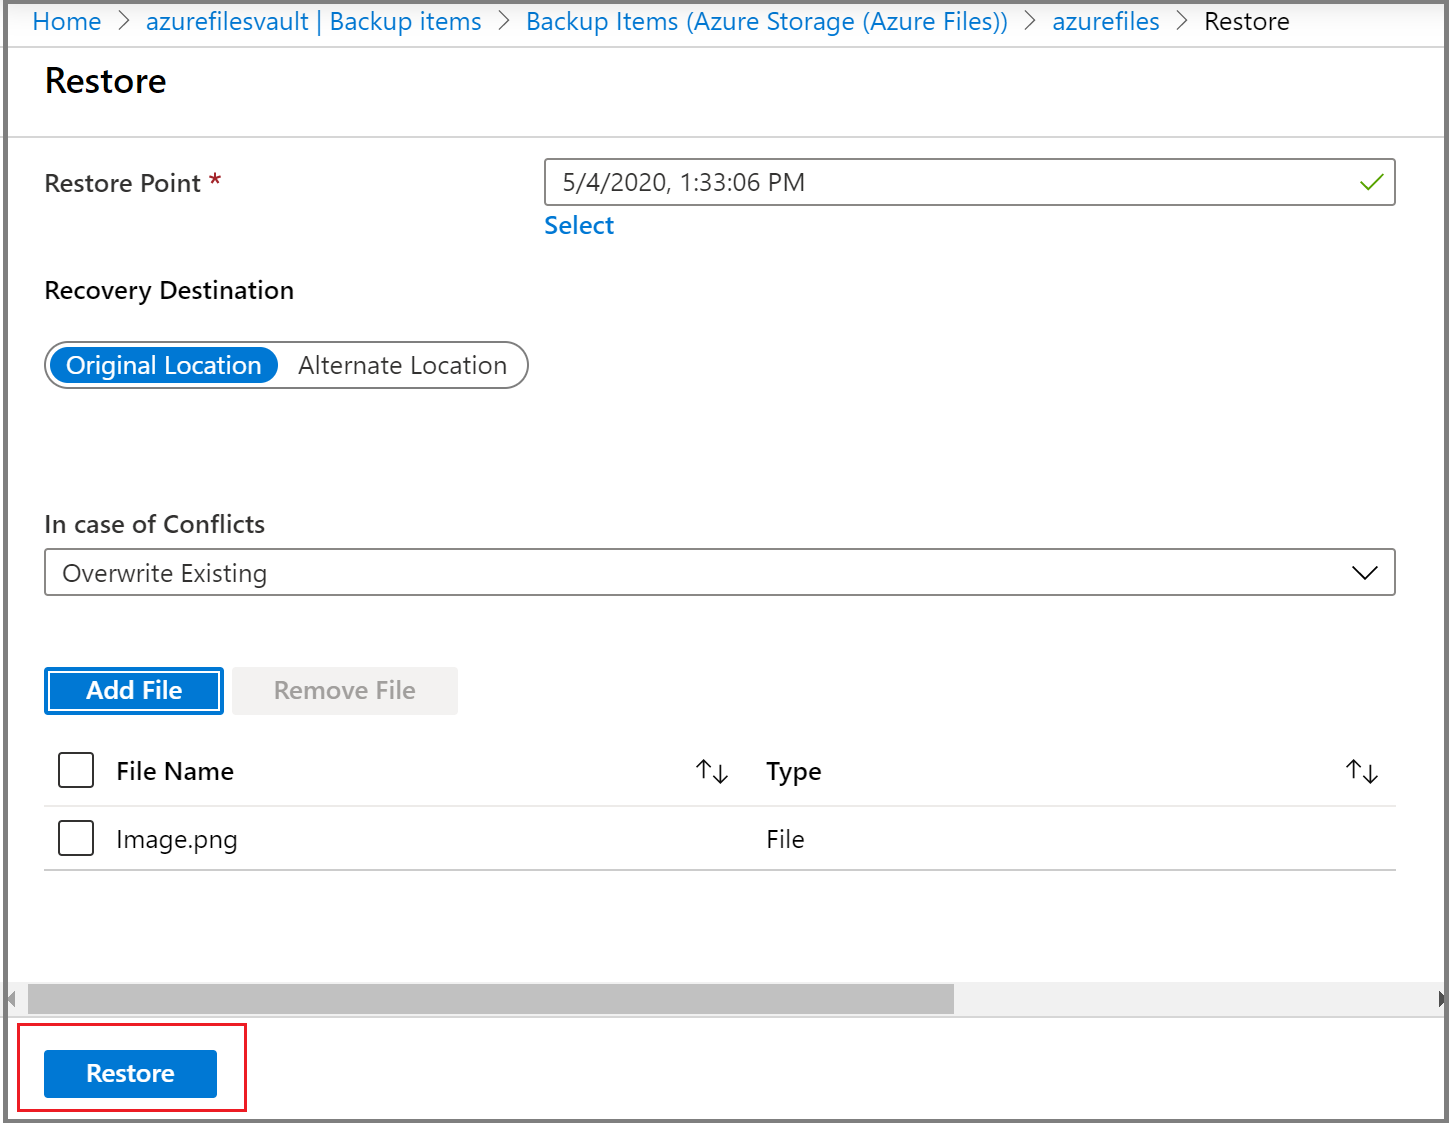
Select Original Location as the Recovery Destination, and select whether to skip or overwrite if there are conflicts, by choosing the appropriate option from the In case of Conflicts drop-down list.
Select Restore to start the restore operation.
Note
To restore data to the original location, choose a recovery point with the recovery tier Snapshot or Snapshot and Vault-tier. If the snapshot corresponding to the selected recovery point is not found, the restore fails.
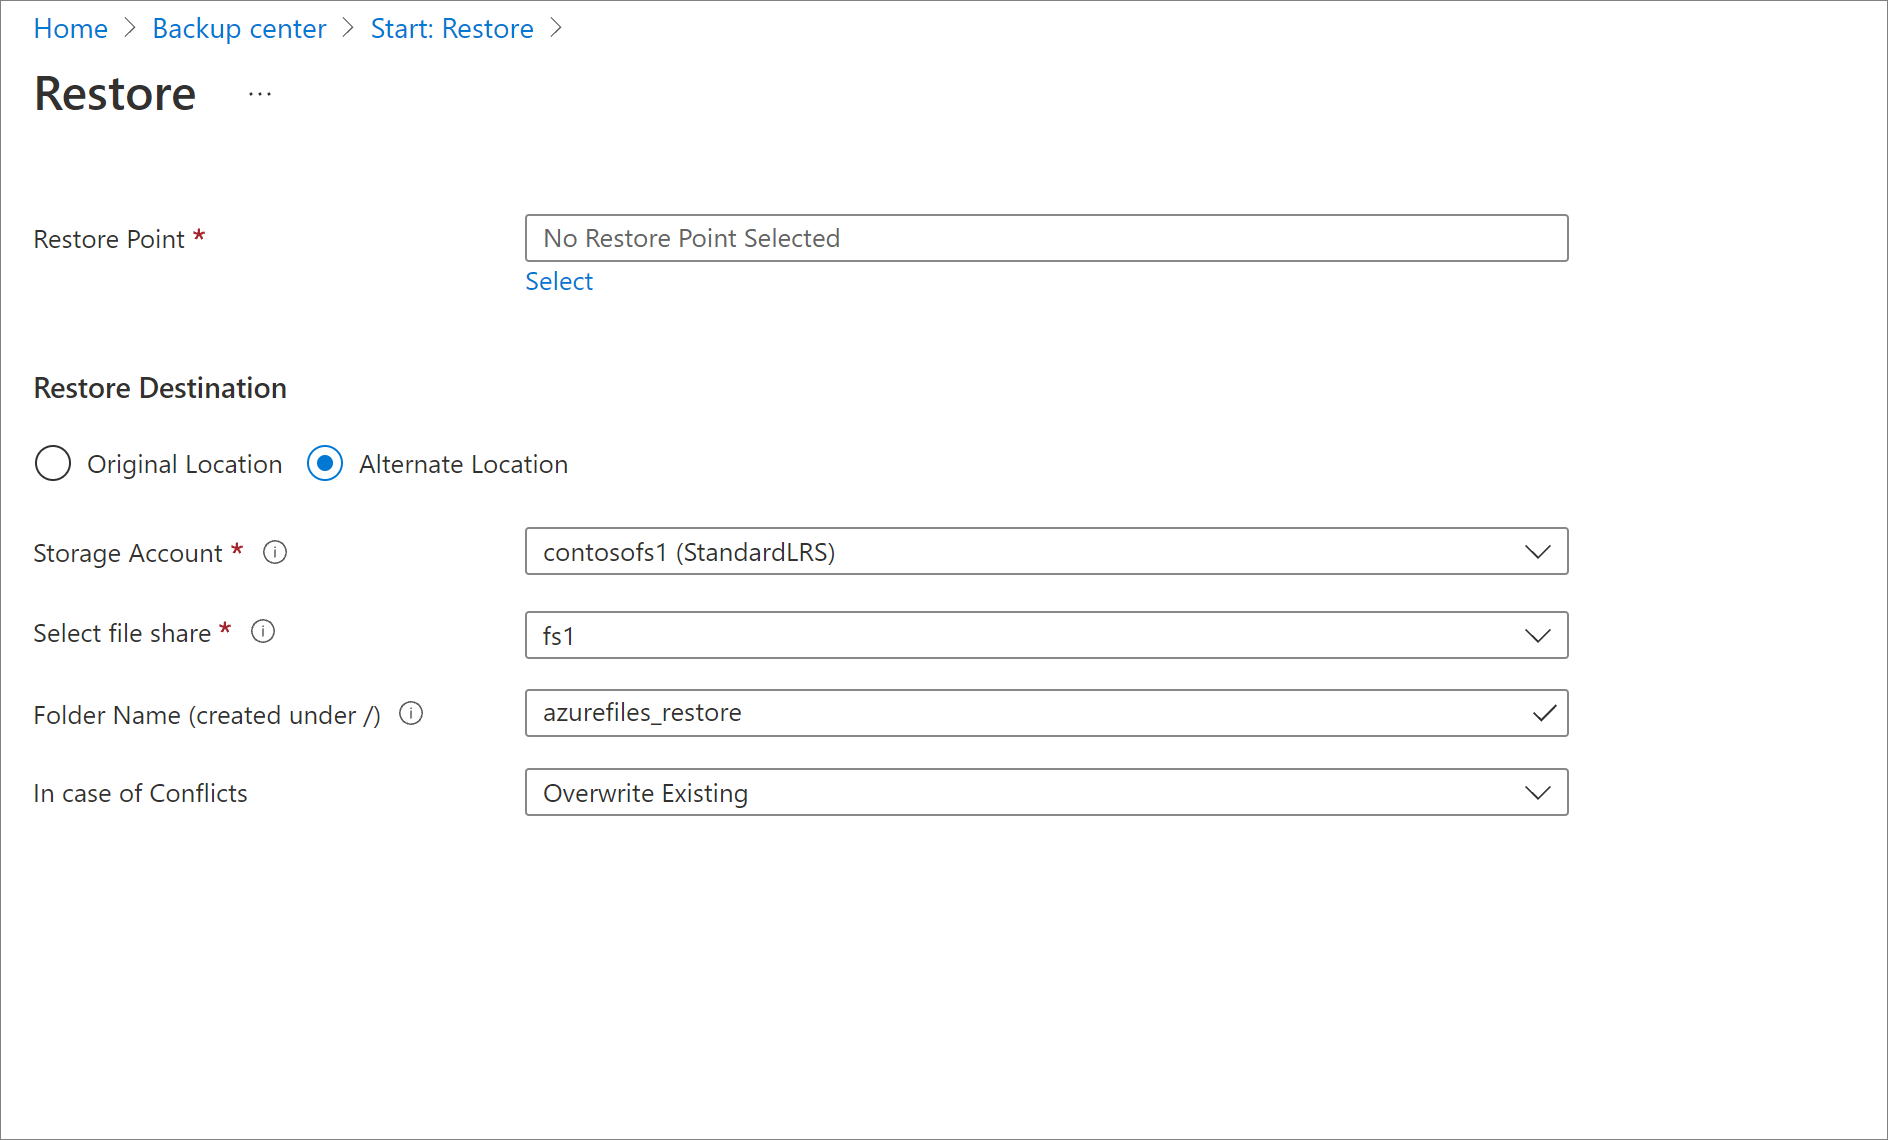
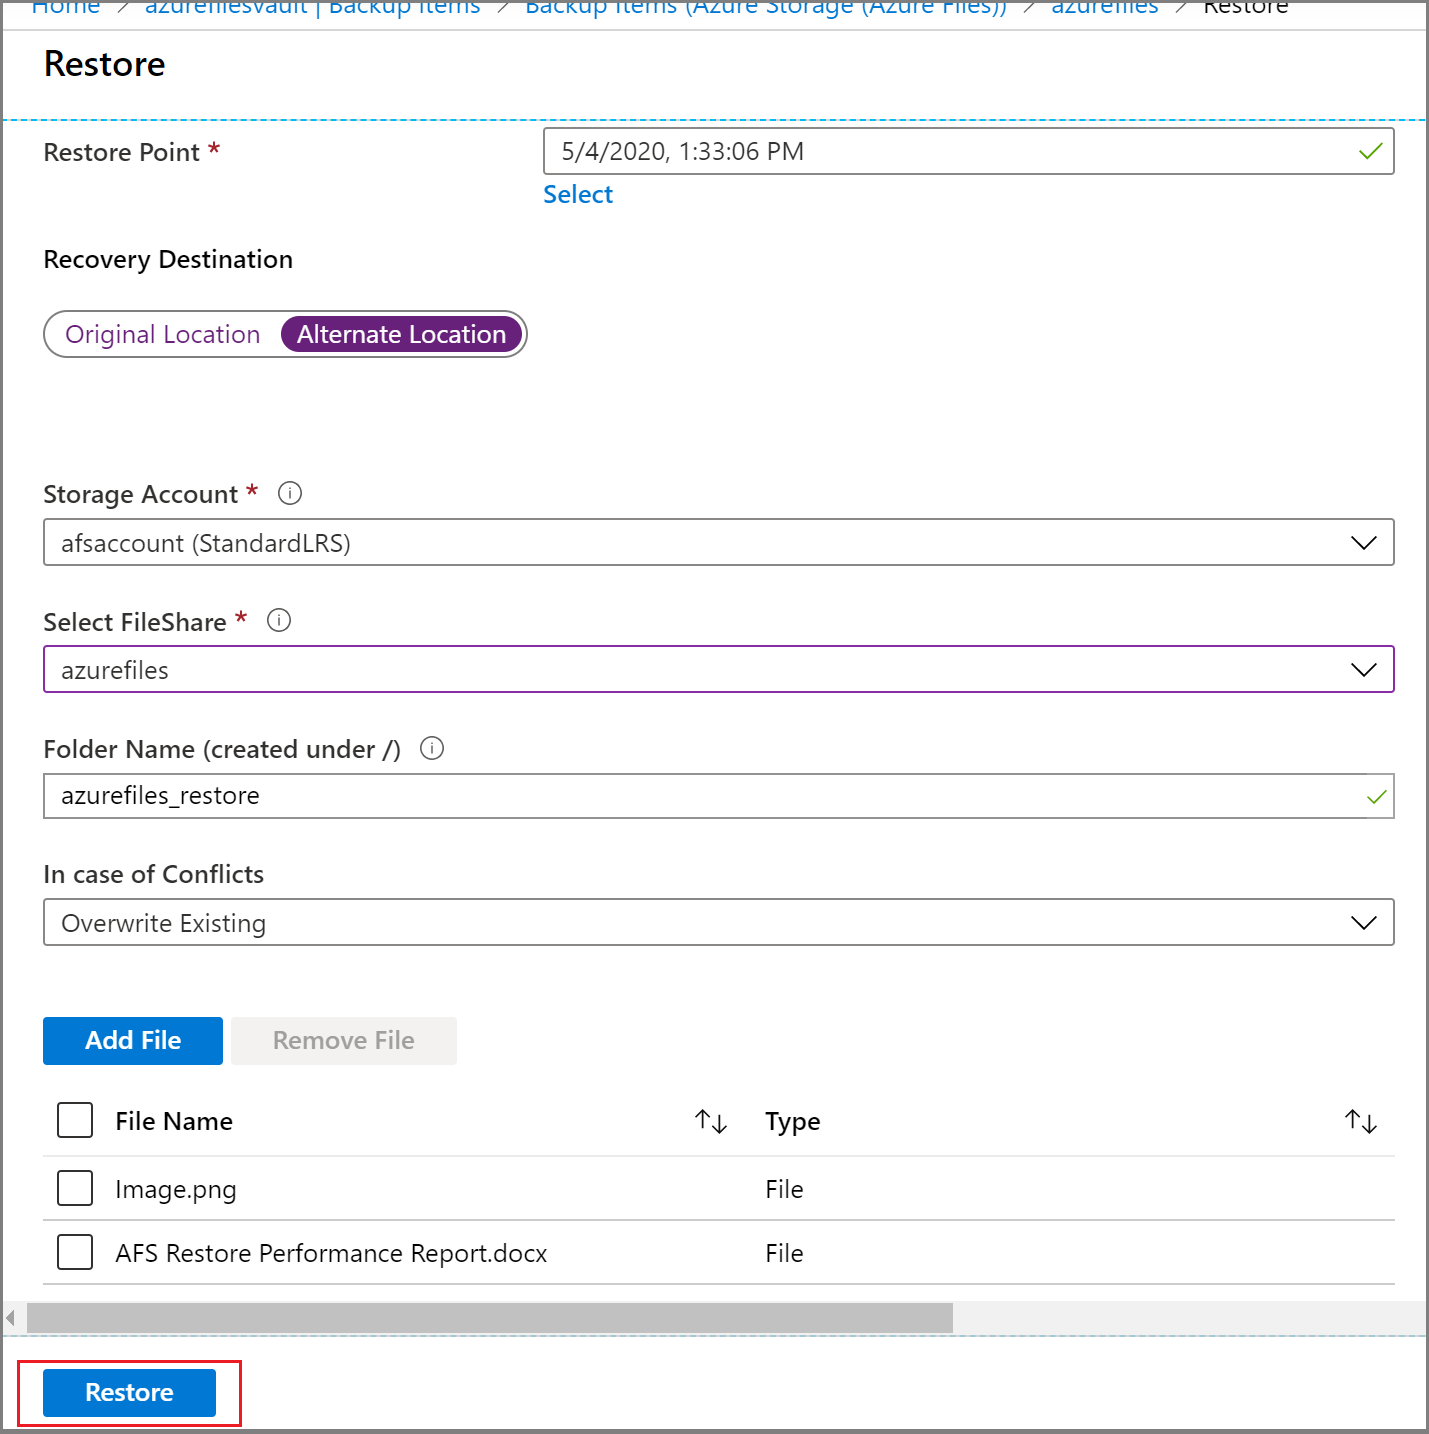
Restore to an alternate location (full share recovery)
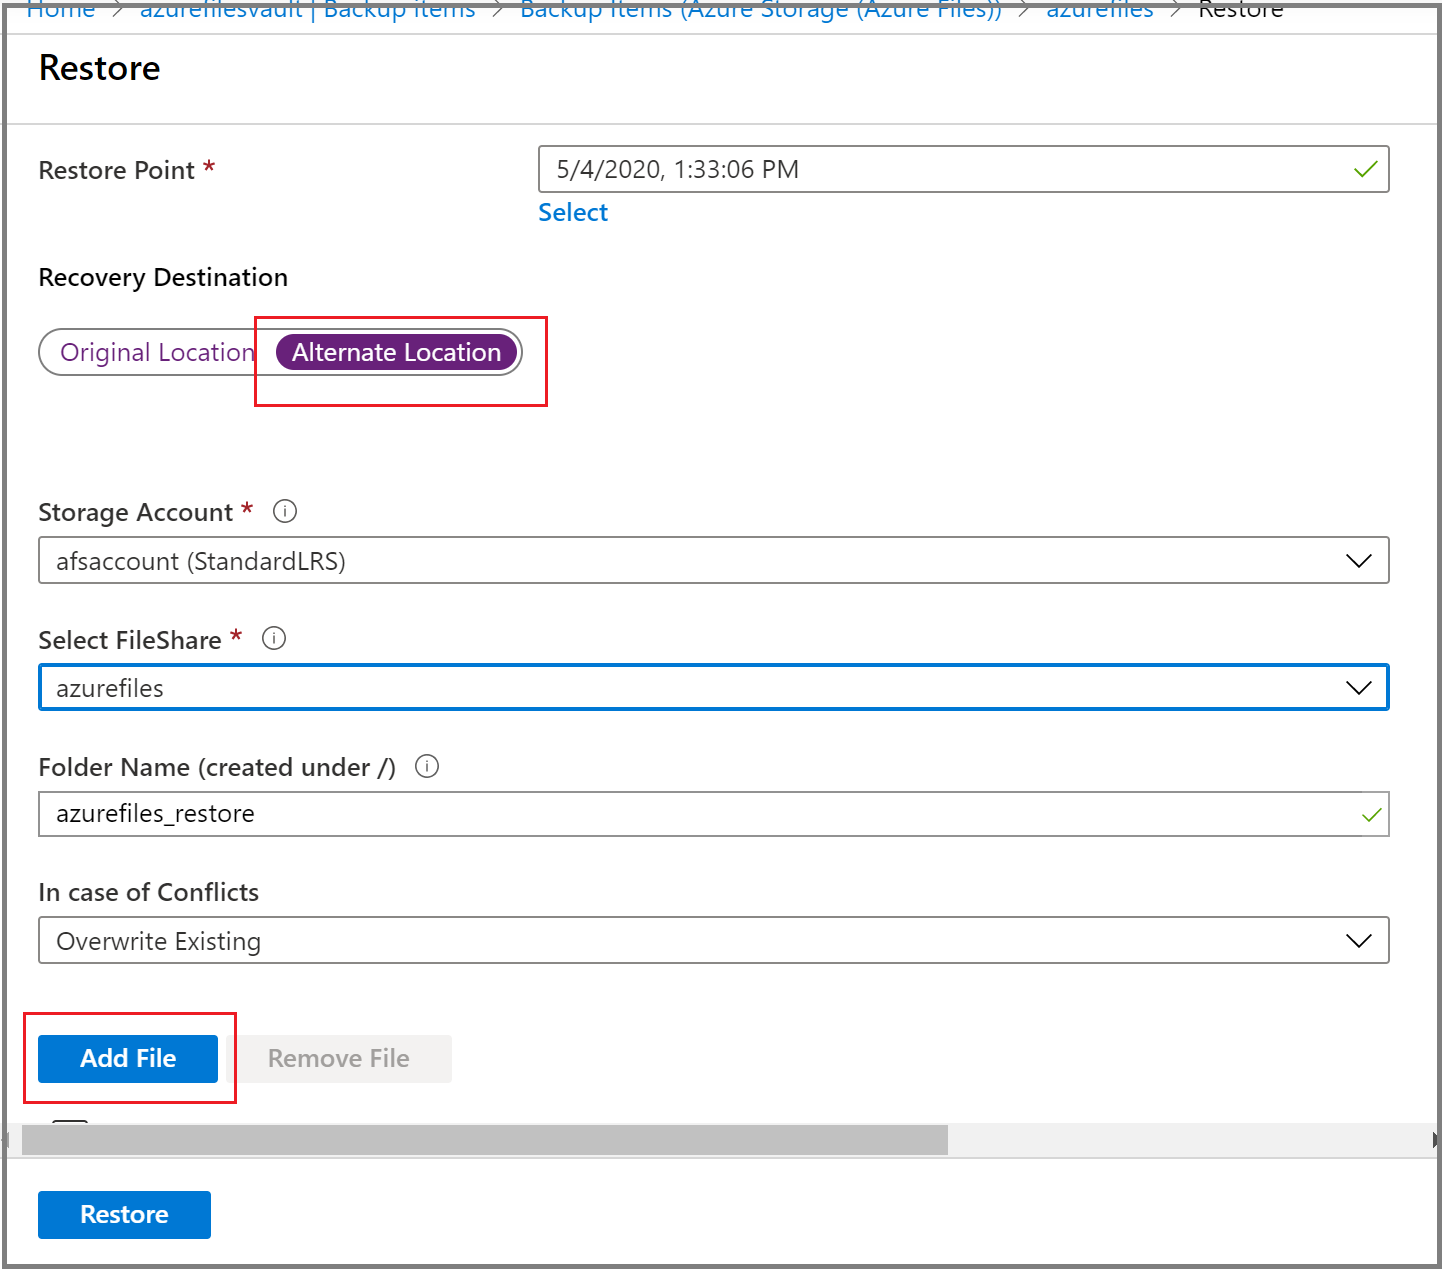
Select Alternate Location as the Recovery Destination.
Select the destination storage account where you want to restore the backed-up content from the Storage Account drop-down list.
The Select File Share drop-down list displays the file shares present in the storage account you selected in step 2. Select the file share where you want to restore the backed-up contents.
In the Folder Name box, specify a folder name you want to create in the destination file share with the restored contents.
Select whether to skip or overwrite if there are conflicts.
After you enter the appropriate values in all boxes, select Restore to start the restore operation.

Track a restore operation
After you trigger the restore operation, the backup service creates a job for tracking. Azure Backup displays notifications about the job in the portal. To view operations for the job, select the notifications hyperlink.

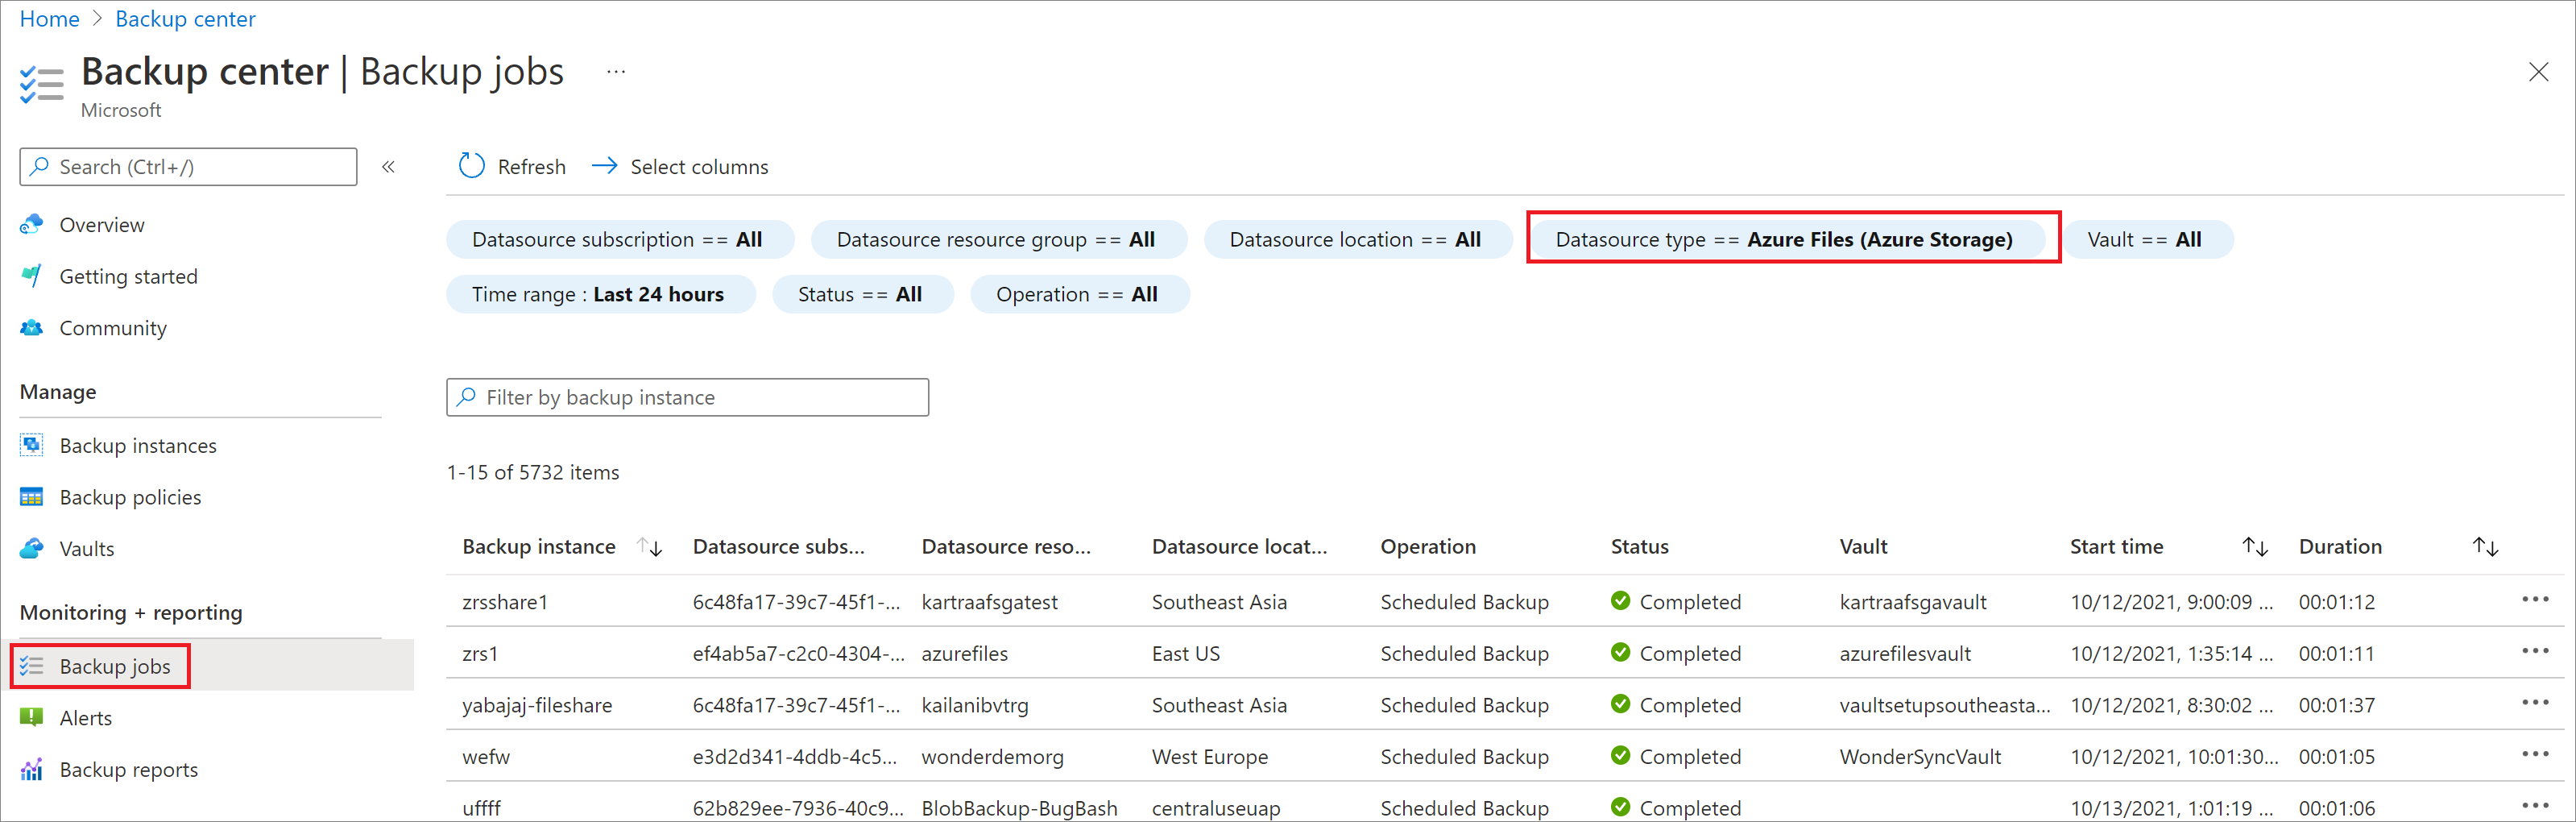
You can also monitor restore progress from the Recovery Services vault:
Go to Backup center and select Backup Jobs from the menu.
On the Backup jobs blade, filter the jobs for the required datasource type and job status.
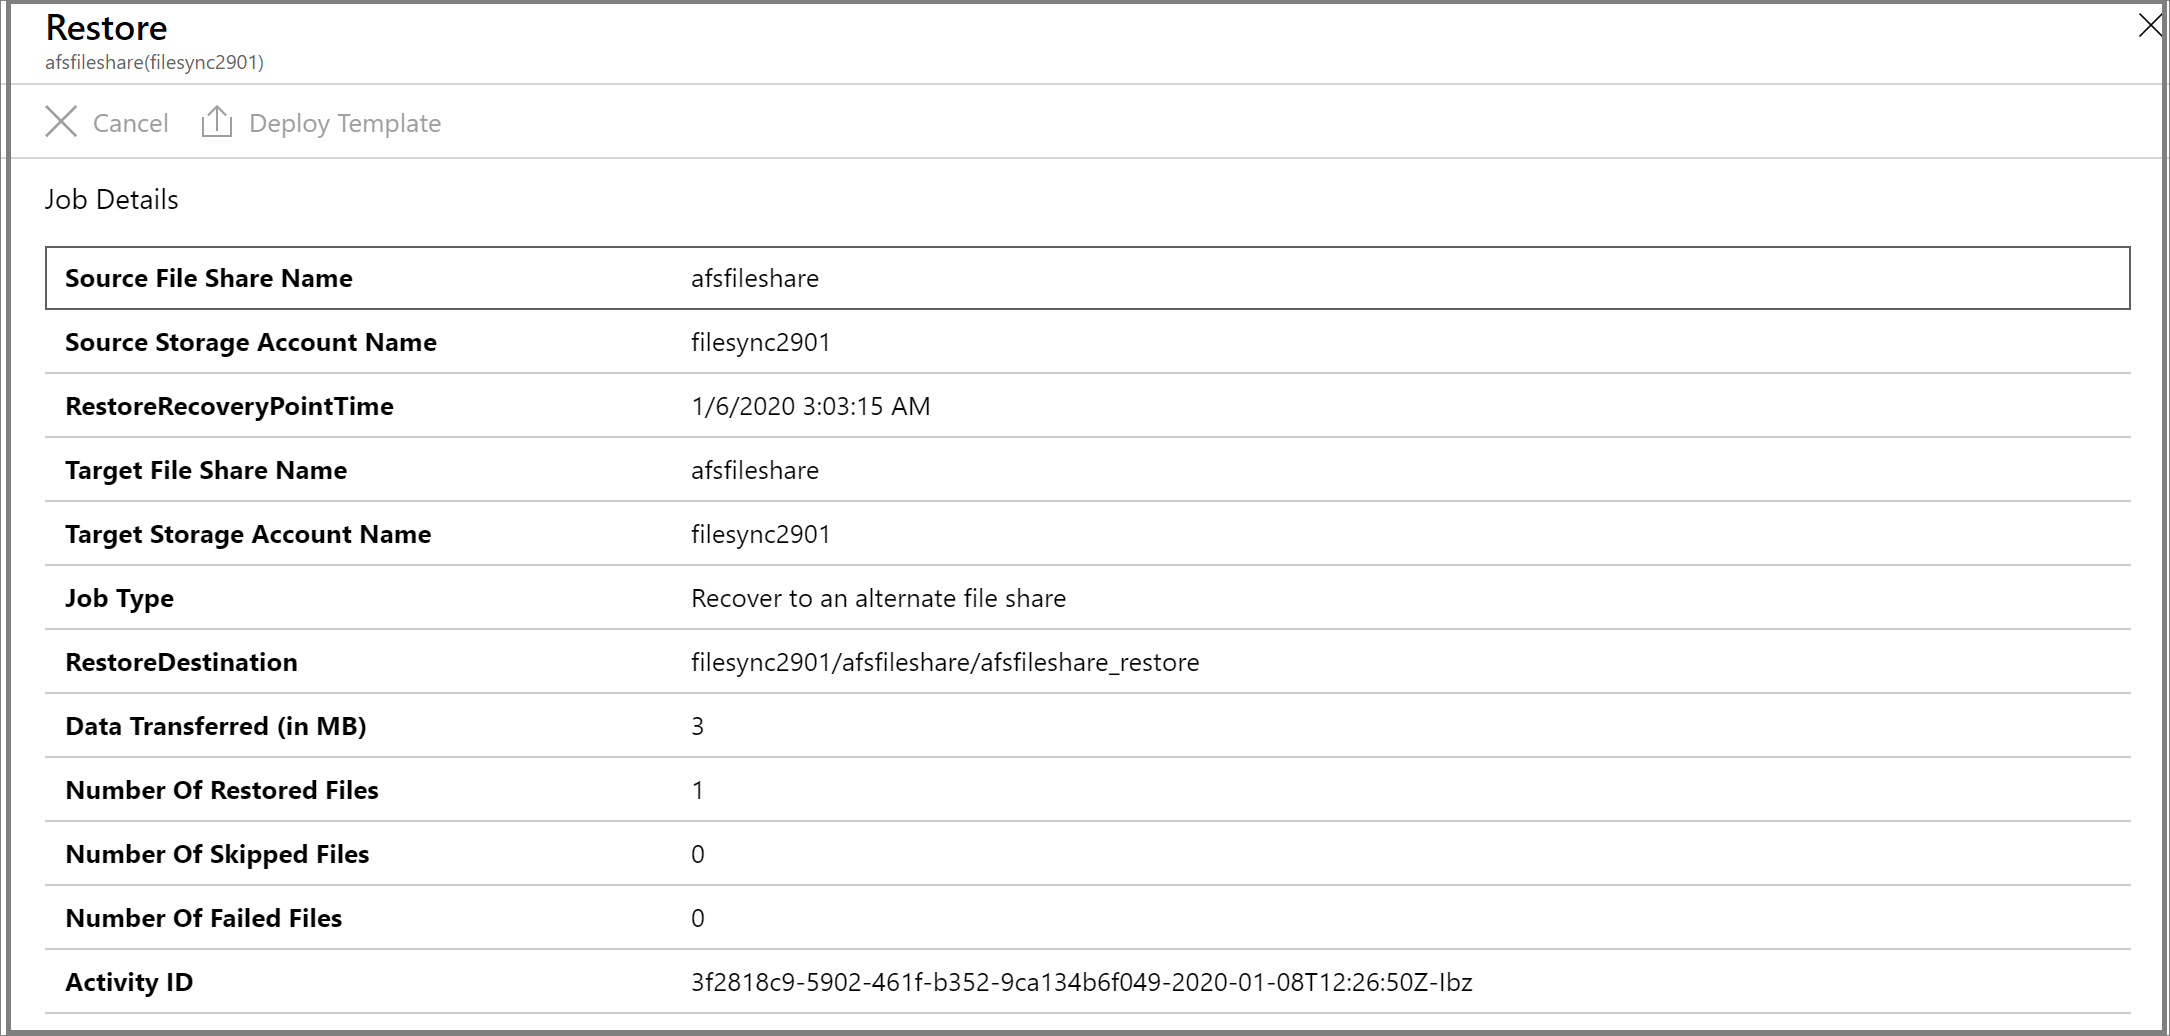
On the Restore blade, select the workload name that corresponds to your file share to view more details about the restore operation, like Data Transferred and Number of Restored Files.

Note
- Folders will be restored with original permissions if there is atleast one file present in them.
- Trailing dots in any directory path can lead to failures in the restore.
- Restore of a file or folder with length >2 KB or with characters
xFFFForxFFFEisn't supported from snapshots.
Next steps
Feedback
Coming soon: Throughout 2024 we will be phasing out GitHub Issues as the feedback mechanism for content and replacing it with a new feedback system. For more information see: https://aka.ms/ContentUserFeedback.
Submit and view feedback for