Note
Access to this page requires authorization. You can try signing in or changing directories.
Access to this page requires authorization. You can try changing directories.
Azure Firewall operates in transparent proxy mode by default. In this mode, a user-defined route (UDR) routes traffic to the firewall. The firewall intercepts the traffic inline and forwards it to the destination.
When you enable explicit proxy for outbound traffic, you can configure the sending application, such as a web browser, to use Azure Firewall as the proxy. This configuration directs traffic from the application to the firewall's private IP address, so traffic egresses directly from the firewall without relying on a UDR.
Explicit proxy mode supports HTTP and HTTPS traffic. You define proxy settings in the browser or application to point to the firewall's private IP address. You can configure this setting manually or use a proxy auto-configuration (PAC) file. The firewall can host the PAC file to handle proxy requests after you upload it to the firewall.
Prerequisites
An Azure Firewall with an associated firewall policy. You configure explicit proxy in the firewall policy, not on the firewall resource. For more information, see Azure Firewall policy rule sets.
To host a PAC file, you also need:
- An Azure Storage account with a blob container to store the PAC file.
- A user-assigned managed identity that has the Storage Blob Data Contributor and Storage Blob Data Reader roles on that storage account.
Configuration
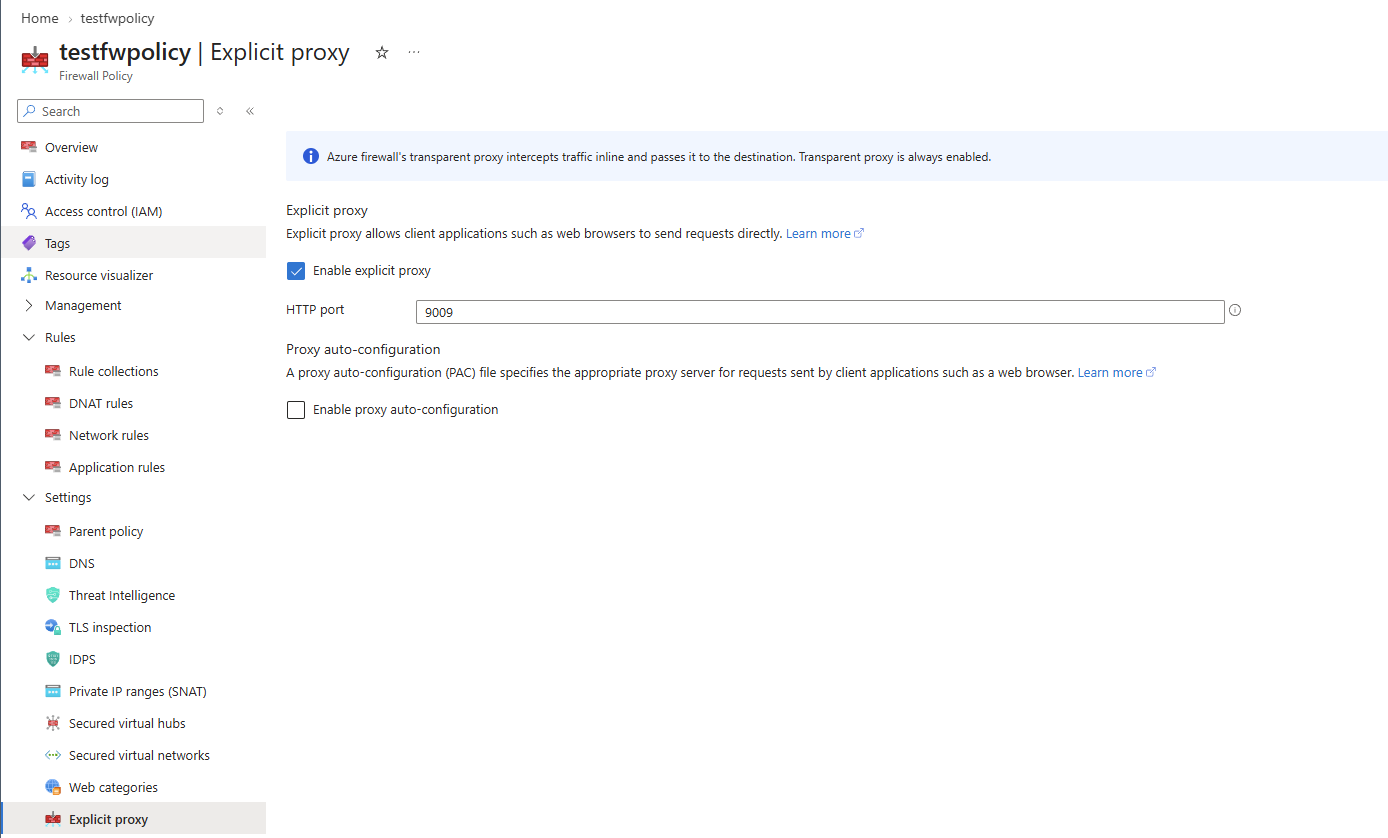
Enable explicit proxy in the Azure Firewall policy.
Note
You can use a single port HTTP Port for both HTTP and HTTPS traffic.
Create an application rule in the firewall policy to allow the traffic through the firewall.
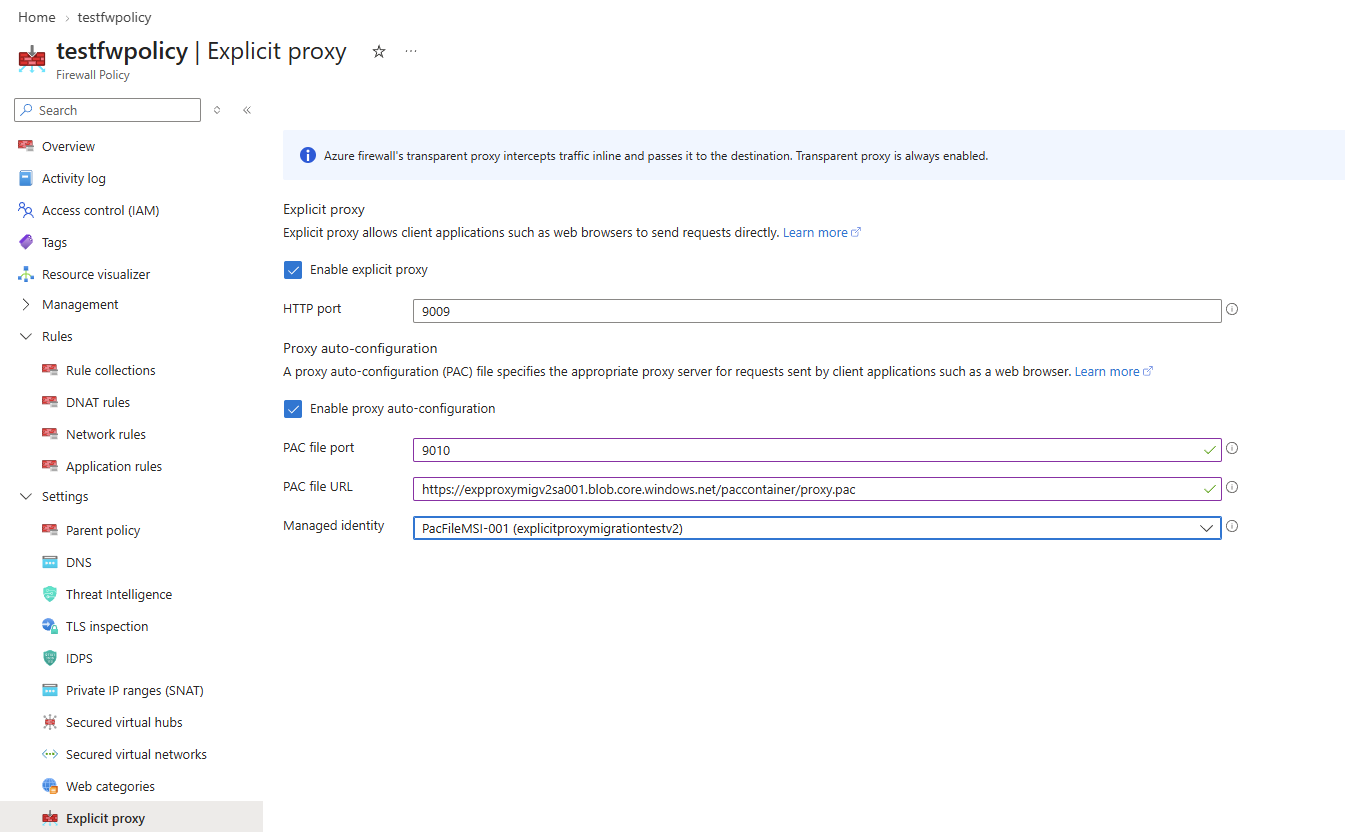
Select Enable proxy auto-configuration to use a proxy auto-configuration (PAC) file.
Generate a PAC File URL by following these steps:
- Create an Azure Storage container by following the steps in Manage blob containers.
Note
Use a subscription to which you have the required permissions to add roles.
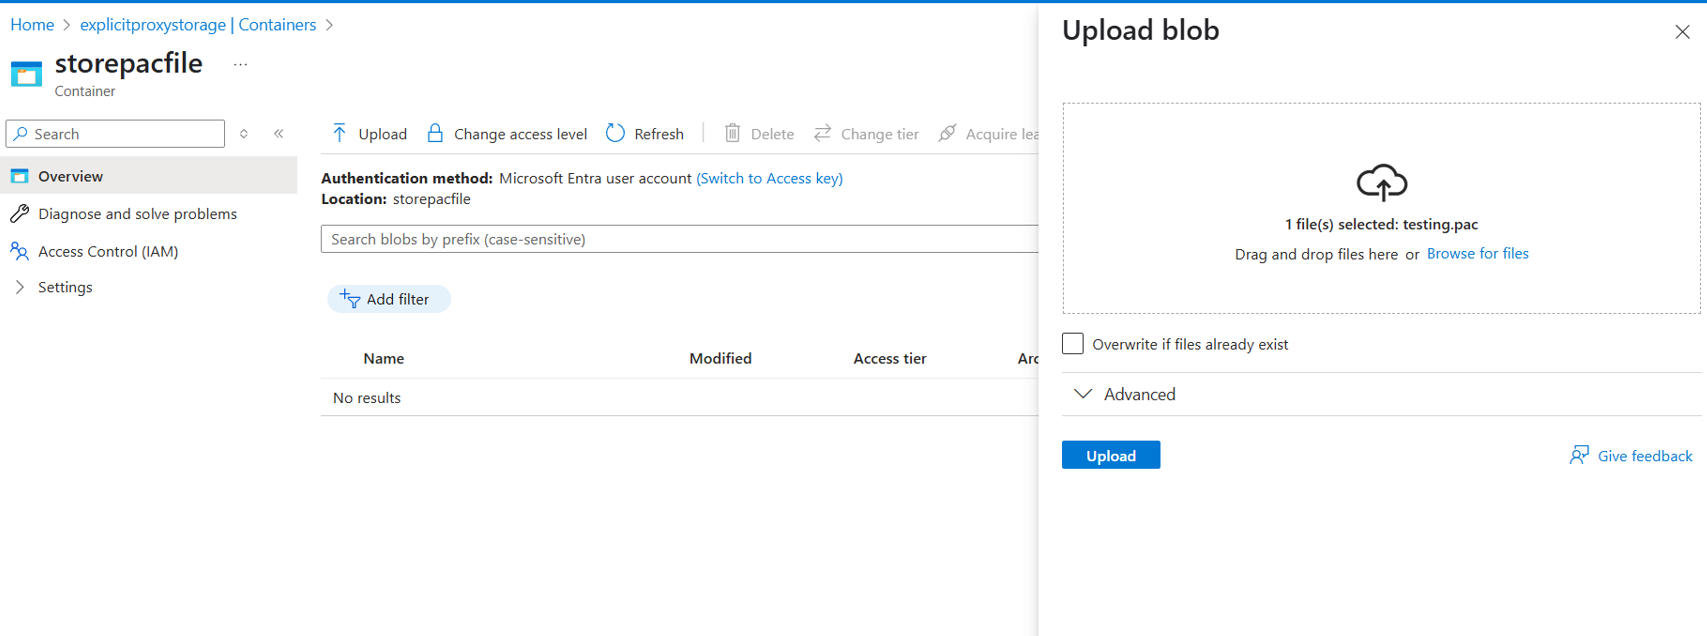
- Upload the PAC file to the storage container.
- Choose the uploaded file and copy the file URL. Example URL:
https://eproxypstestresources.blob.core.windows.net/explicitproxycontainer/proxy.pac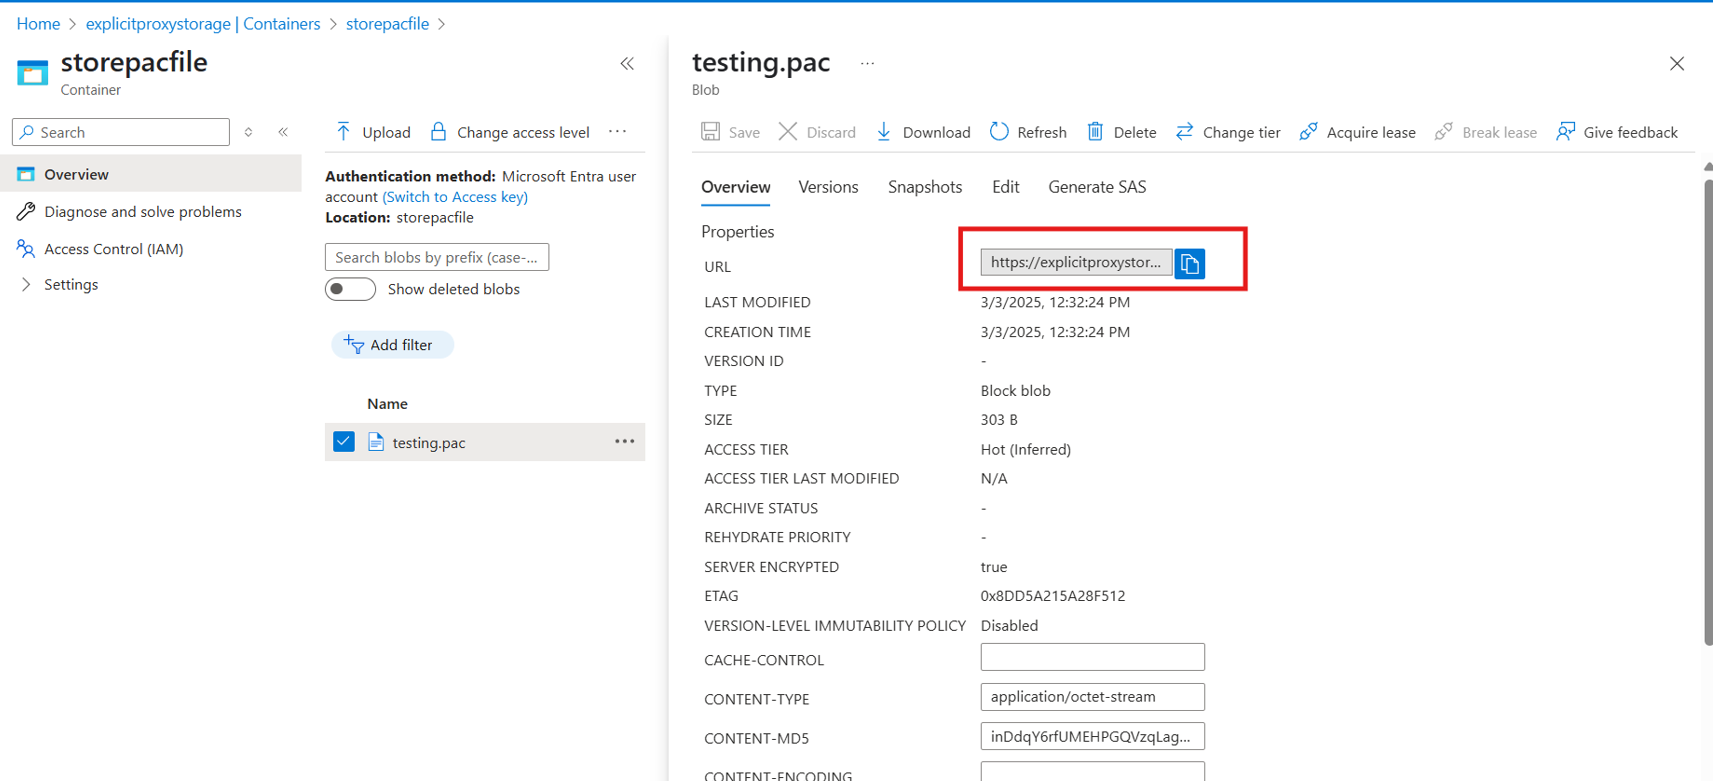
Create a Managed Identity and assign the required roles.
- Go to the Managed Identity resource and create a Managed Identity. For more information, see Manage user-assigned managed identities.
- Go to the storage account resource that you created and navigate to Access Control (IAM). Select Add to add the role assignment.
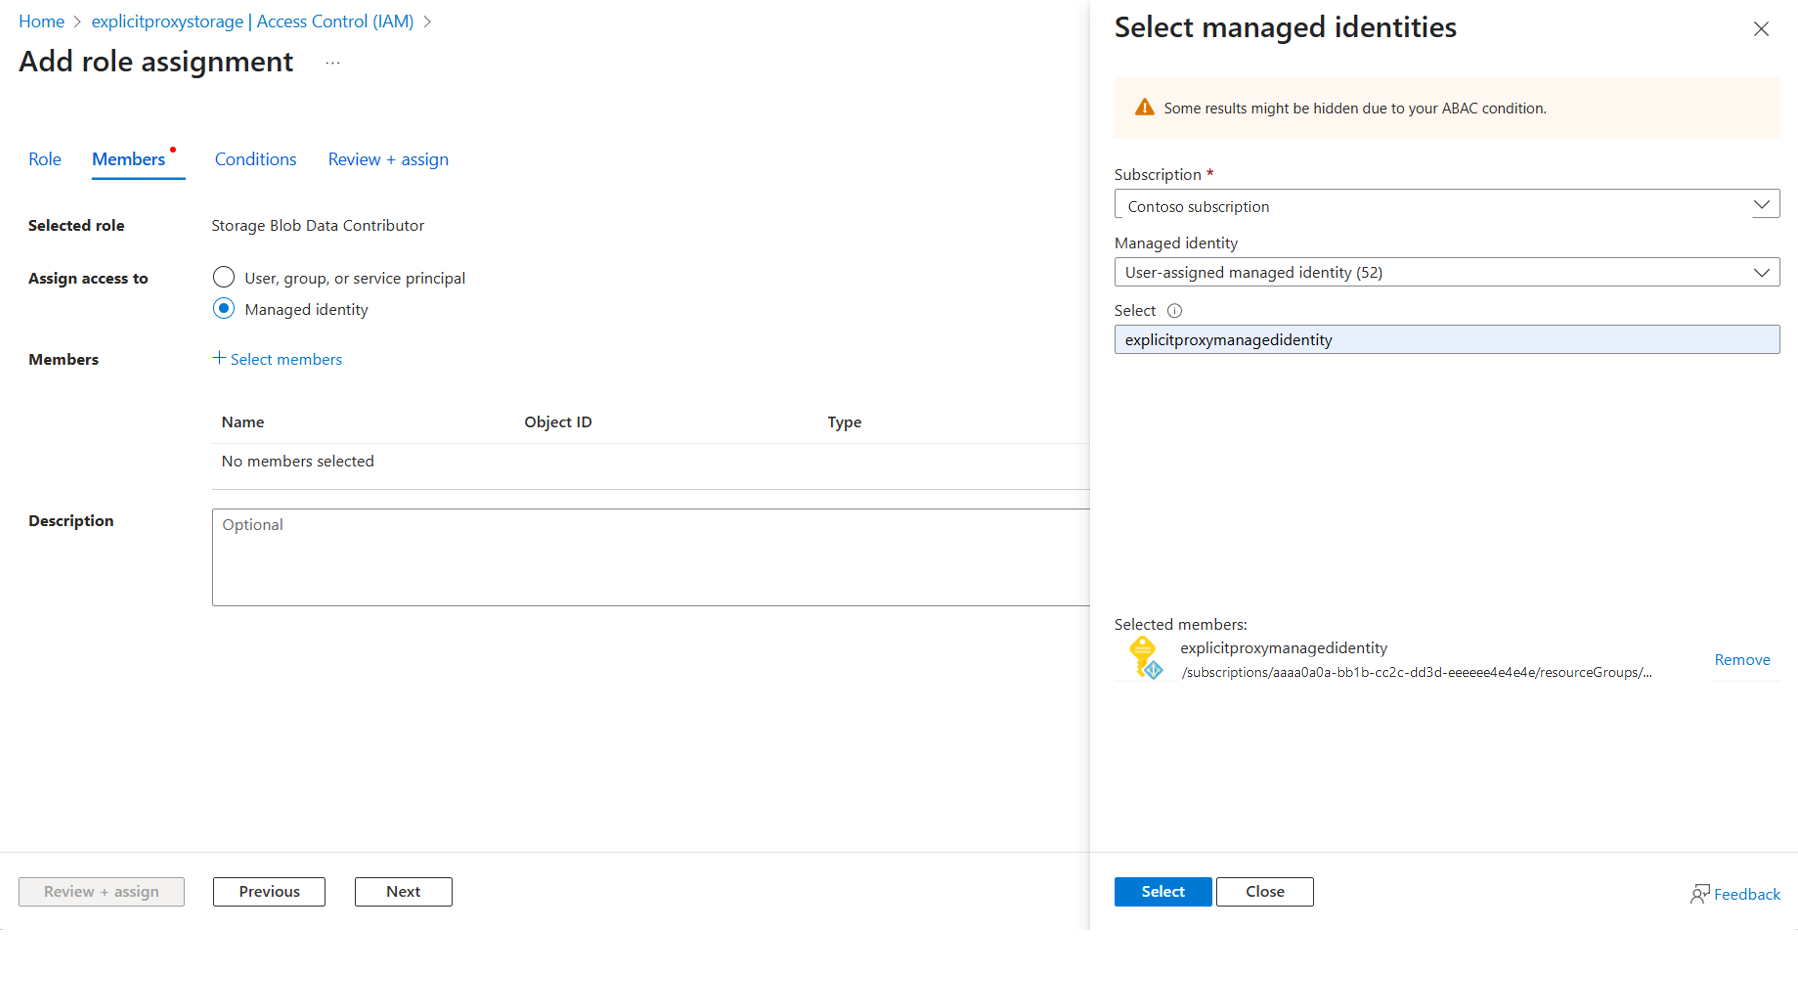
- Go to Add role assignment, search for Storage Blob Data Contributor and Storage Blob Data Reader, and select them.
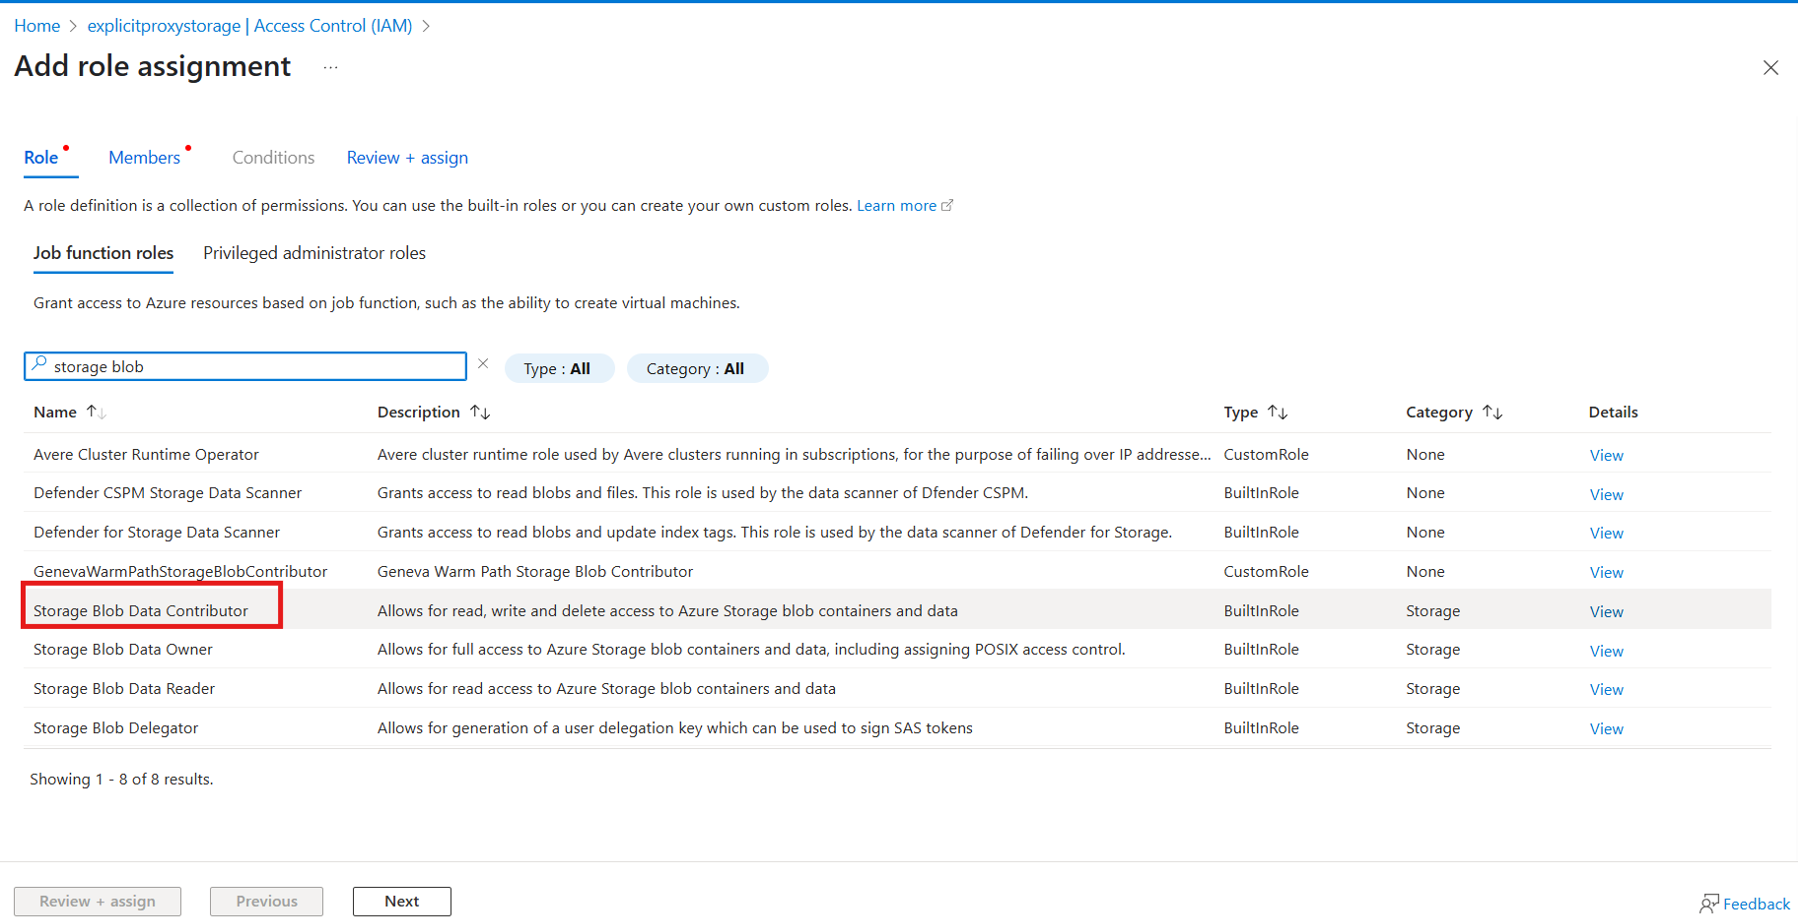
- Go to Members and select the Managed Identity. Review the changes and select Assign in Review+Assign.
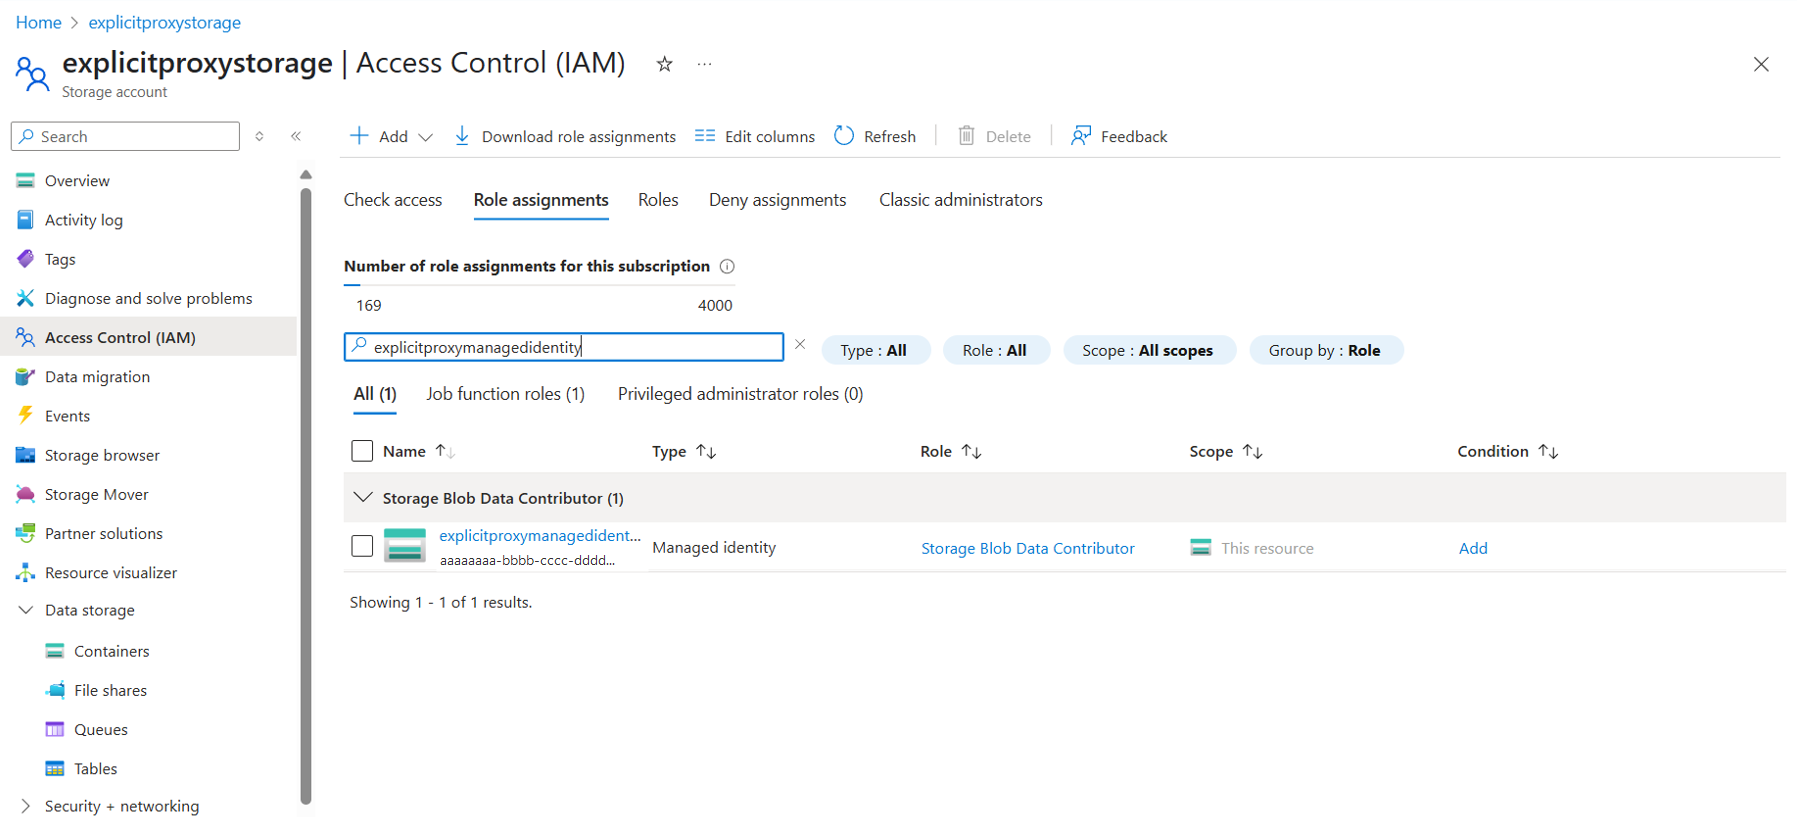
- Verify that your changes are reflected in Role Assignments by searching the managed identity.
Note
Make sure that the Managed Identity that you create has the prefix "PacFileMSI-".
After you have the PAC file URL and Managed Identity, you can enable the PAC file in the Explicit proxy configuration by providing the PAC file URL and selecting the Managed Identity that you created.
Governance and compliance
To ensure consistent configuration of explicit proxy settings across your Azure Firewall deployments, use Azure Policy definitions. The following policies are available to govern explicit proxy configurations:
- Enforce Explicit Proxy Configuration for Firewall Policies: Ensures that all Azure Firewall policies have explicit proxy configuration enabled.
- Enable PAC file configuration while using Explicit Proxy: Audits that when explicit proxy is enabled, the PAC (Proxy Auto-Configuration) file is also properly configured.
For more information about these policies and how to implement them, see Use Azure Policy to help secure your Azure Firewall deployments.
Next steps
- To learn how to use explicit proxy to reach Azure services from Azure Arc-enabled resources, see Access Azure services over Azure Firewall explicit proxy.
- To learn how to create the application rules that allow proxied traffic, see Azure Firewall policy rule sets.
- To learn how to govern explicit proxy settings, see Use Azure Policy to help secure your Azure Firewall deployments.
- To learn how to deploy an Azure Firewall, see Deploy and configure Azure Firewall by using Azure PowerShell.
- To learn more about explicit proxy, see Demystifying Explicit proxy: Enhancing Security with Azure Firewall.