Configure rule sets in Azure Front Door
This article shows how to create rule sets and your first set of rules using the Azure portal. You also learn how to associate a rule set to a route from the rule sets page or from Front Door manager.
Prerequisites
- Before you can configure rule sets, you must first create an Azure Front Door Standard or Premium. For more information, see create an Azure Front Door profile.
Configure Rule set in Azure portal
Go to your Azure Front Door profile, select Rule sets under Settings in the left side menu pane. Select + Add, then give rule set a name.
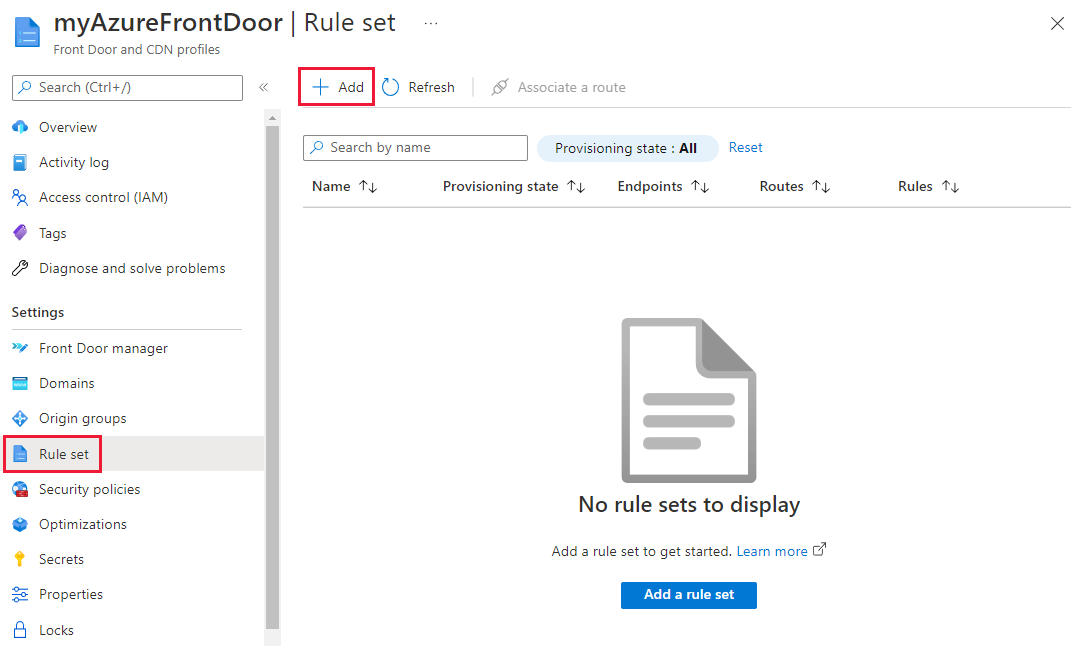
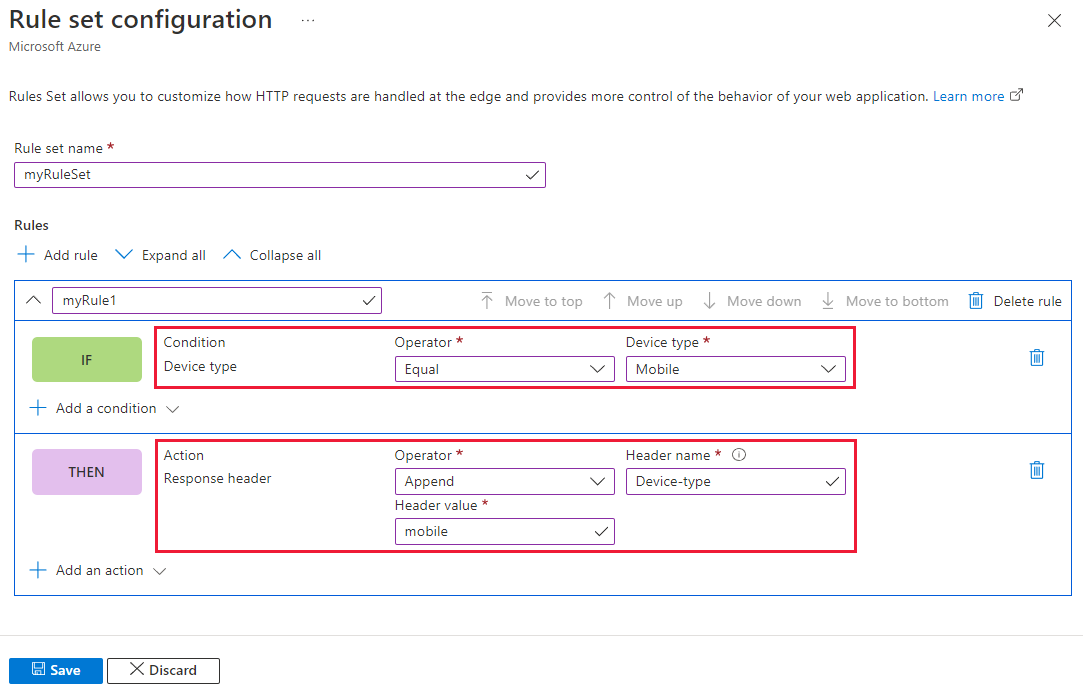
To create your first rule, give it rule name. Then select + Add condition and + Add action to define your rule. You can add up to 10 conditions and 5 actions for one rule. In this example, we use server variable to append "Device type" to the response header for requests that are coming in from a "Mobile" device type. For more information, see match conditions and actions.
Note
- To delete a condition or action from a rule, use the trash can on the right-hand side of the specific condition or action.
- To create a rule that applies to all incoming traffic, do not specify any conditions.
- To stop evaluating remaining rules if a specific rule is met, check Stop evaluating remaining rule. If this option is checked then all remaining rules in that Rule Set as well as all the remaining Rule Sets associated with the route will not be executed regardless of the matching conditions being met.
- All paths in Rules Engine are case sensitive.
- Header names should adhere to RFC 7230.
You can determine the priority of the rules within your Rule Set by using the arrow buttons to move the rules higher or lower in priority. The list is in ascending order, so the most important rule is listed first.
Tip
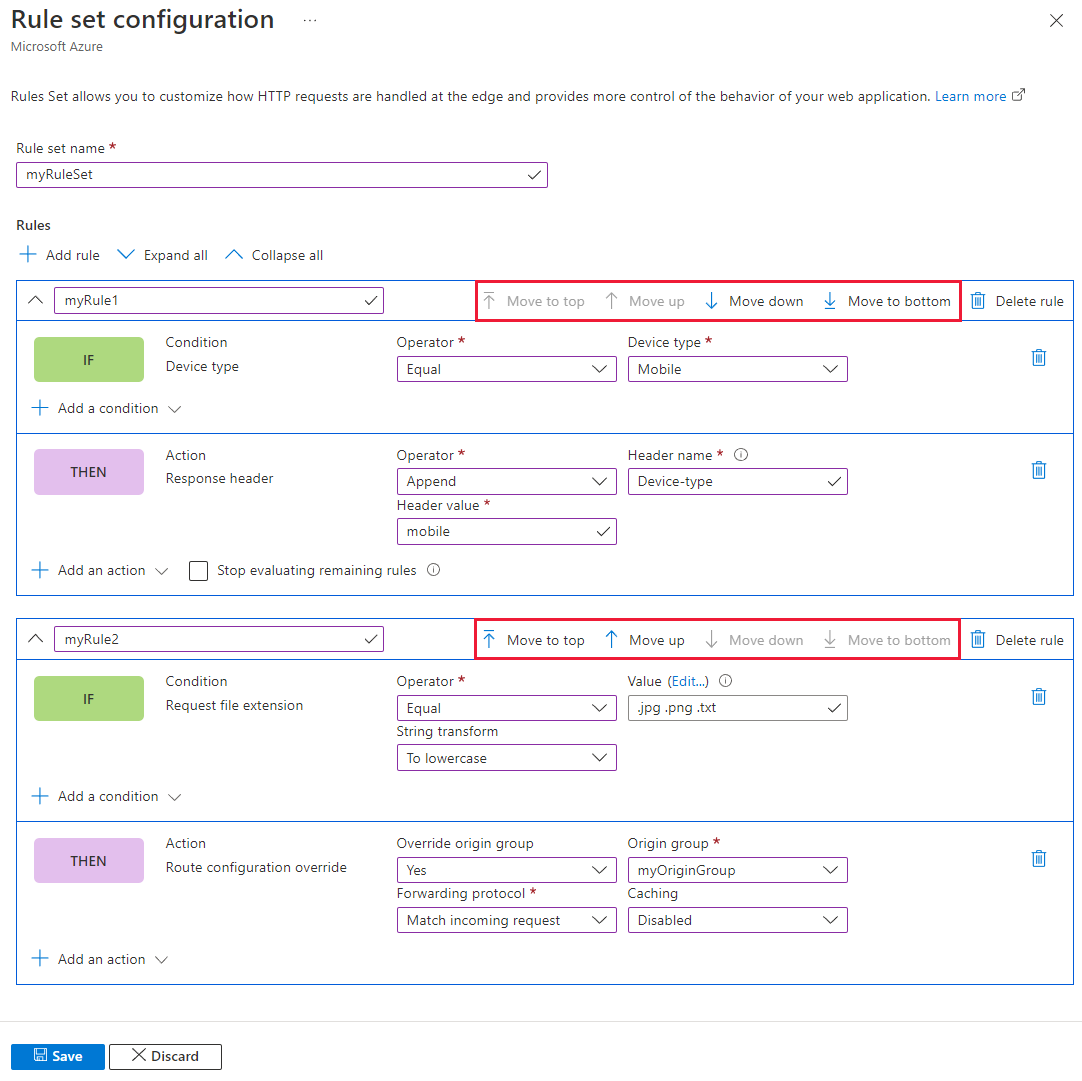
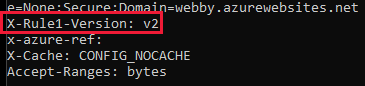
If you like to verify when the changes are propagated to Azure Front Door, you can create a custom response header in the rule using the following example. You can add a response header
_X-<RuleName>-Version_and change the value each time rule is updated. After the changes are updated, you can go to the URL to confirm the rule version being invoked:
Once you've created all the rules you need, select Save to complete the creation of your rule set.
Now you can associate the rule set to a route so it can take effect. You can associate the rule set on the Rule sets page or you can do so from the Front Door manager.
Rule set page:
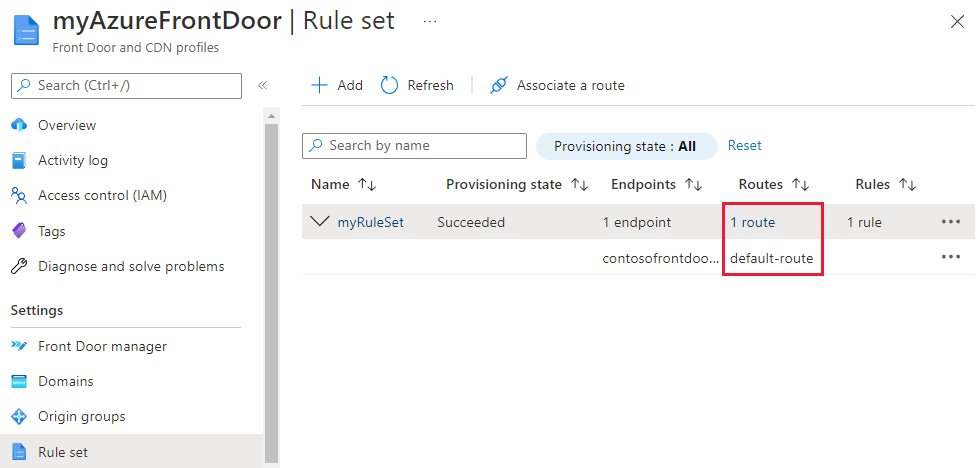
From the Rule set page, select the Unassociated link to associate the Rule set to a route.

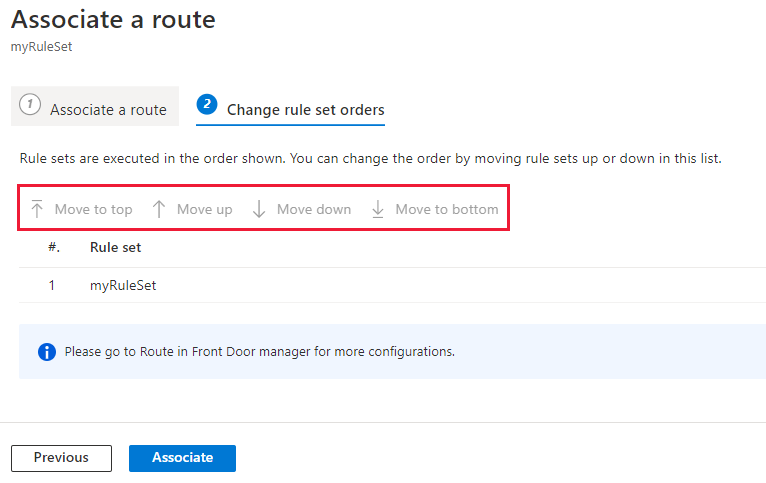
Then on the Associate a route page, select the endpoint and route you want to associate the rule set to.

Select Next to change the rule set order if you have multiple rule sets for the selected route. The rule set processes in the order listed. You can change orders by selecting the rule set and selecting the buttons at the top of the page. Select Associate to complete the route association.
Note
You can only associate one rule set with a single route on this page. To associate a rule set with another route, use the Front Door manager.
The rule set is now associated with a route. You can look at the response header and confirm that the Device Type is added.
Front Door manager:
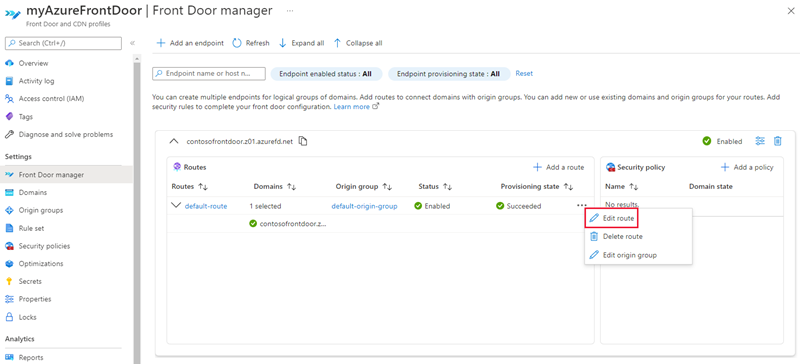
Go to the Front Door manager, select the ... next to the route you want to configure. Then select Edit route.
On the Update route page, under Rules, select rule sets you want to associate with the route from the dropdown. Then you can change the order of the rule sets.
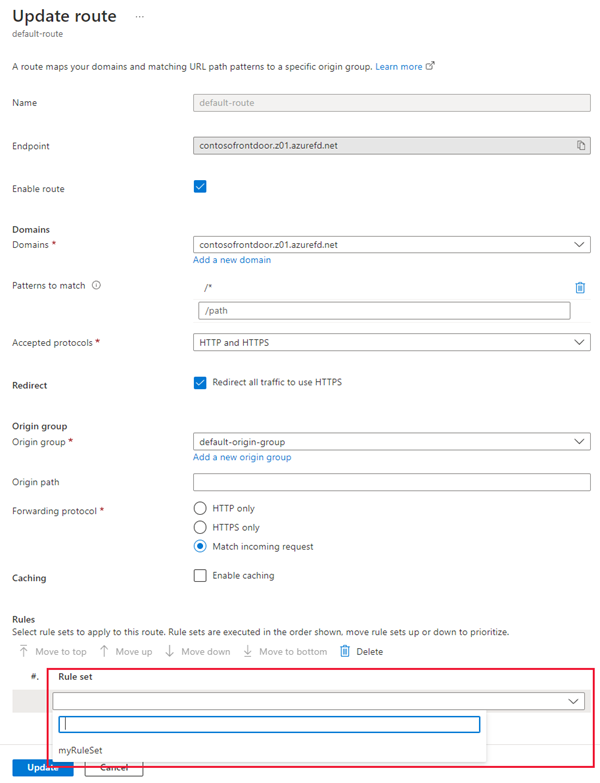
Select Update to save the route configuration.


Delete a rule set
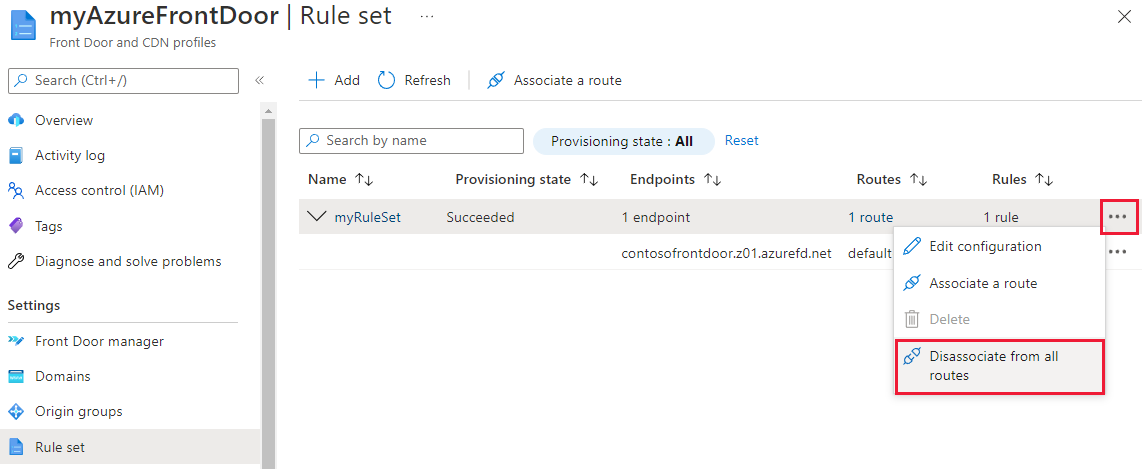
If you no longer want the Rule set in your Azure Front Door profile, you can remove the Rule set by completing the following steps:
Go to the Rule set page under Settings.
Select the ... next to the rule set you want to remove and then select Disassociate from all routes.
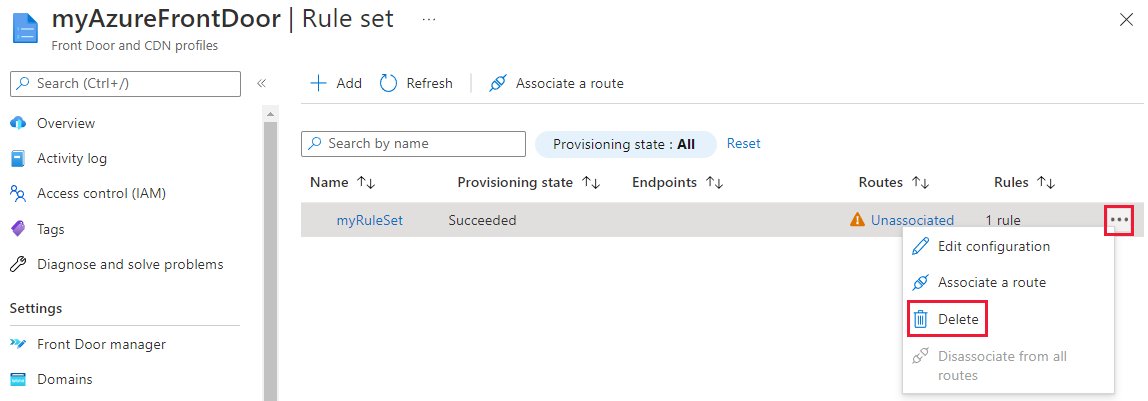
Once the rule set gets disassociated, you can select the ... again. Select Delete and then select Yes to confirm deletion of the rule set.
Repeat steps 2 and 3 to remove any other rule set you have in the Azure Front Door profile.
Next steps
Learn how to add Security headers with rules Set.