Note
Access to this page requires authorization. You can try signing in or changing directories.
Access to this page requires authorization. You can try changing directories.
After you create storage targets, you must also create namespace paths for them. Client machines use these virtual paths to access files through the cache instead of connecting to the back-end storage directly. This system lets cache administrators change back-end storage systems without having to rewrite client instructions.
Read Plan the aggregated namespace to learn more about this feature.
The Namespace page in the Azure portal shows the paths that clients use to access your data through the cache. Use this page to create, remove, or change namespace paths. You also can configure namespace paths by using the Azure CLI.
All of the client-facing paths that have been defined for this cache are listed on the Namespace page. Storage targets that don't have any namespace paths defined yet don't appear in the table.
You can sort the table columns to better understand your cache's aggregated namespace. Click the arrows in the column headers to sort the paths.

Add or edit namespace paths
You must create at least one namespace path before clients can access the storage target. (Read Mount the Azure HPC Cache for more about client access.)
If you recently added a storage target or customized an access policy, it might take a minute or two before you can create a namespace path.
Blob namespace paths
An Azure Blob storage target can have only one namespace path.
Follow the instructions below to set or change the path with the Azure portal or Azure CLI.
From the Azure portal, load the Namespace settings page. You can add, change, or delete namespace paths from this page.
Add a new path: Click the + Add button at the top and fill in information in the edit panel.

Enter the path clients will use to access this storage target.
Select which access policy to use for this path. Learn more about customizing client access in Use client access policies.
Select the storage target from the drop-down list. If a blob storage target already has a namespace path, it can't be selected.
For an Azure Blob storage target, the export and subdirectory paths are automatically set to
/.
Change an existing path: Click the namespace path. The edit panel opens. You can modify the path and the access policy, but you can't change to a different storage target.
Delete a namespace path: Select the checkbox to the left of the path and click the Delete button.
NFS namespace paths
An NFS storage target can have multiple virtual paths, as long as each path represents a different export or subdirectory on the same storage system.
When planning your namespace for an NFS storage target, keep in mind that each path must be unique, and can't be a subdirectory of another namespace path. For example, if you have a namespace path that is called /parent-a, you can't also create namespace paths like /parent-a/user1 and /parent-a/user2. Those directory paths are already accessible in the namespace as subdirectories of /parent-a.
All of the namespace paths for an NFS storage system are created on one storage target.
For each NFS namespace path, provide the client-facing path, the storage system export, and optionally an export subdirectory.
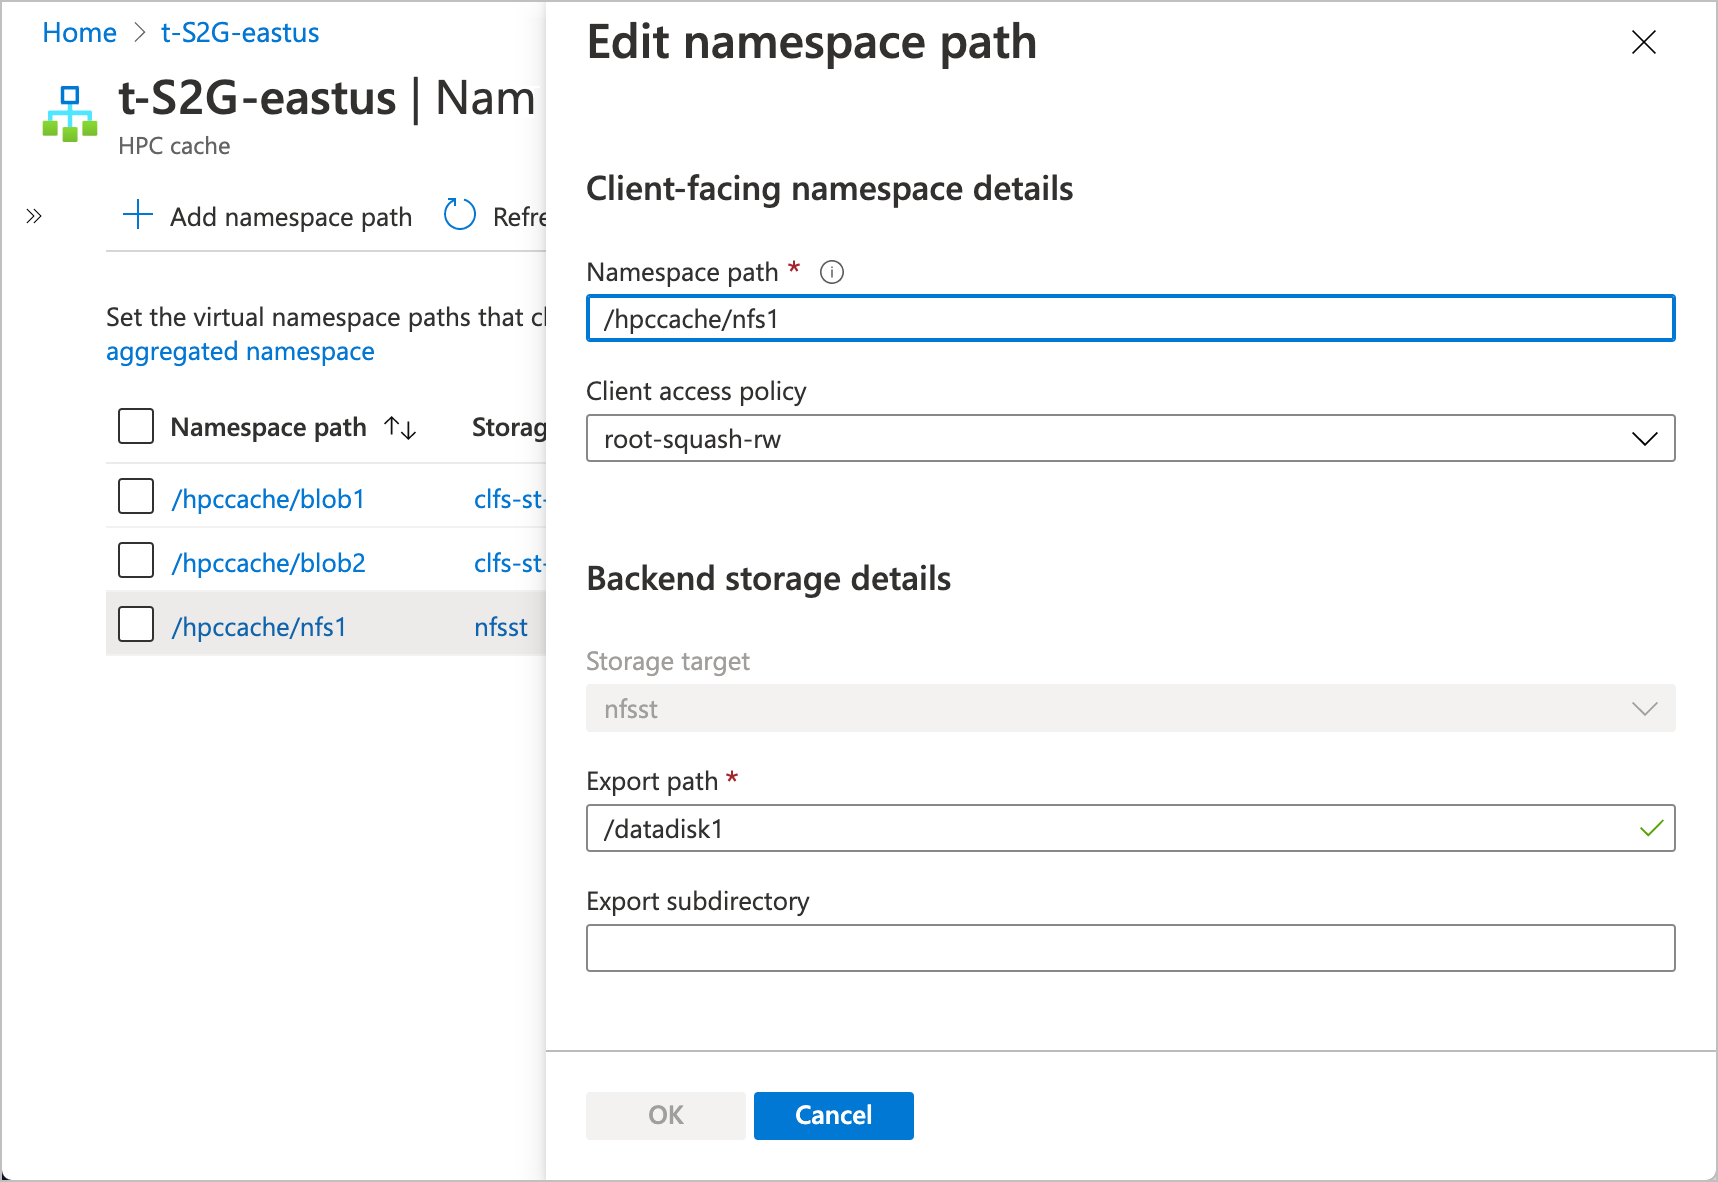
From the Azure portal, load the Namespace settings page. You can add, edit, or delete namespace paths from this page.
- To add a new path: Click the + Add button at the top and fill in information in the edit panel.
- To change an existing path: Click the namespace path. The edit panel opens and you can modify the path.
- To delete a namespace path: Select the checkbox to the left of the path and click the Delete button.
Fill in these values for each namespace path:
Namespace path - The client-facing file path.
Client access policy - Select which access policy to use for this path. Learn more about customizing client access in Use client access policies.
Storage target - If creating a new namespace path, select a storage target from the drop-down menu.
Export path - Enter the path to the NFS export. Make sure to type the export name correctly - the portal validates the syntax for this field but does not check the export until you submit the change.
Export subdirectory - If you want this path to mount a specific subdirectory of the export, enter it here. If not, leave this field blank.
ADLS-NFS namespace paths
Like a regular blob storage target, an ADLS-NFS storage target only has one export, so it can only have one namespace path.
Follow the instructions below to set or change the path with the Azure portal.
Load the Namespace settings page.
Add a new path: Click the + Add button at the top and fill in information in the edit panel.
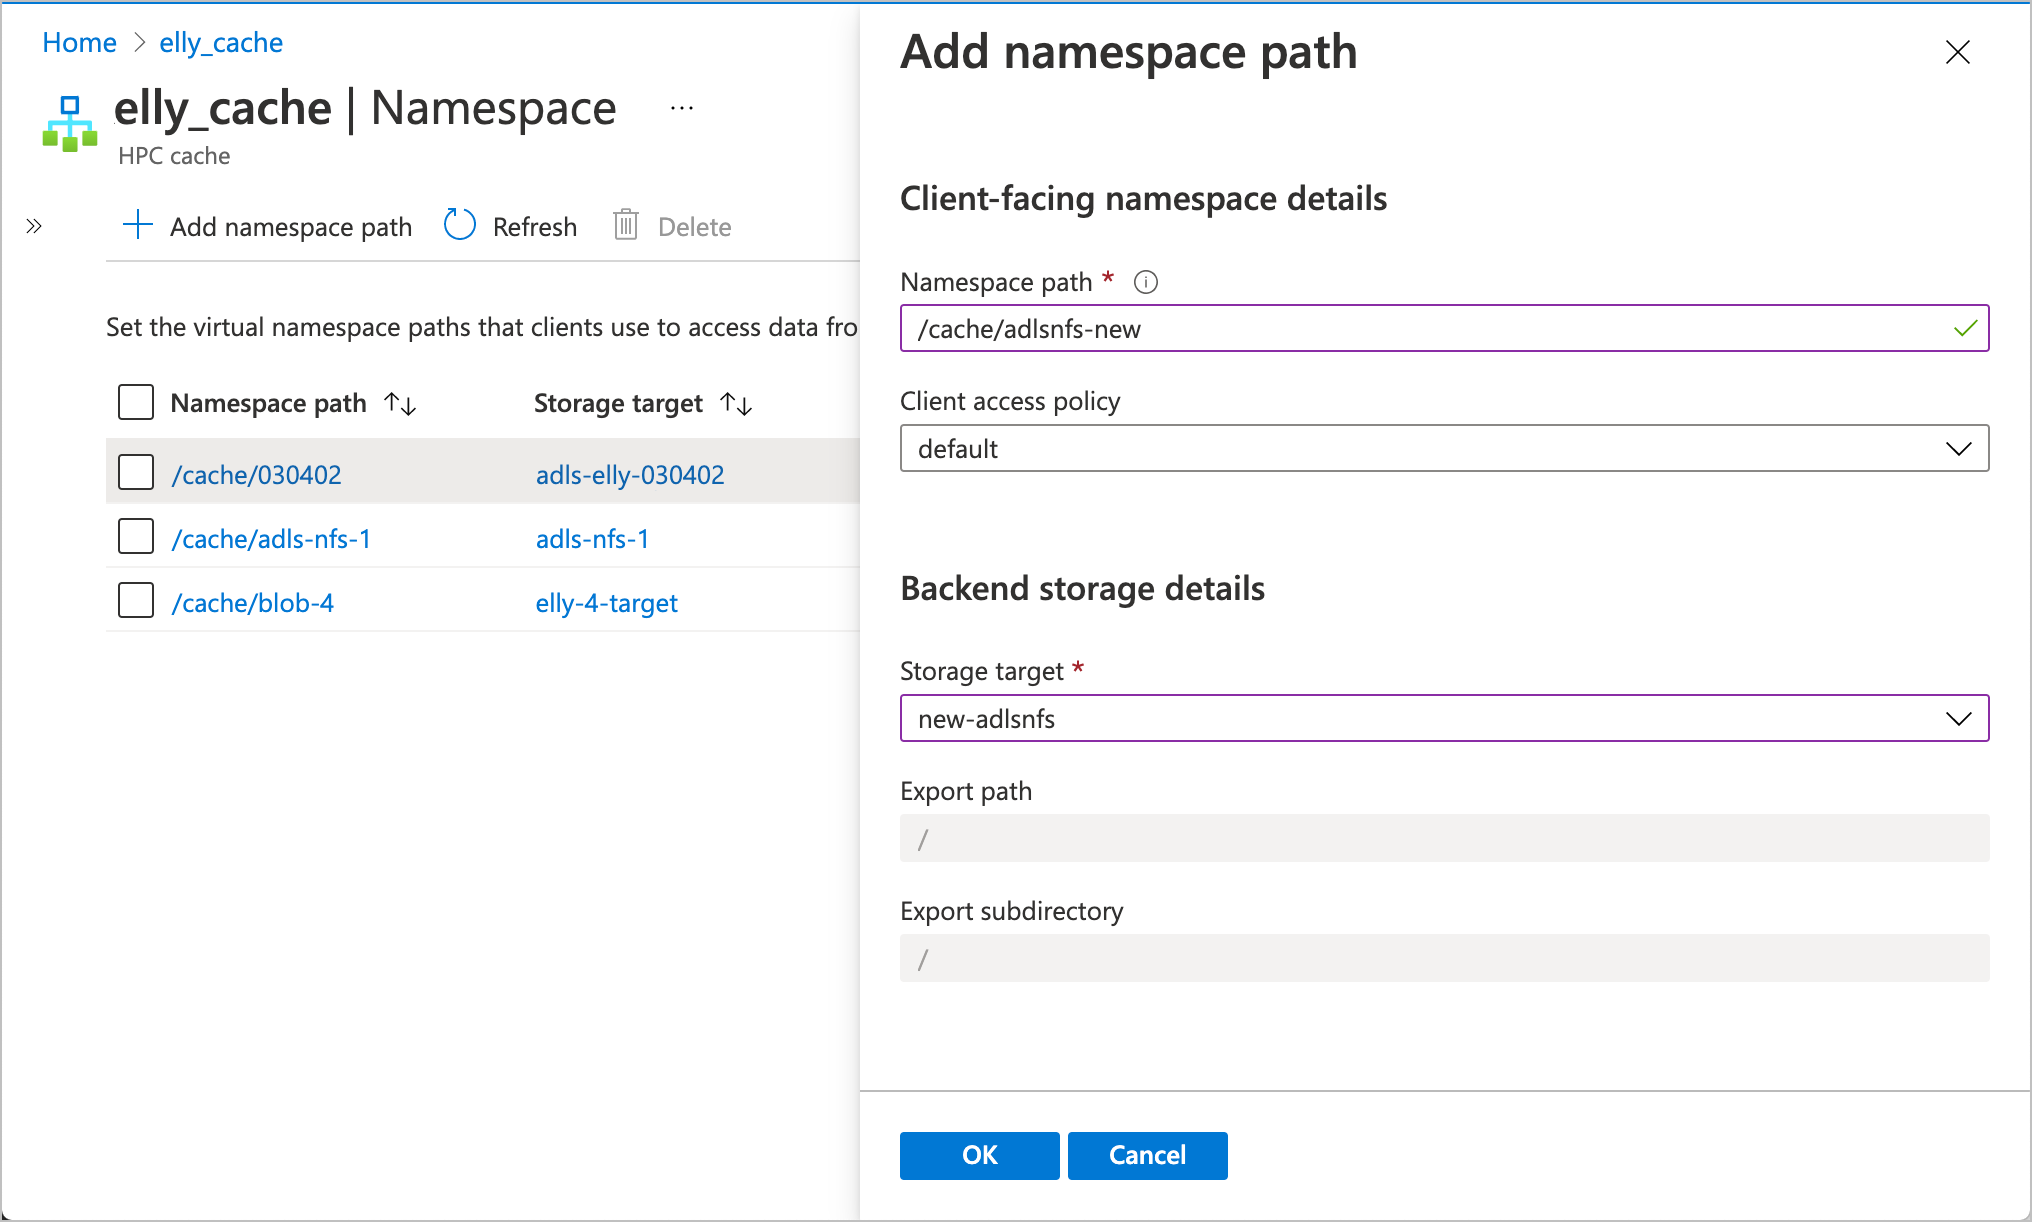
Enter the path clients will use to access this storage target.
Select which access policy to use for this path. Learn more about customizing client access in Use client access policies.
Select the storage target from the drop-down list. If an ADLS-NFS storage target already has a namespace path, it can't be selected.
For an ADLS-NFS storage target, the export and subdirectory paths are automatically set to
/.
Change an existing path: Click the namespace path. The edit panel opens. You can modify the path and the access policy, but you can't change to a different storage target.
Delete a namespace path: Select the checkbox to the left of the path and click the Delete button.
Next steps
After creating the aggregated namespace for your storage targets, you can mount clients on the cache. Read these articles to learn more.