Continuous integration and continuous deployment to Azure IoT Edge devices
Applies to: ![]() IoT Edge 1.5
IoT Edge 1.5 ![]() IoT Edge 1.4
IoT Edge 1.4
Important
IoT Edge 1.5 LTS and IoT Edge 1.4 LTS are supported releases. IoT Edge 1.4 LTS is end of life on November 12, 2024. If you are on an earlier release, see Update IoT Edge.
You can easily adopt DevOps with your Azure IoT Edge applications with the built-in Azure IoT Edge tasks in Azure Pipelines. This article demonstrates how you can use Azure Pipelines to build, test, and deploy Azure IoT Edge modules using YAML. Alternatively, you can use the classic editor.
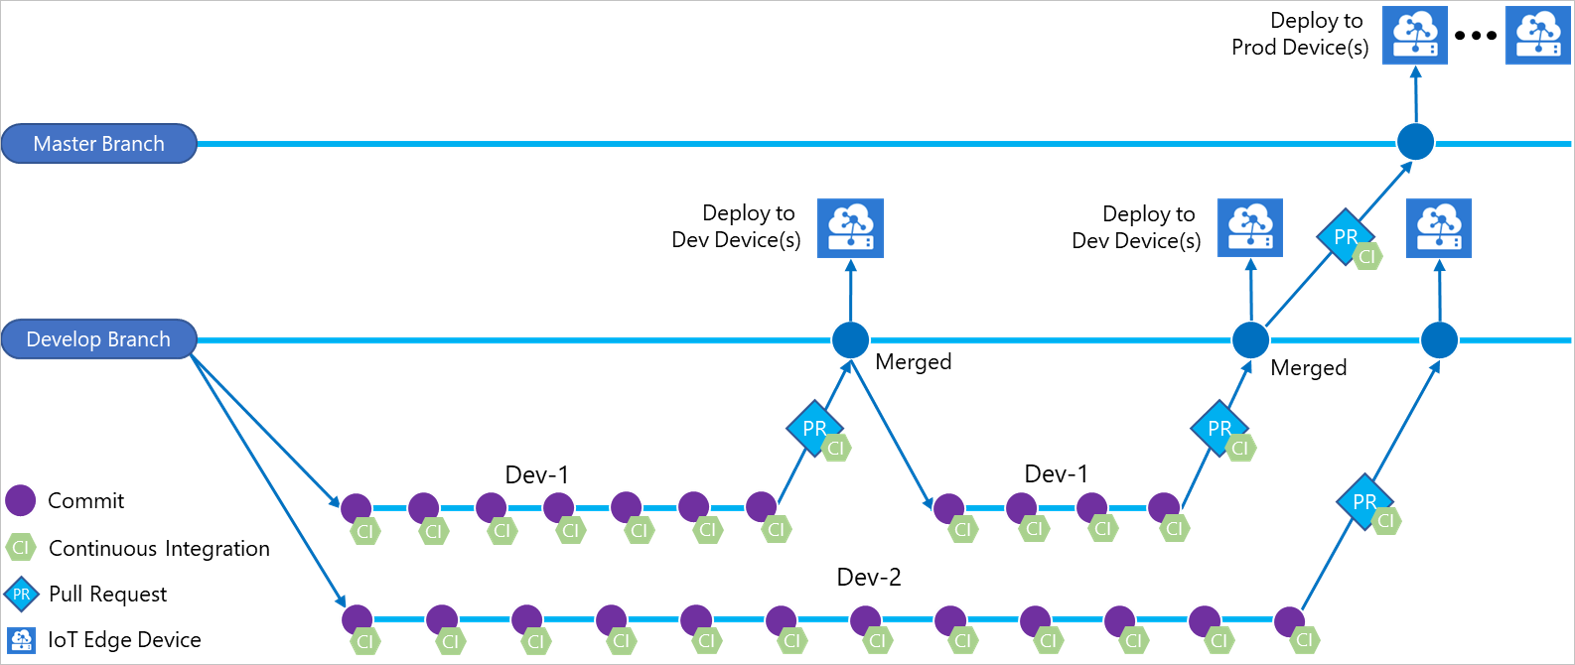
In this article, you learn how to use the built-in Azure IoT Edge tasks for Azure Pipelines to create build and release pipelines for your IoT Edge solution. Each Azure IoT Edge task added to your pipeline implements one of the following four actions:
| Action | Description |
|---|---|
| Build module images | Takes your IoT Edge solution code and builds the container images. |
| Push module images | Pushes module images to the container registry you specified. |
| Generate deployment manifest | Takes a deployment.template.json file and the variables, then generates the final IoT Edge deployment manifest file. |
| Deploy to IoT Edge devices | Creates IoT Edge deployments to one or more IoT Edge devices. |
Unless otherwise specified, the procedures in this article do not explore all the functionality available through task parameters. For more information, see the following resources:
Prerequisites
An Azure Repos repository. If you don't have one, you can Create a new Git repo in your project. For this article, we created a repository called IoTEdgeRepo.
An IoT Edge solution committed and pushed to your repository. If you want to create a new sample solution for testing this article, follow the steps in Develop Azure IoT Edge modules using Visual Studio Code. For this article, we created a solution in our repository called IoTEdgeSolution, which has the code for a module named filtermodule.
For this article, all you need is the solution folder created by the IoT Edge templates in either Visual Studio Code or Visual Studio. You don't need to build, push, deploy, or debug this code before proceeding. You'll set up those processes in Azure Pipelines.
Know the path to the deployment.template.json file in your solution, which is used in several steps. If you're unfamiliar with the role of the deployment template, see Learn how to deploy modules and establish routes.
Tip
If you're creating a new solution, clone your repository locally first. Then, when you create the solution you can choose to create it directly in the repository folder. You can easily commit and push the new files from there.
A container registry where you can push module images. You can use Azure Container Registry or a third-party registry.
An active Azure IoT hub with at least two IoT Edge devices for testing the separate test and production deployment stages. You can follow the quickstart articles to create an IoT Edge device on Linux or Windows
For more information about using Azure Repos, see Share your code with Visual Studio and Azure Repos.
Create a build pipeline for continuous integration
In this section, you create a new build pipeline. You configure the pipeline to run automatically when you check in any changes to the sample IoT Edge solution and to publish build logs.
Sign in to your Azure DevOps organization (
https://dev.azure.com/{your organization}) and open the project that contains your IoT Edge solution repository.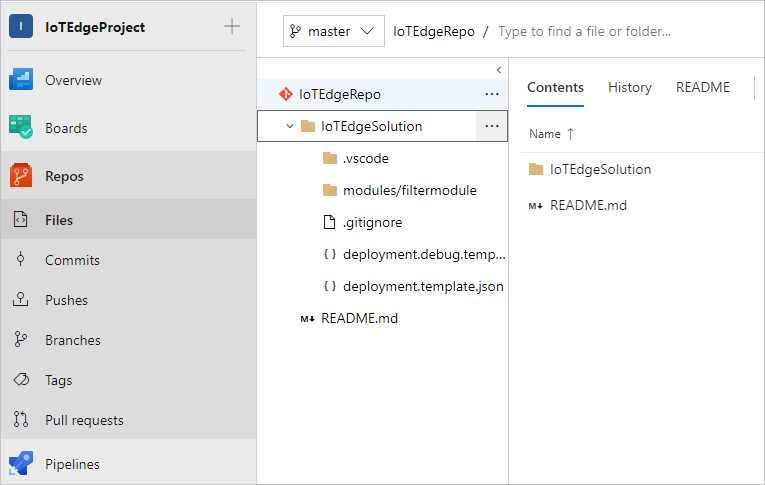
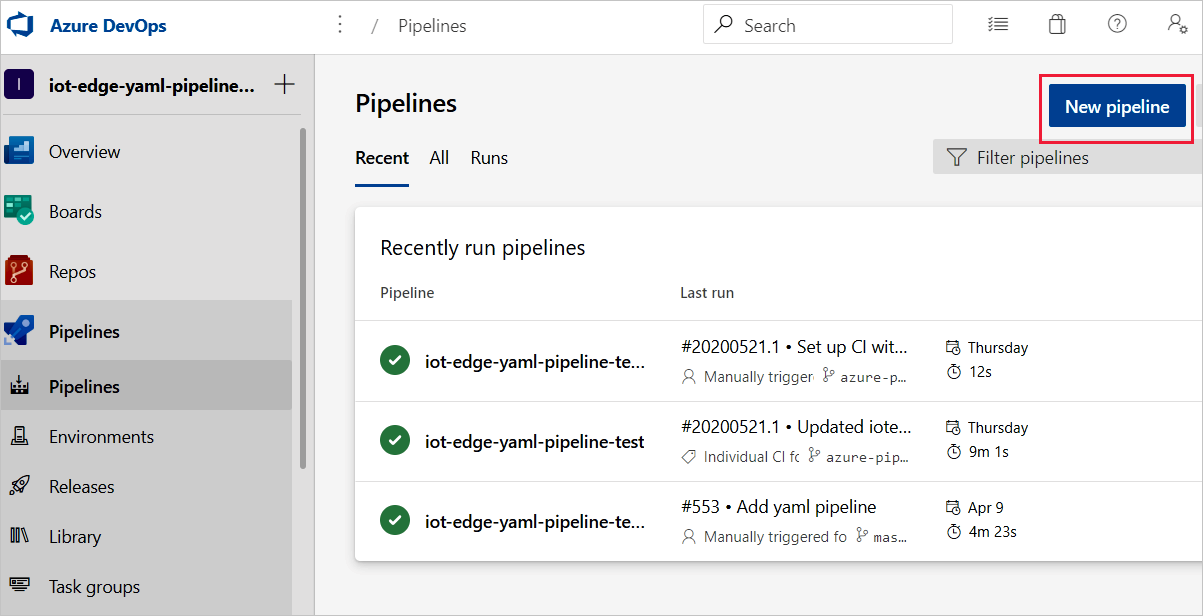
From the left pane menu in your project, select Pipelines. Select Create Pipeline at the center of the page. Or, if you already have build pipelines, select the New pipeline button in the top right.
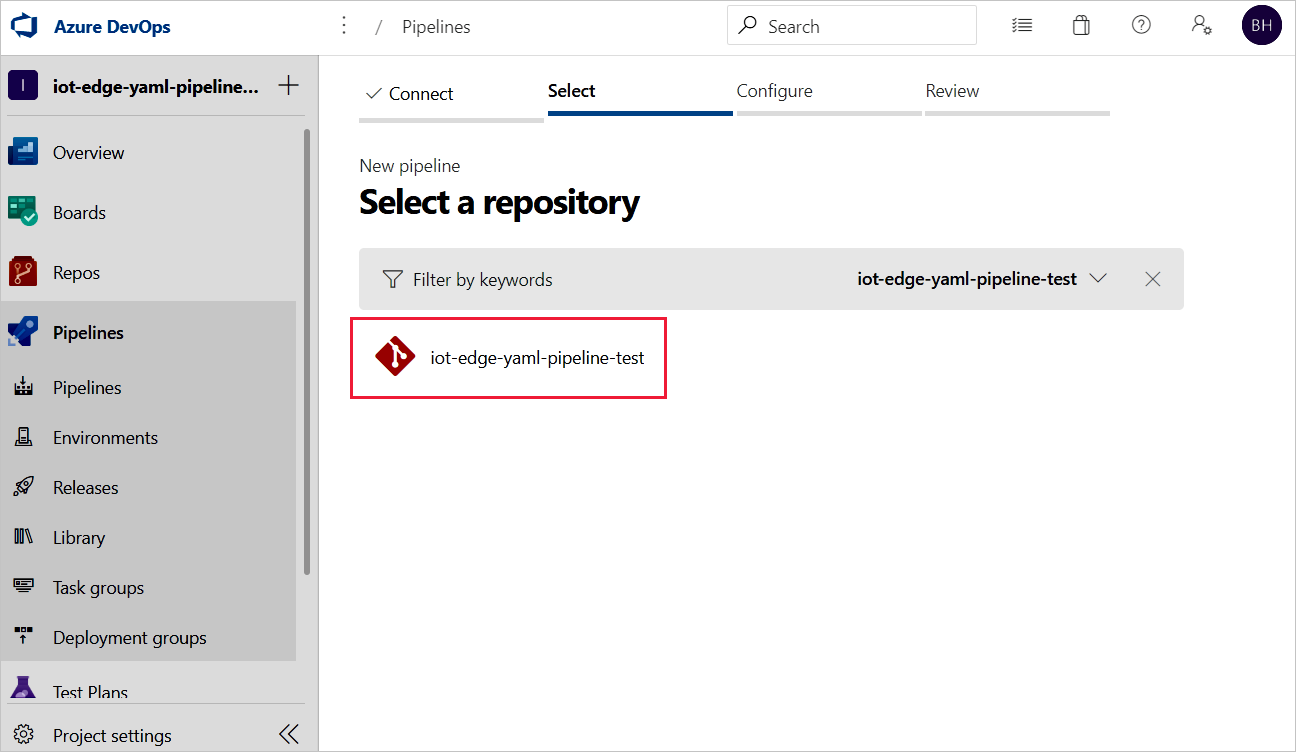
On the Where is your code? page, select Azure Repos Git
YAML. If you wish to use the classic editor to create your project's build pipelines, see the classic editor guide.Select the repository you are creating a pipeline for.
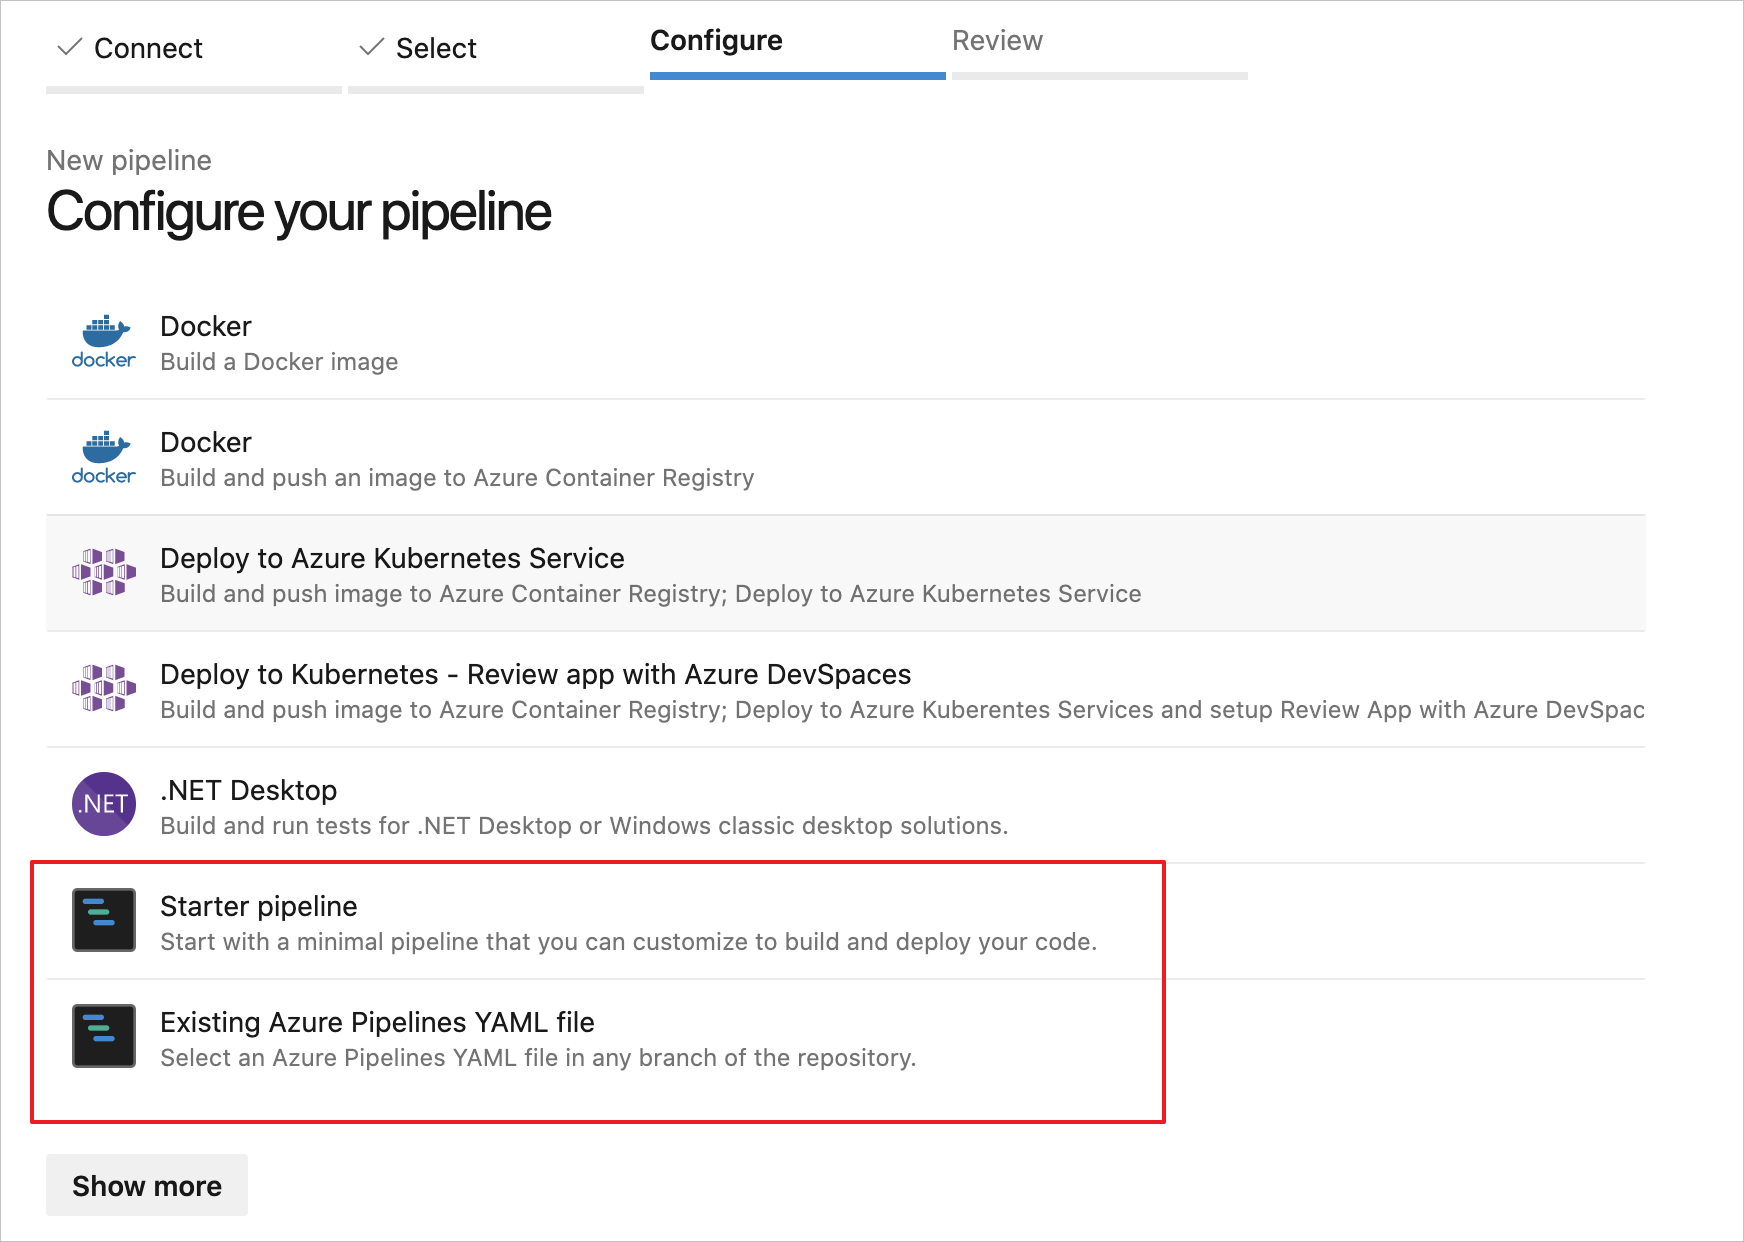
On the Configure your pipeline page, select Starter pipeline. If you have a preexisting Azure Pipelines YAML file you wish to use to create this pipeline, you can select Existing Azure Pipelines YAML file and provide the branch and path in the repository to the file.
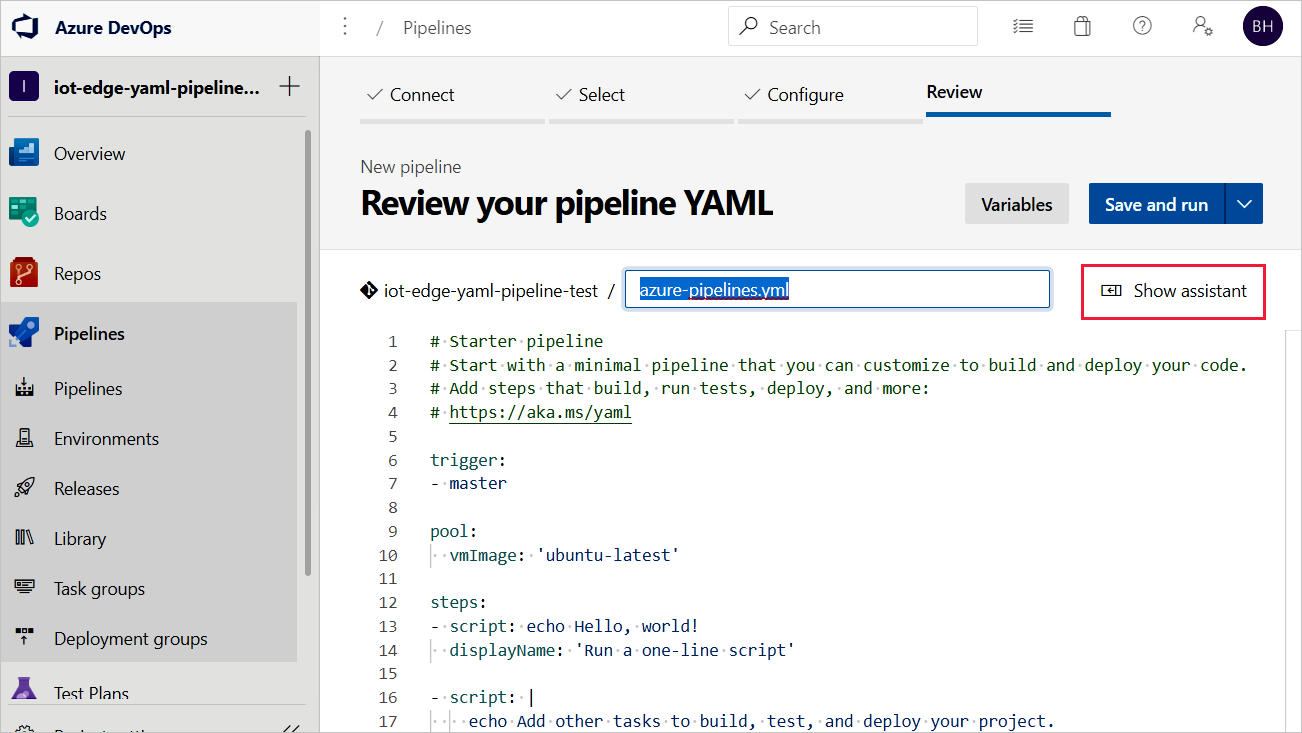
On the Review your pipeline YAML page, you can select the default name
azure-pipelines.ymlto rename your pipeline's configuration file.Select Show assistant to open the Tasks palette.
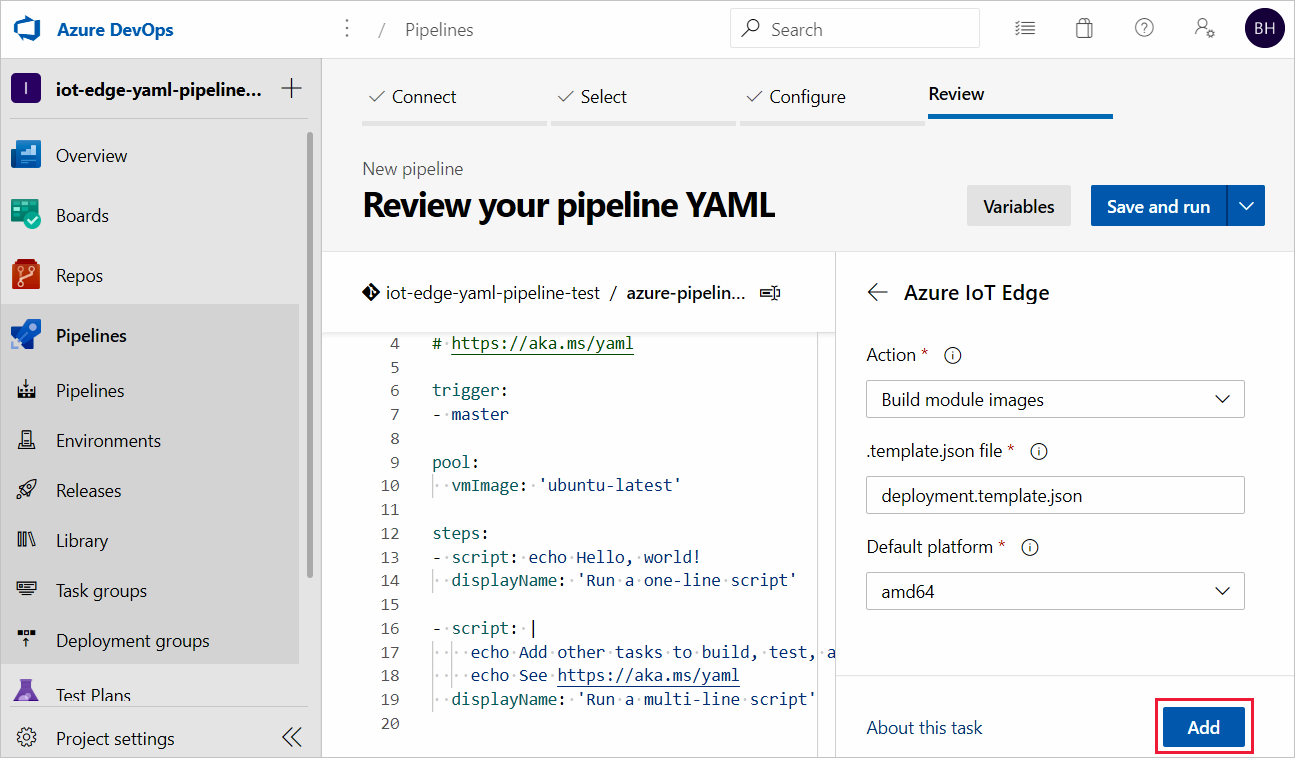
To add a task, place your cursor at the end of the YAML or wherever you want the instructions for your task to be added. Search for and select Azure IoT Edge. Fill out the task's parameters as follows. Then, select Add.
Parameter Description Action Select Build module images. .template.json file Provide the path to the deployment.template.json file in the repository that contains your IoT Edge solution. Default platform Select the appropriate operating system for your modules based on your targeted IoT Edge device. For more information about this task and its parameters, see Azure IoT Edge task.
Tip
After each task is added, the editor will automatically highlight the added lines. To prevent accidental overwriting, deselect the lines and provide a new space for your next task before adding additional tasks.
Repeat this process to add three more tasks with the following parameters:
Task: Azure IoT Edge
Parameter Description Action Select Push module images. Container registry type Use the default type: Azure Container Registry. Azure subscription Select your subscription. Azure Container Registry Choose the registry that you want to use for the pipeline. .template.json file Provide the path to the deployment.template.json file in the repository that contains your IoT Edge solution. Default platform Select the appropriate operating system for your modules based on your targeted IoT Edge device. For more information about this task and its parameters, see Azure IoT Edge task.
Task: Copy Files
Parameter Description Source Folder The source folder to copy from. Empty is the root of the repo. Use variables if files are not in the repo. Example: $(agent.builddirectory).Contents Add two lines: deployment.template.jsonand**/module.json.Target Folder Specify the variable $(Build.ArtifactStagingDirectory). See Build variables to learn about the description.For more information about this task and its parameters, see Copy files task.
Task: Publish Build Artifacts
Parameter Description Path to publish Specify the variable $(Build.ArtifactStagingDirectory). See Build variables to learn about the description.Artifact name Specify the default name: dropArtifact publish location Use the default location: Azure PipelinesFor more information about this task and its parameters, see Publish build artifacts task.
Select Save from the Save and run dropdown in the top right.
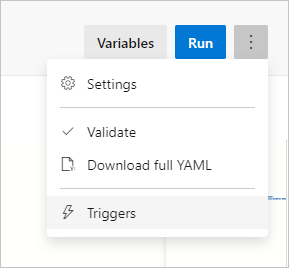
The trigger for continuous integration is enabled by default for your YAML pipeline. If you wish to edit these settings, select your pipeline and select Edit in the top right. Select More actions next to the Run button in the top right and go to Triggers. Continuous integration shows as enabled under your pipeline's name. If you wish to see the details for the trigger, check the Override the YAML continuous integration trigger from here box.
Continue to the next section to build the release pipeline.
Create a release pipeline for continuous deployment
In this section, you create a release pipeline that is configured to run automatically when your build pipeline drops artifacts, and it shows deployment logs in Azure Pipelines.
Create a new pipeline, and add a new stage:
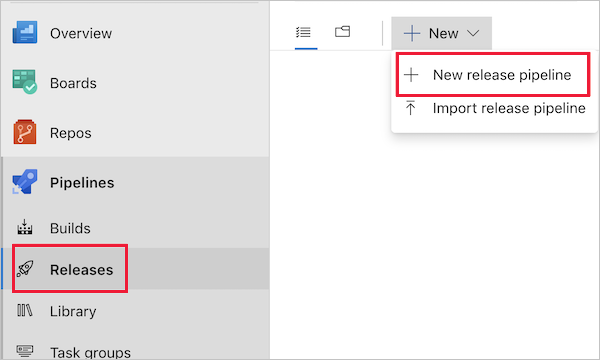
In the Releases tab under Pipelines, choose + New pipeline. Or, if you already have release pipelines, choose the + New button and select + New release pipeline.
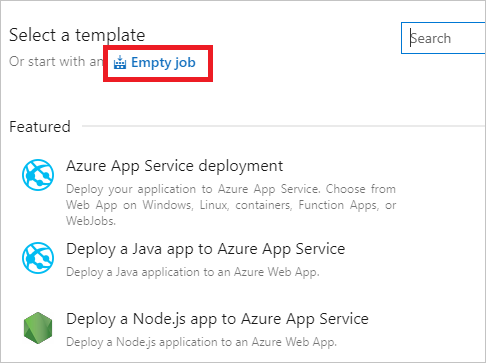
When prompted to select a template, choose to start with an Empty job.
Your new release pipeline initializes with one stage, called Stage 1. Rename Stage 1 to dev and treat it as a continuous deployment pipeline for your development environment. Usually, continuous deployment pipelines have multiple stages including dev, staging, and prod. You can use different names and create more based on your DevOps practice. Close the stage details window once it's renamed.
You can also rename your release pipeline by selecting the "New release pipeline" text at the top.
Link the release to the build artifacts that are published by the build pipeline. Select Add in artifacts area.

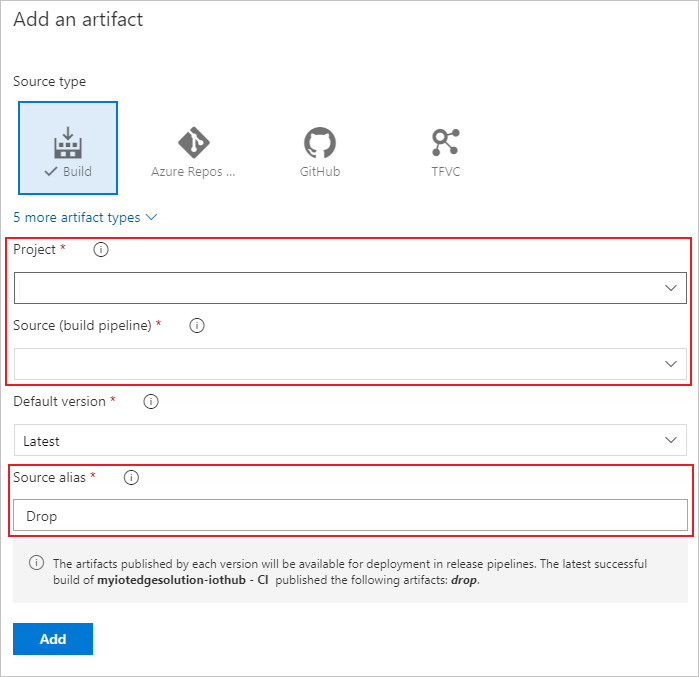
On the Add an artifact page, select Build as the Source type. Choose the project and the build pipeline you created. If you wish, you can change the Source alias to something more descriptive. Then, select Add.
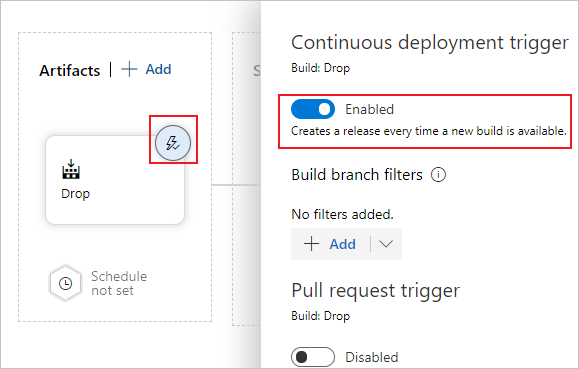
Open the artifact triggers and select the toggle to enable the continuous deployment trigger. Now, a new release is created each time a new build is available.
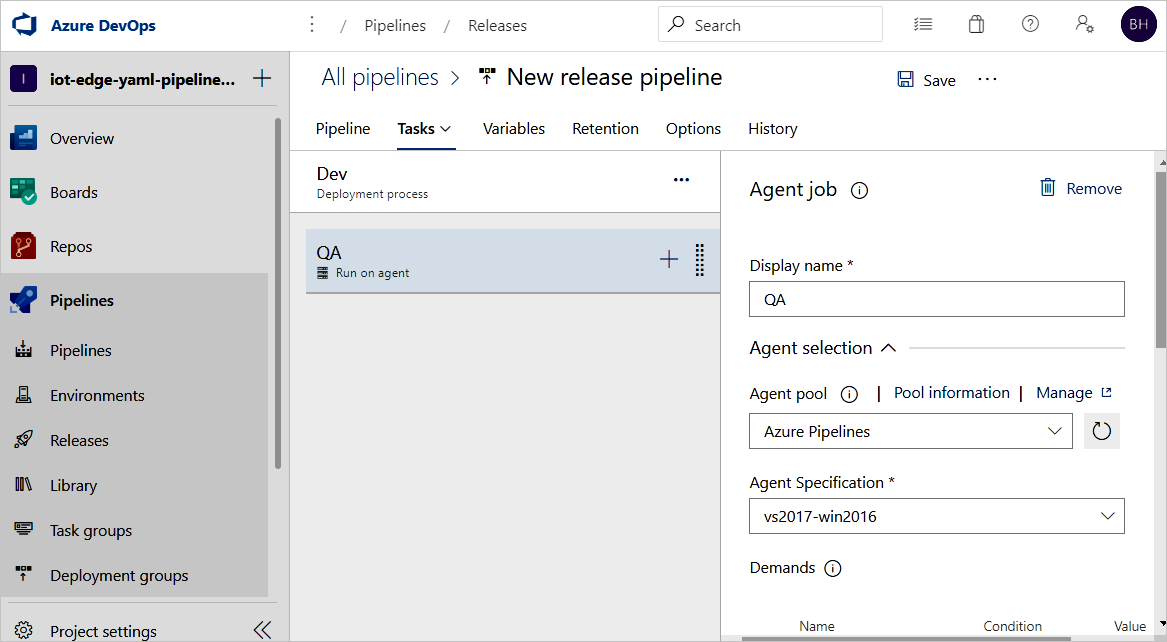
The dev stage is preconfigured with one job and zero tasks. From the pipeline menu, select Tasks then choose the dev stage. Select the Agent job and change its Display name to QA. You can configure details about the agent job, but the deployment task is platform insensitive so you can use any Agent specification in the chosen Agent pool.
On the QA job, select the plus sign (+) to add two tasks. Search for and add Azure IoT Edge twice.
Select the first Azure IoT Edge task and configure it with the following values:
Parameter Description Display name The display name is automatically updated when the Action field changes. Action Select Generate deployment manifest..template.json file Specify the path: $(System.DefaultWorkingDirectory)/Drop/drop/deployment.template.json. The path is published from build pipeline.Default platform Select the appropriate operating system for your modules based on your targeted IoT Edge device. Output path Put the path $(System.DefaultWorkingDirectory)/Drop/drop/configs/deployment.json. This path is the final IoT Edge deployment manifest file.These configurations help replace the module image URLs in the
deployment.template.jsonfile. The Generate deployment manifest also helps replace the variables with the exact value you defined in thedeployment.template.jsonfile. In Visual Studio/Visual Studio Code, you are specifying the actual value in a.envfile. In Azure Pipelines, you set the value in Release Pipeline Variables tab. Move to Variables tab and configure the name and value as following:- ACR_ADDRESS: Your Azure Container Registry Login server value. You can retrieve the Login server from the Overview page of your container registry in the Azure portal.
- ACR_PASSWORD: Your Azure Container Registry password.
- ACR_USER: Your Azure Container Registry username.
If you have other variables in your project, you can specify the name and value in this tab. The Generate deployment manifest can only recognize the variables that are in
${VARIABLE}flavor. Make sure you are using this flavor in your*.template.jsonfiles."registryCredentials": { "<ACR name>": { // Your Azure Container Registry **Registry name** value "username": "${ACR_USER}", "password": "${ACR_PASSWORD}", "address": "${ACR_ADDRESS}" } }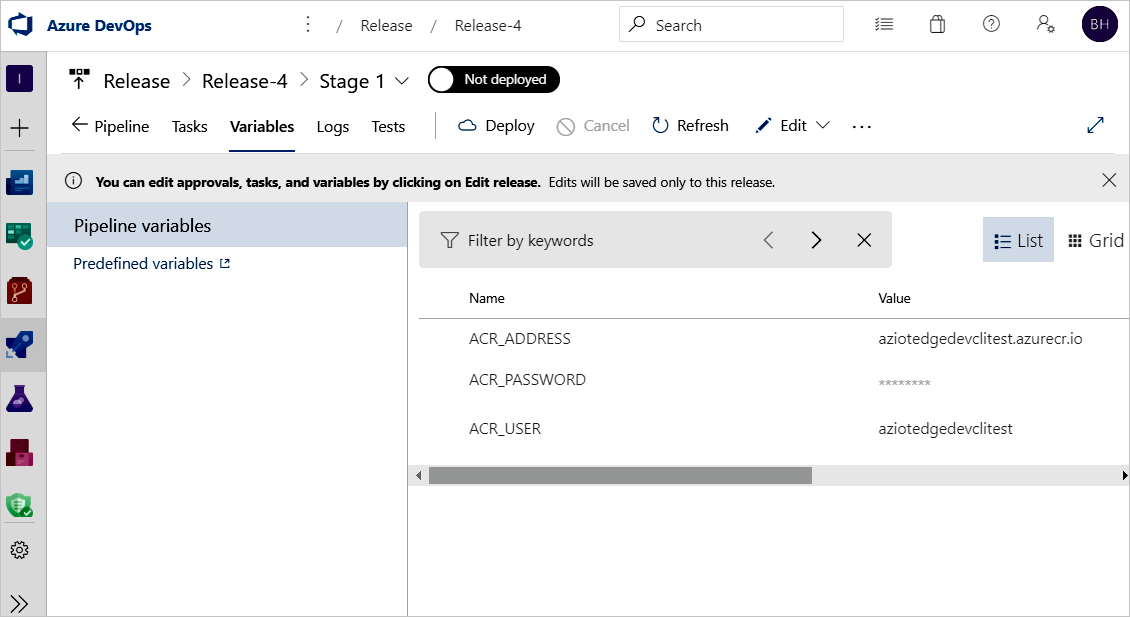
Select the second Azure IoT Edge task and configure it with the following values:
Parameter Description Display name The display name is automatically updated when the Action field changes. Action Select Deploy to IoT Edge devices.Deployment file Put the path $(System.DefaultWorkingDirectory)/Drop/drop/configs/deployment.json. This path is the file IoT Edge deployment manifest file.Azure subscription Select the subscription that contains your IoT Hub. IoT Hub name Select your IoT hub. Choose single/multiple device Choose whether you want the release pipeline to deploy to one or multiple devices. If you deploy to a single device, enter the IoT Edge device ID. If you are deploying to multiple devices, specify the device target condition. The target condition is a filter to match a set of IoT Edge devices in IoT Hub. If you want to use device tags as the condition, you need to update your corresponding devices tags with IoT Hub device twin. Update the IoT Edge deployment ID and IoT Edge deployment priority in the advanced settings. For more information about creating a deployment for multiple devices, see Understand IoT Edge automatic deployments. Device ID or target condition Depending on the prior selection, specify a device ID or target condition to deploy to multiple devices. Advanced For the IoT Edge deployment ID, specify $(System.TeamProject)-$(Release.EnvironmentName). This variable maps the project and release name with your IoT Edge deployment ID.If your task involves using an image that resides in a private Docker Trusted Registry that isn't visible to the public cloud, you can set the SKIP_MODULE_IMAGE_VALIDATION environment variable to
trueto skip image validation.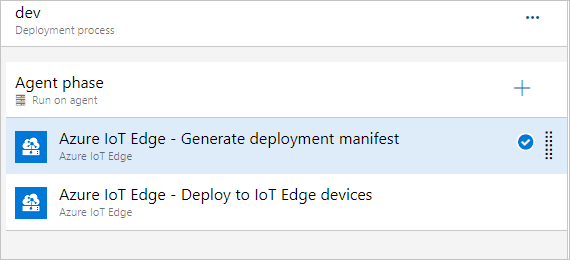
Select Save to save your changes to the new release pipeline. Return to the pipeline view by selecting Pipeline tab from the menu.
Verify IoT Edge CI/CD with the build and release pipelines
To trigger a build job, you can either push a commit to source code repository or manually trigger it. In this section, you manually trigger the CI/CD pipeline to test that it works. Then verify that the deployment succeeds.
From the left pane menu, select Pipelines and open the build pipeline that you created at the beginning of this article.
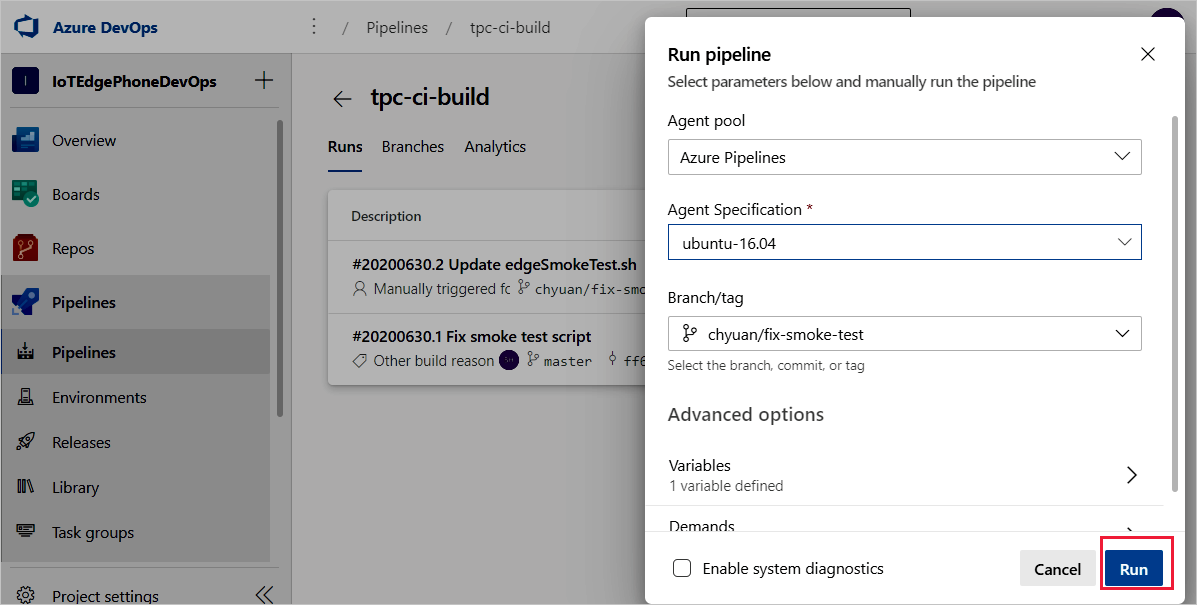
You can trigger a build job in your build pipeline by selecting the Run pipeline button in the top right.
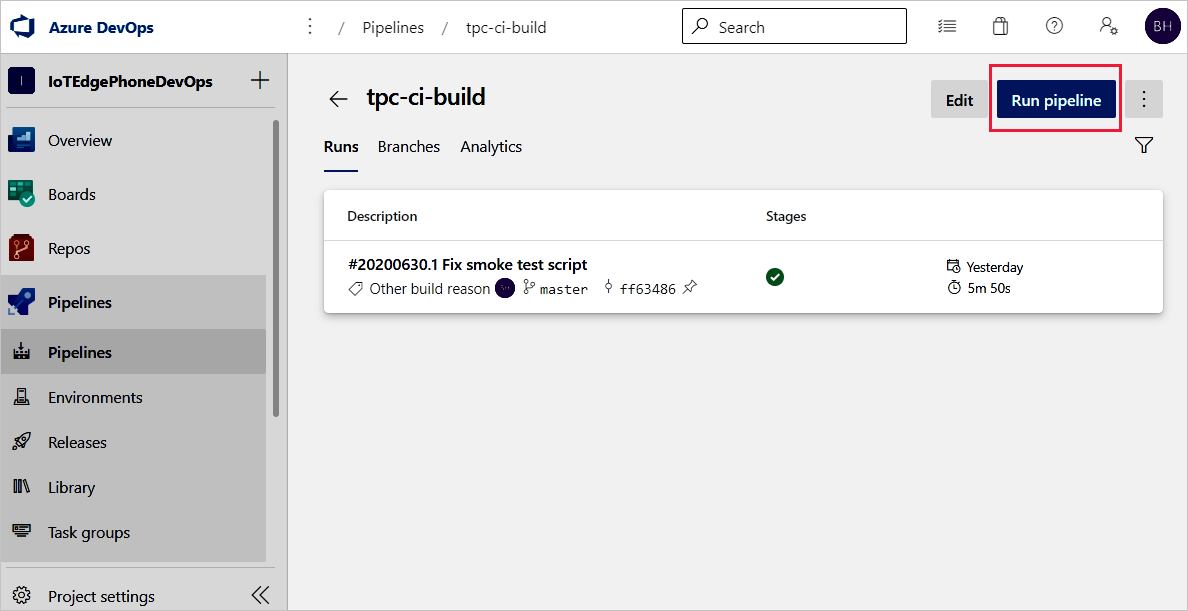
Review the Run pipeline settings. Then, select Run.
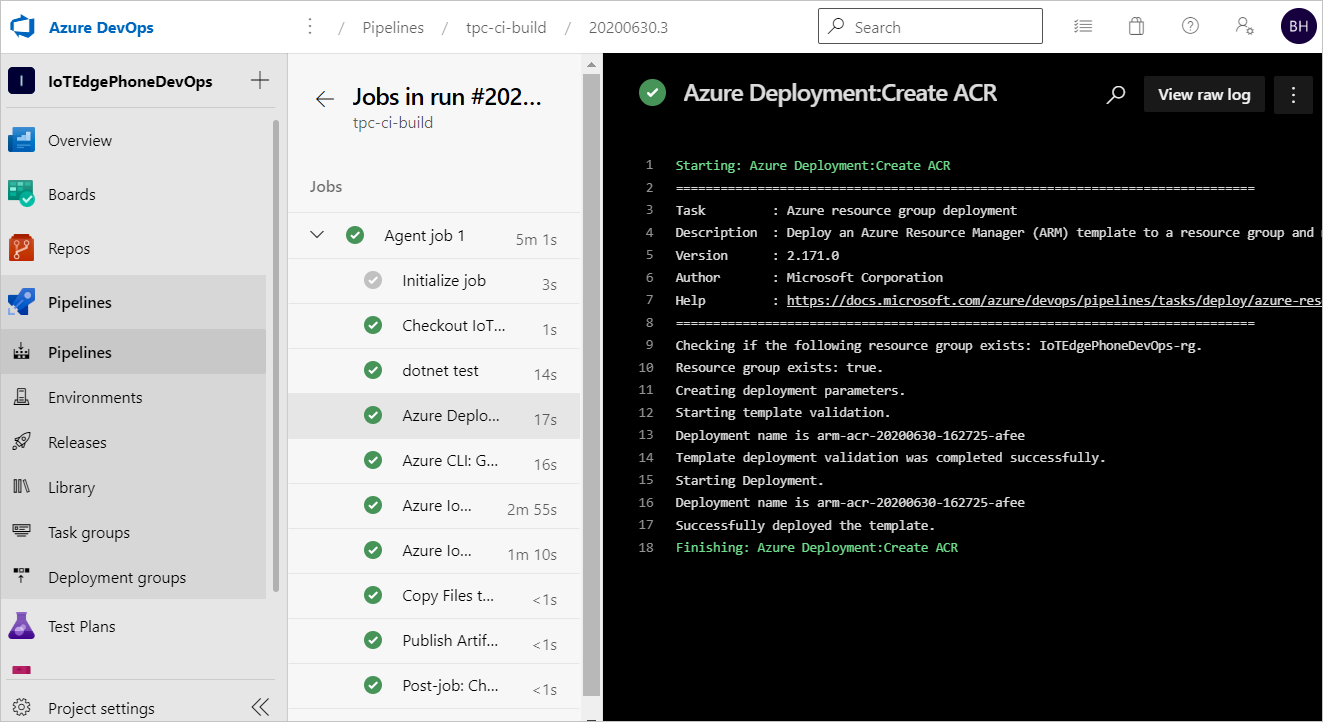
Select Agent job 1 to watch the run's progress. You can review the logs of the job's output by selecting the job.
If the build pipeline is completed successfully, it triggers a release to dev stage. The successful dev release creates IoT Edge deployment to target IoT Edge devices.
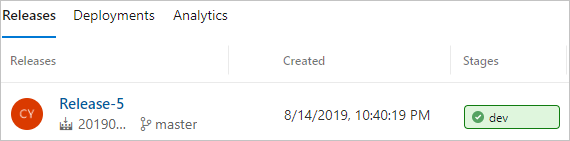
Select dev stage to see release logs.
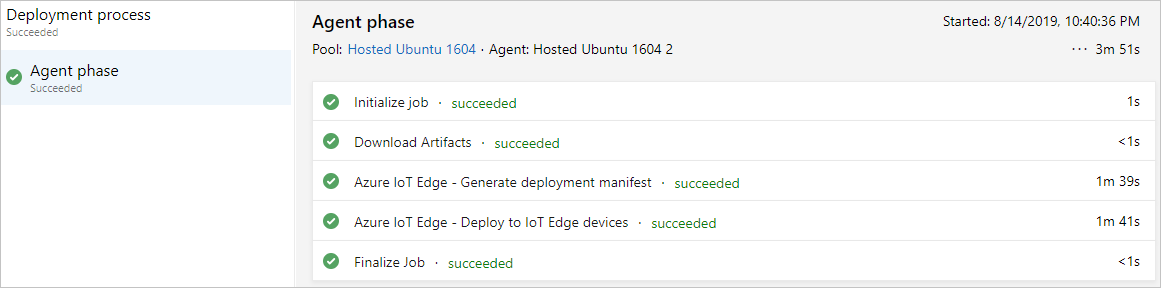
If your pipeline is failing, start by looking at the logs. You can view logs by navigating to the pipeline run summary and selecting the job and task. If a certain task is failing, check the logs for that task. For detailed instructions for configuring and using logs, see Review logs to diagnose pipeline issues.
Next steps
- Understand the IoT Edge deployment in Understand IoT Edge deployments for single devices or at scale
- Walk through the steps to create, update, or delete a deployment in Deploy and monitor IoT Edge modules at scale.
Feedback
Coming soon: Throughout 2024 we will be phasing out GitHub Issues as the feedback mechanism for content and replacing it with a new feedback system. For more information see: https://aka.ms/ContentUserFeedback.
Submit and view feedback for